- About
- Inventory Manager
- Manage Studies: Record Harvest
- Related
About
Inventory management functionalities in v15 are split between Inventory Manager and Study Manager tools. Inventory Manager v15 is the first phase of improvements for seed management in the BMS. The Inventory Manager replaces and improves upon the previous Inventory View in the Germplasm Manager. Expect continued expansion and unification of Inventory Manager functionalities in upcoming releases.
Inventory Manager: Filter, reserve, withdraw, export data, create lots independently of studies
Study Manager: Create stock list and harvest labels. Record harvest amounts.
Lots & Transactions
Lots are inventory units. Inventory reservations, withdrawals, and deposits are recorded as lot transactions. Each lot is associated with a Lot UID suitable for bar coding, as well as a lot number, and a customizable human-readable StockID. Stock lists created via Manage Studies assign each germplasm (GID) to a unique lot leading to the common situation of having a one-to-one relationship between germplasm (GID) and lot in the BMS. The Inventory Manager allows for the creation of lots independently of studies and permits a single GID to be associated with numerous lots to support the following types of inventory activities:
- Record inventory created outside of the BMS (no associated BMS study). For example create lots during the initial phase of BMS deployment.
- Split the inventory of a single GID between physical locations. For example, create multiple lots of a single GID to distribute between regional programs.
Inventory Manager
The inventory manager allows you to browse, view, filter and manage lots and transactions. Expect to see additional functionality in upcoming releases.

This Maize program includes 3844 active lots.
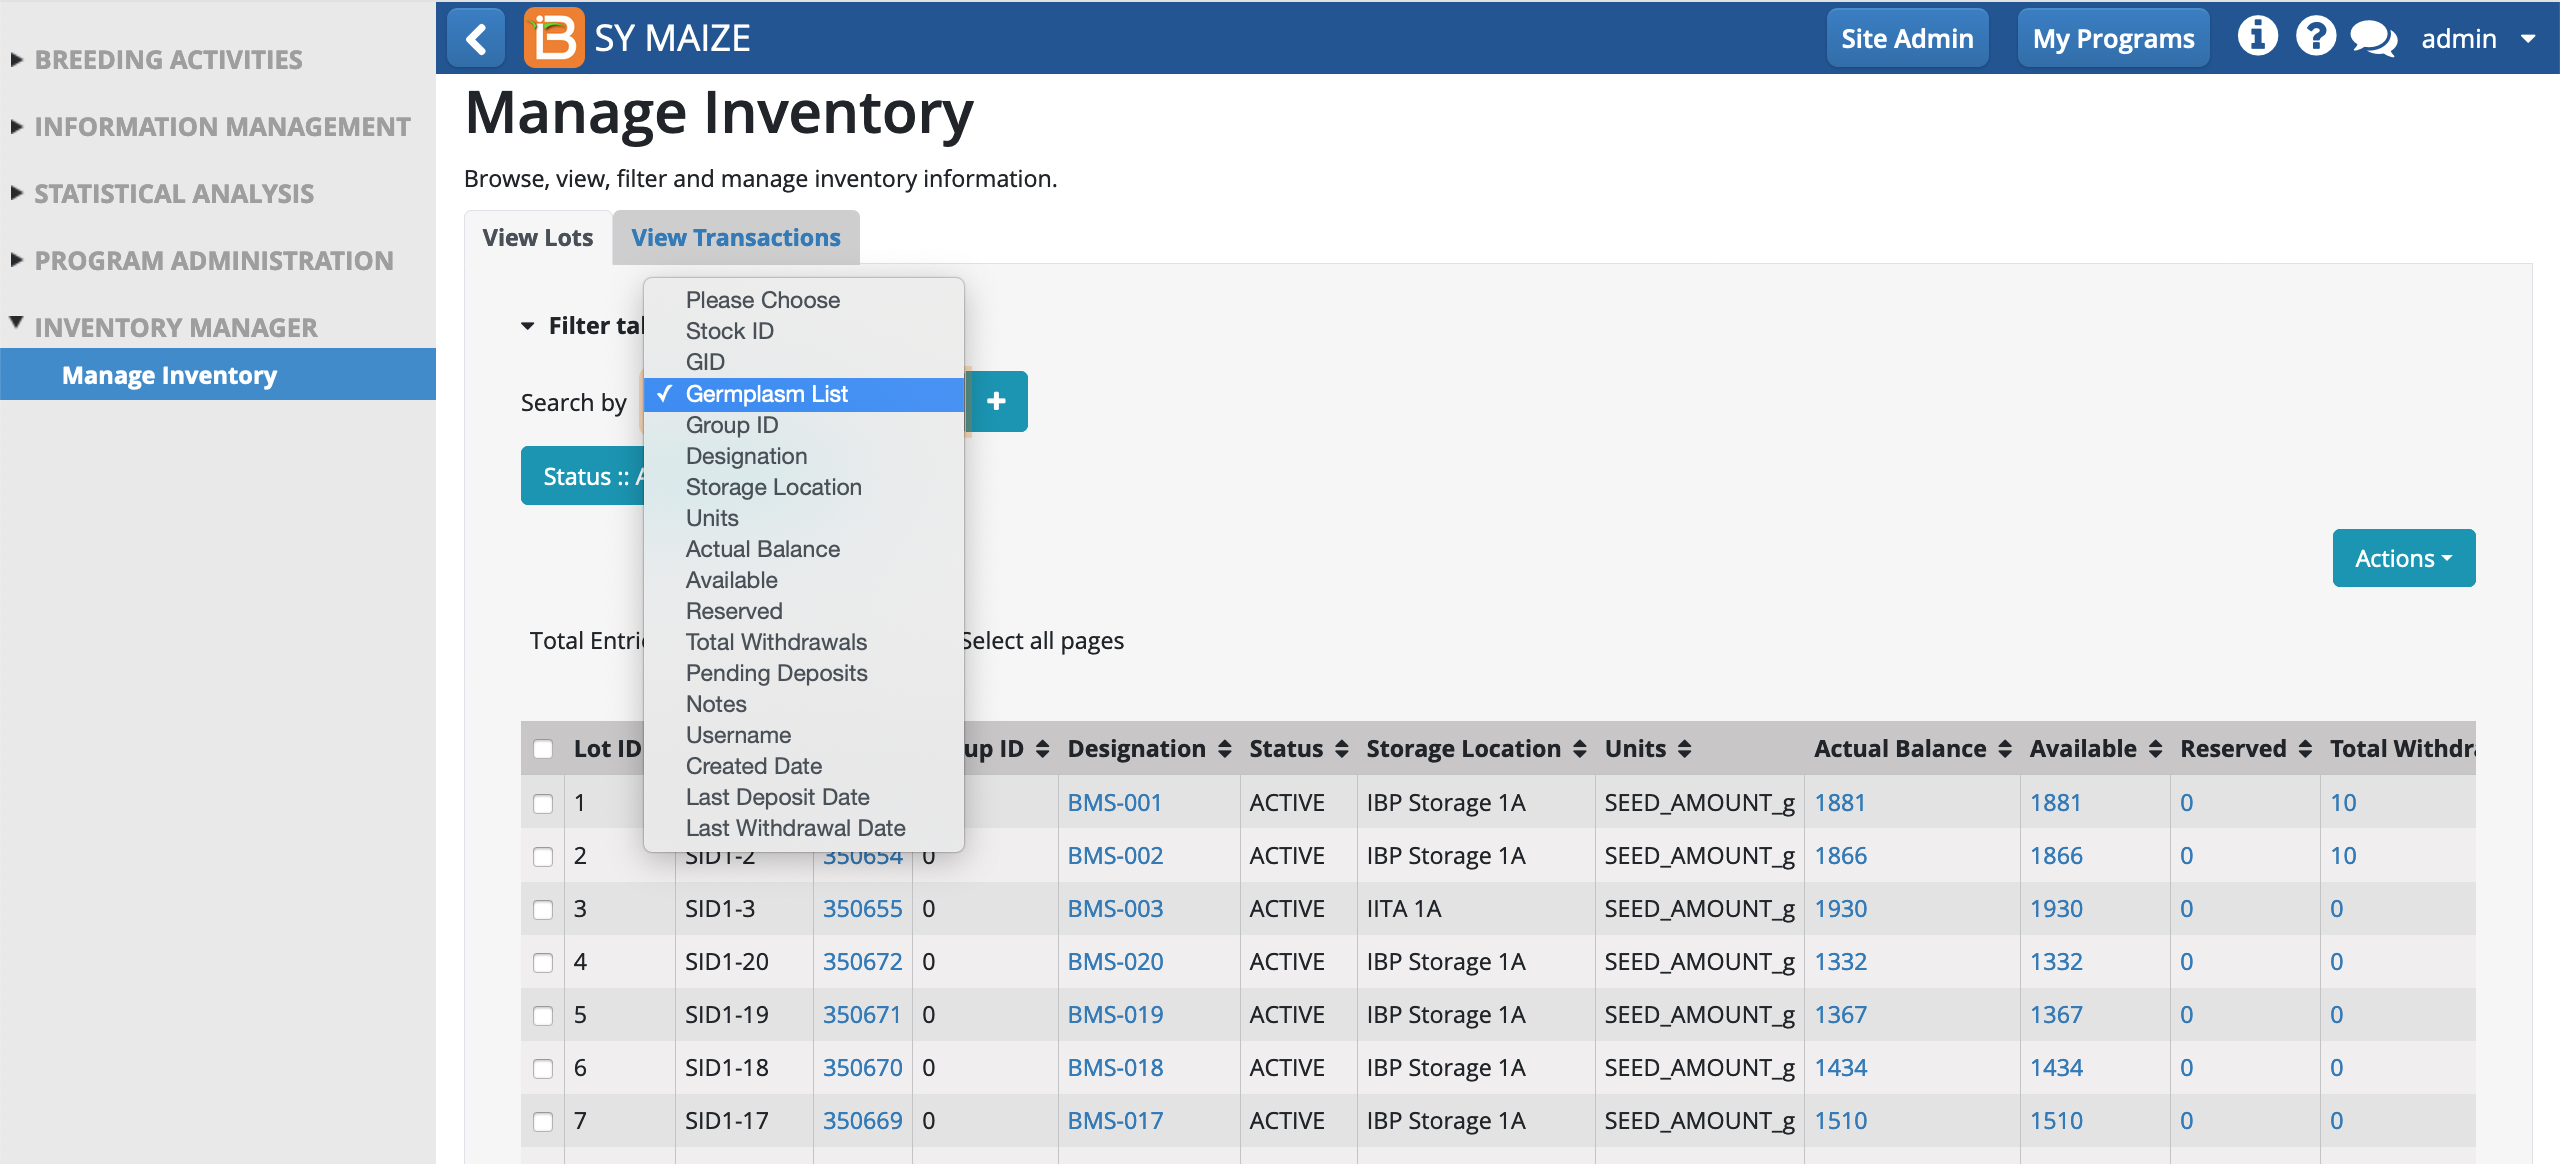
Lot Filters
From View Lots you have the ability to filter lots by any detail or combination of details.
- Filter lots by any detail or combination of details. Select the detail from the "Search by" drop down and add to filter by selecting the + button.
Filter Example: Germplasm List
- Select Germplasm List to reveal the filter options. Select the list(s) of interest and Ok.
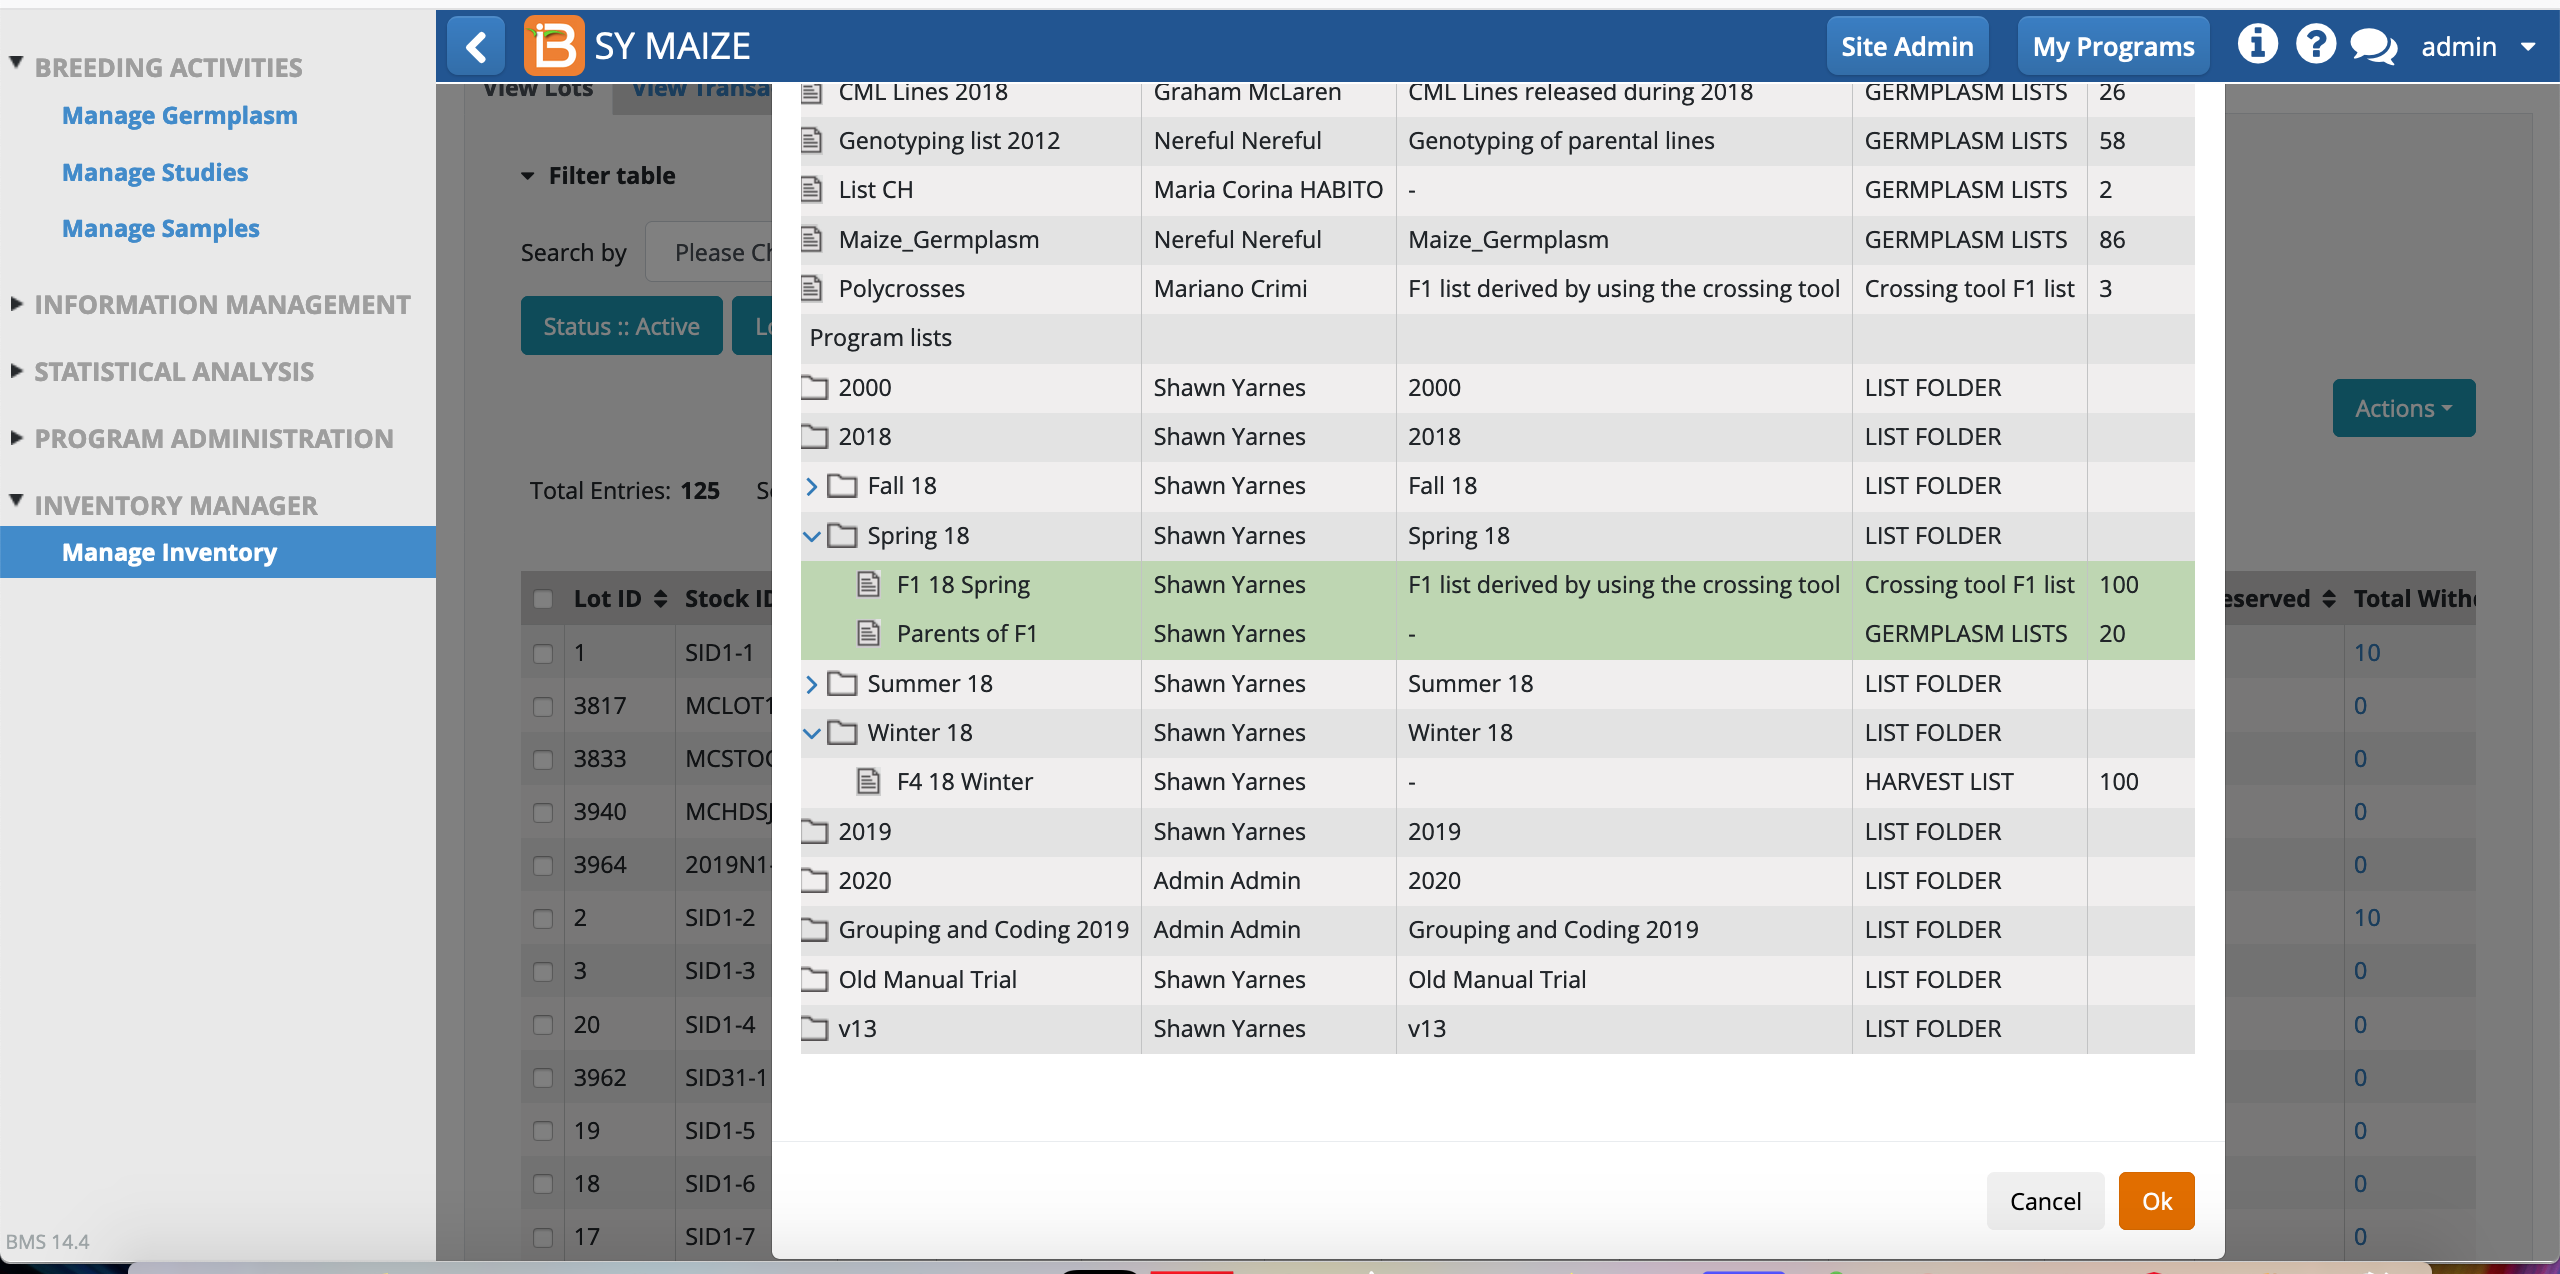
The two list selected represent 120 germplasm entries.
 The two germplasm lists, consisting of 120 germplasm entries, are represented by 125 lots, because some of the germplasm entries contain mulitple lots.
Filter Example: Available
- Select Available to reveal options for filtering available inventory. Enter the min/max of interest and Apply. Entering min value alone will reveal all lots with a equal to or greater than available amount.
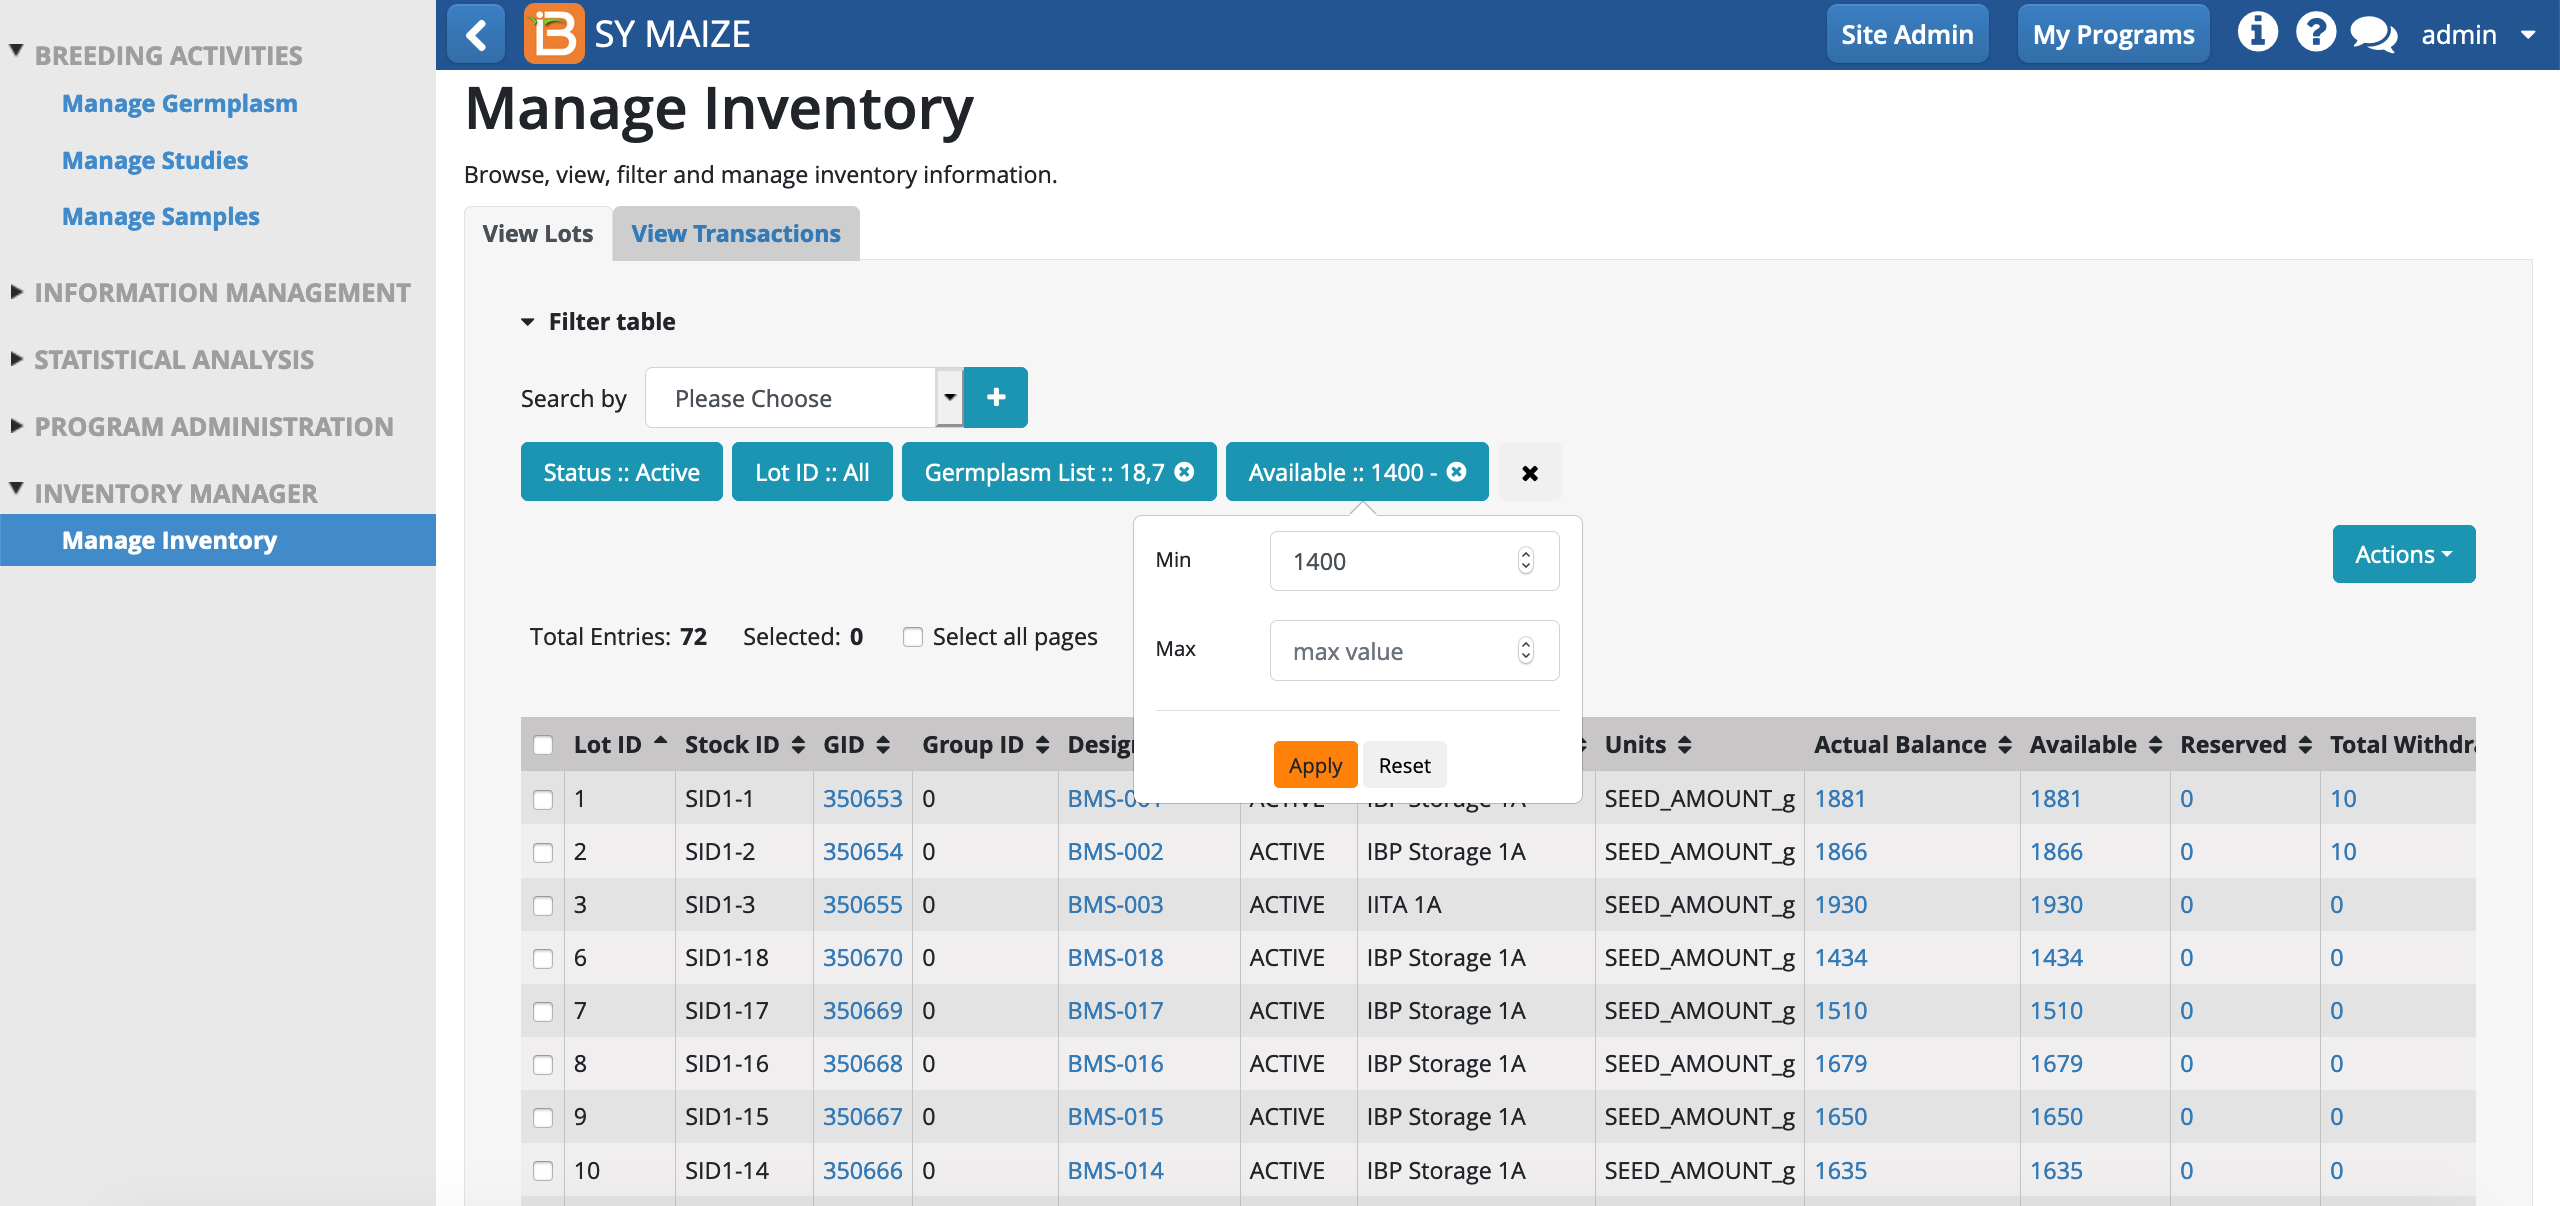
This search reveals that 72 lots contain greater than 1400g of seed.
Filter Example: Designation
- Select Designation to search germplasm designations containing matching text.

This search reveals 59 lots with designations containing the text, "IB".
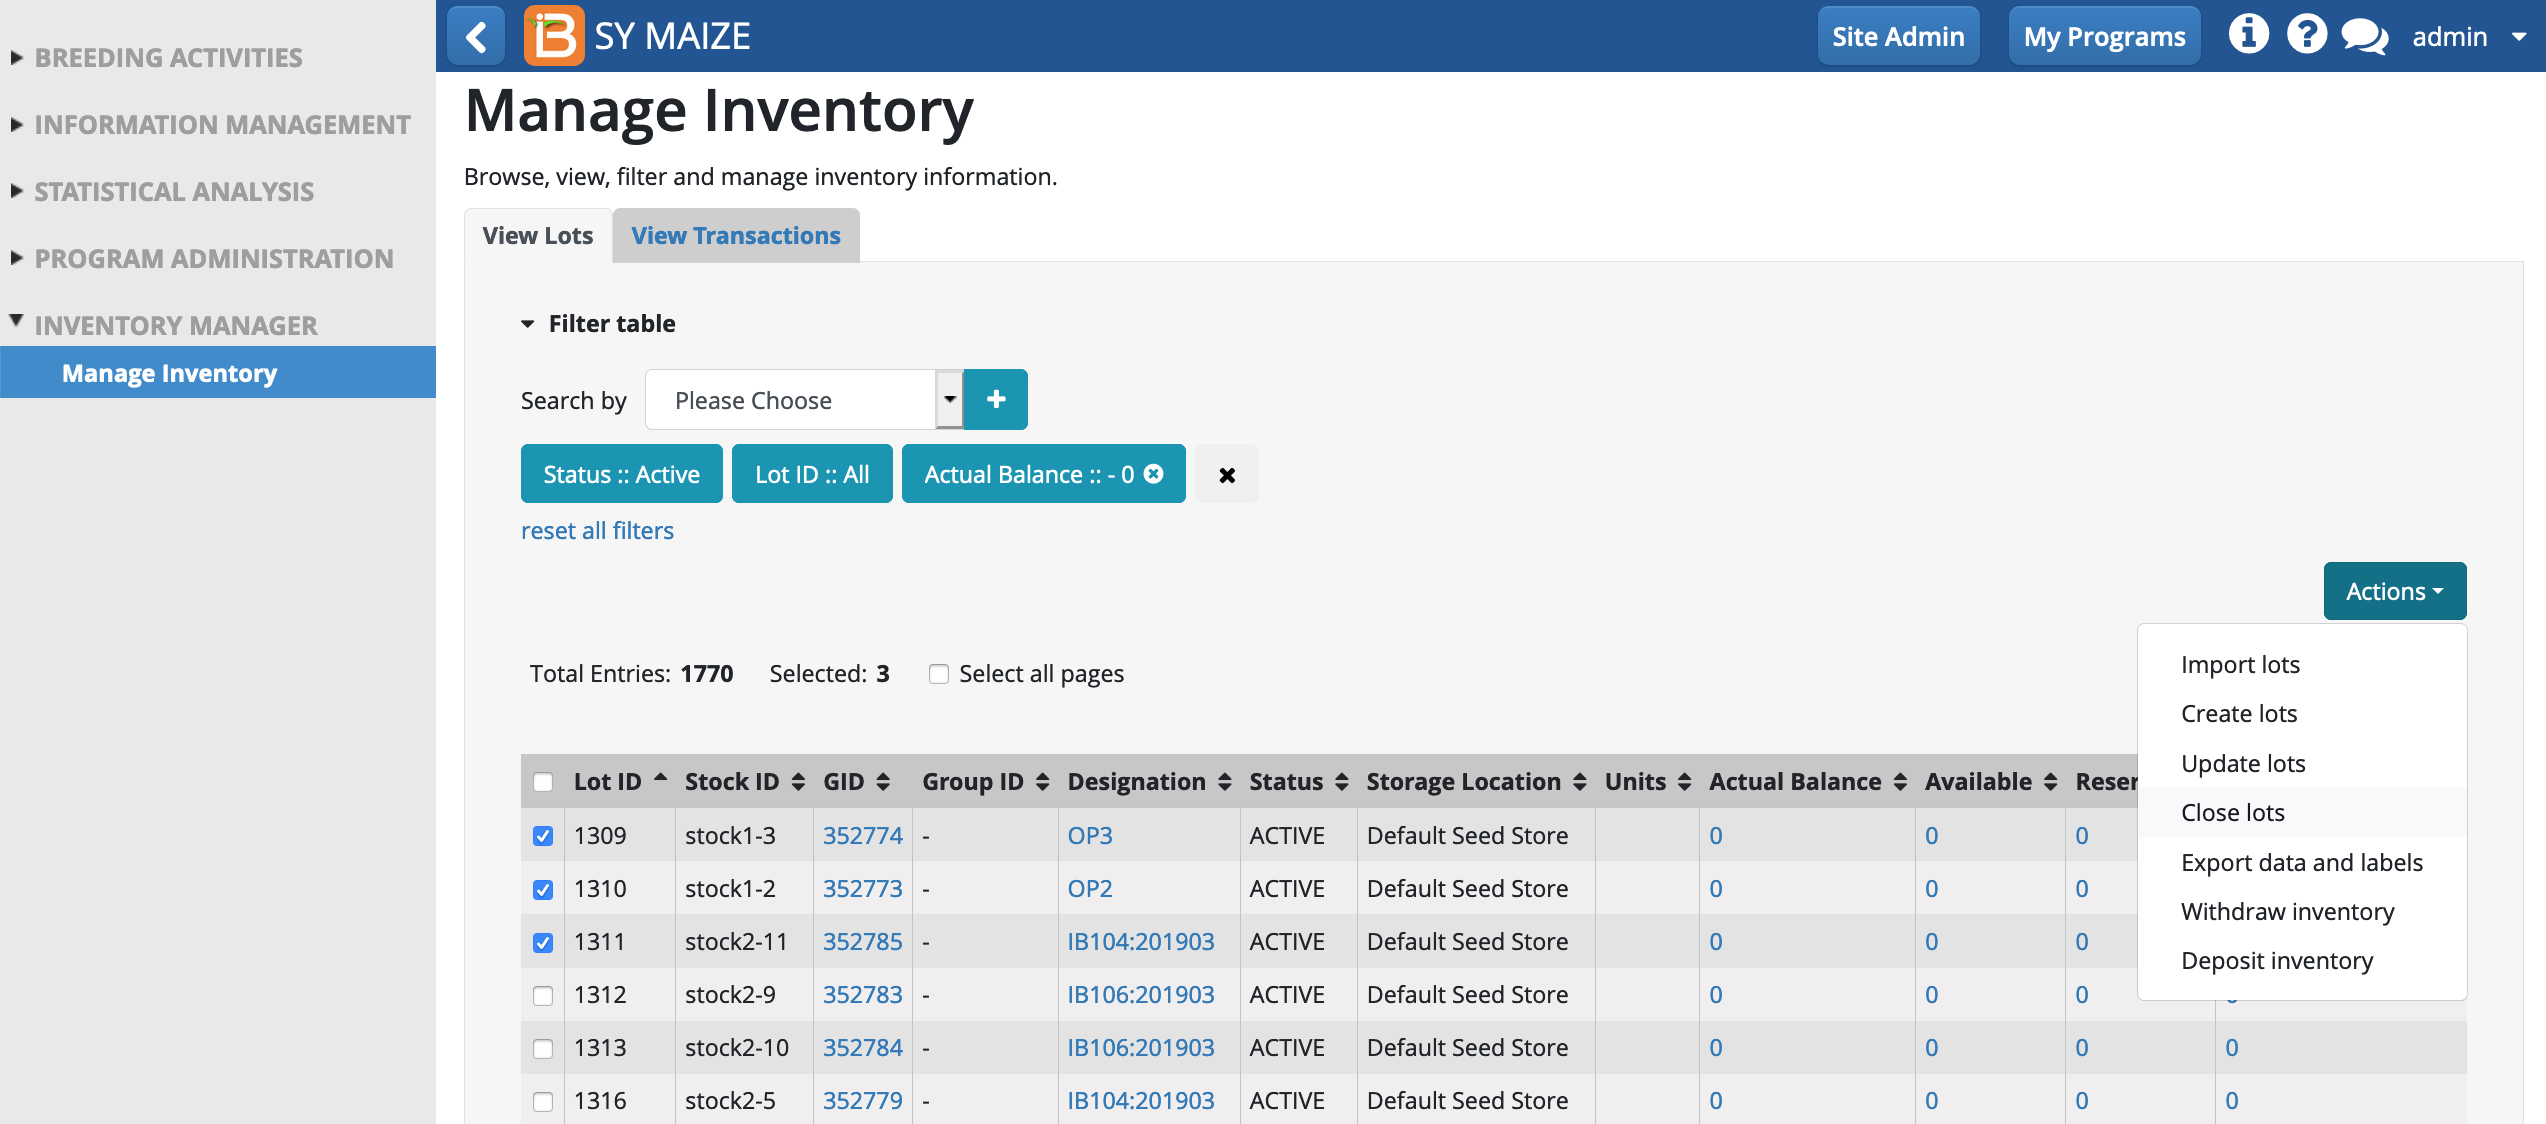
Lot Actions
- Import lots
- Create lots
- Update lots
- Close lots
- Export data and labels
- Withdraw inventory
- Deposit inventory

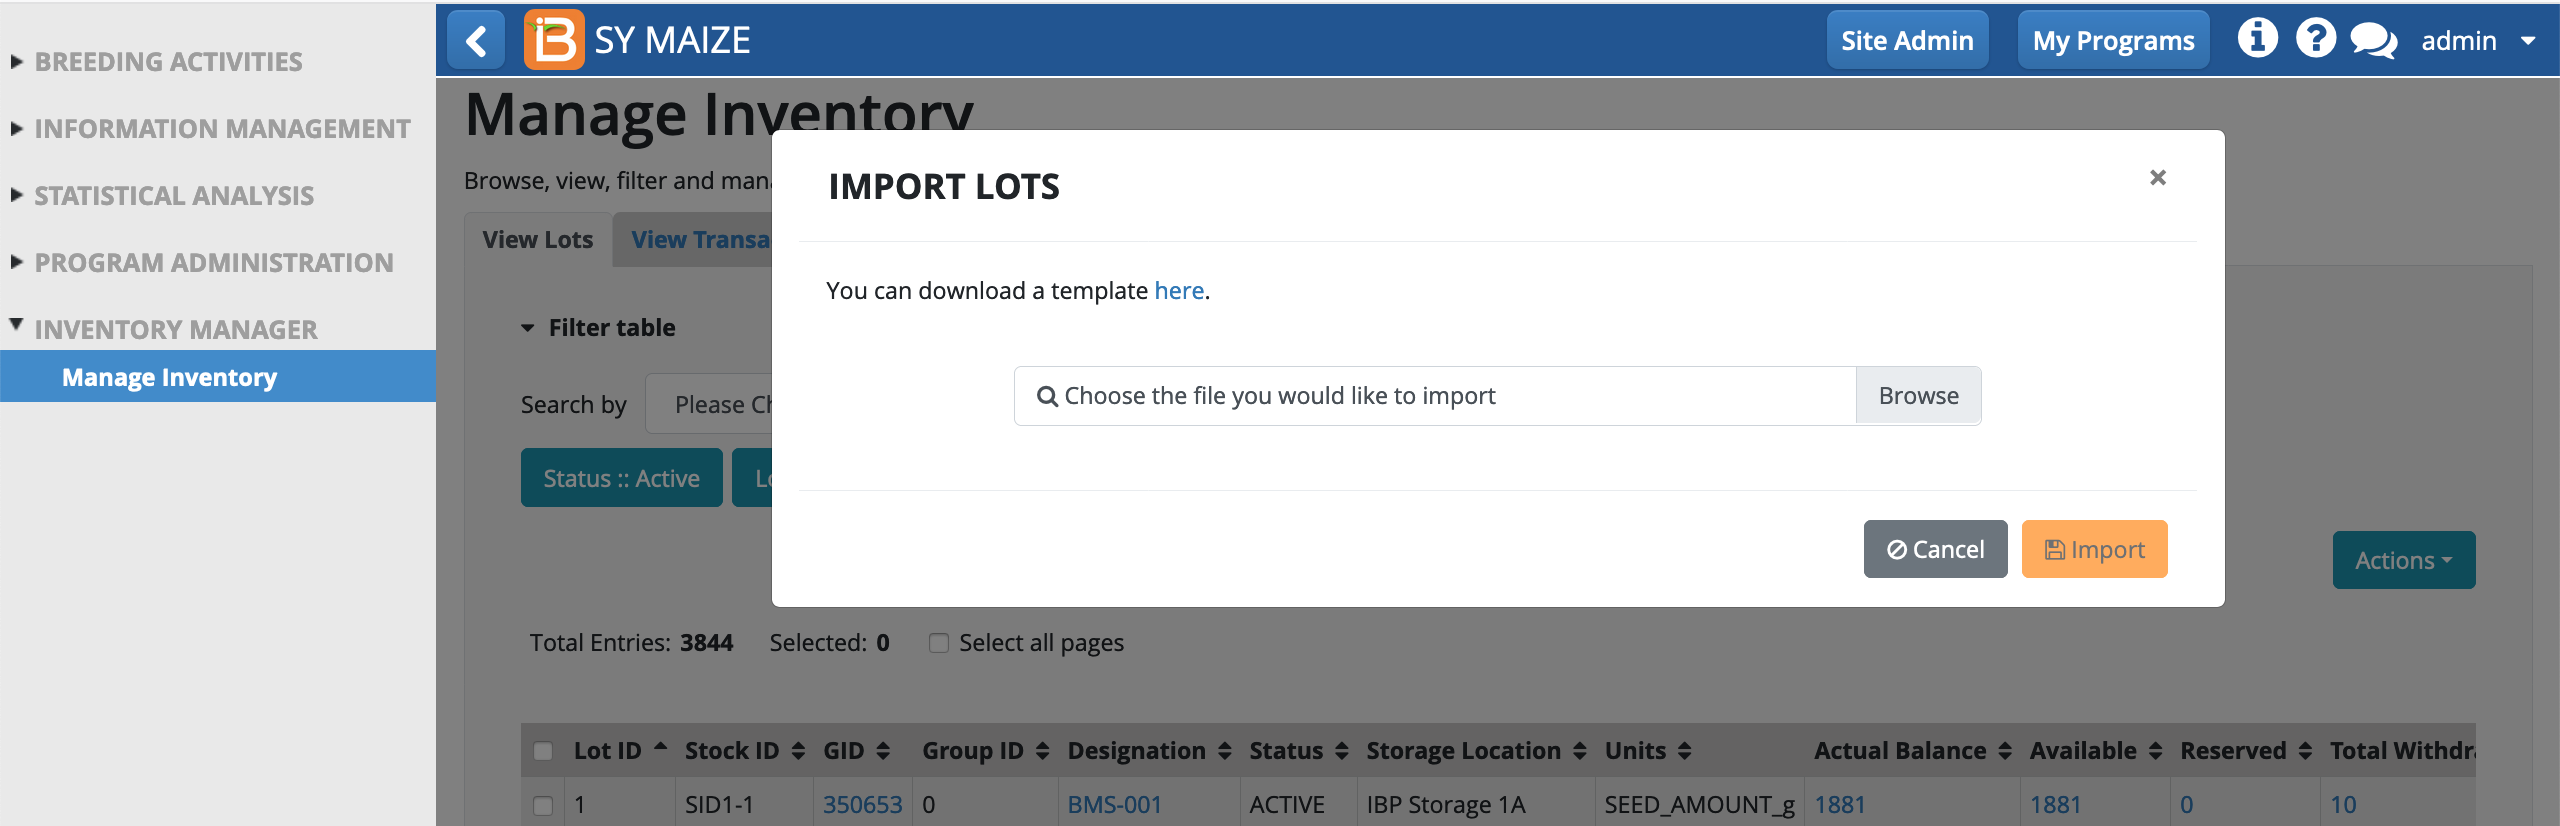
Import lots
Import lots allows you to batch create lots using an .xls file. This action requires that germplasm already exist in the system with GIDs. (See Import Germplasm for more information.)
- Select Import lots from Action menu. Download the template (.xls)
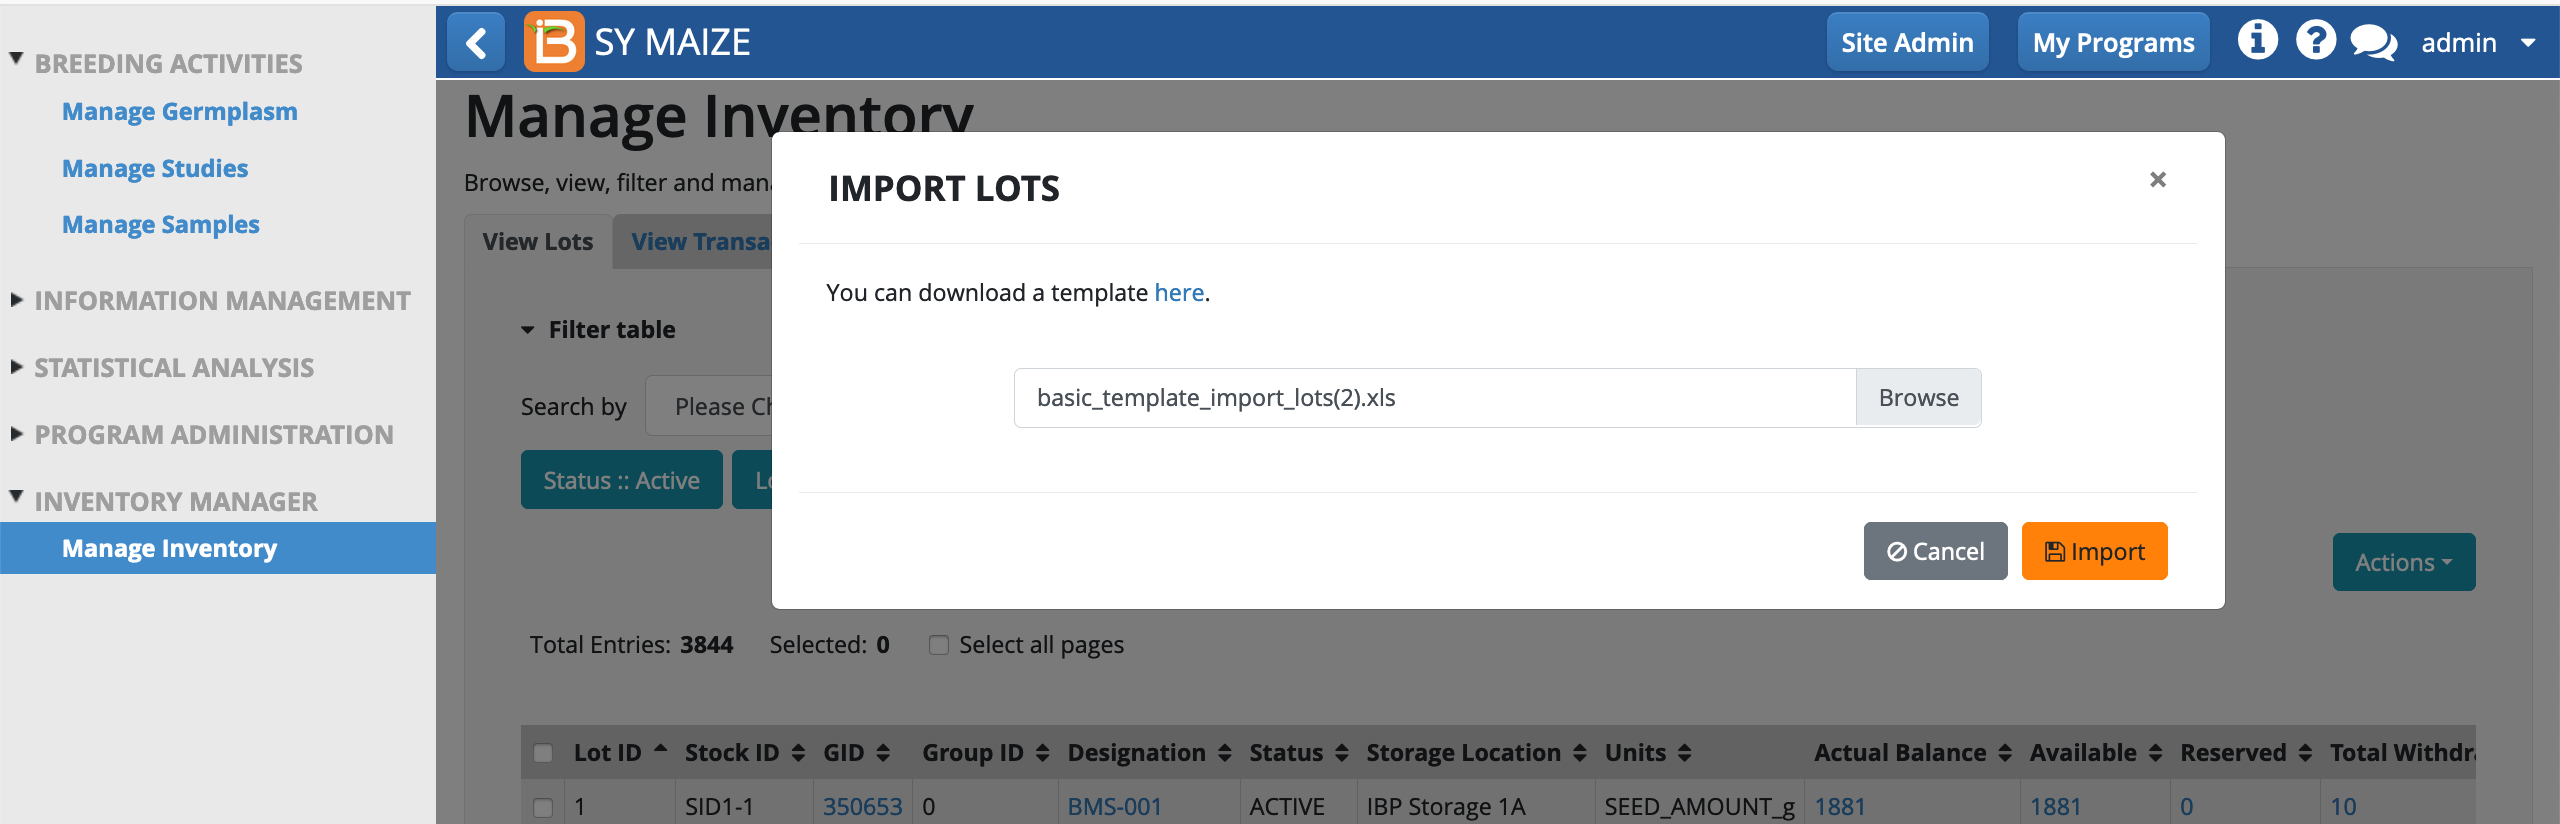
The following columns of data are mandatory for import of lots: GID, STORAGE LOCATION ABBR, UNITS, AMOUNT.
 The Codes page of the .xls file provides guidance on how to format STORAGE LOCATION ABBR and UNITS. These options are customizable via Manage Ontology
-
Edit the import lots template. Obtain the GIDs by exporting from the Germplasm Manager. Save file.

Notice that GID 395616 has two lots specified. The lots are recorded in different units and stored in different locations.
- Browse to saved file (.xls) and import.
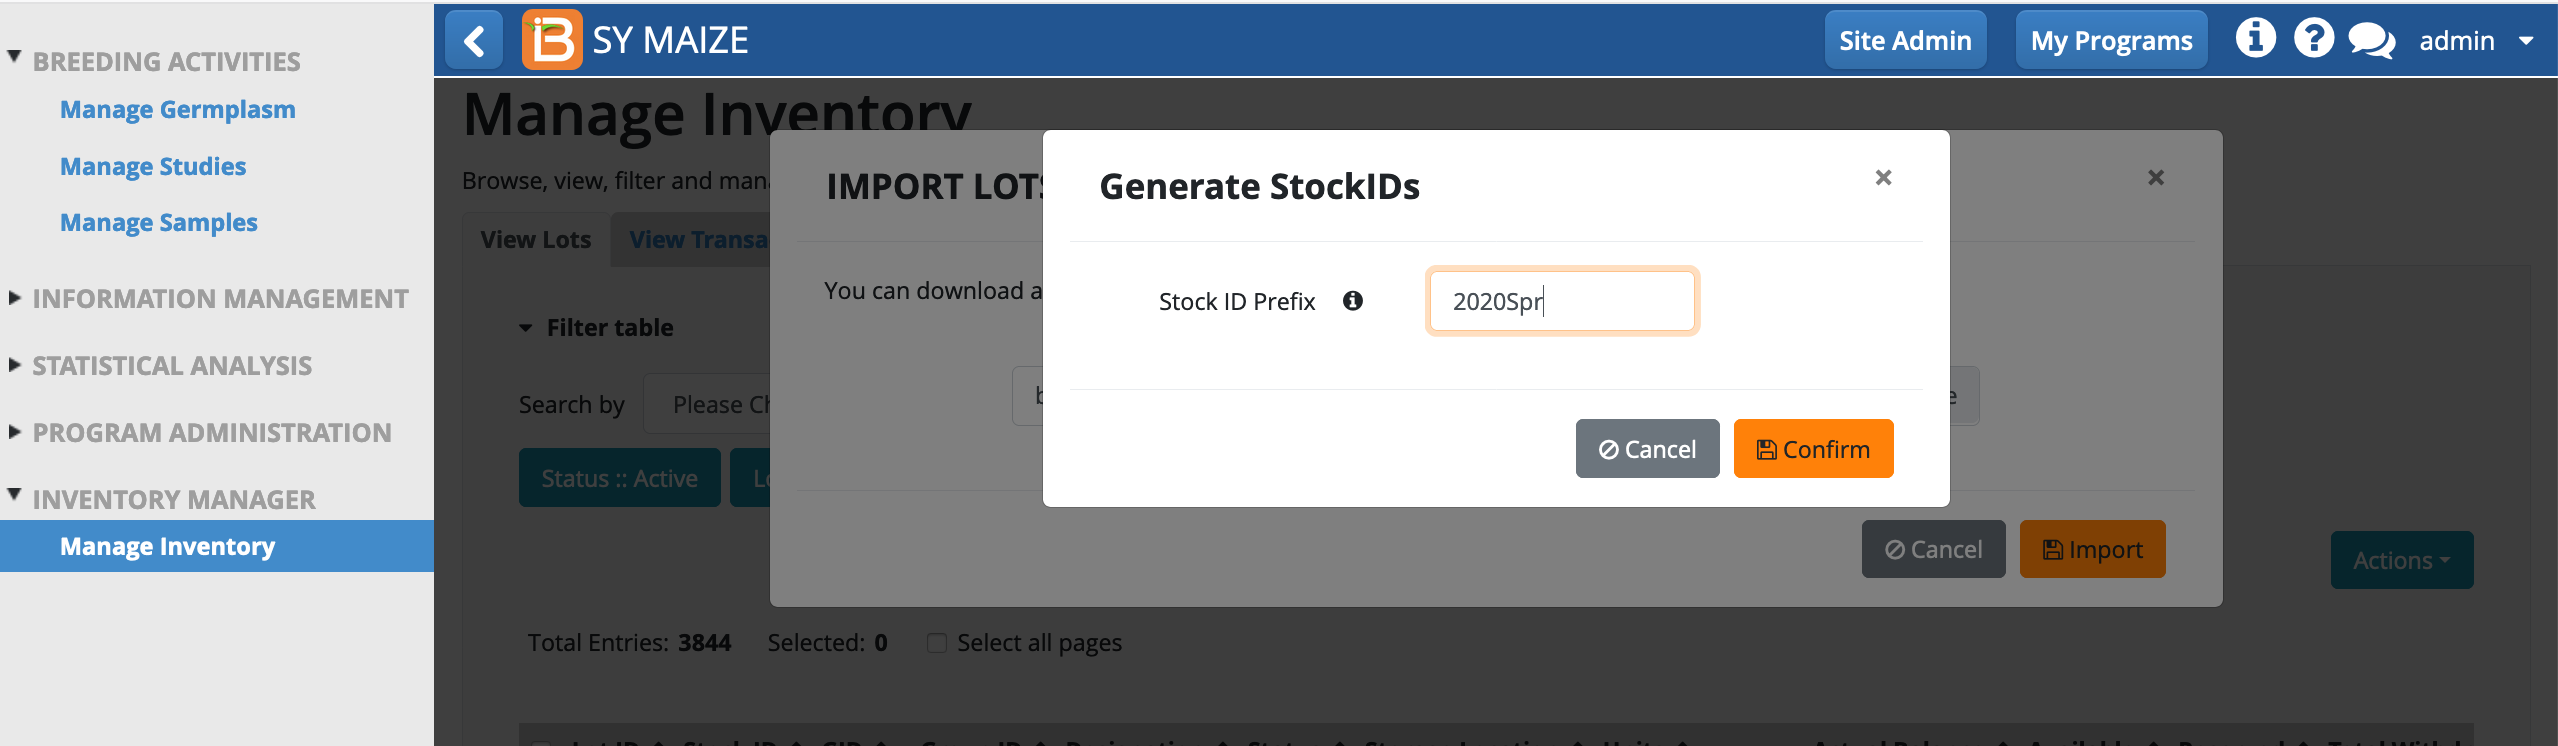
- If you did not specify a Stock ID in the template file, you will be asked to customize a prefix. Stock ID prefix cannot end in a number. Confirm. If the import is sucessful, you will receive a confirmation message.
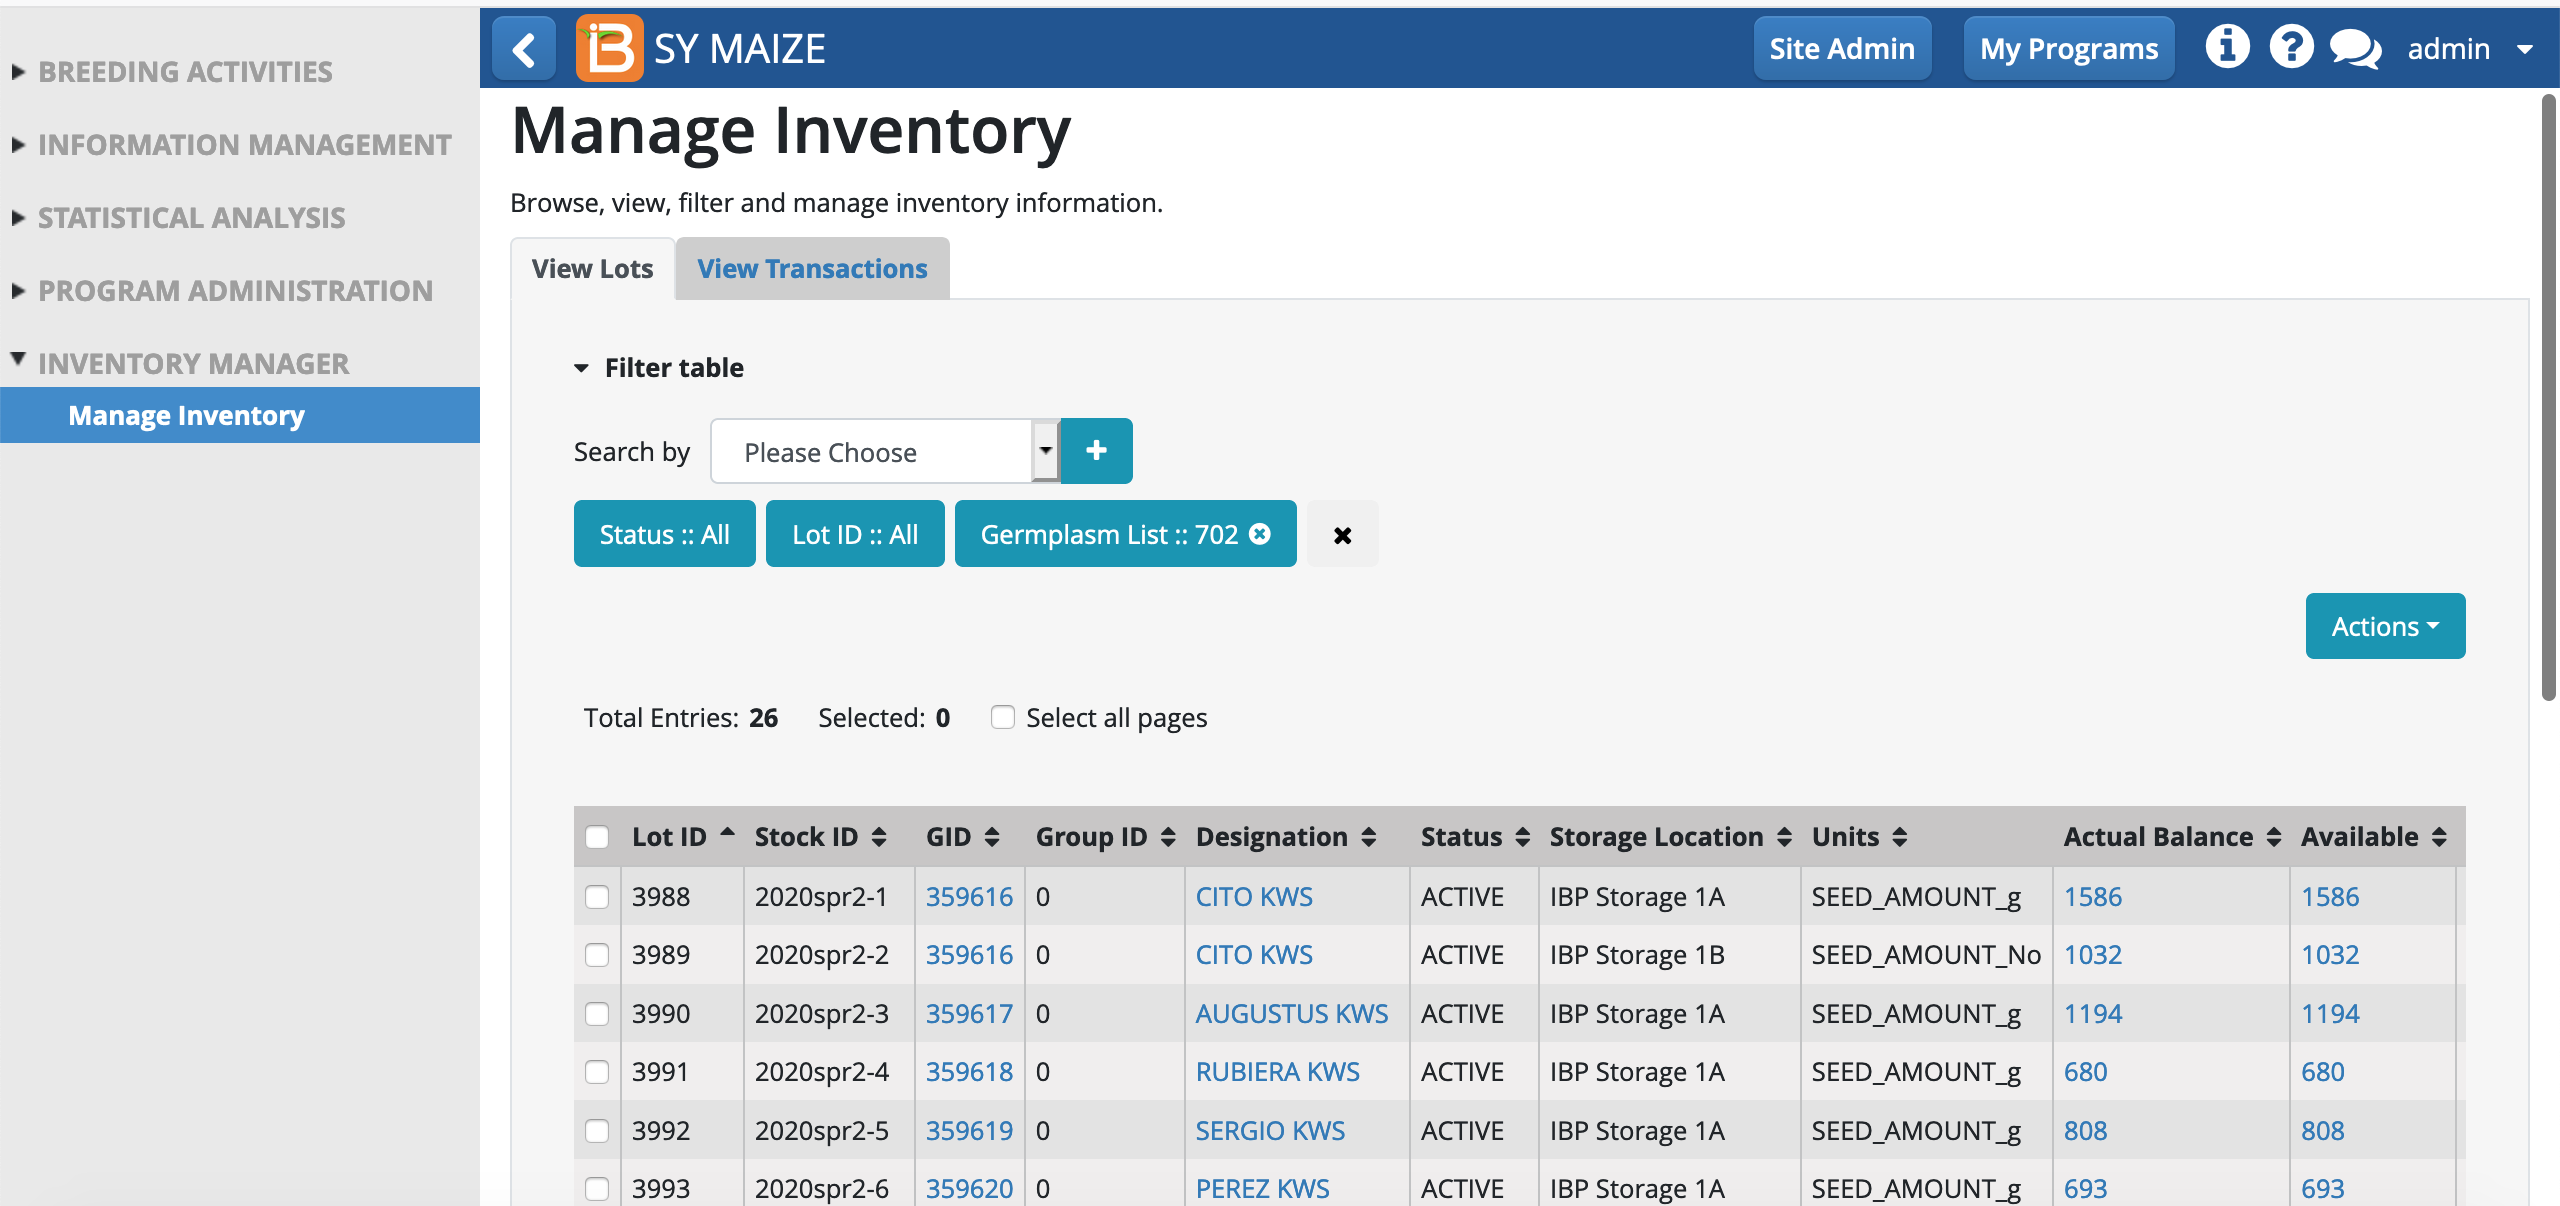
If the import is successful, you will receive a confirmation message and the list of germplasm is now updated with lots.
Create lots
Create lots allows you to create lot one at a time through the user interface (see Import Lots above for batch functionality). This action requires that germplasm already exist in the system with GIDs. (See Import Germplasm for more information.)
- Select Create lots from Action menu. Fill the details. Stock ID prefix cannot end in a number. Save.

If the import is successful, you will receive a confirmation message and the germplasm is now updated with a lot.
Update lots
Scenarios for Use:
- Assign lot(s) to a new GID based on genotyping results.
- Move lot(s) to a new storage location
- Change units for lots with pending transactions.
- Add a note to lot(s).
- Select lot(s) of interest. Select the Update Lots from Action menu and change the lot details. Update.

In this example 26 selected lots are being moved to a new storage location.
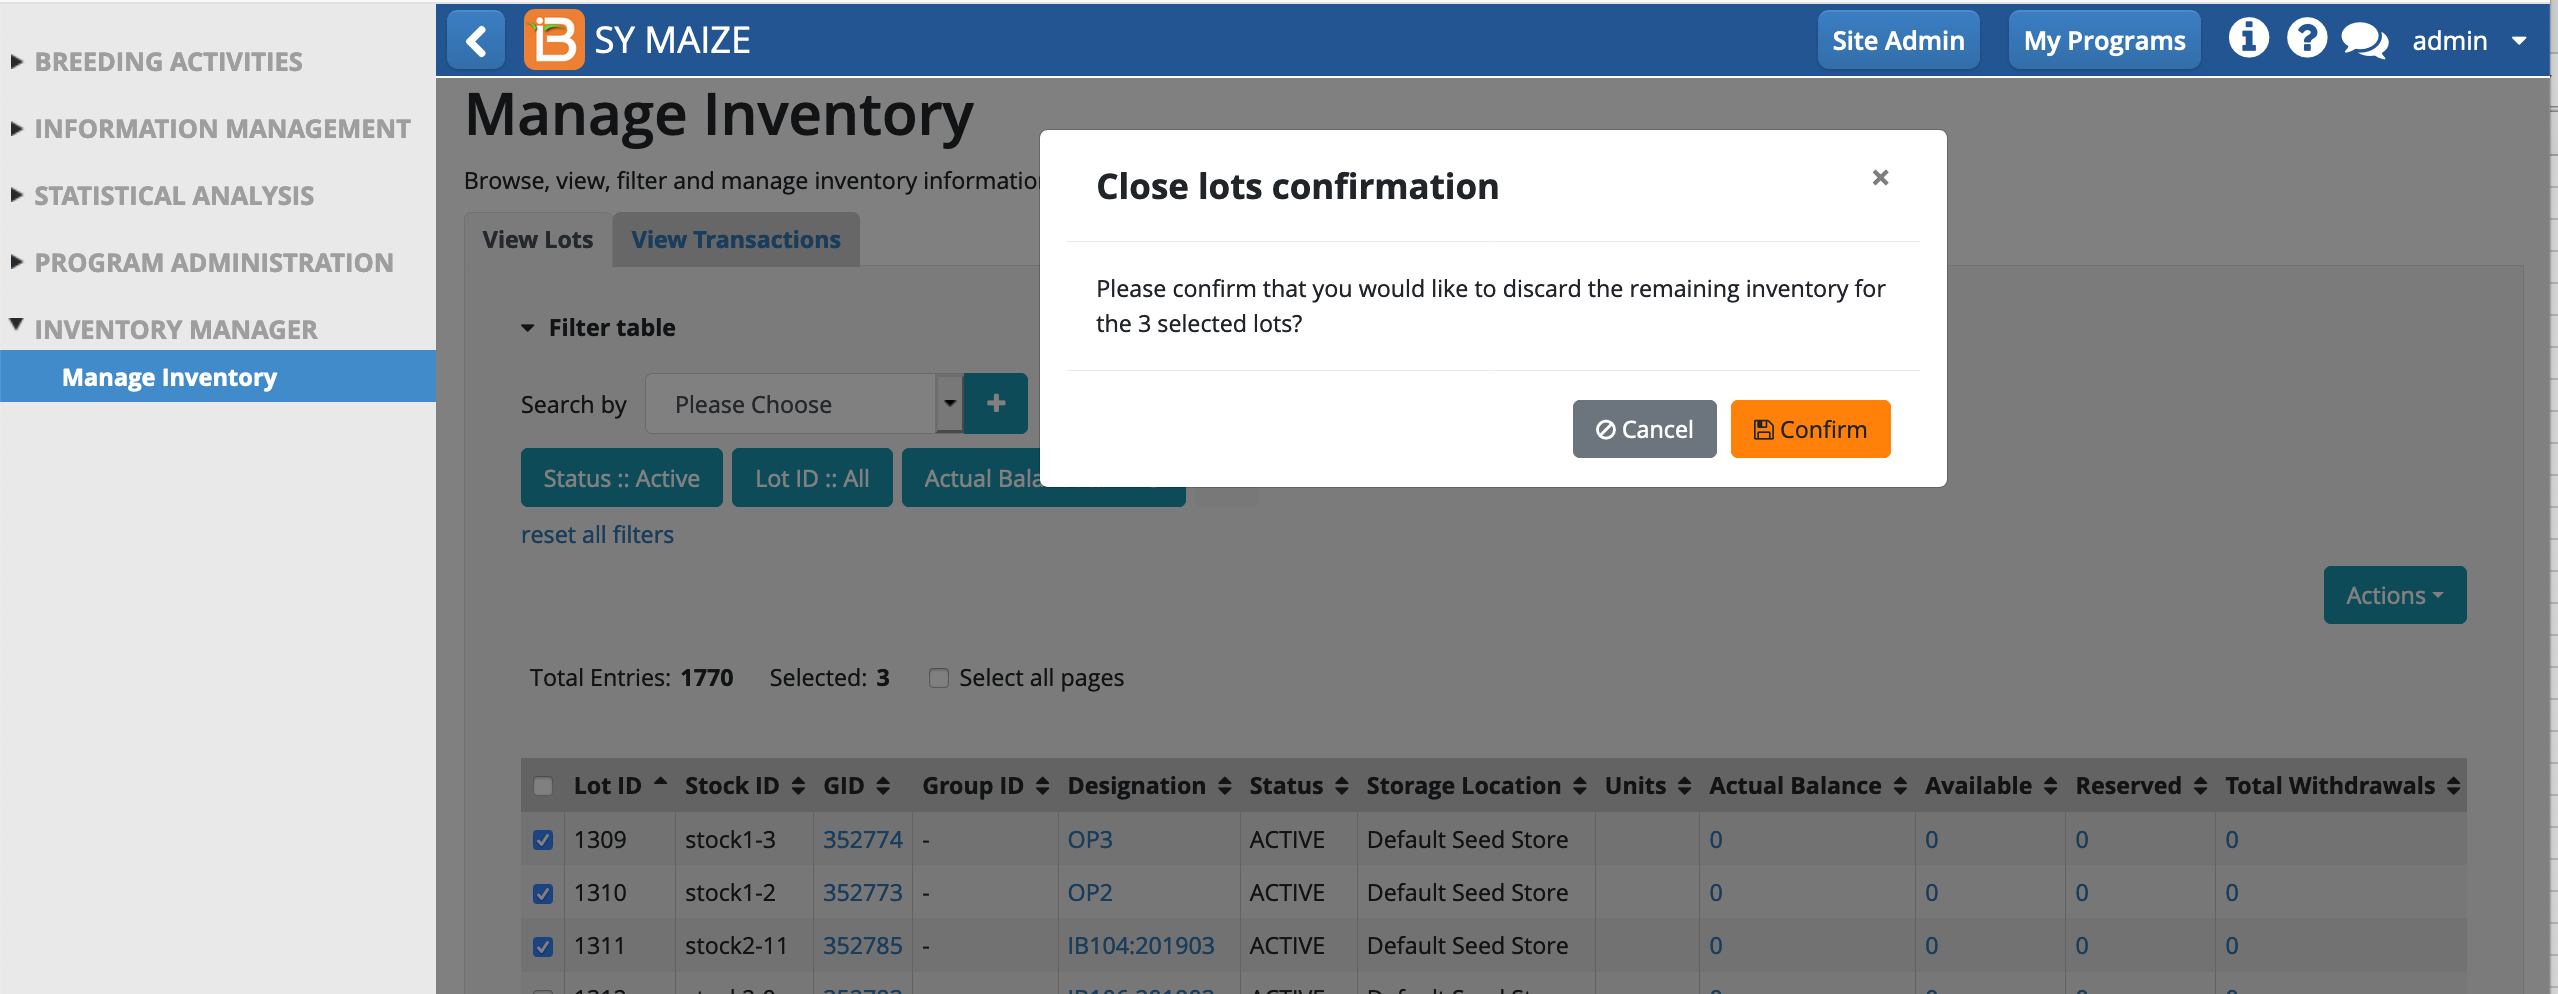
Close Lots
- When lots are discarded or no longer being filled, they can be converted from active to closed. Select lots of interest. Select Close lots from Actions menu.
- Closing lots will discard remaining inventory. Confirm that you would like the lots closed.
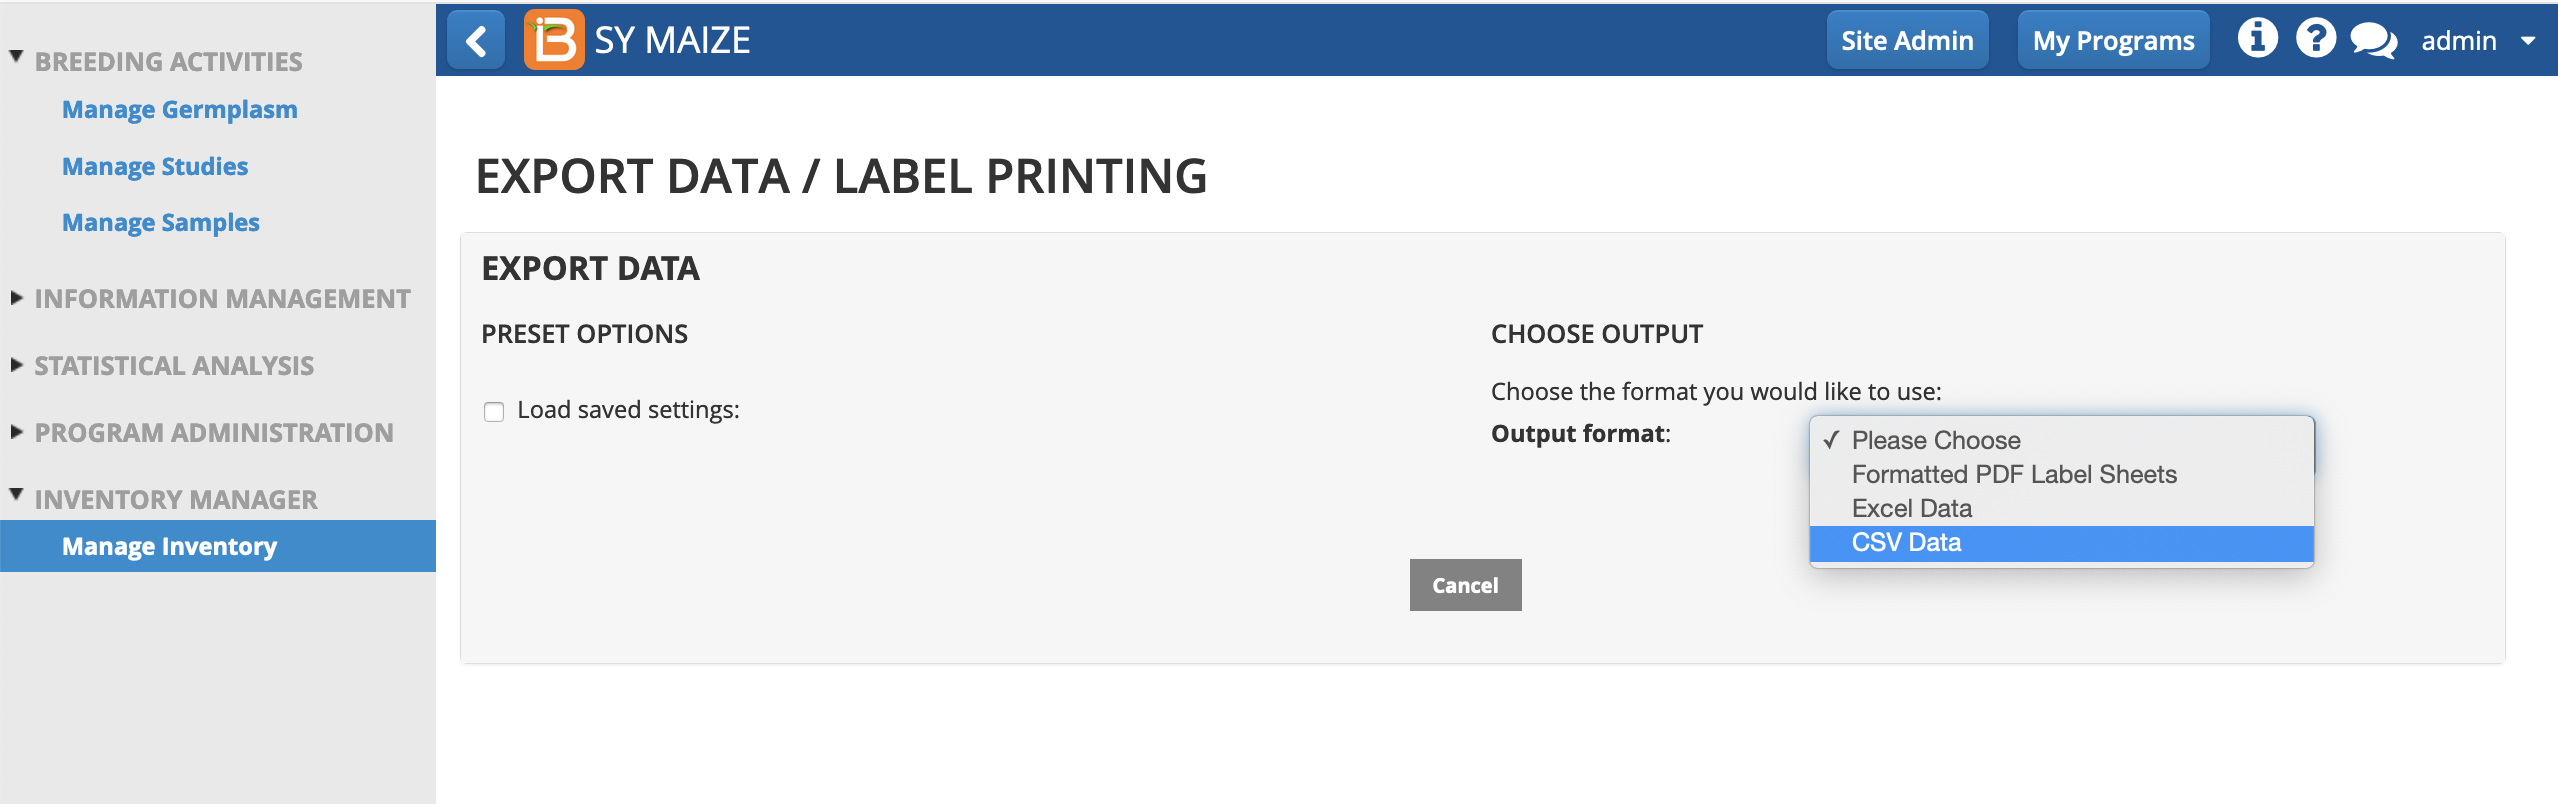
Export data and labels
- Select lot(s) of interest. Select Export data and labels from Action menu. Select the output format.
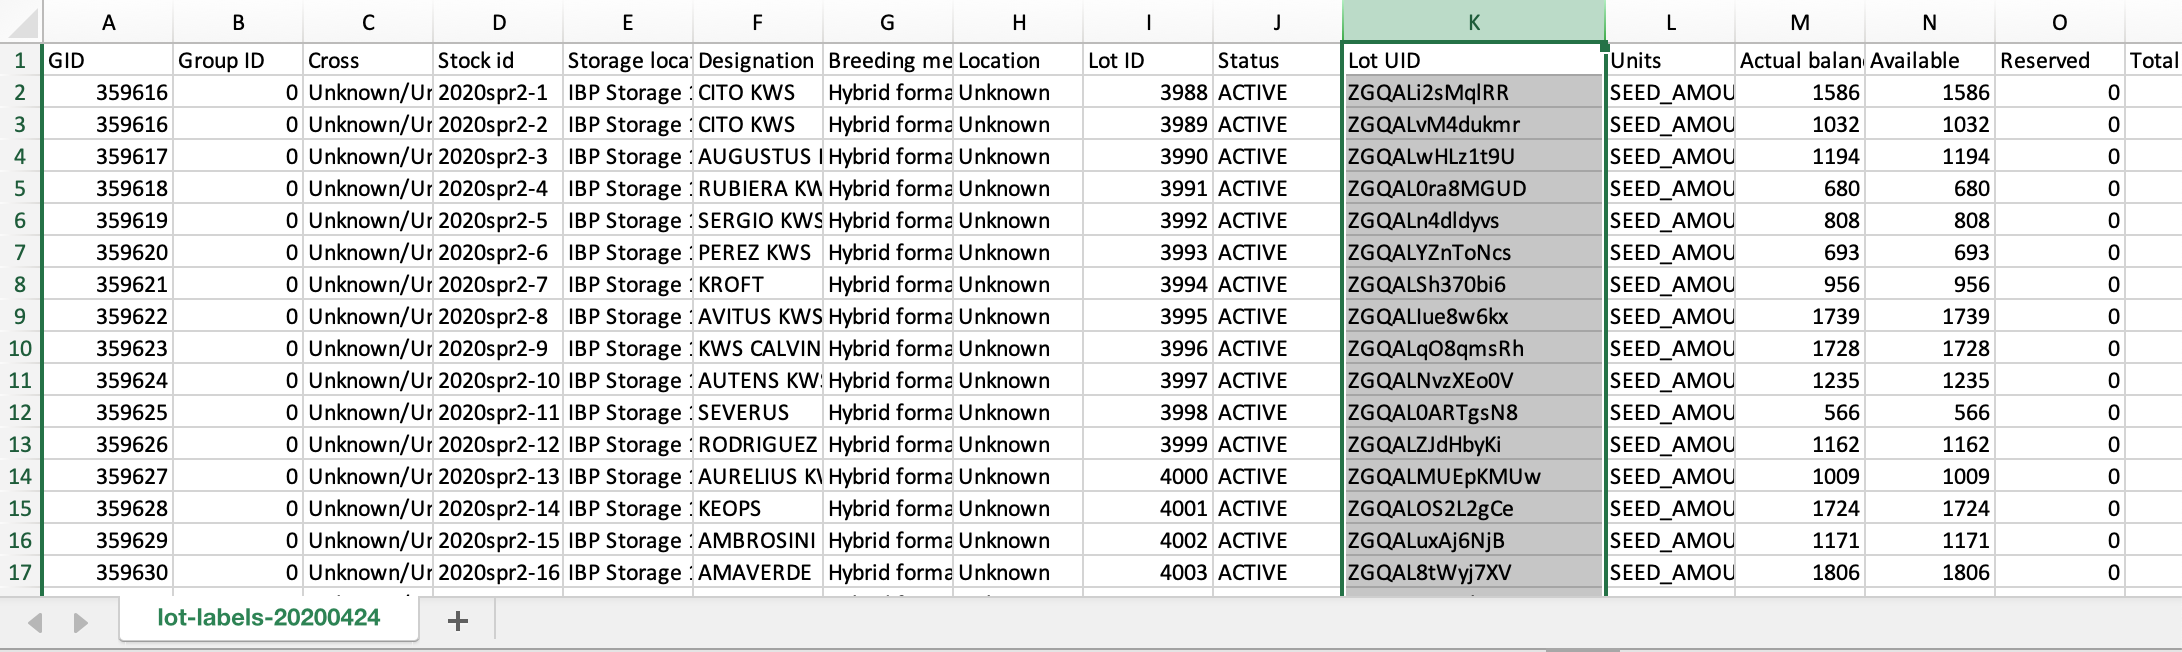
- Drag and drop the selected lot and germplasm data for export. Remember that Lot UID is appropriate for creating the bar code.
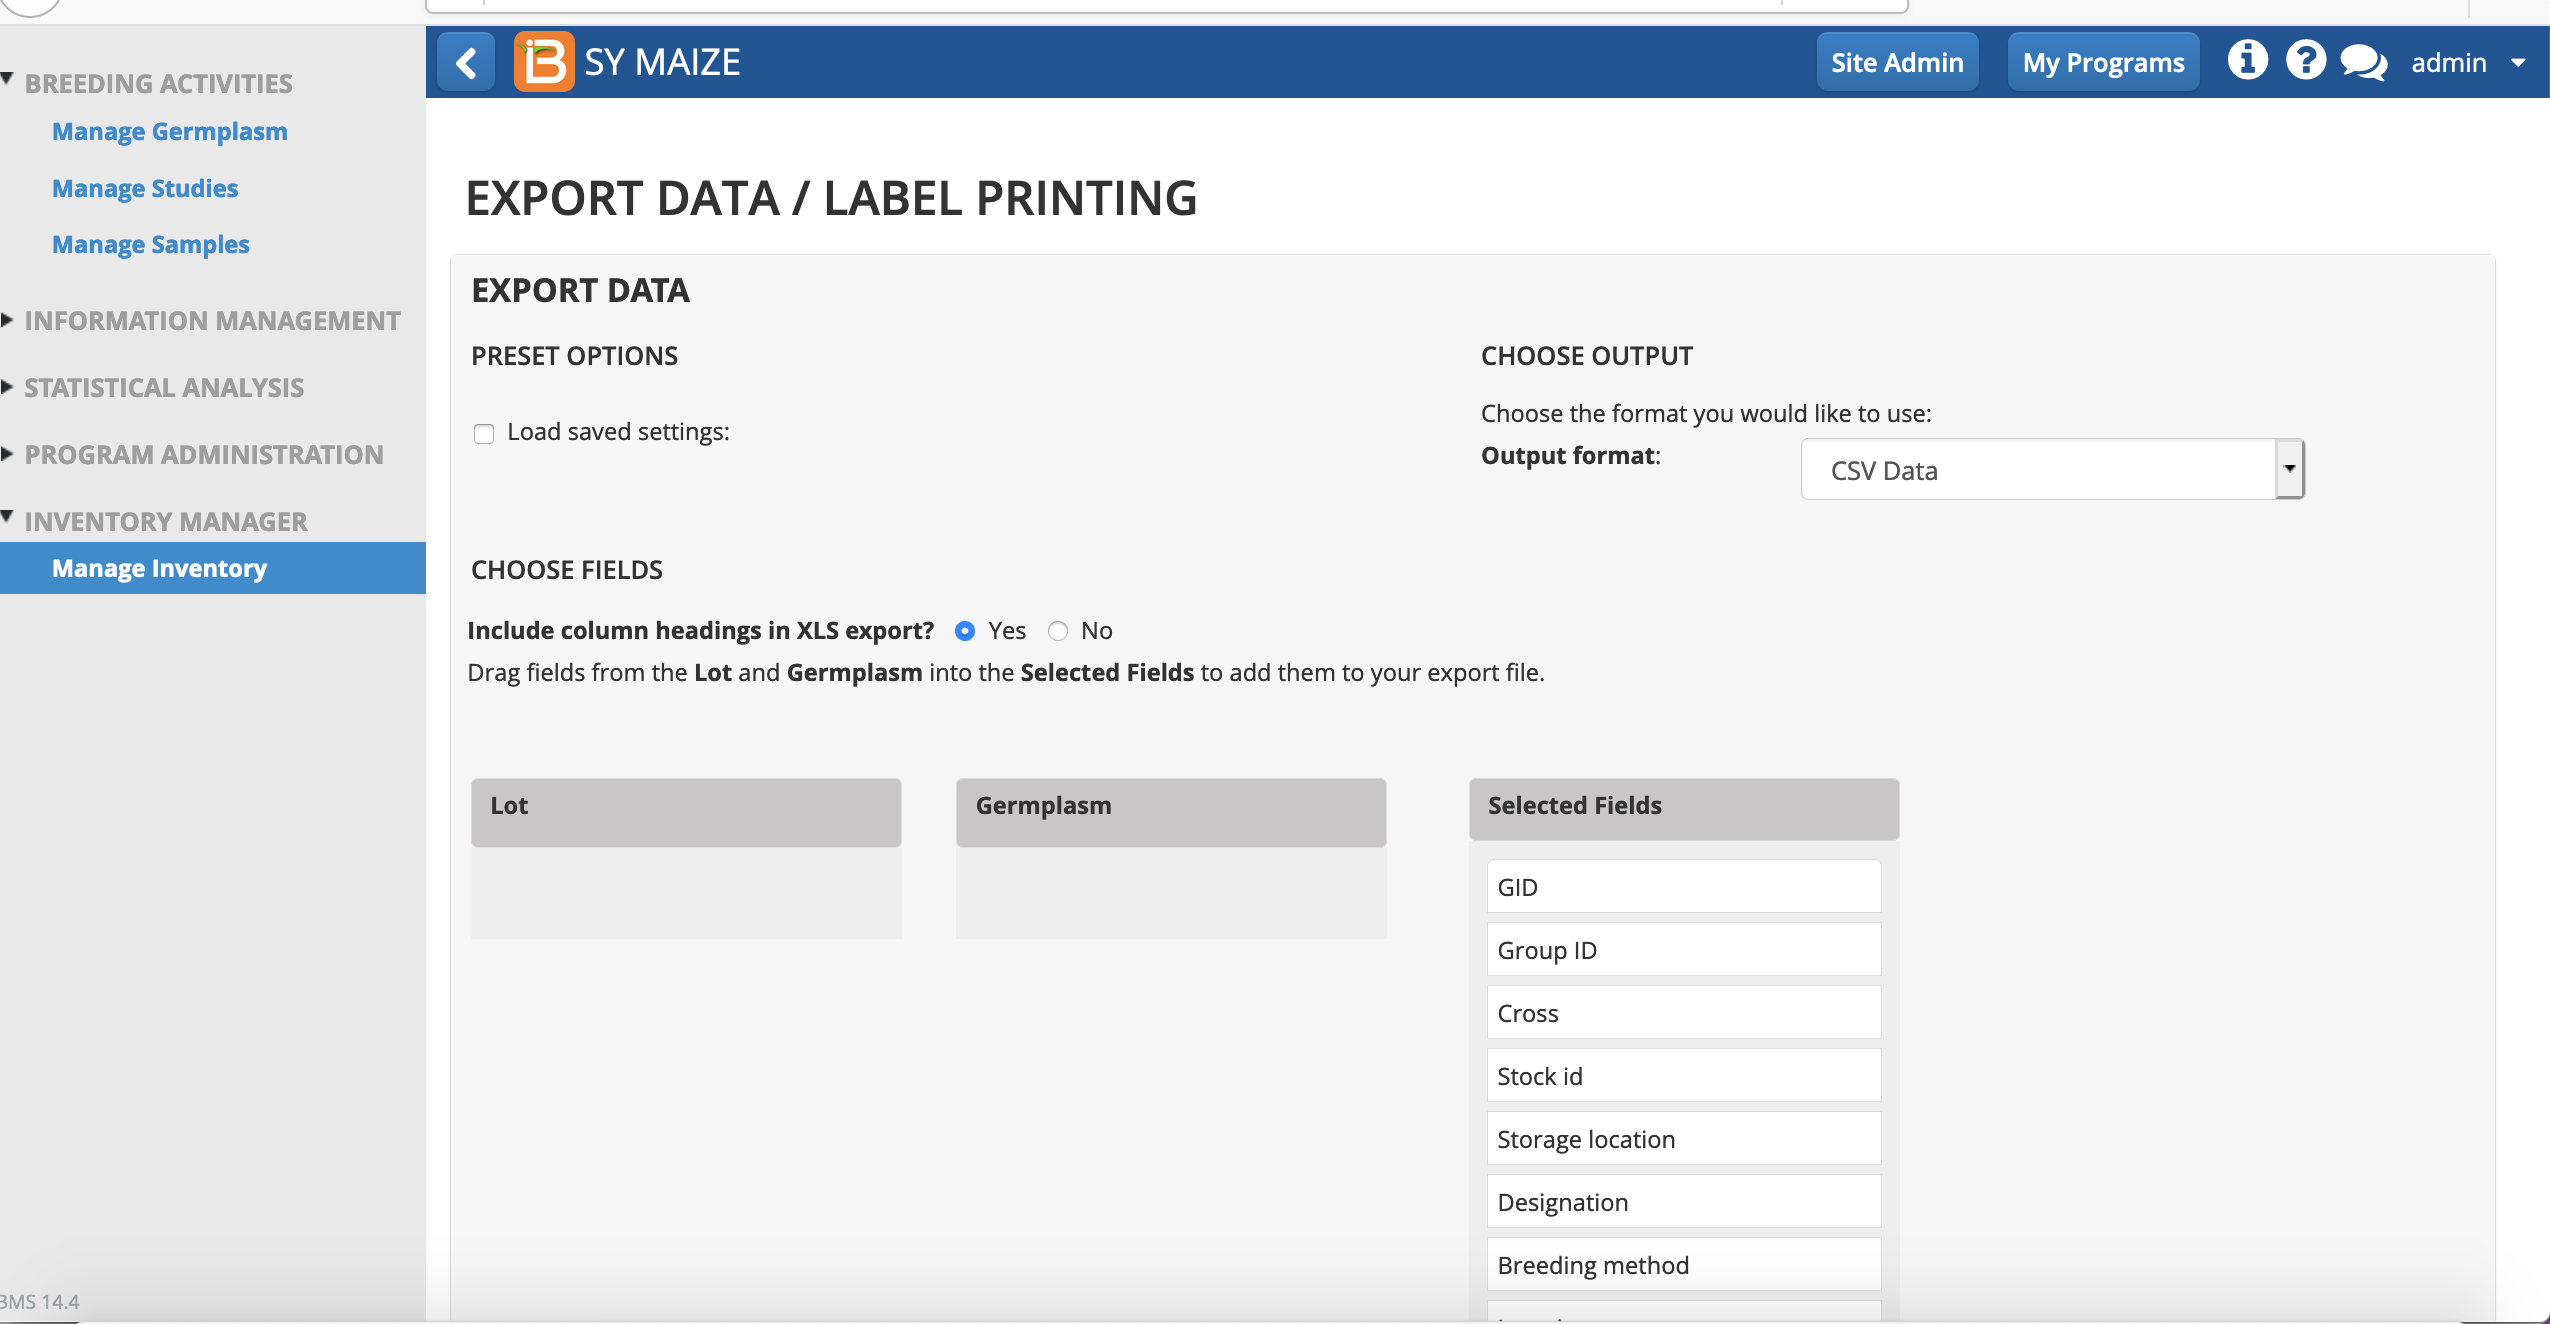
In this example all of the available fields have been selected for export to a .csv file.
- Optional Save Preset. The preset name will be available to automatically format will be available for export options in future.

The export file contains all of the selected fields, including Lot UID, which can be used for barcodes in label-making software.
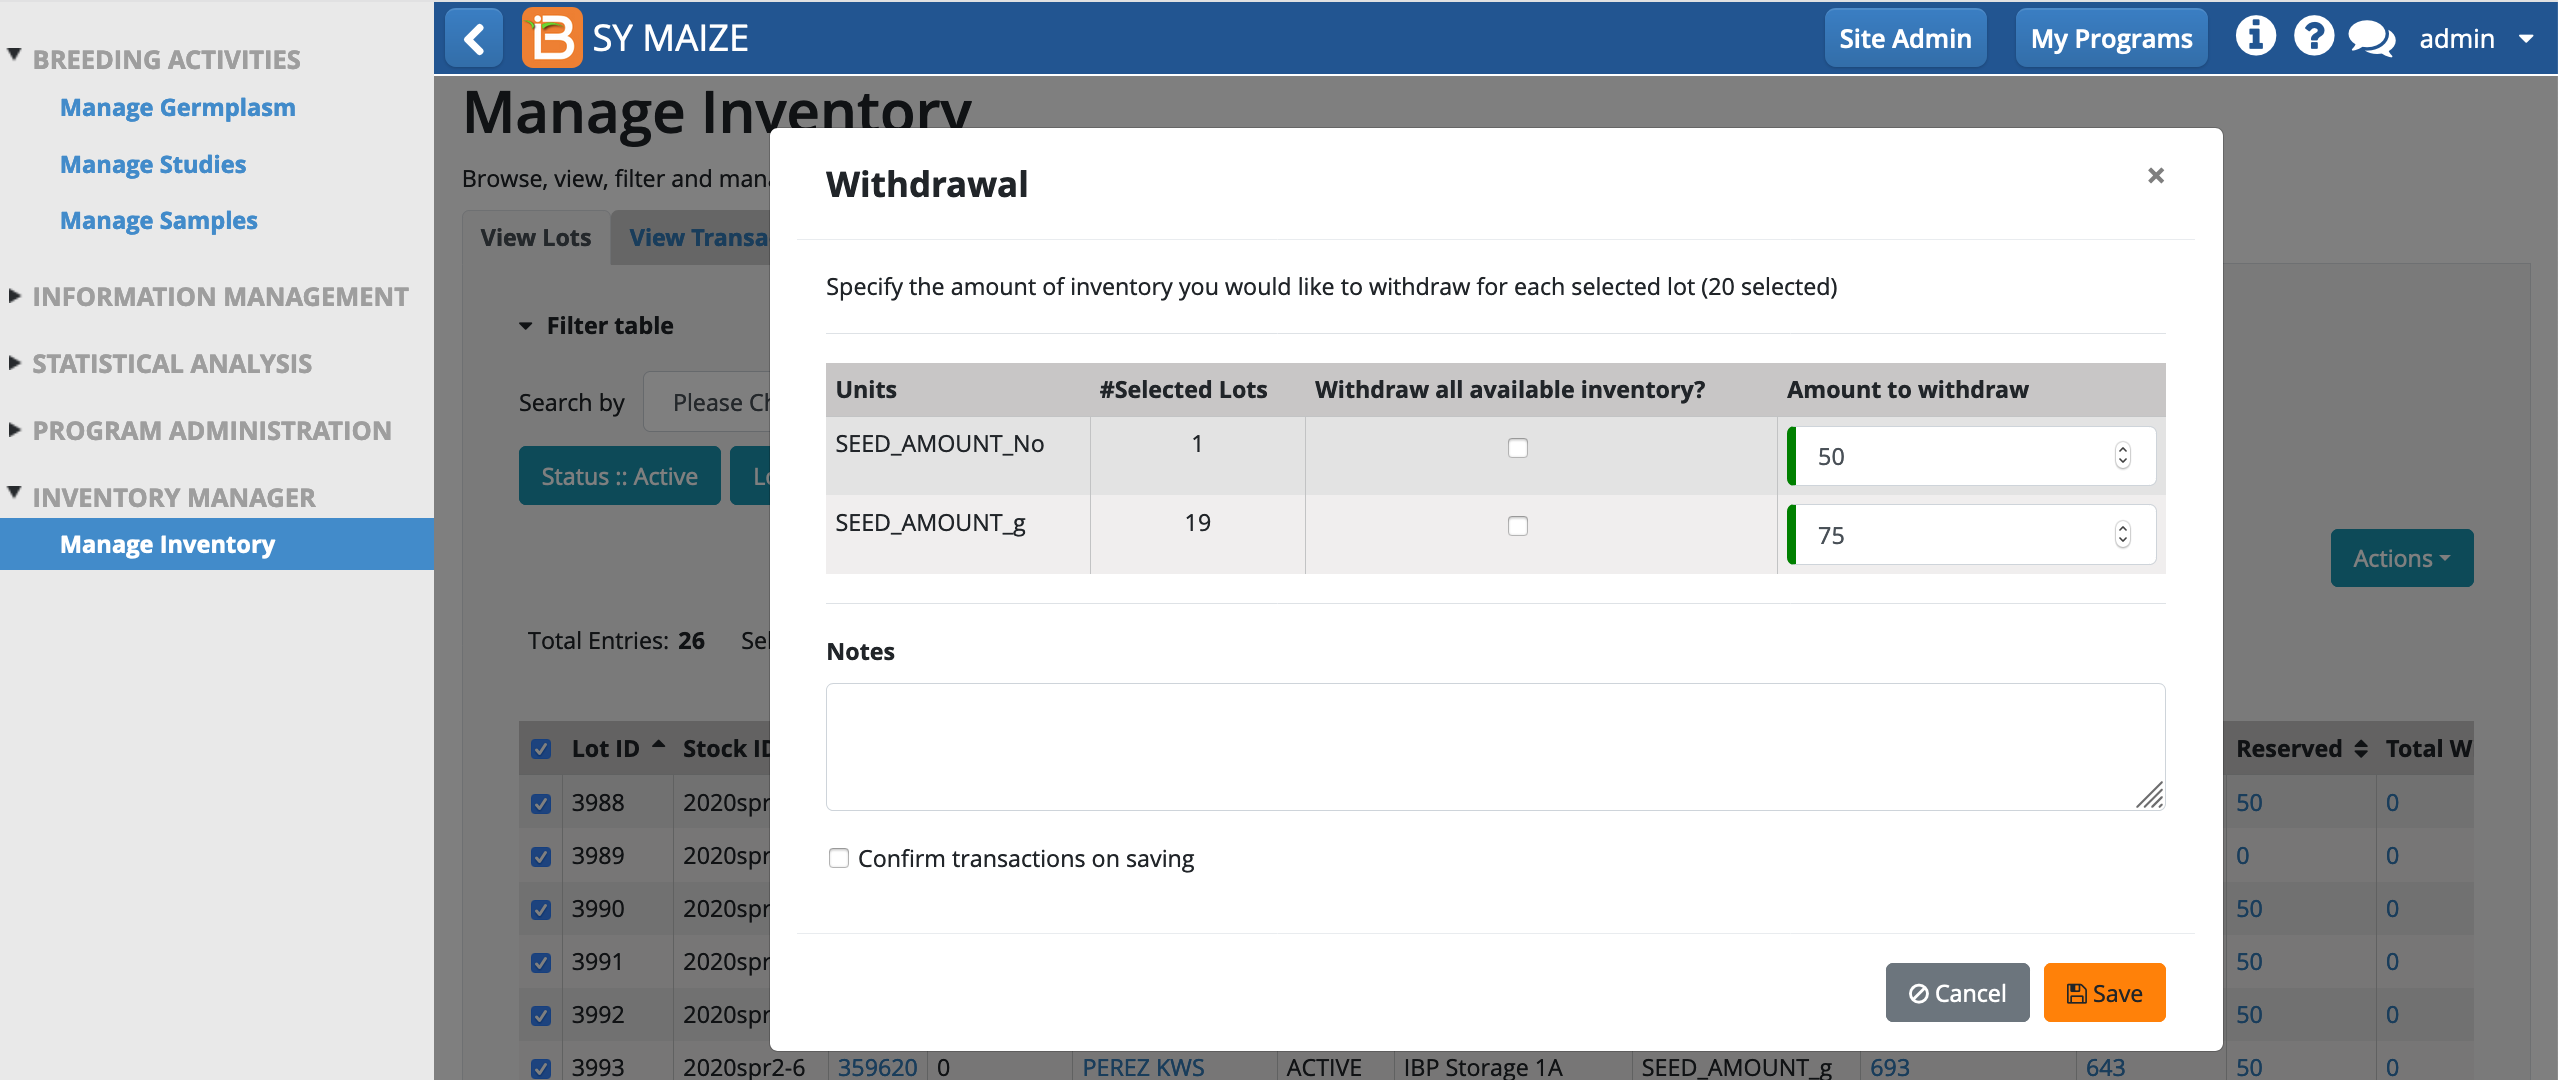
Withdraw inventory
- Select lot(s) of interest. Select Withdraw inventory from Action menu. Specify the amount to withdraw. Save. If the selected lots have more than one unit type, you will be asked the withdrawal amounts for each unit type. If "confirm transaction on saving" is selected, the subtraction from inventory will be immediate. If not selected, a reservation transaction will be created. Successful save of the transaction(s) will trigger a confirmation message.
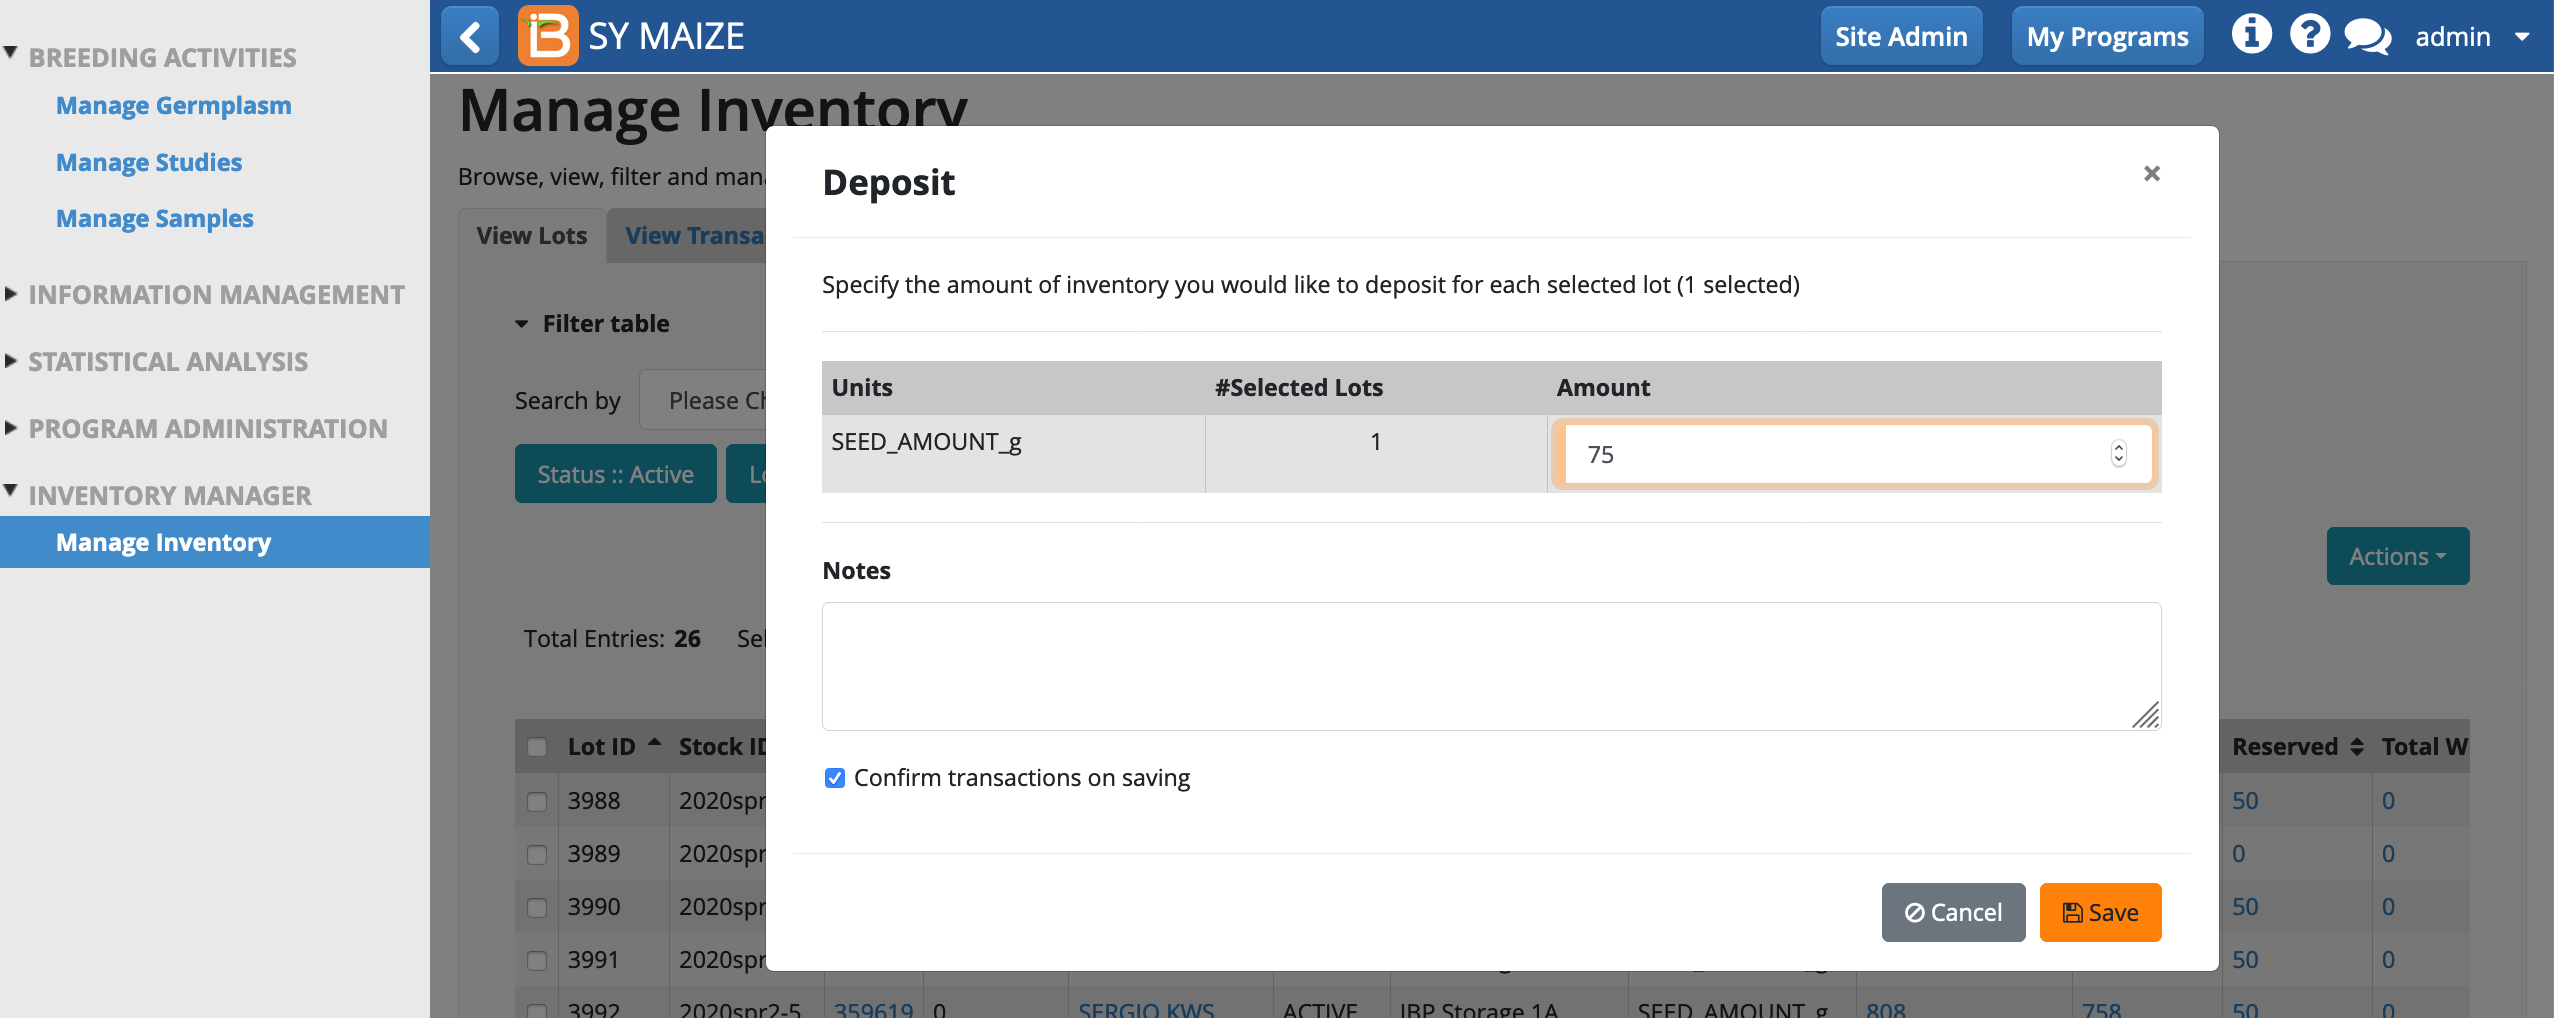
Deposit inventory
Harvest deposits are generally updated via the stock list functions of Mange Studies (see information below), so that study details like plot location are connected to the deposit. However, the Inventory Manager provides flexibility to add to lots independently of studies.
- Select lot(s) of interest. Select Deposit inventory from Action menu. Specify the amount to deposit. If "confirm transaction on saving" is selected, the addition to the lot will be immediate. If not selected, a pending deposit transaction will be created. Save. Successful save of the transaction(s) will trigger a confirmation message.
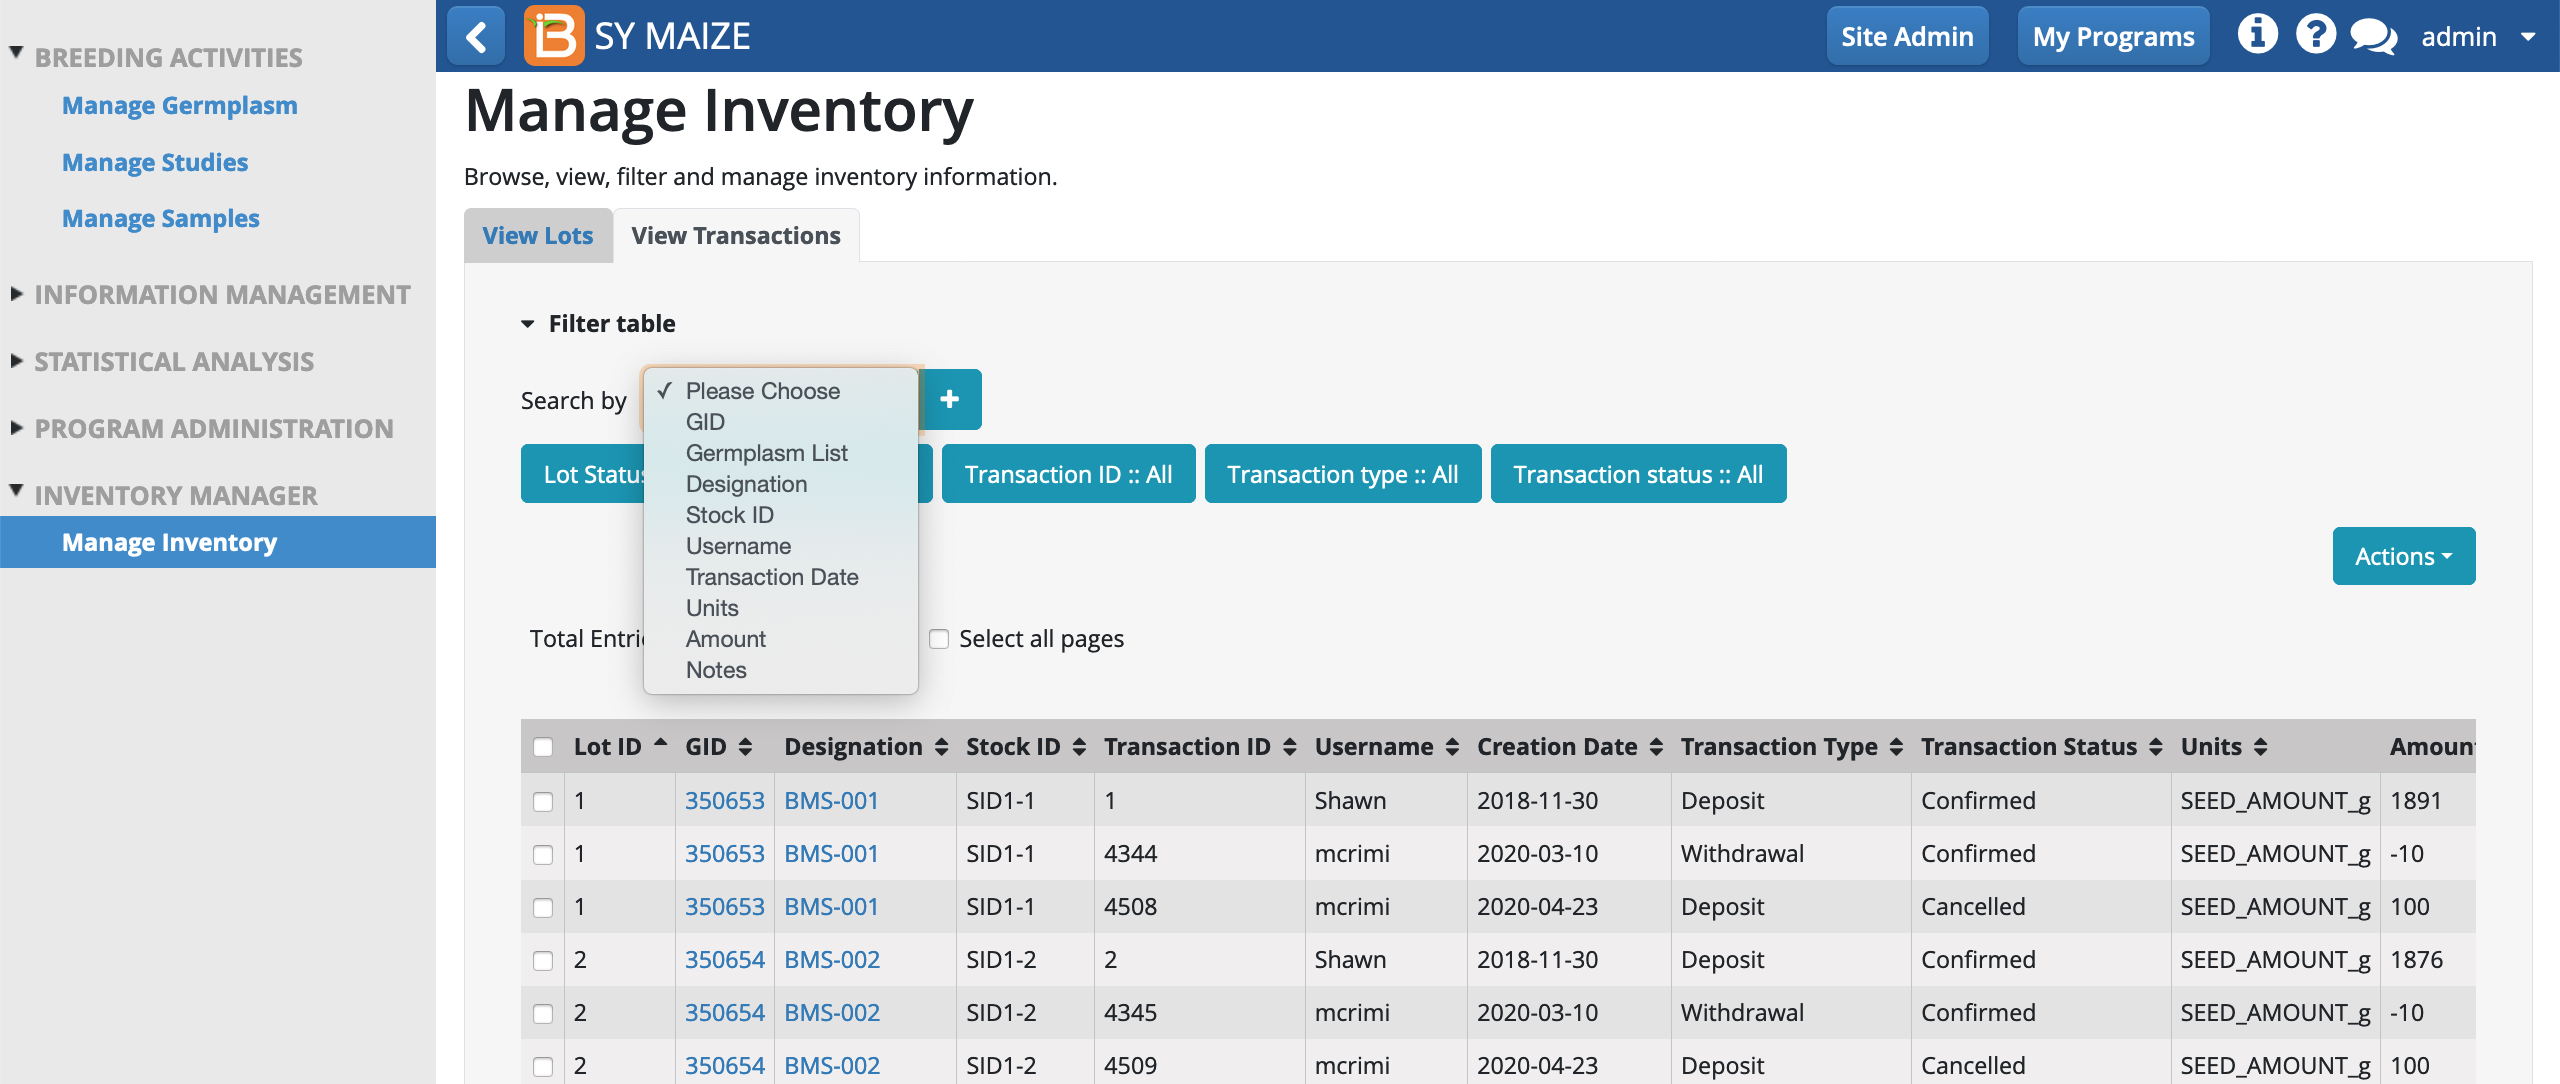
Transaction Filters
From View Transactions you have the ability to filter transactions by any detail or combination of details.
- Filter lots by any detail or combination of details. Select the detail from the "Search by" drop down and add to filter by selecting the + button.
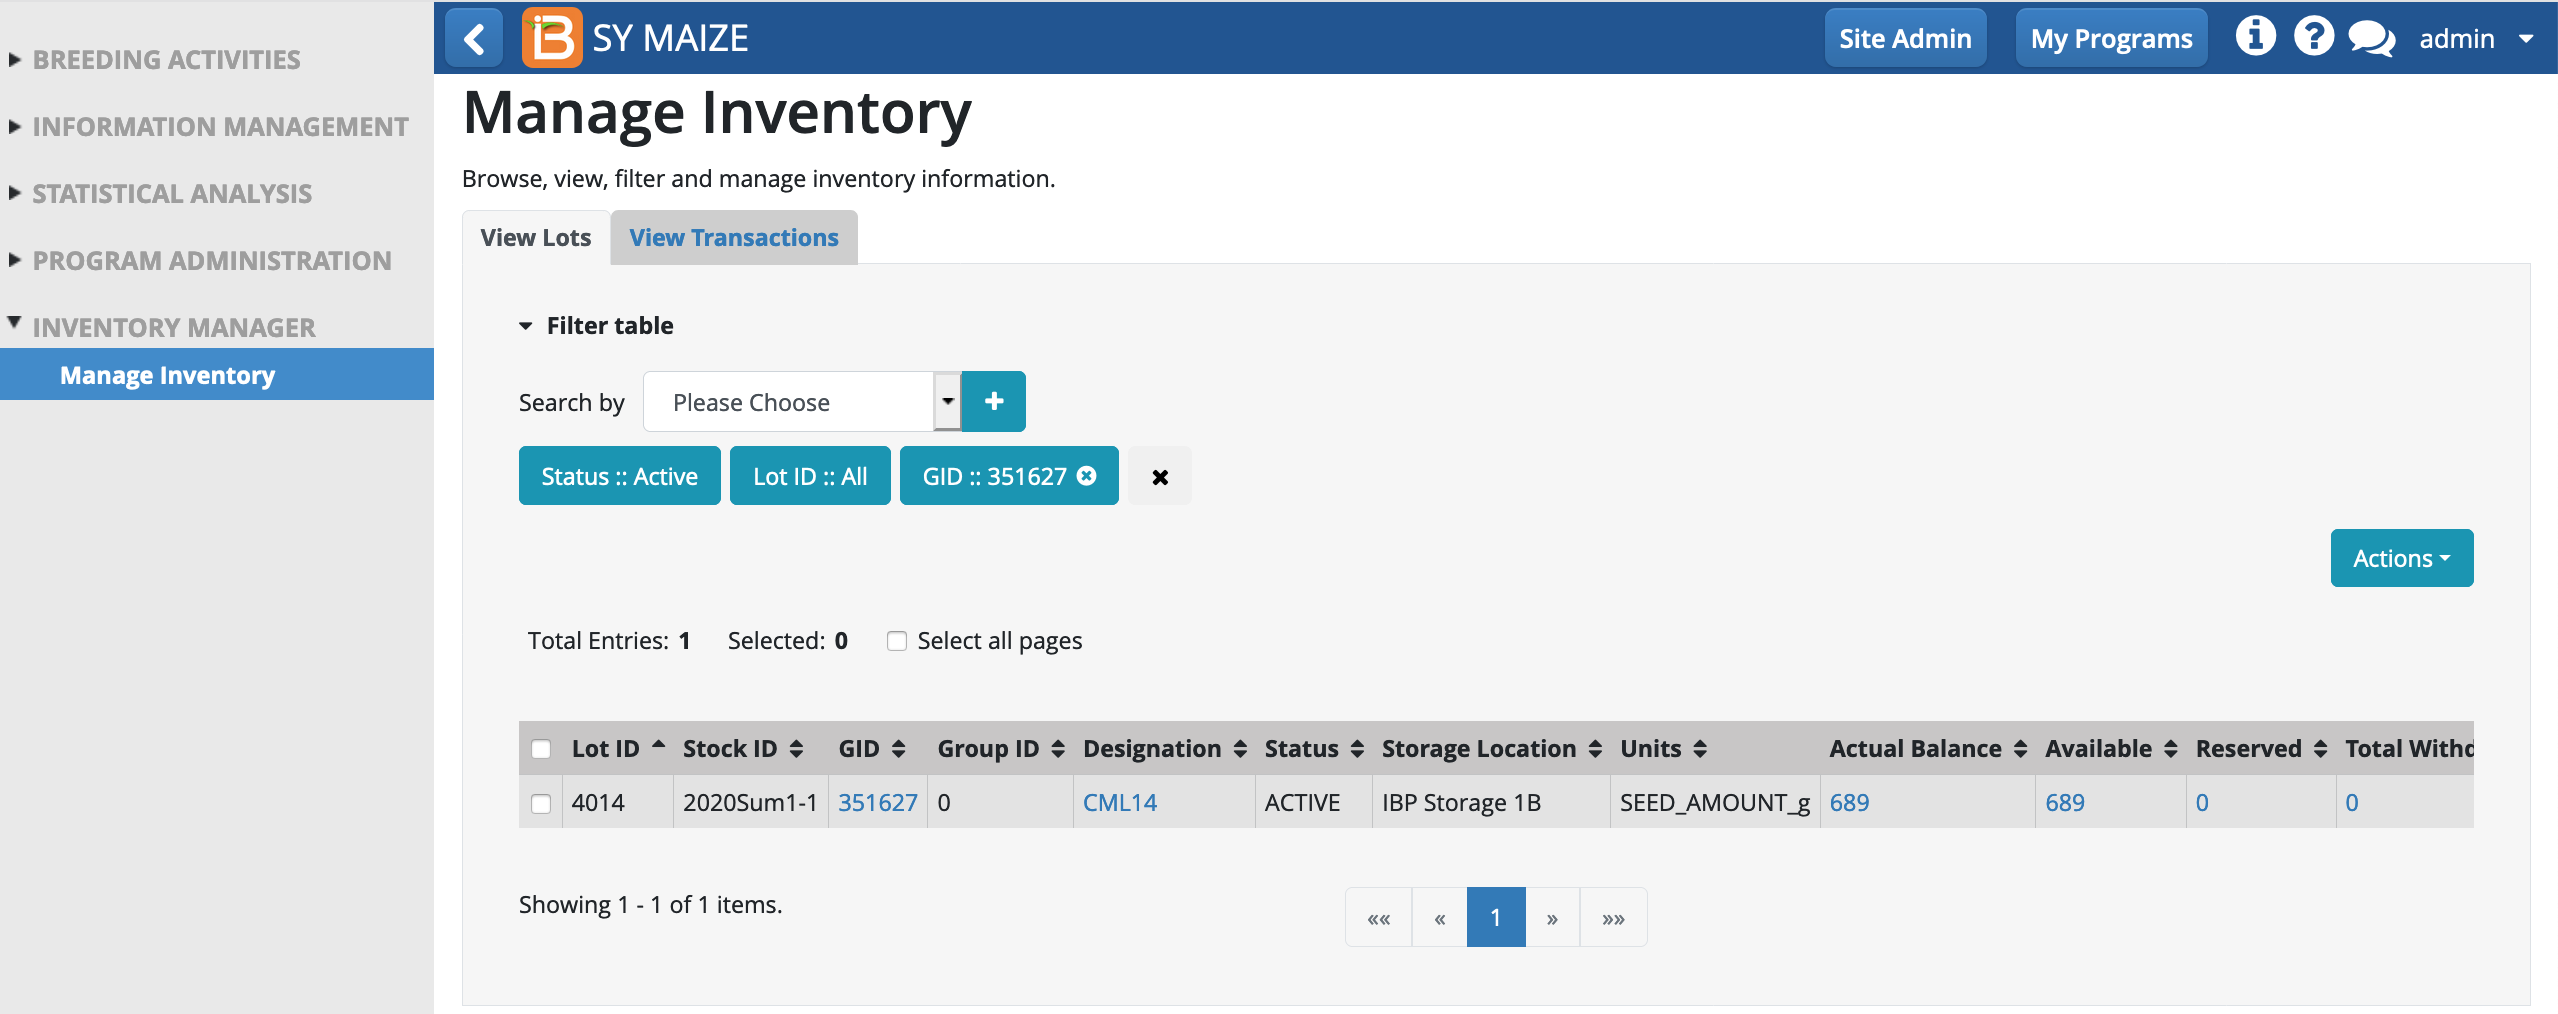
Filter Example: GID
- Select GID to filter by GID. Paste in GID(s) of interest. If searching for multiple GIDs enter comma separated values. Apply
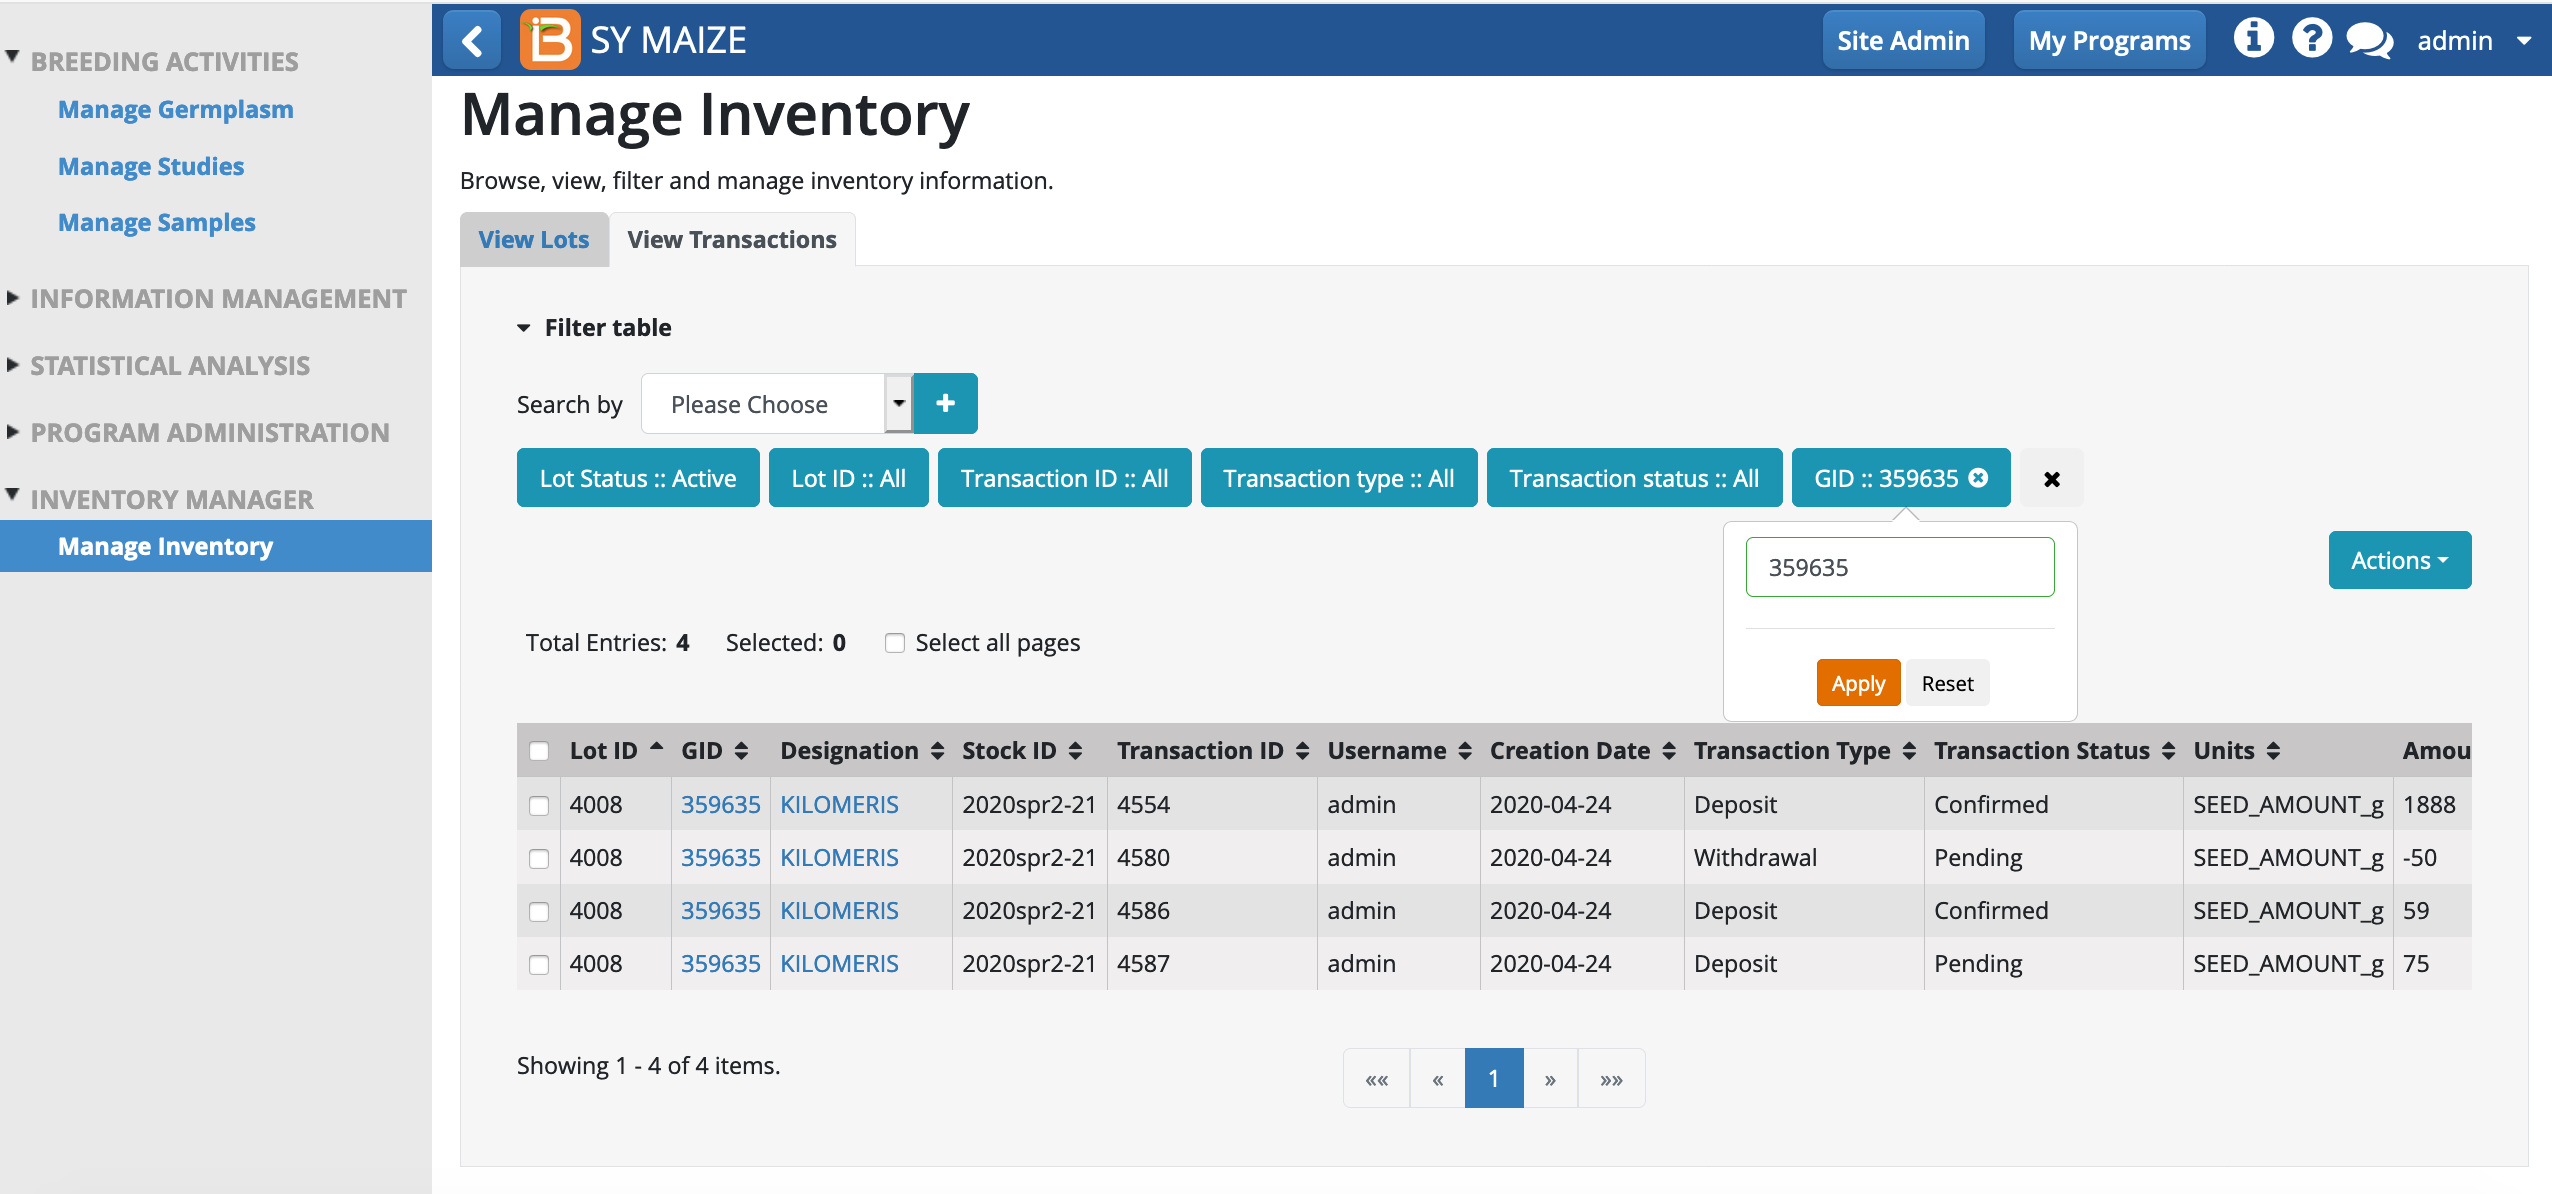
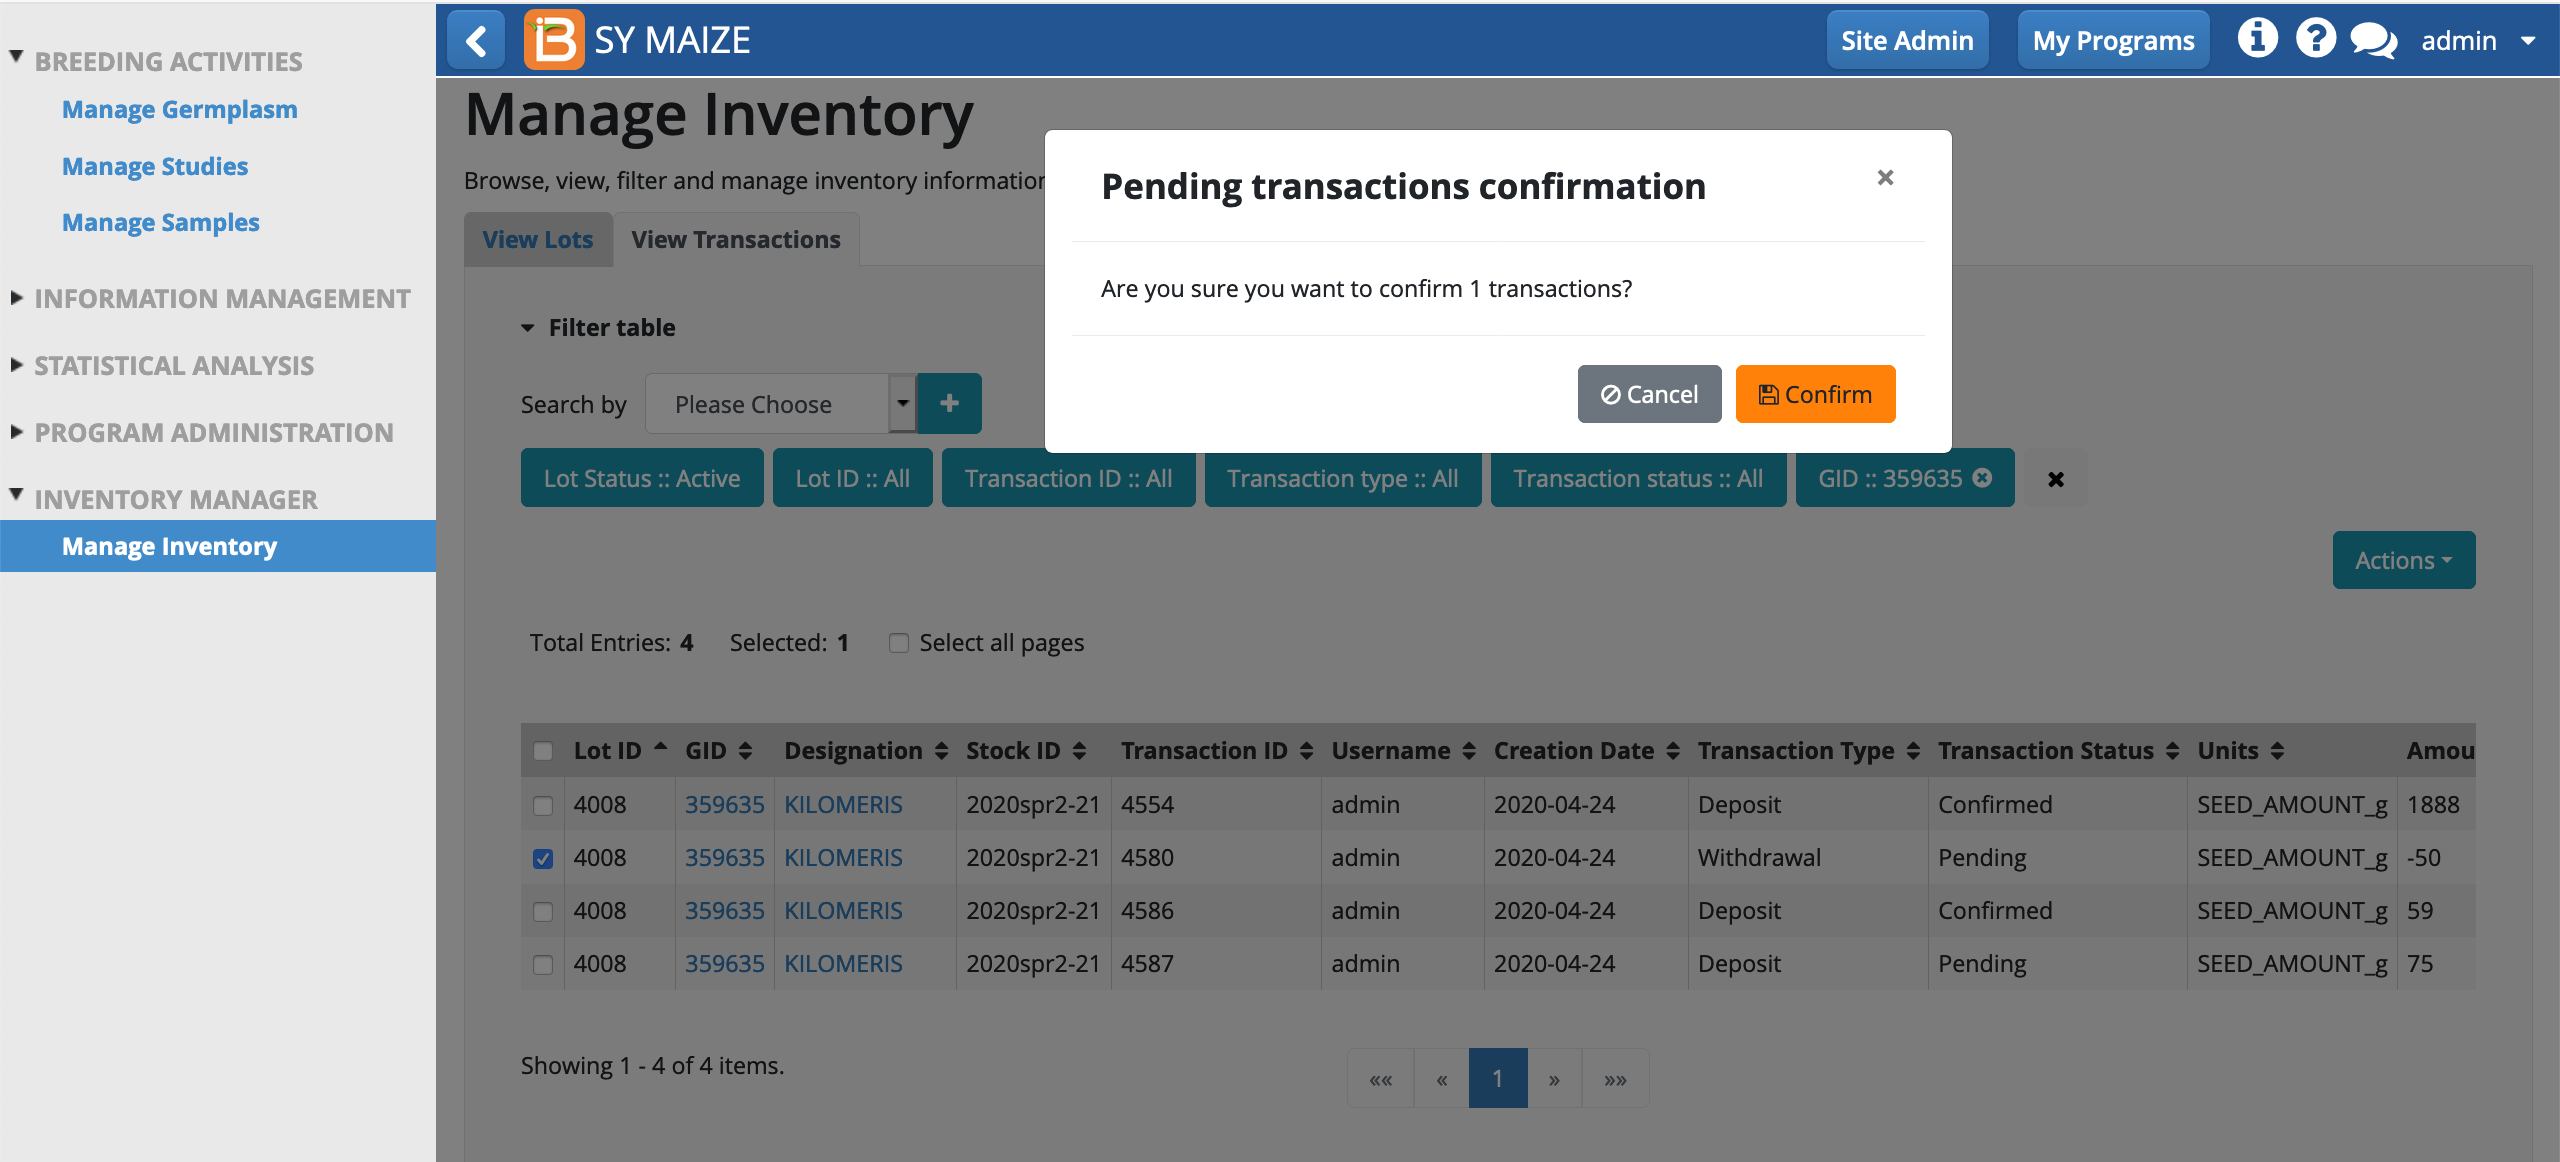
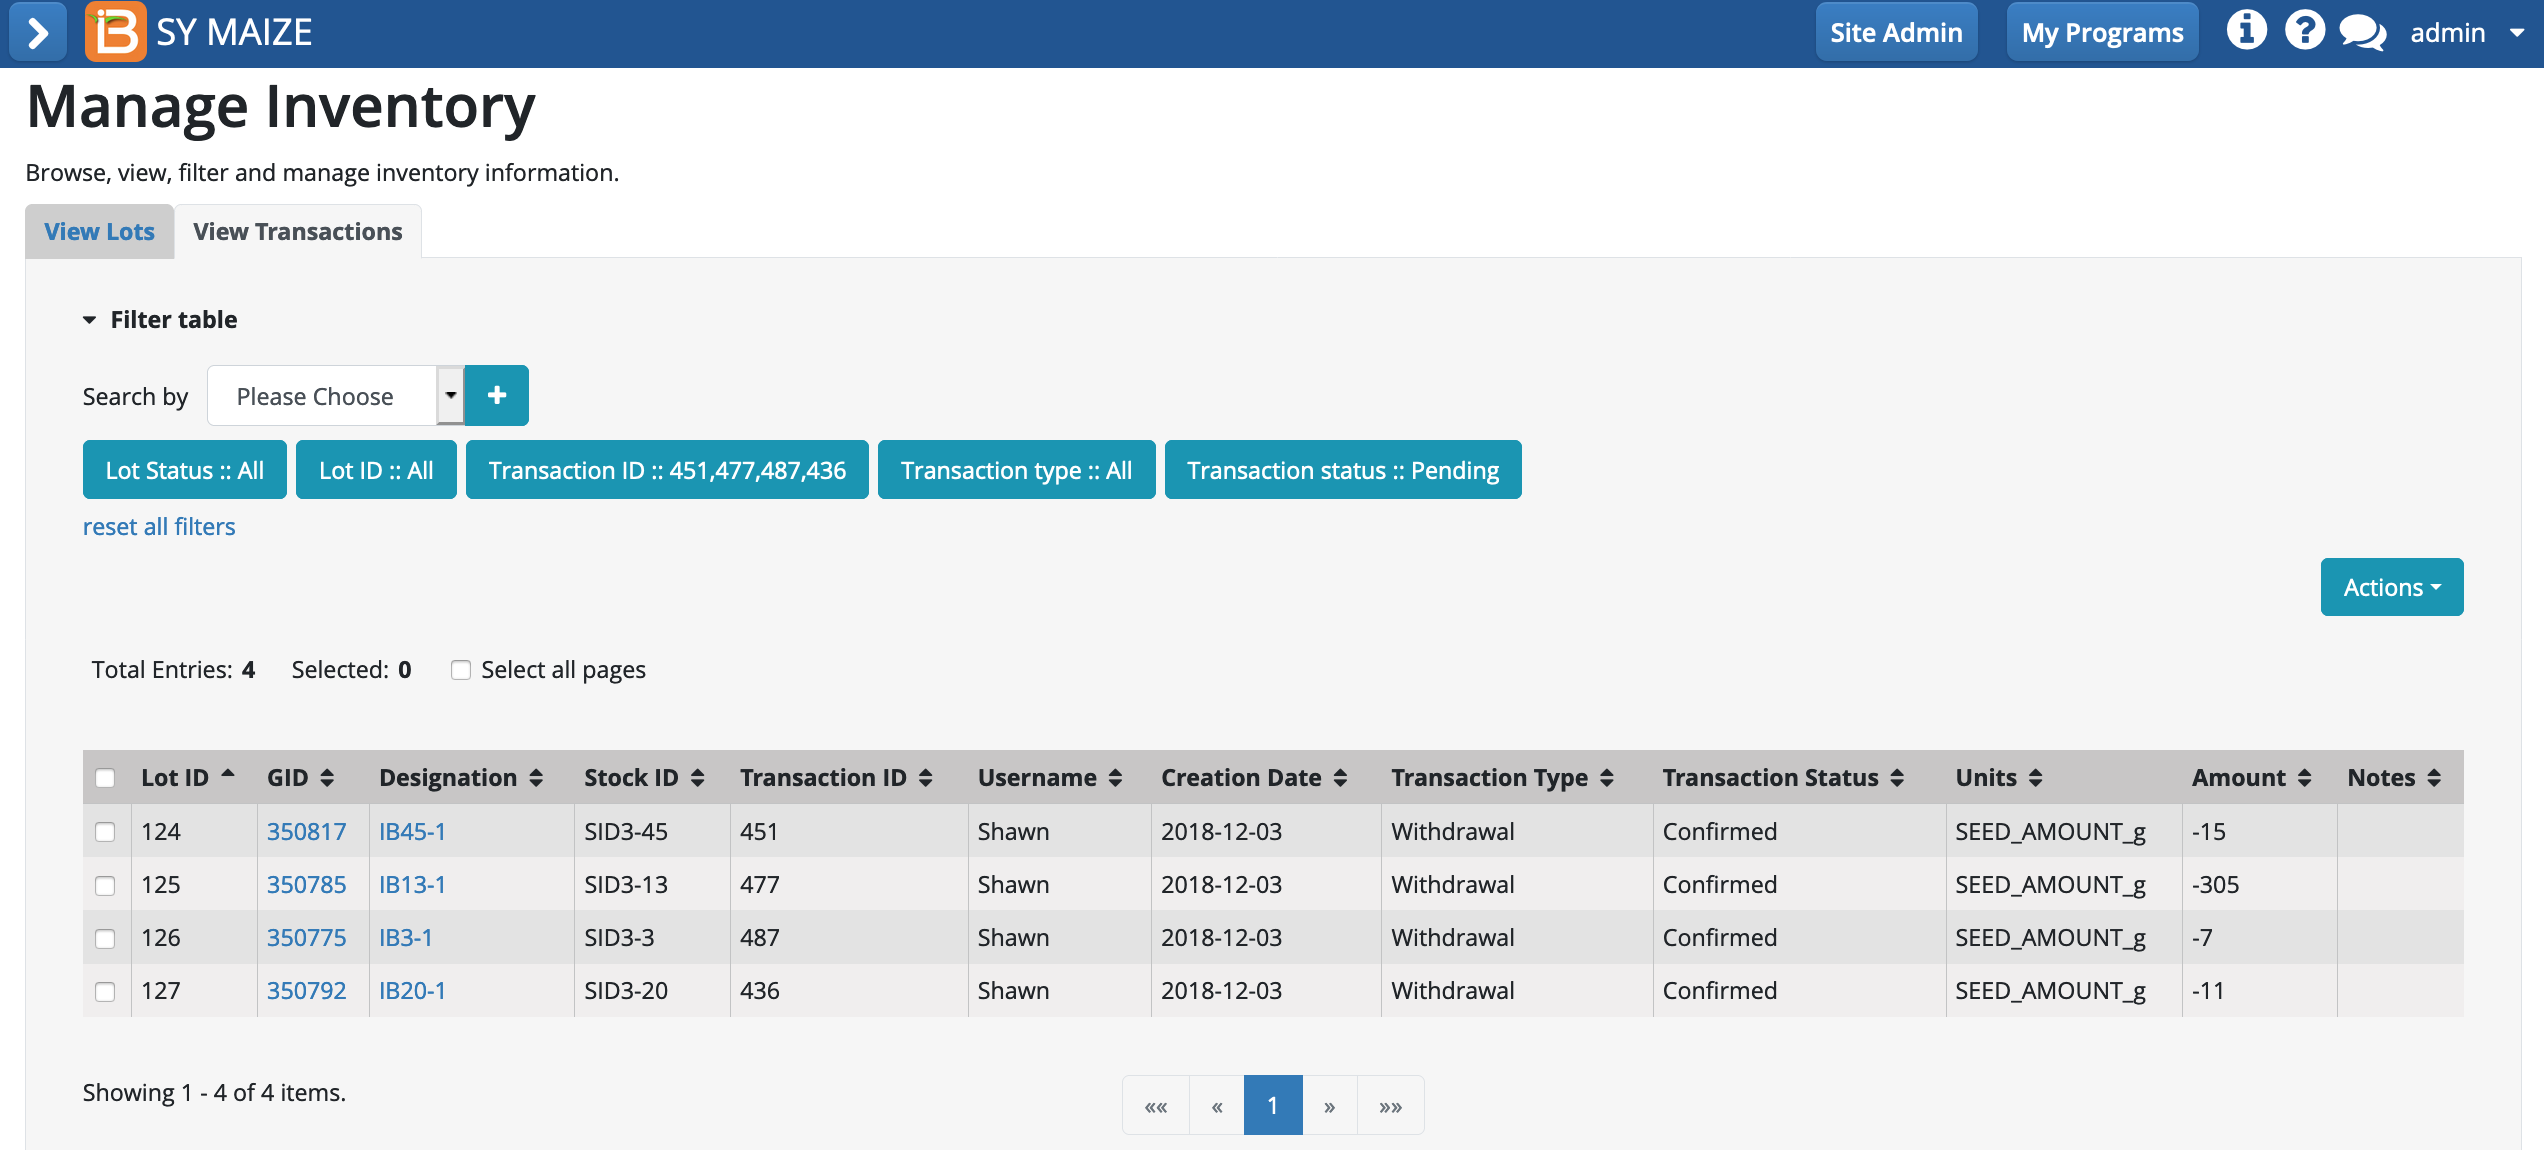
GID 359635 has one lot, Lot ID 4008, and four transactions: 2 confirmed deposit, 1 pending withdrawal, and 1 pending deposit.
Filter Example: Transaction Status
- Choose transaction status options to filter by pending, confirmed, and/or canceled transactions. Apply filter.
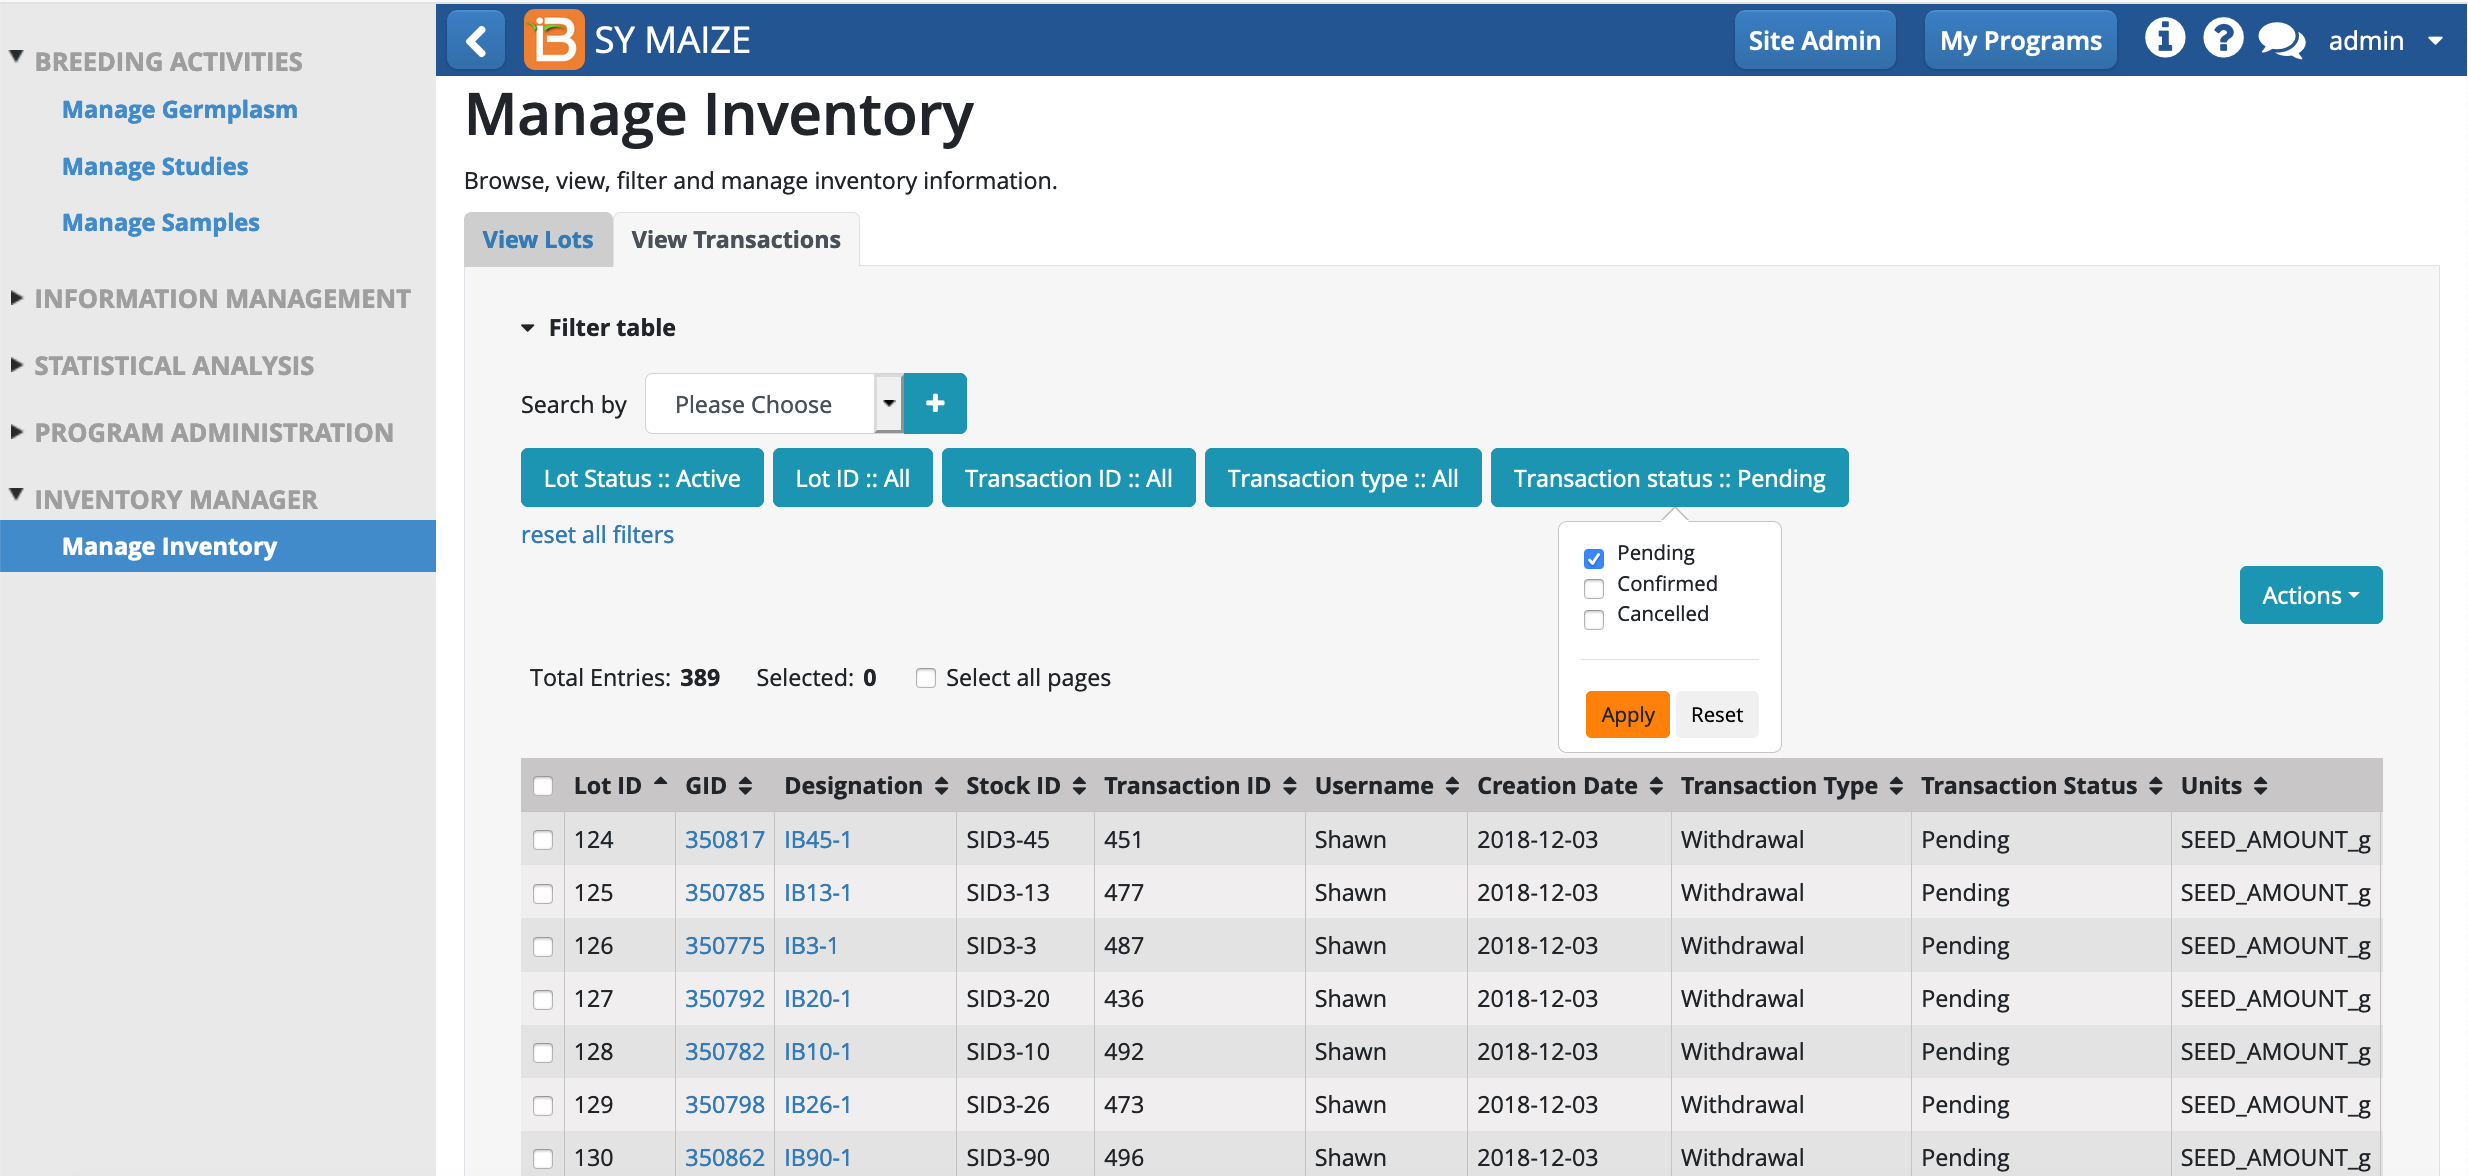
The choosen filter presents only pending transactions.
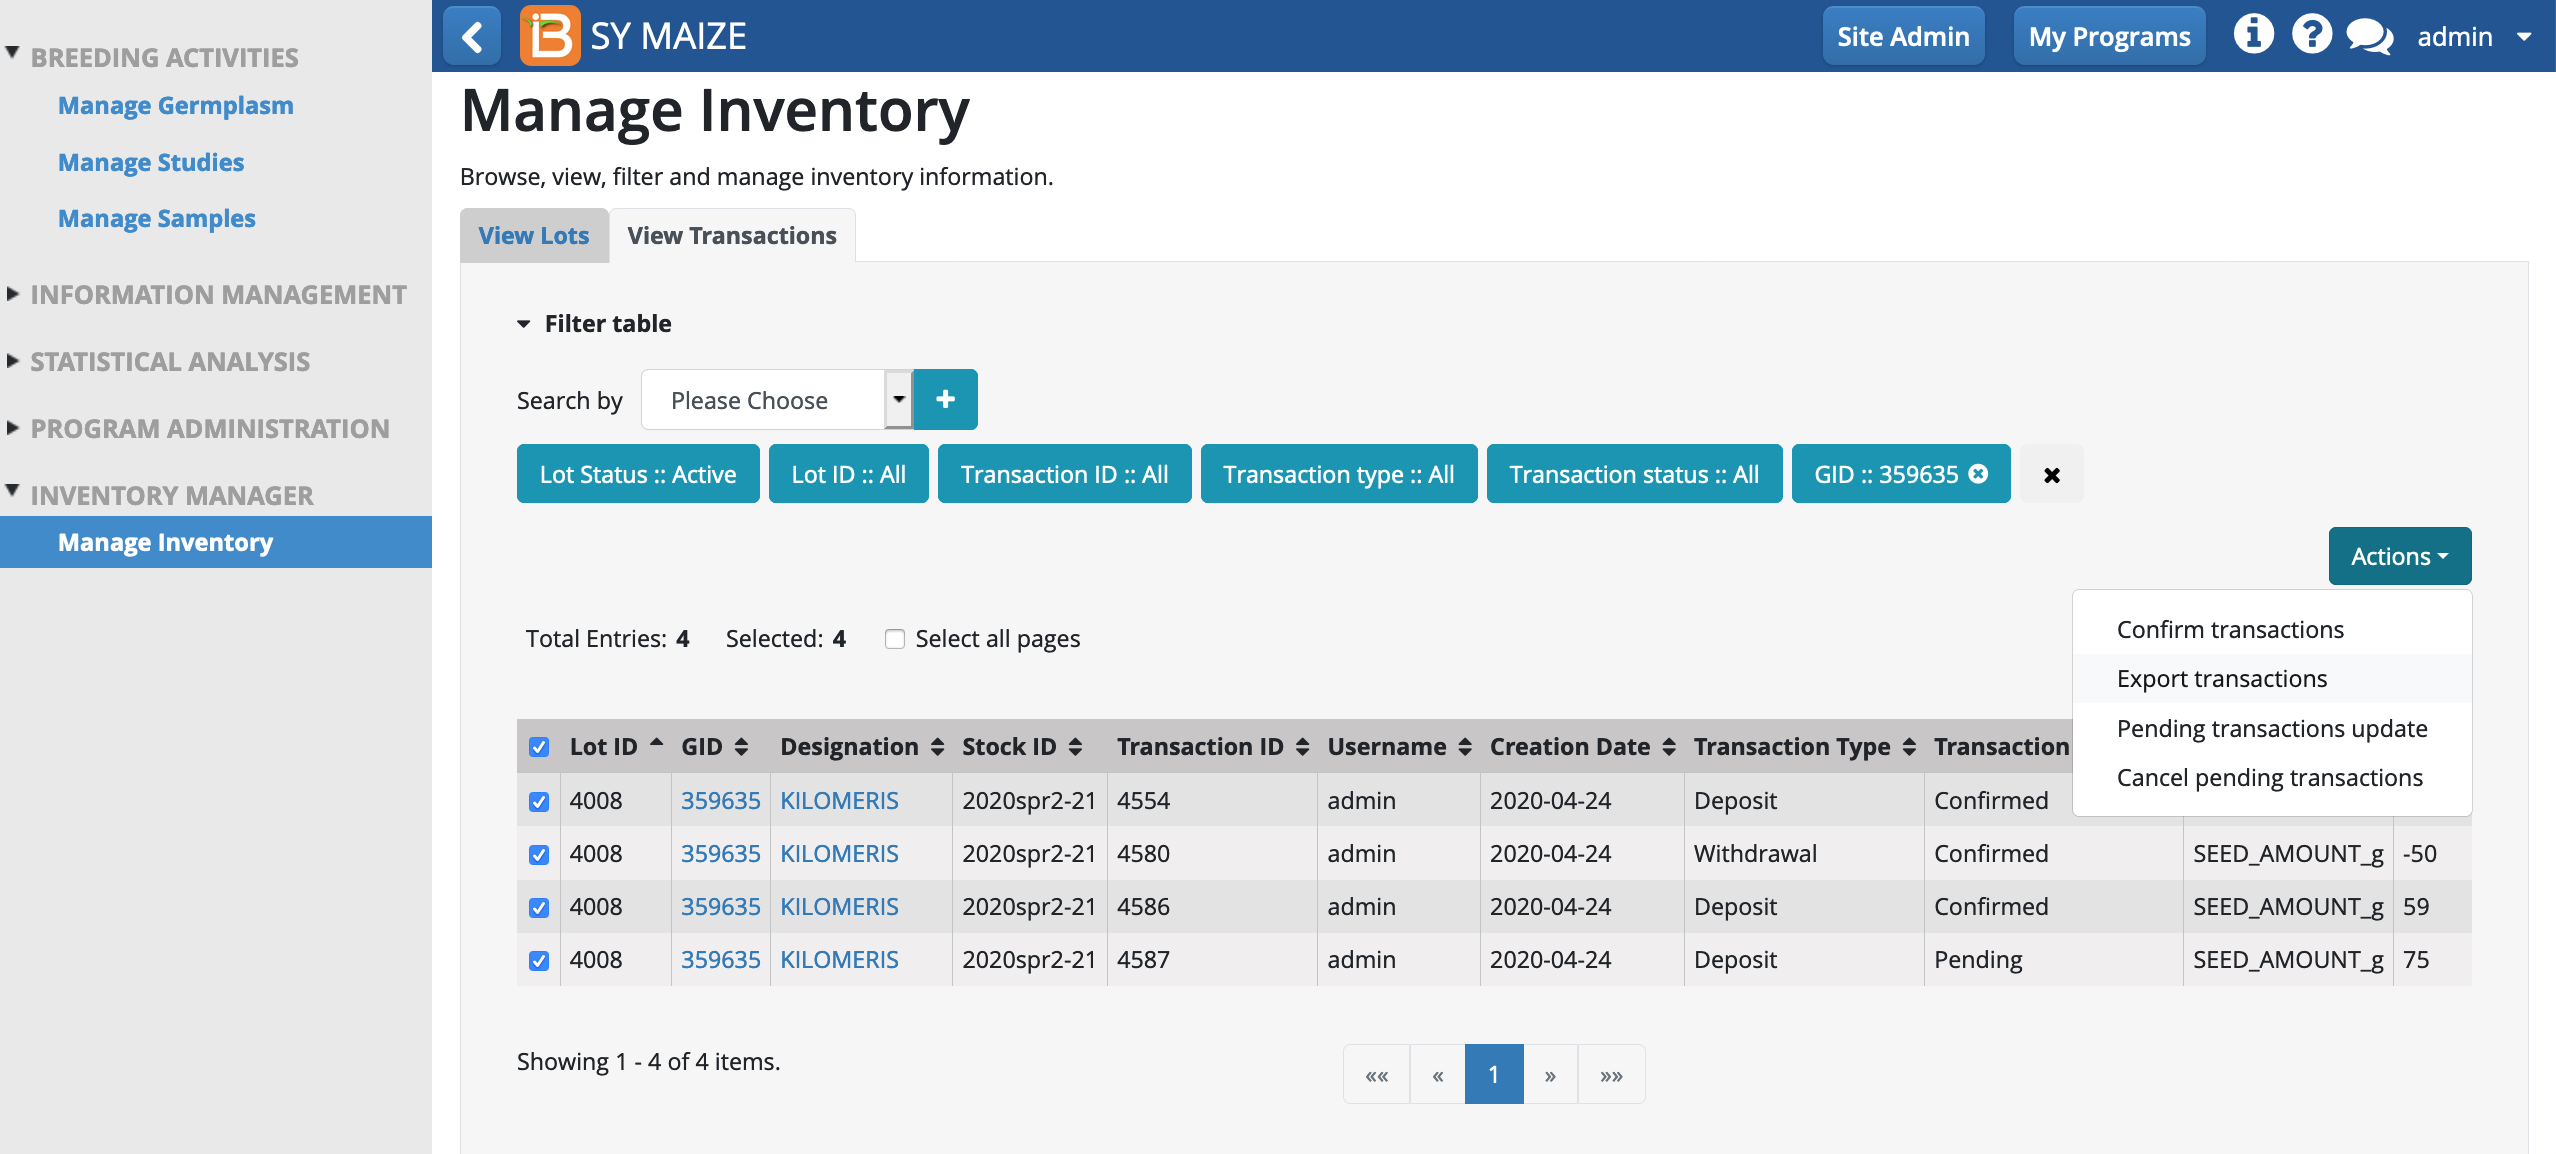
Transaction Actions
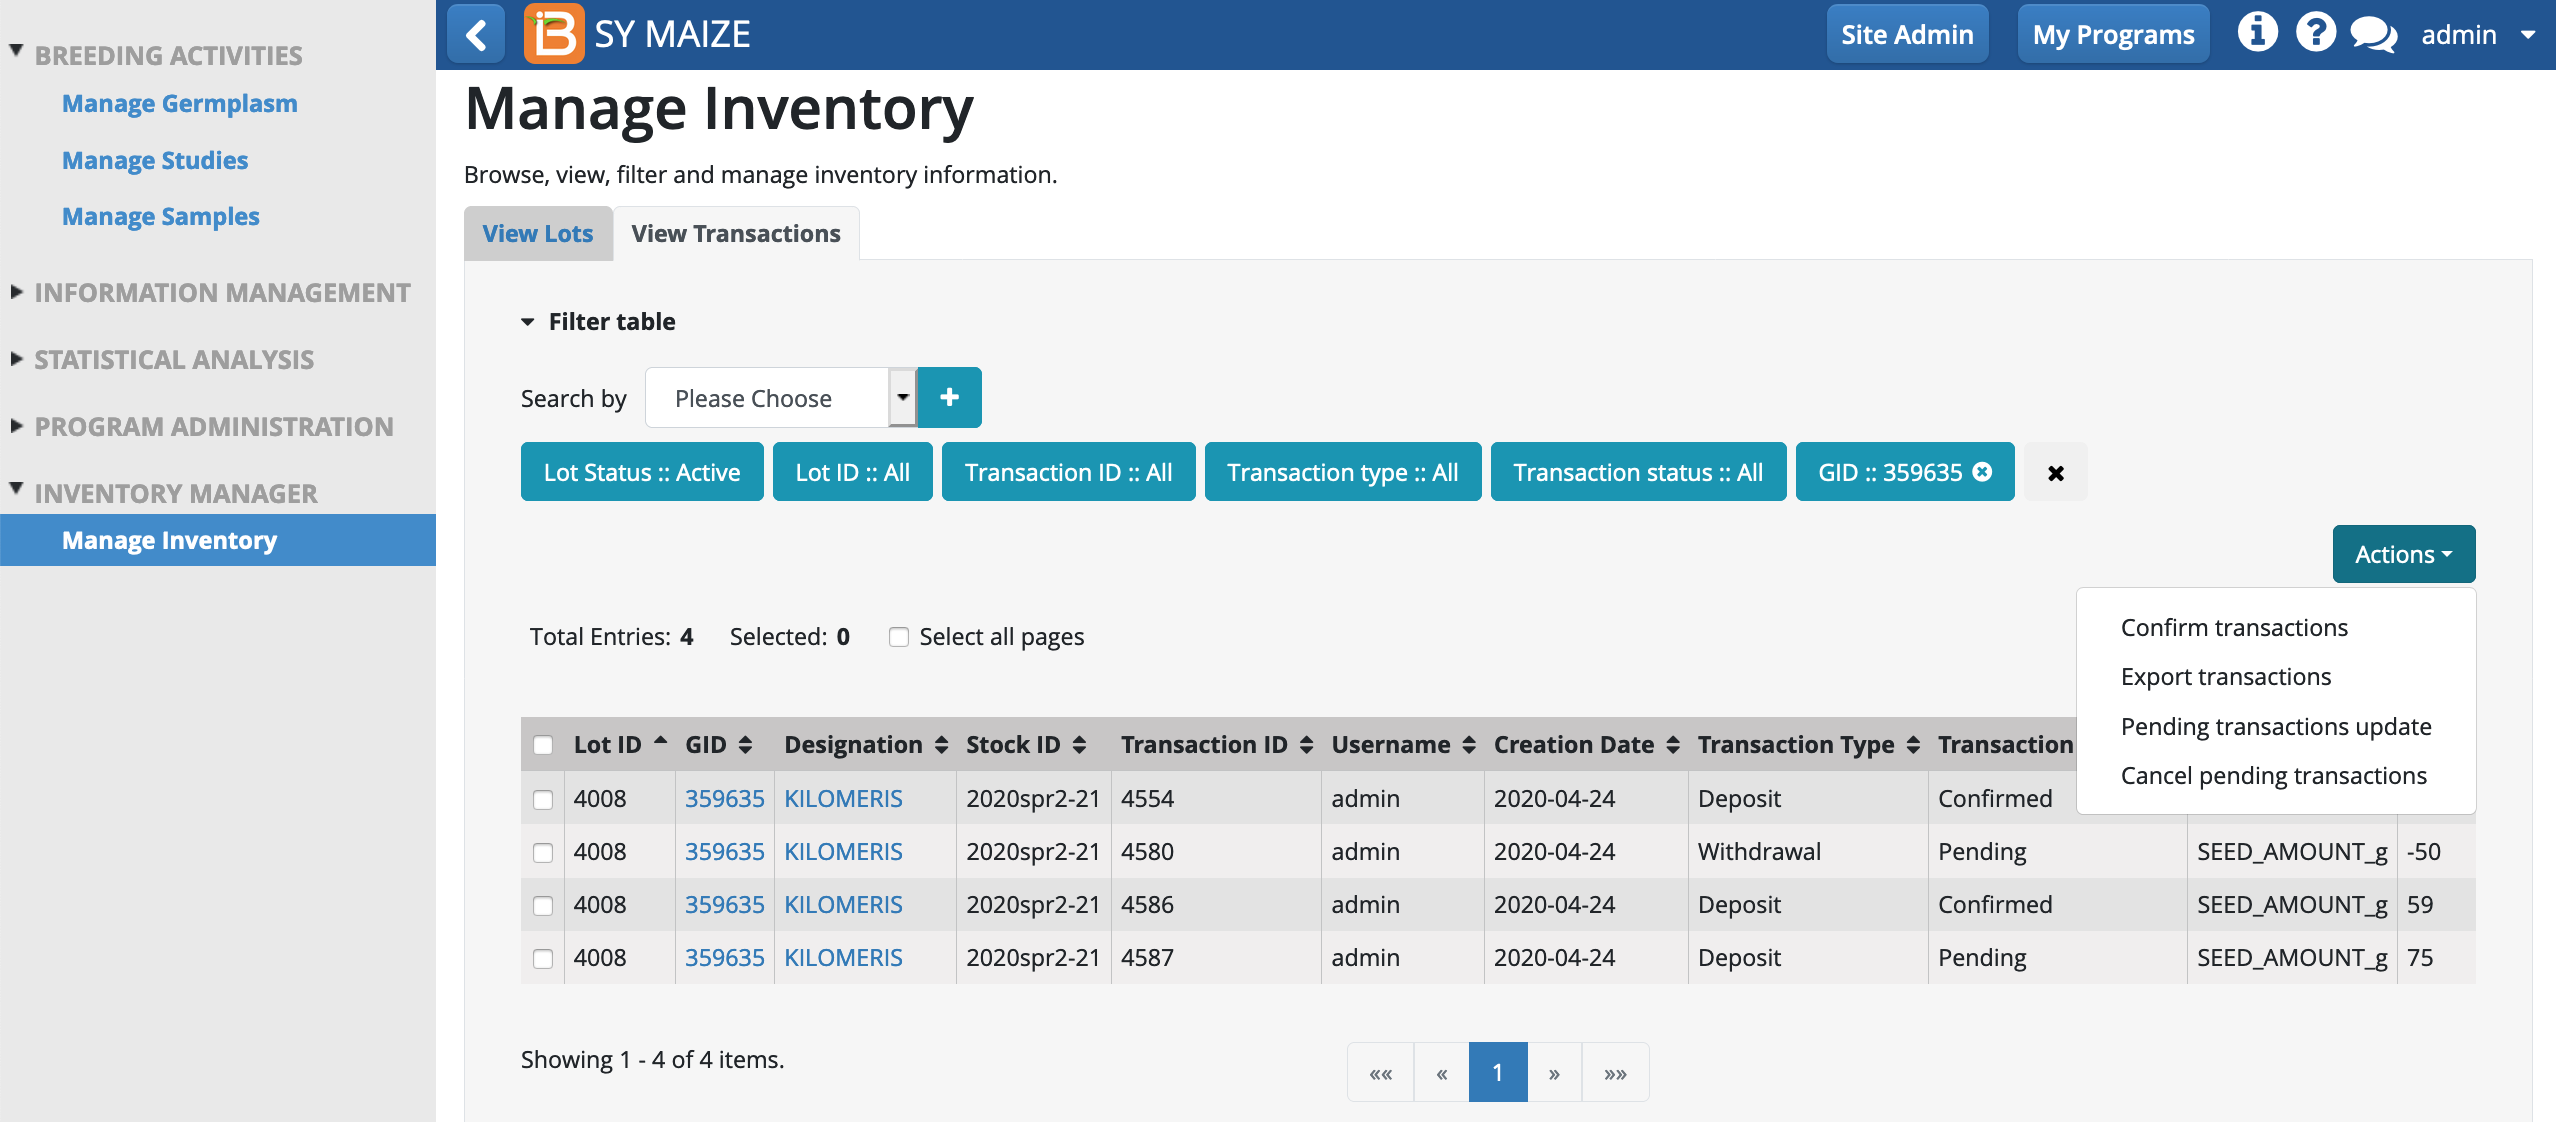
Confirm Transactions
- Select a pending transaction. Select Confirm transactions from the Actions menu. Confirm.
Successful confirmation will be reported with a success message.

The previously pending withdrawal transaction #4580 is now confirmed.
Export transactions
- Select transactions to export (.xls). Select Export transactions from the Actions menu.
An .xls file containing the selected transactions will be downloaded to a file on your computer specified by your browser settings, for example your Downloads folder.

Pending transaction update
When/if the amount of inventory withdrawn differs from pending withdrawal amount, the transaction file can be edited to reflect the true withdrawal amount.
- Export transactions (.xls) file containing only pending transactions (filtering and export instructions above). Edit the "New Amount" or "New Balance" columns with values greater than zero. "New Notes" are optional. Save.

- Select Pending transactions update from the Actions menu.
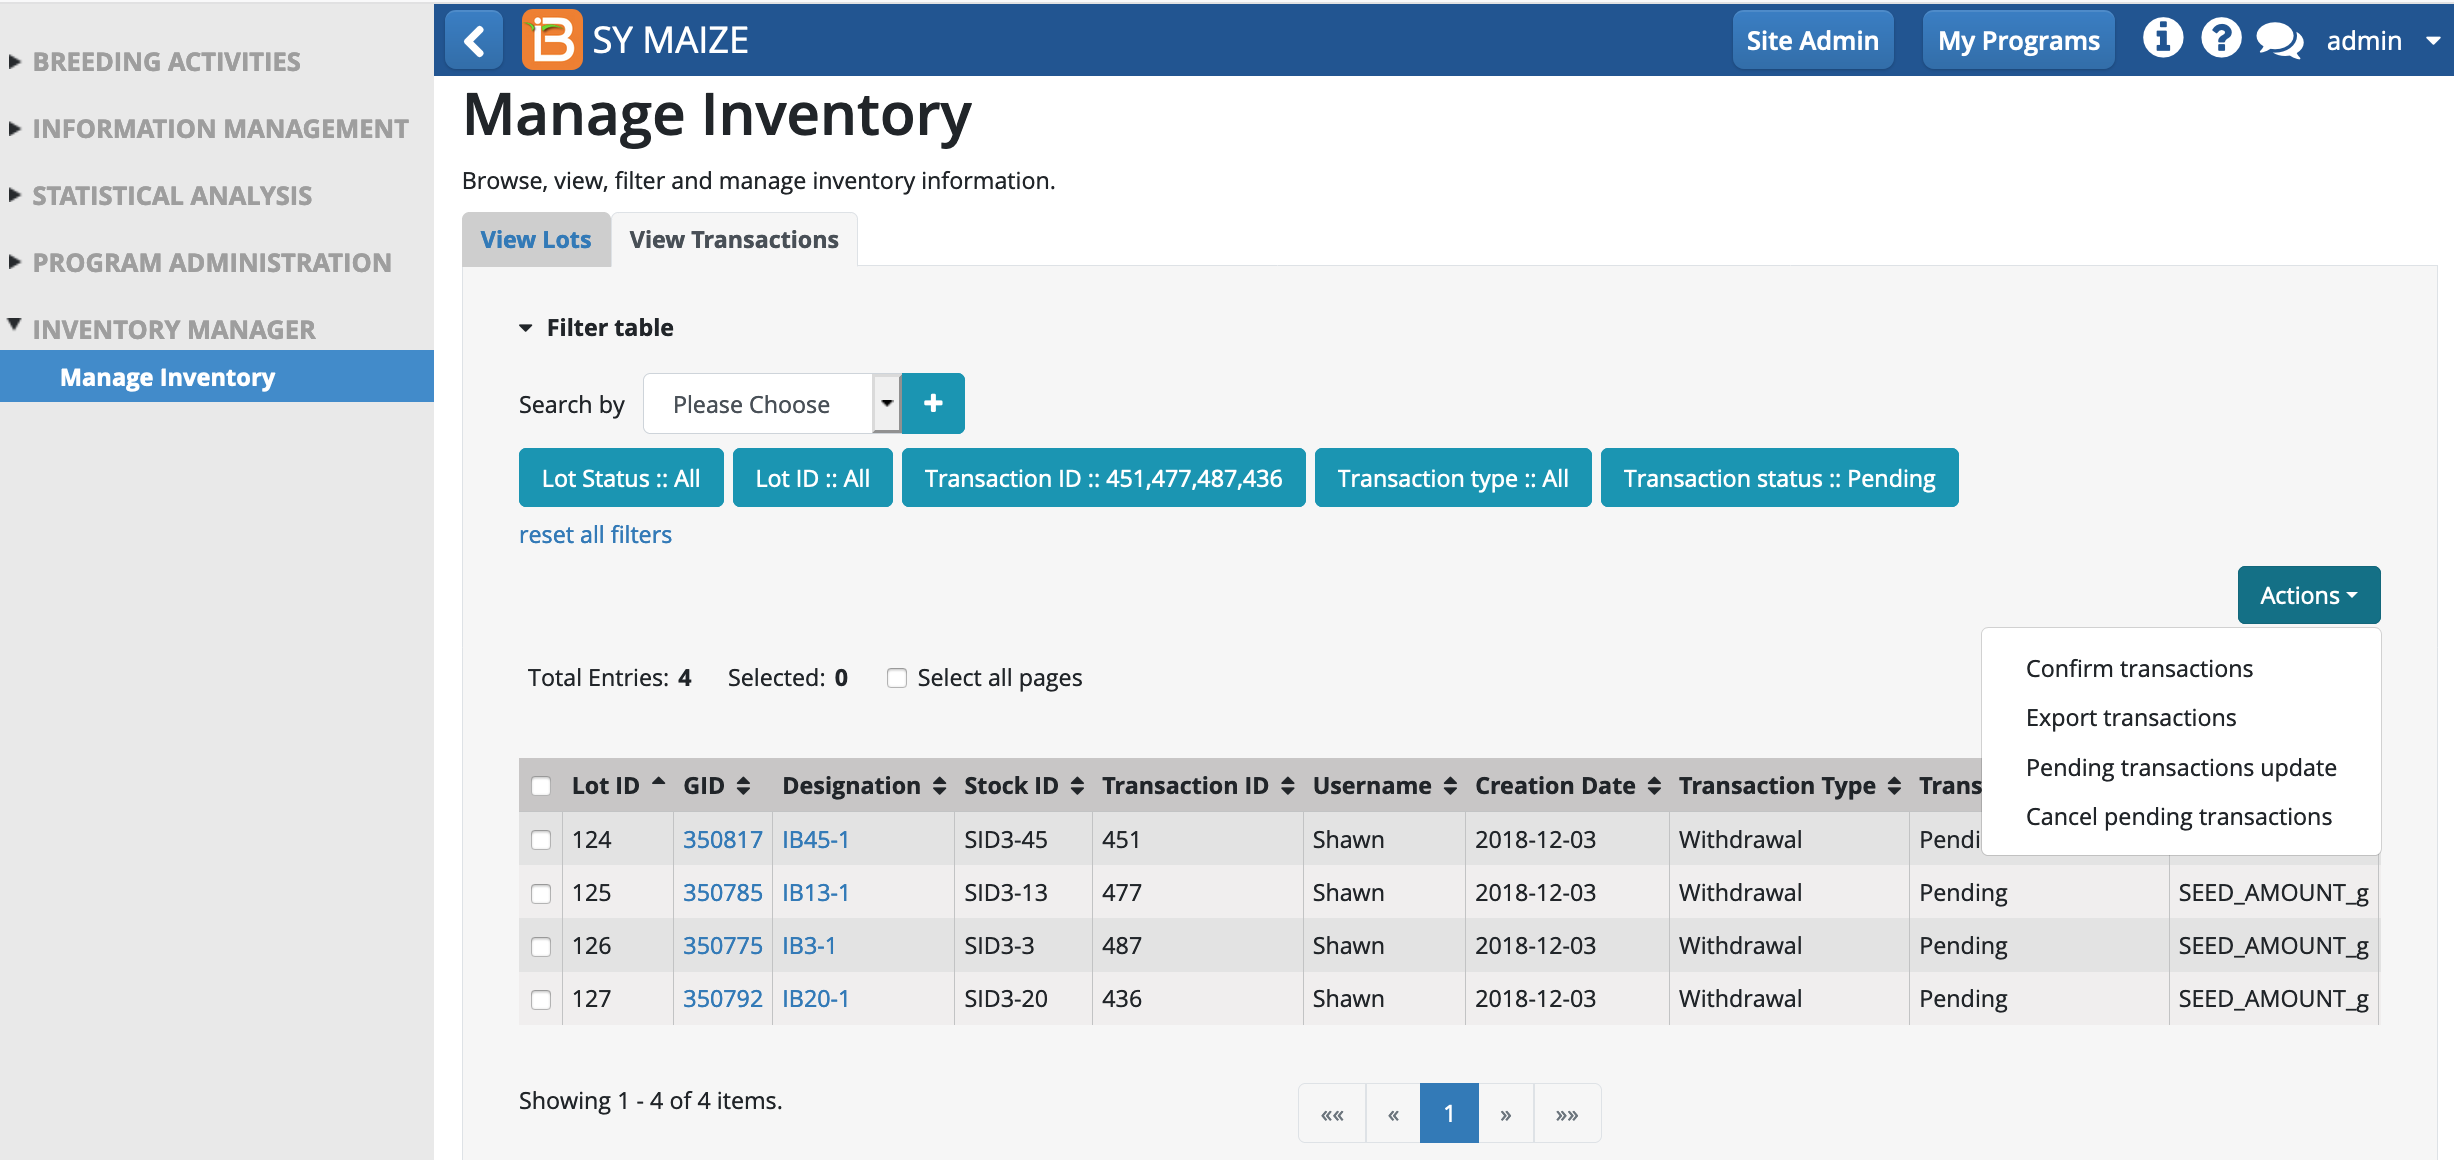
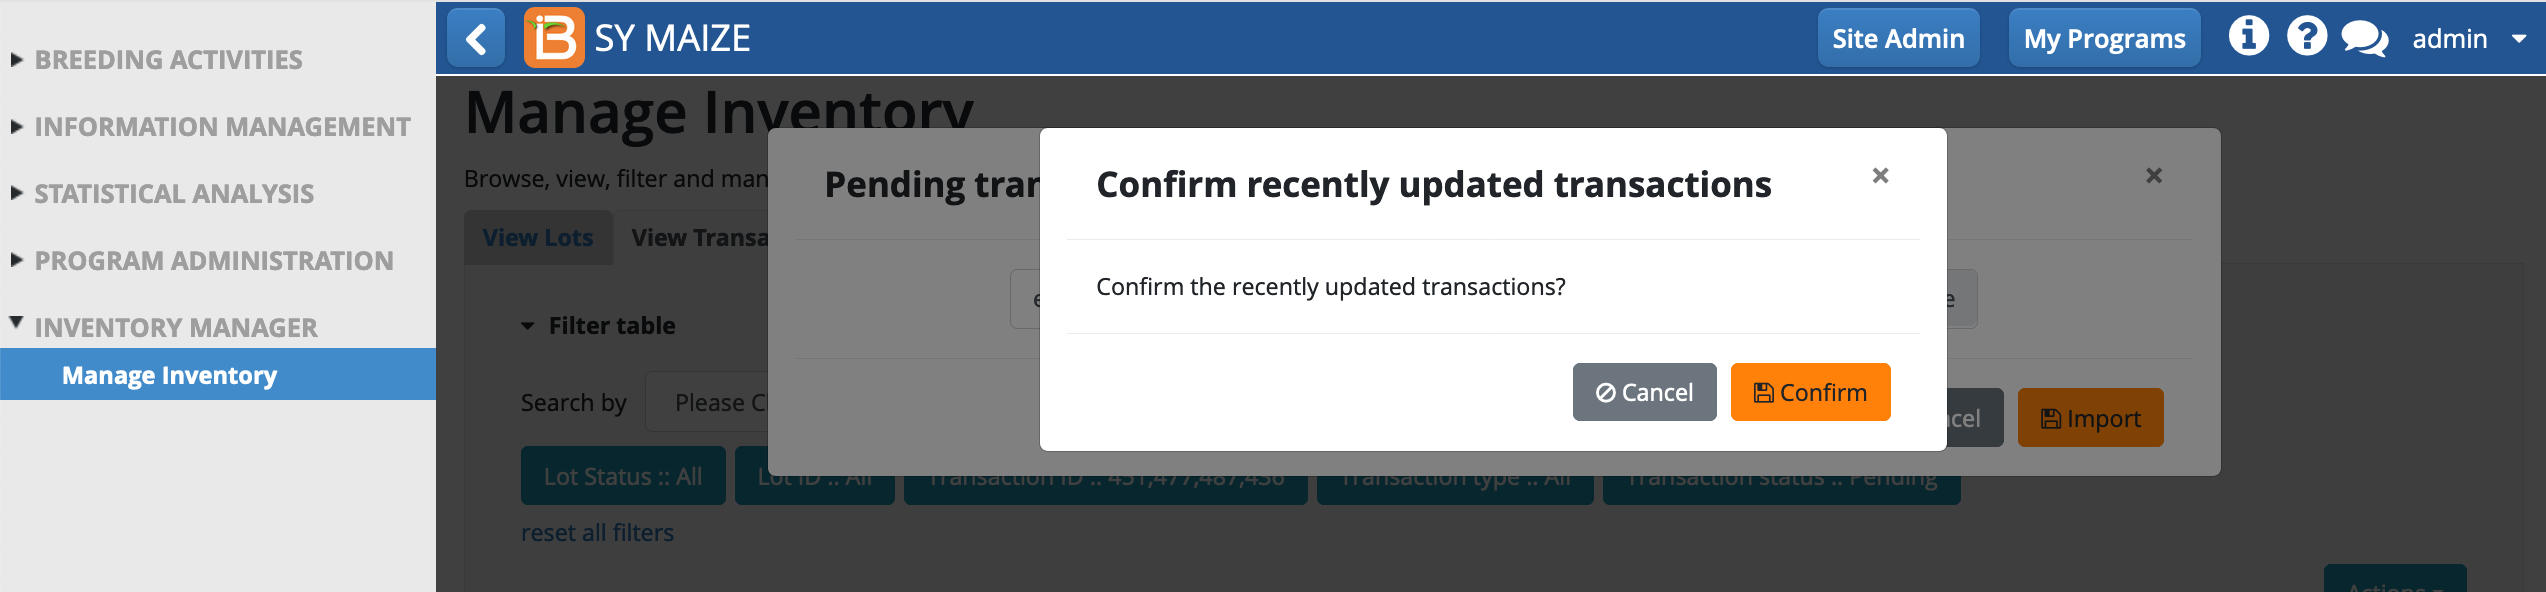
- Browse to the saved transaction file (.xls) and Import.

- Confirm recently updated transactions.
The withdrawals now reflect the amounts edited in the transactions file.
Cancel pending transactions
- Select pending transaction(s) to cancel. Choose "Cancel pending transactions" from the actions menu.

- Confirm.
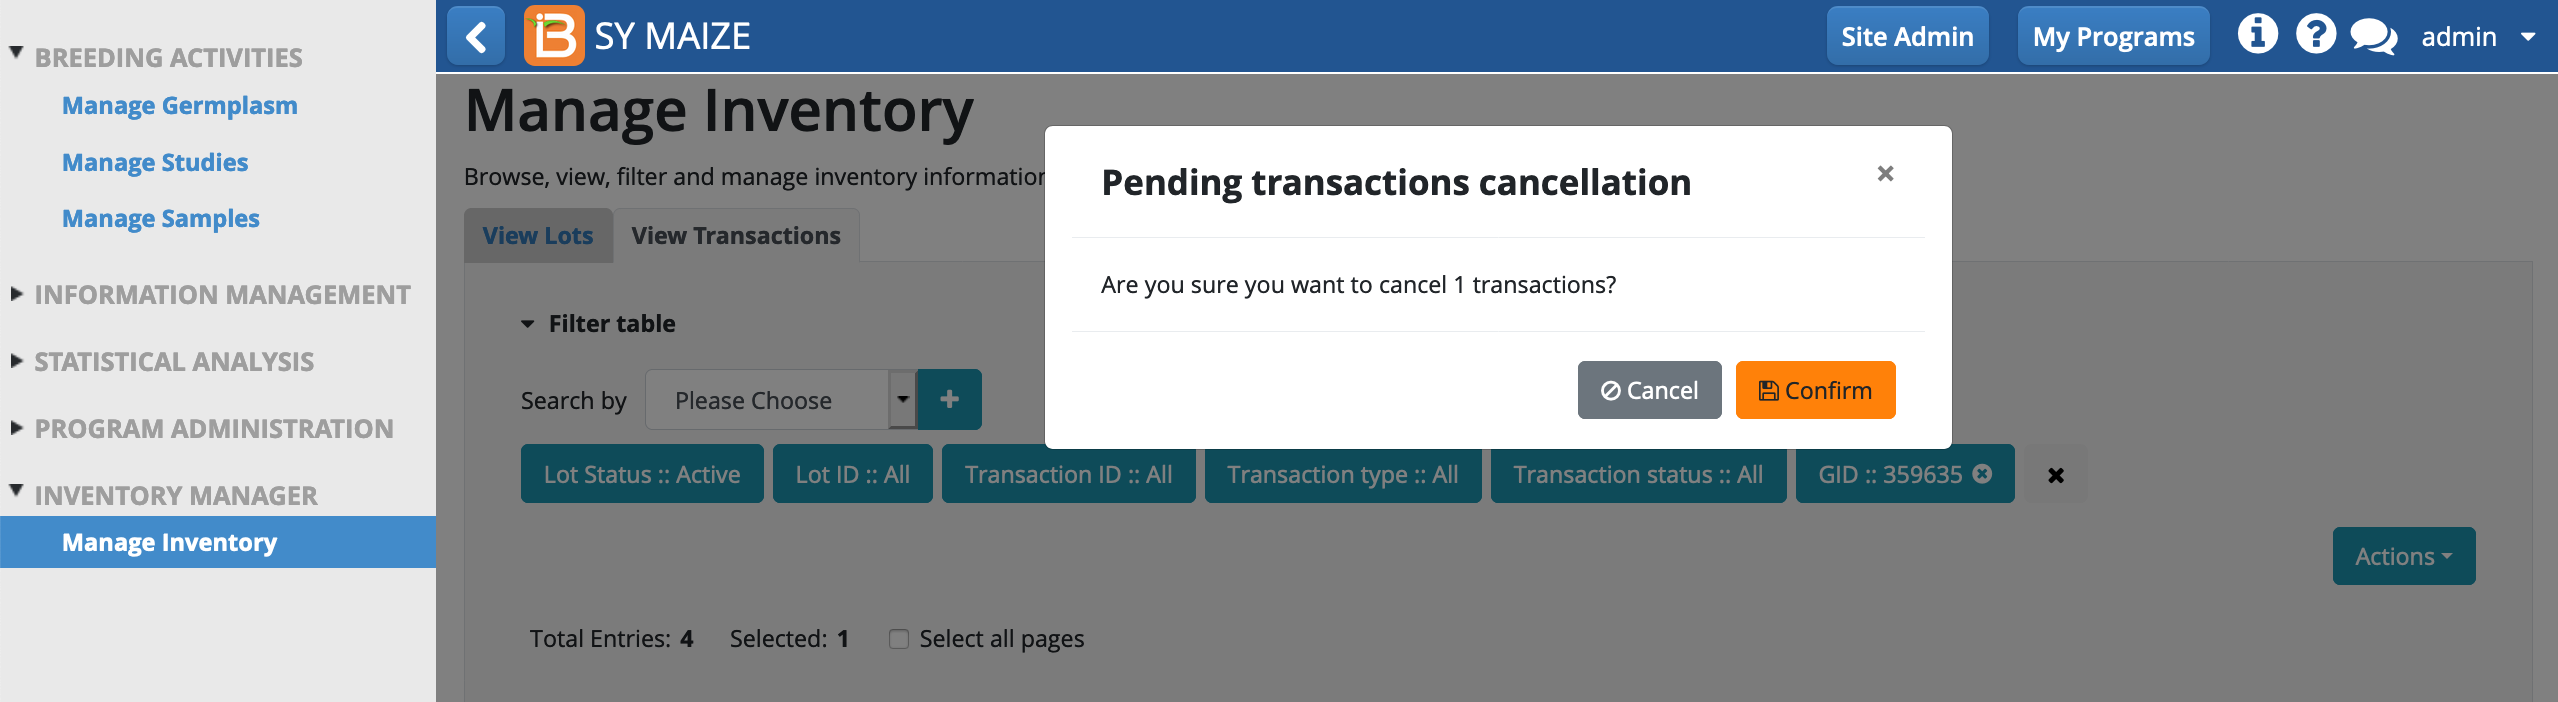
The transaction(s) status is now "Cancelled".

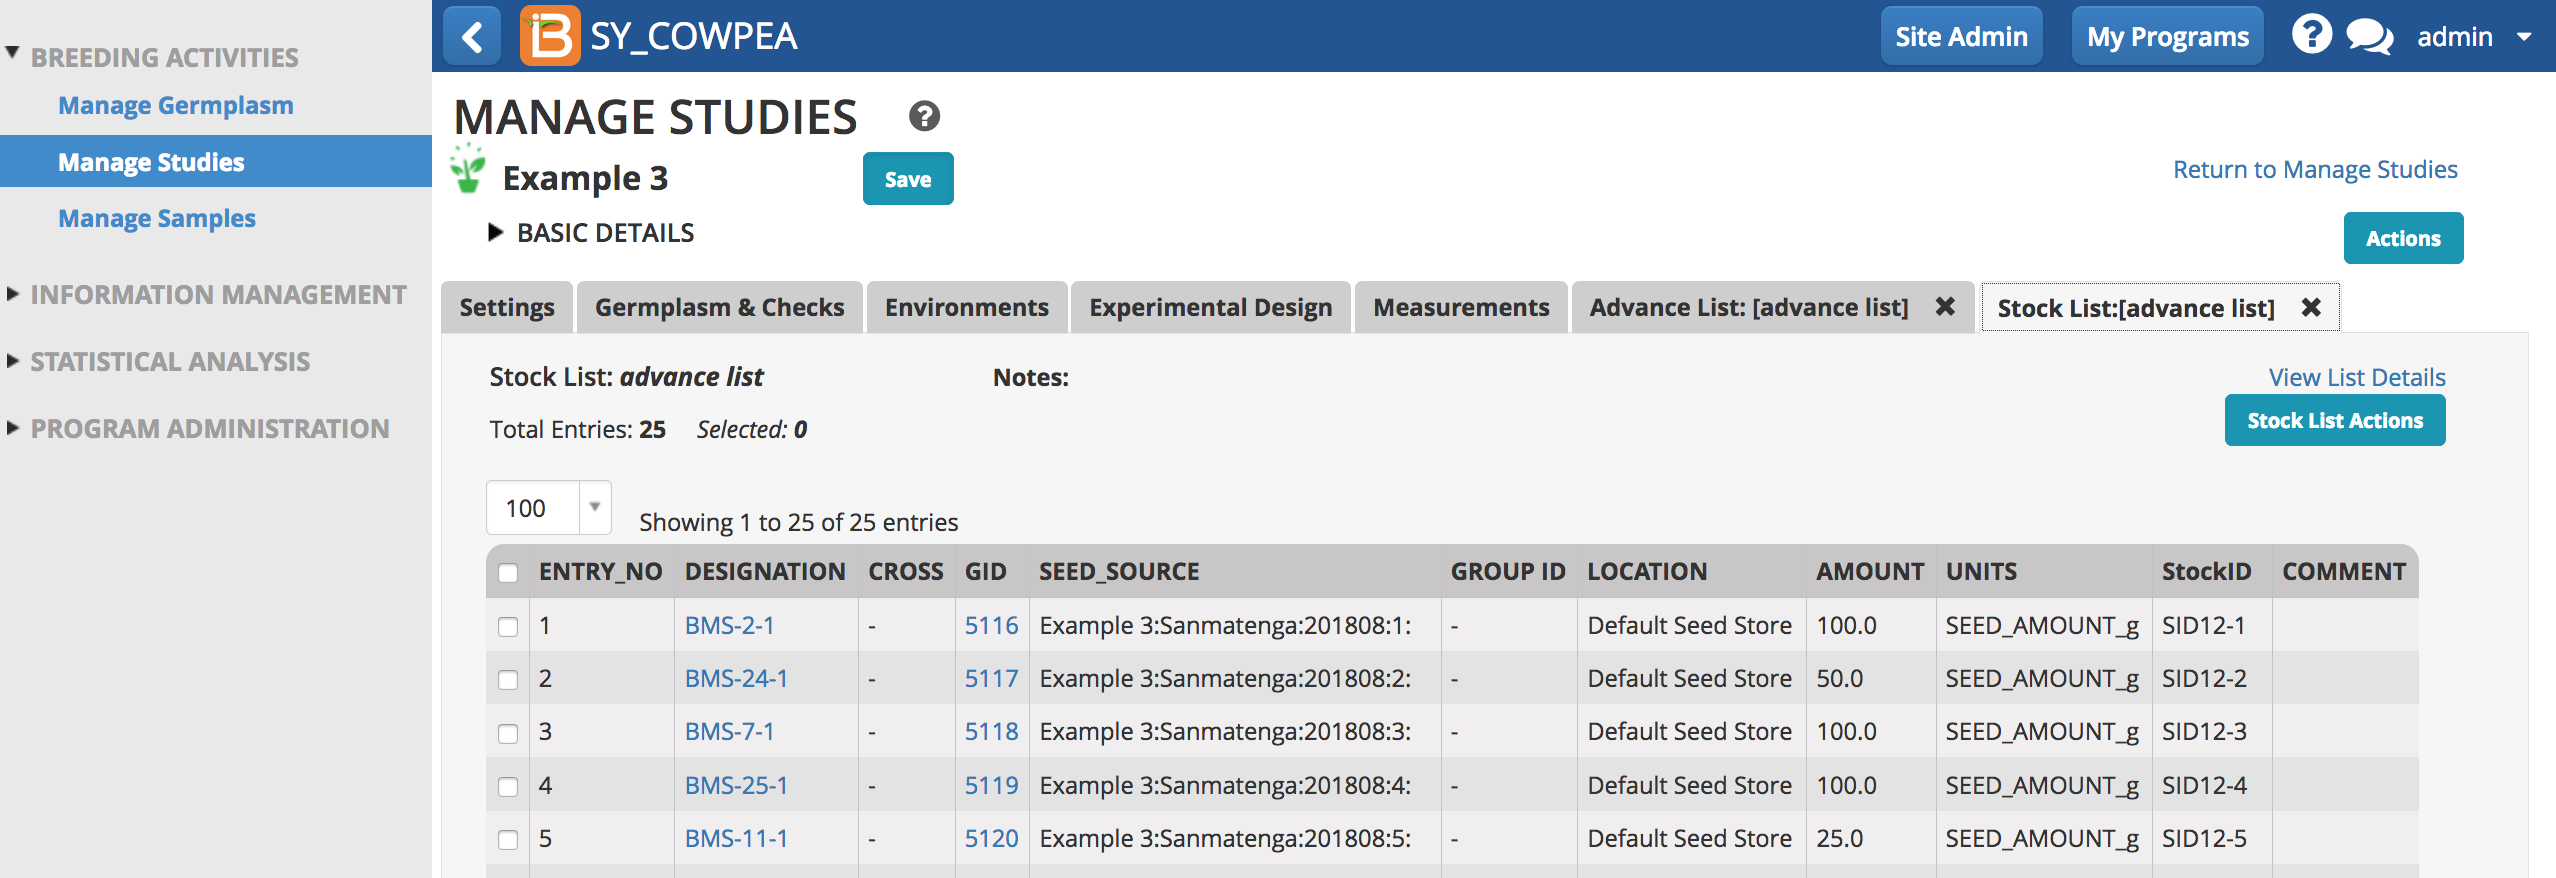
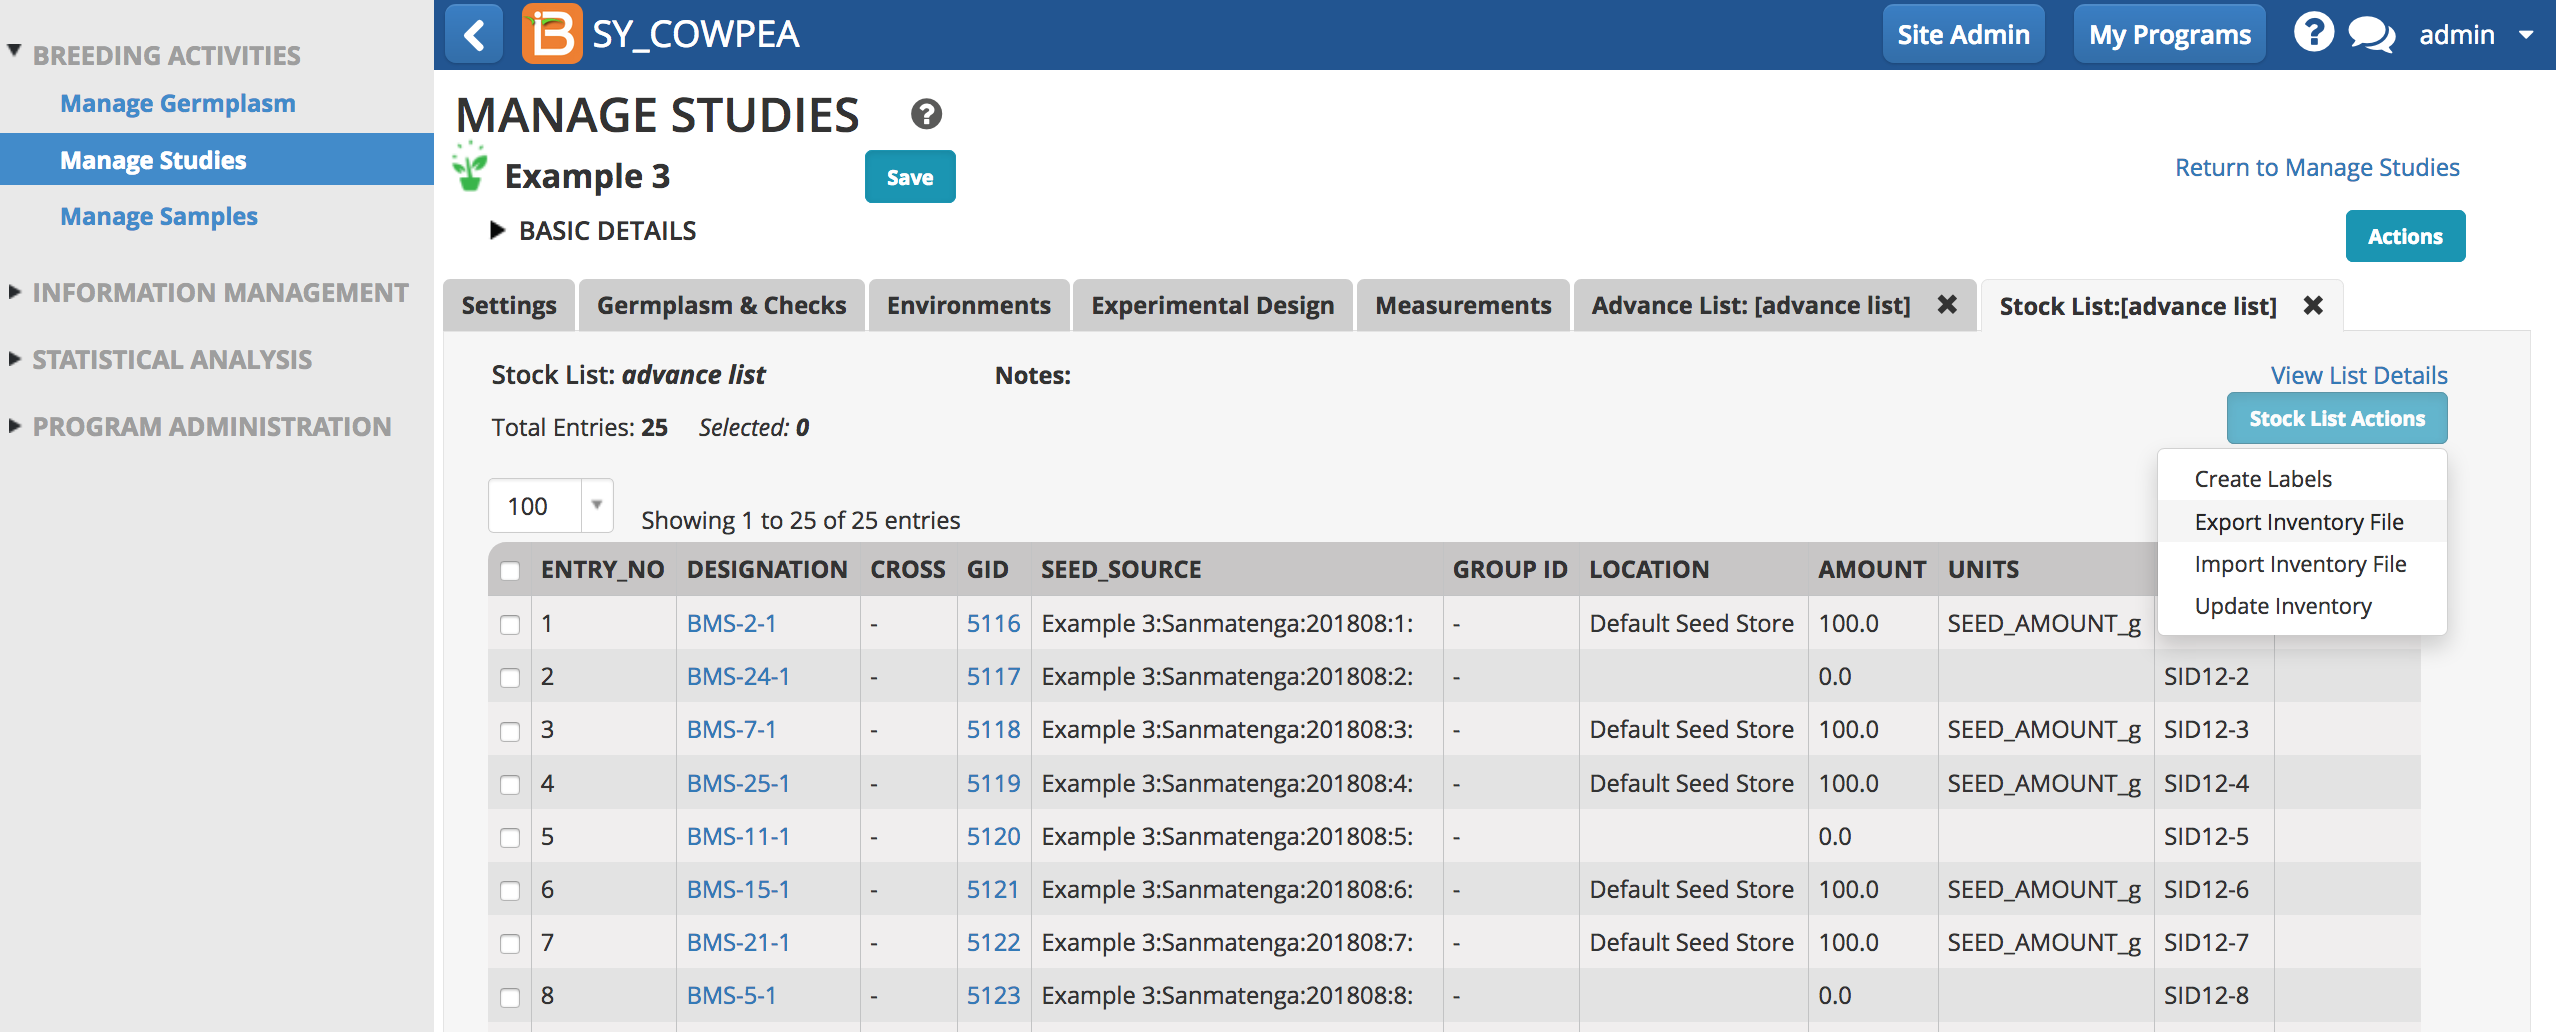
Manage Studies: Record Harvest
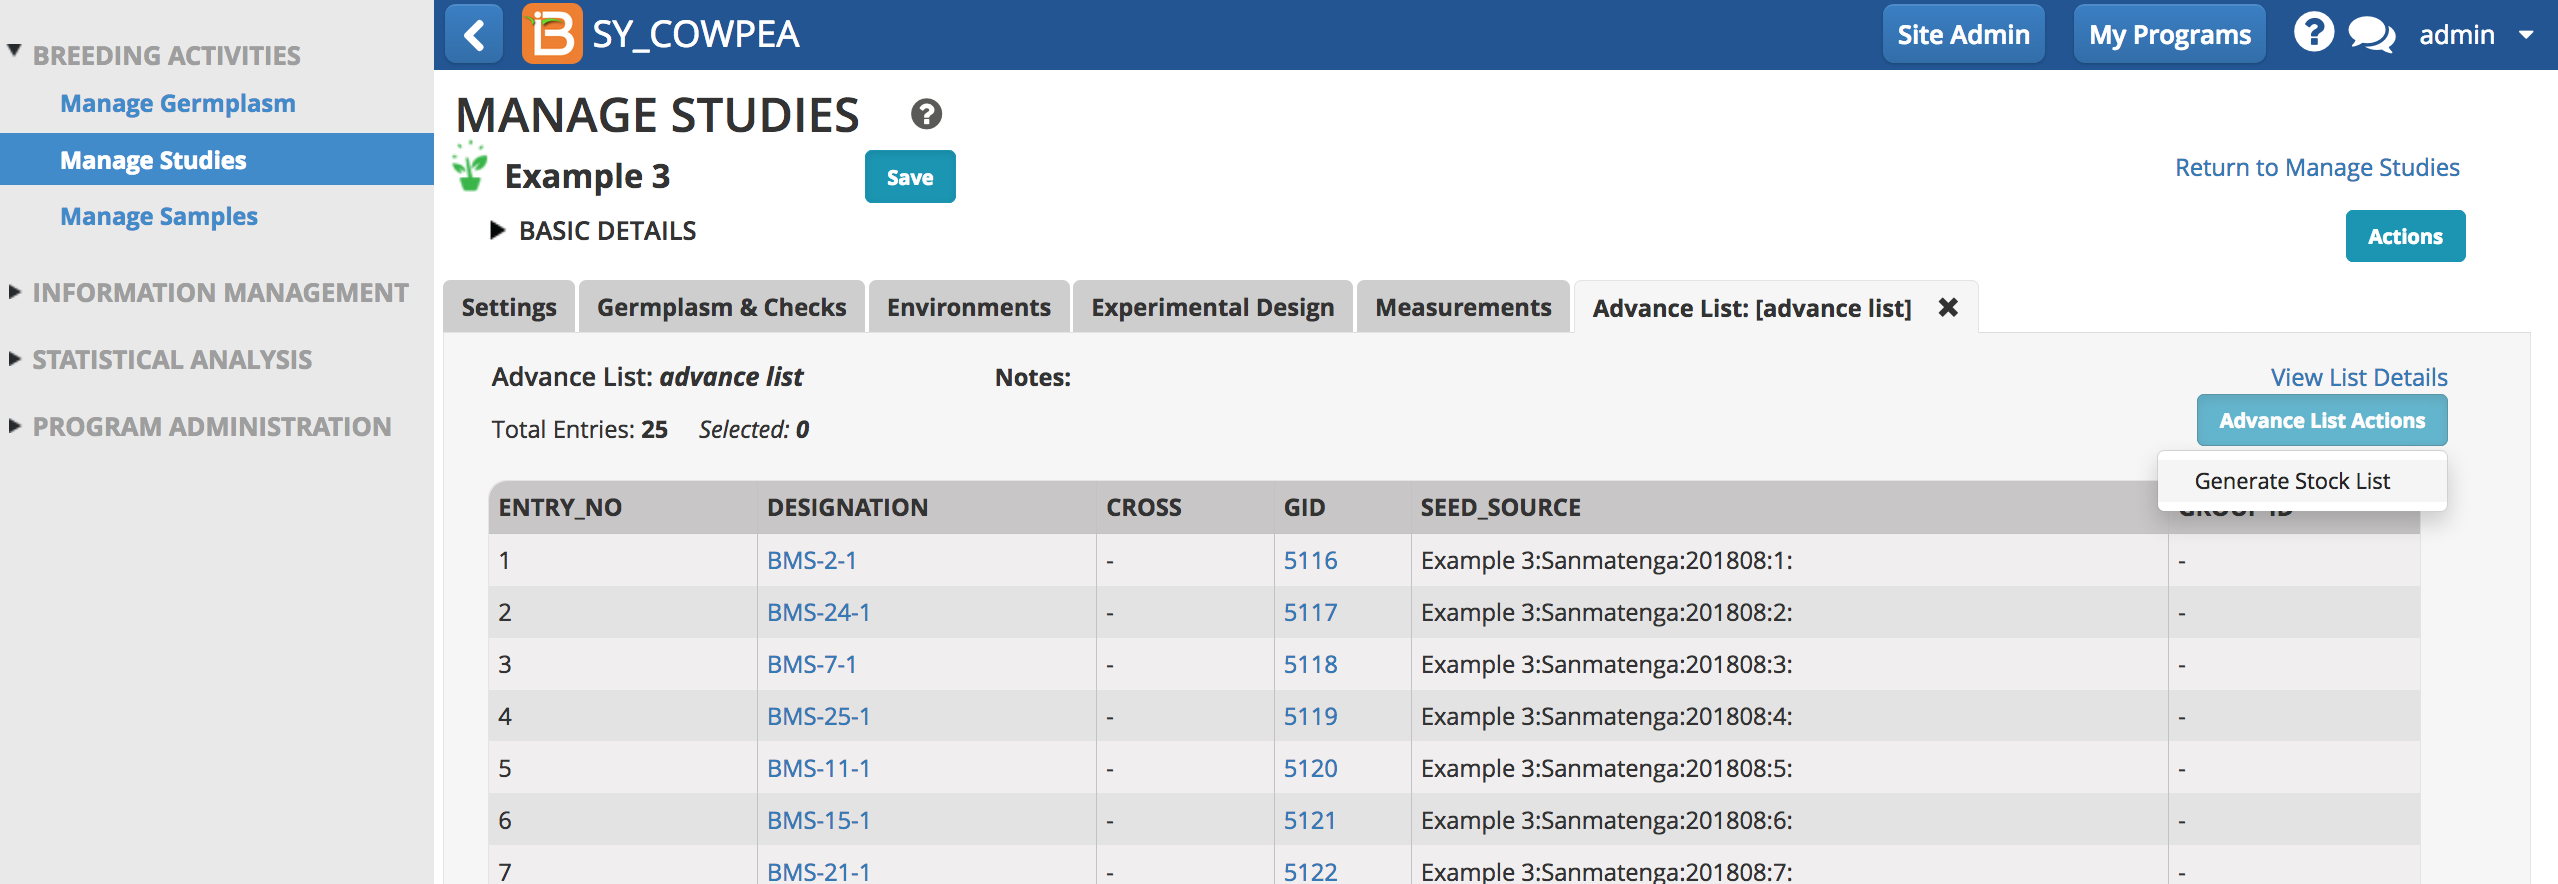
Inventory amounts can be added from within studies when new germplasm is created. The option to generate a stock list is available from advancement and/or crossing lists.
Generate Stock List
- Select Generate Stock List from the Actions button available from advance and crossing lists.
-
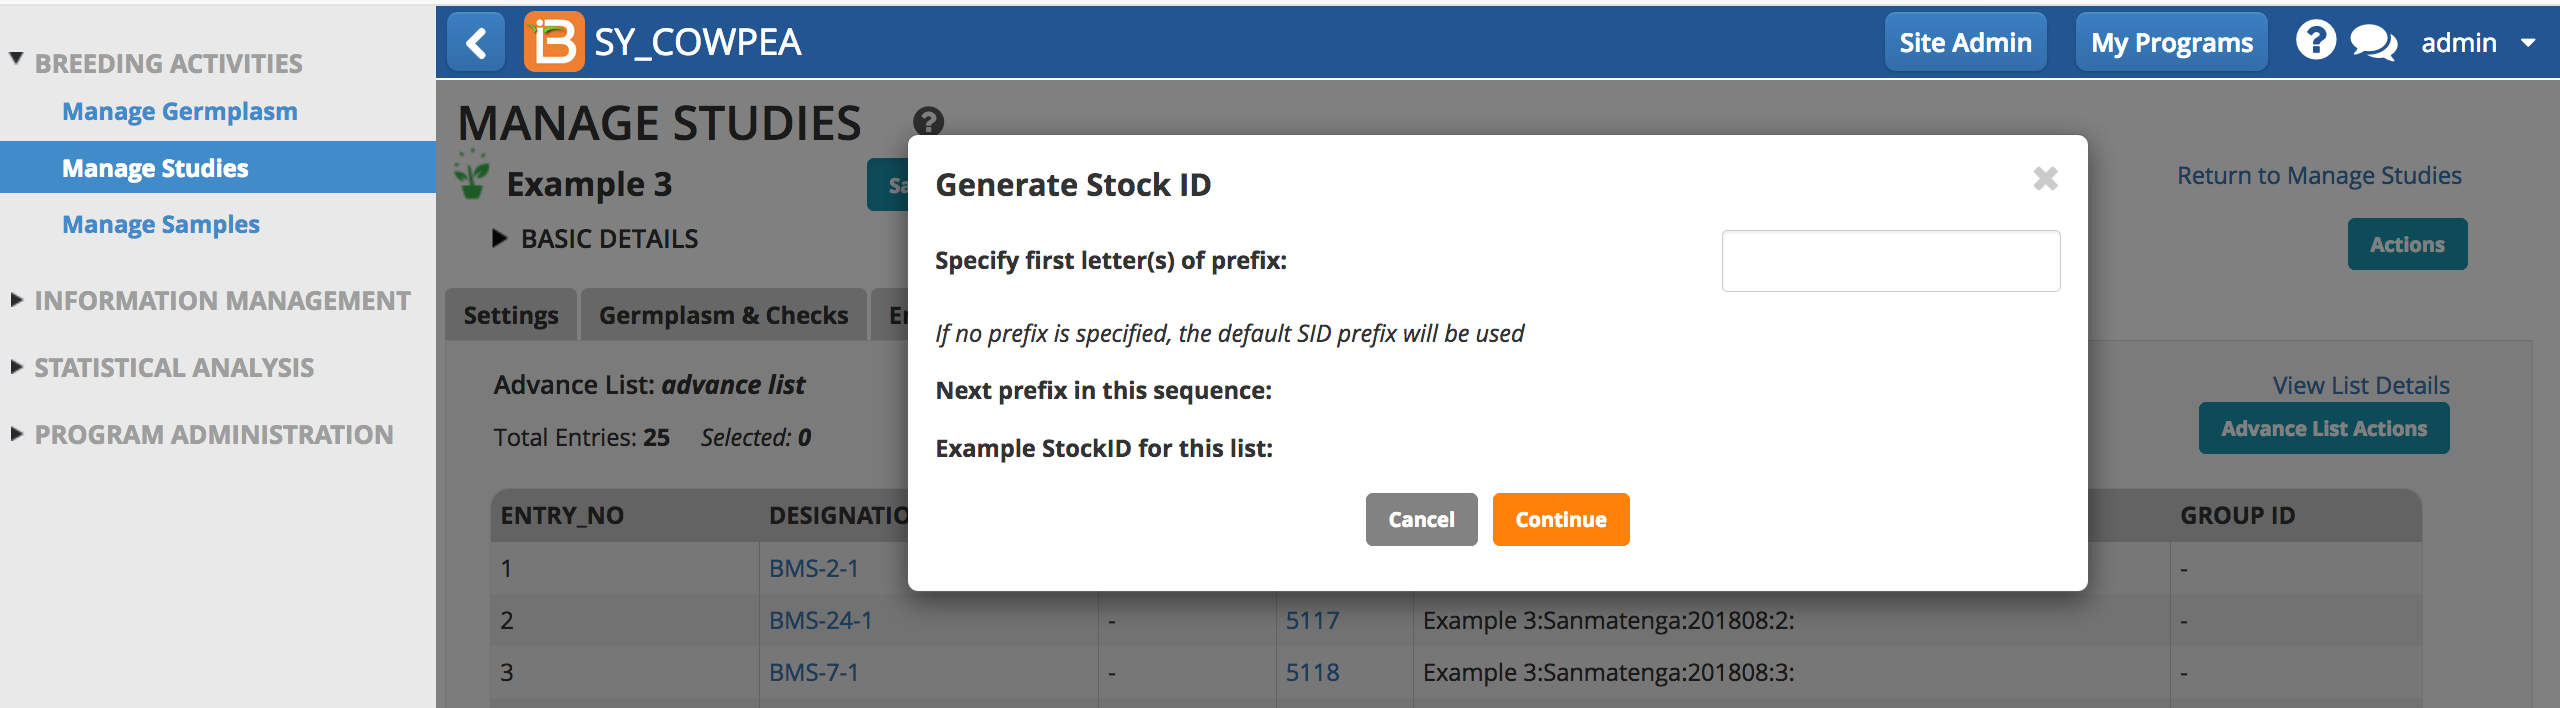
Either specify a Stock ID pre-fix or use the default SID convention.
The stock list is now available for review in the nursery and the Stock List Actions menu is activated.
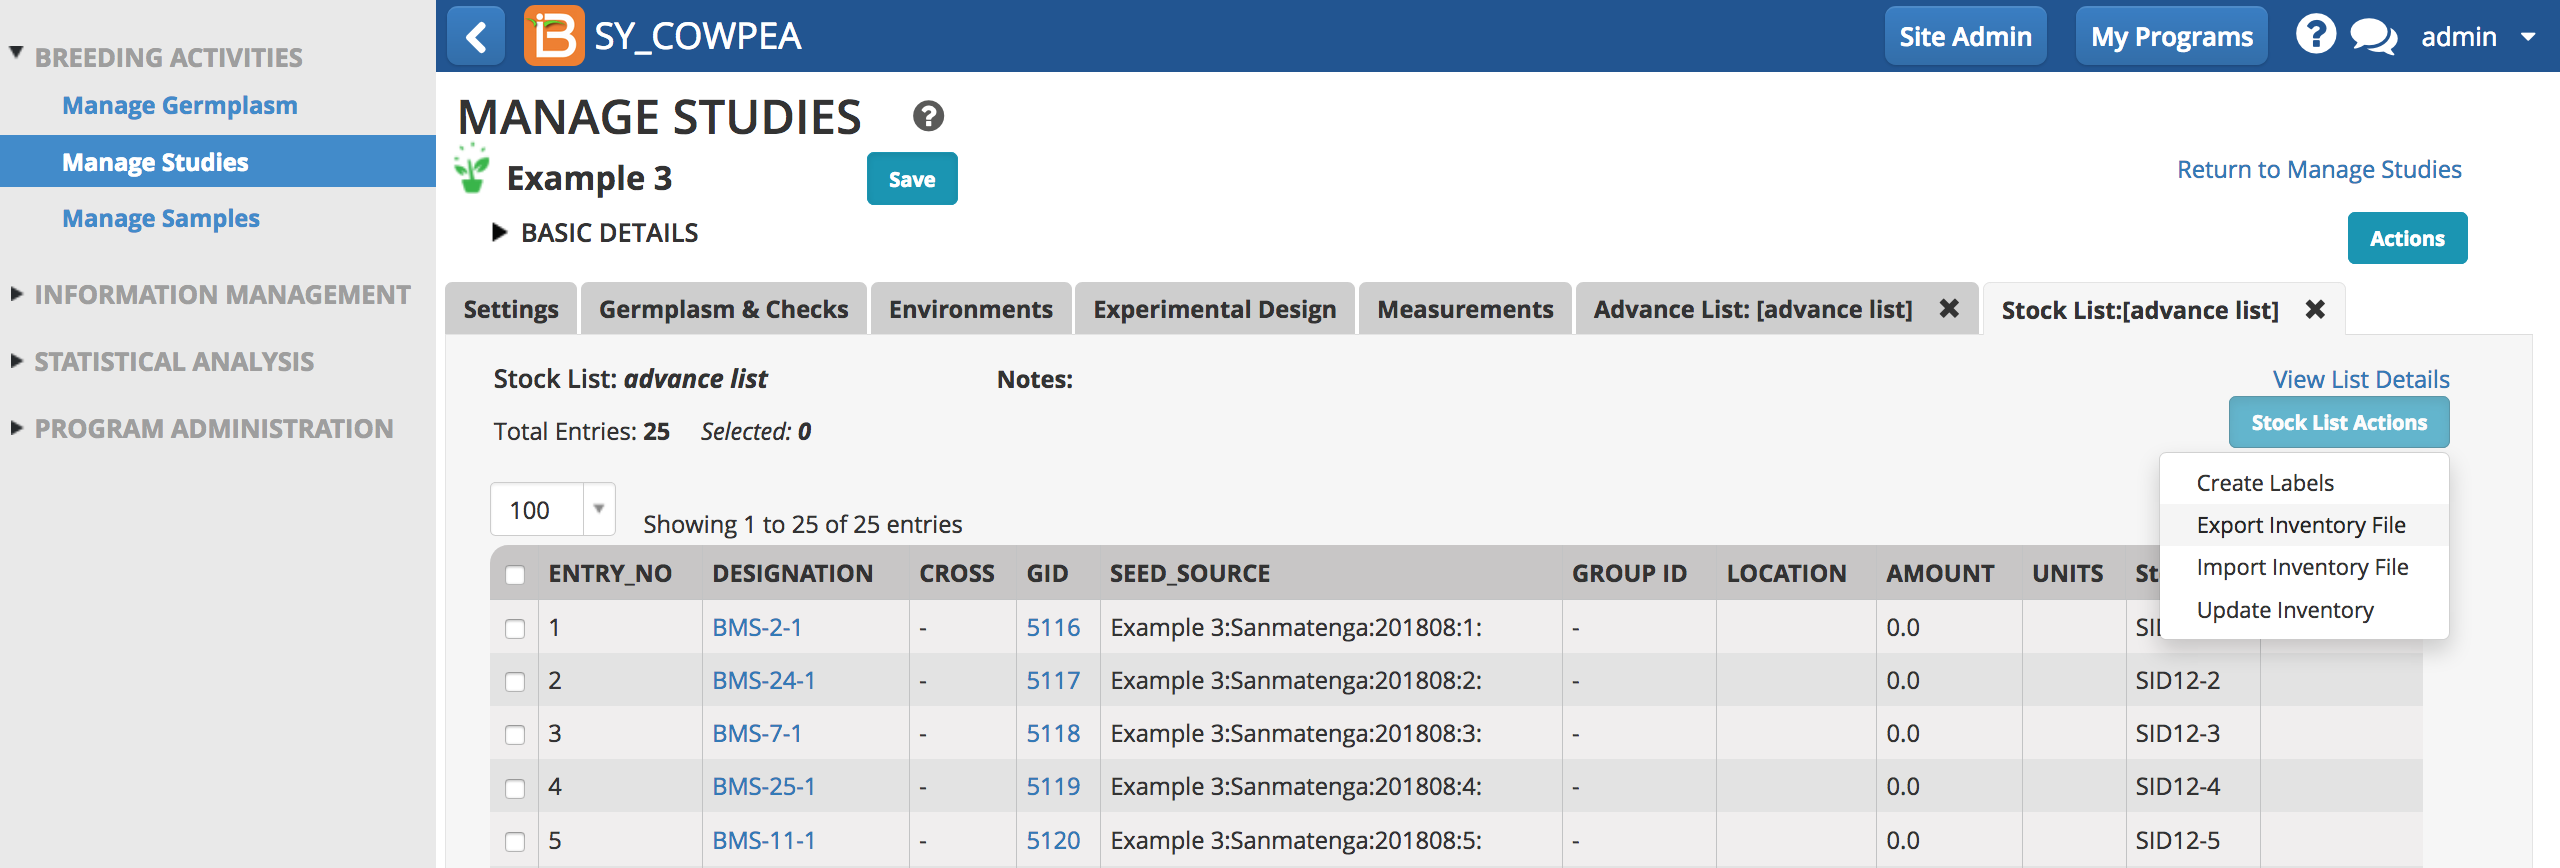
Inventory can be added by either Updating Inventory in the UI or by Exporting Inventory File for editing in Excel. For long lists of non-uniform amounts, most users will favor exporting and editing an inventory template in Excel.
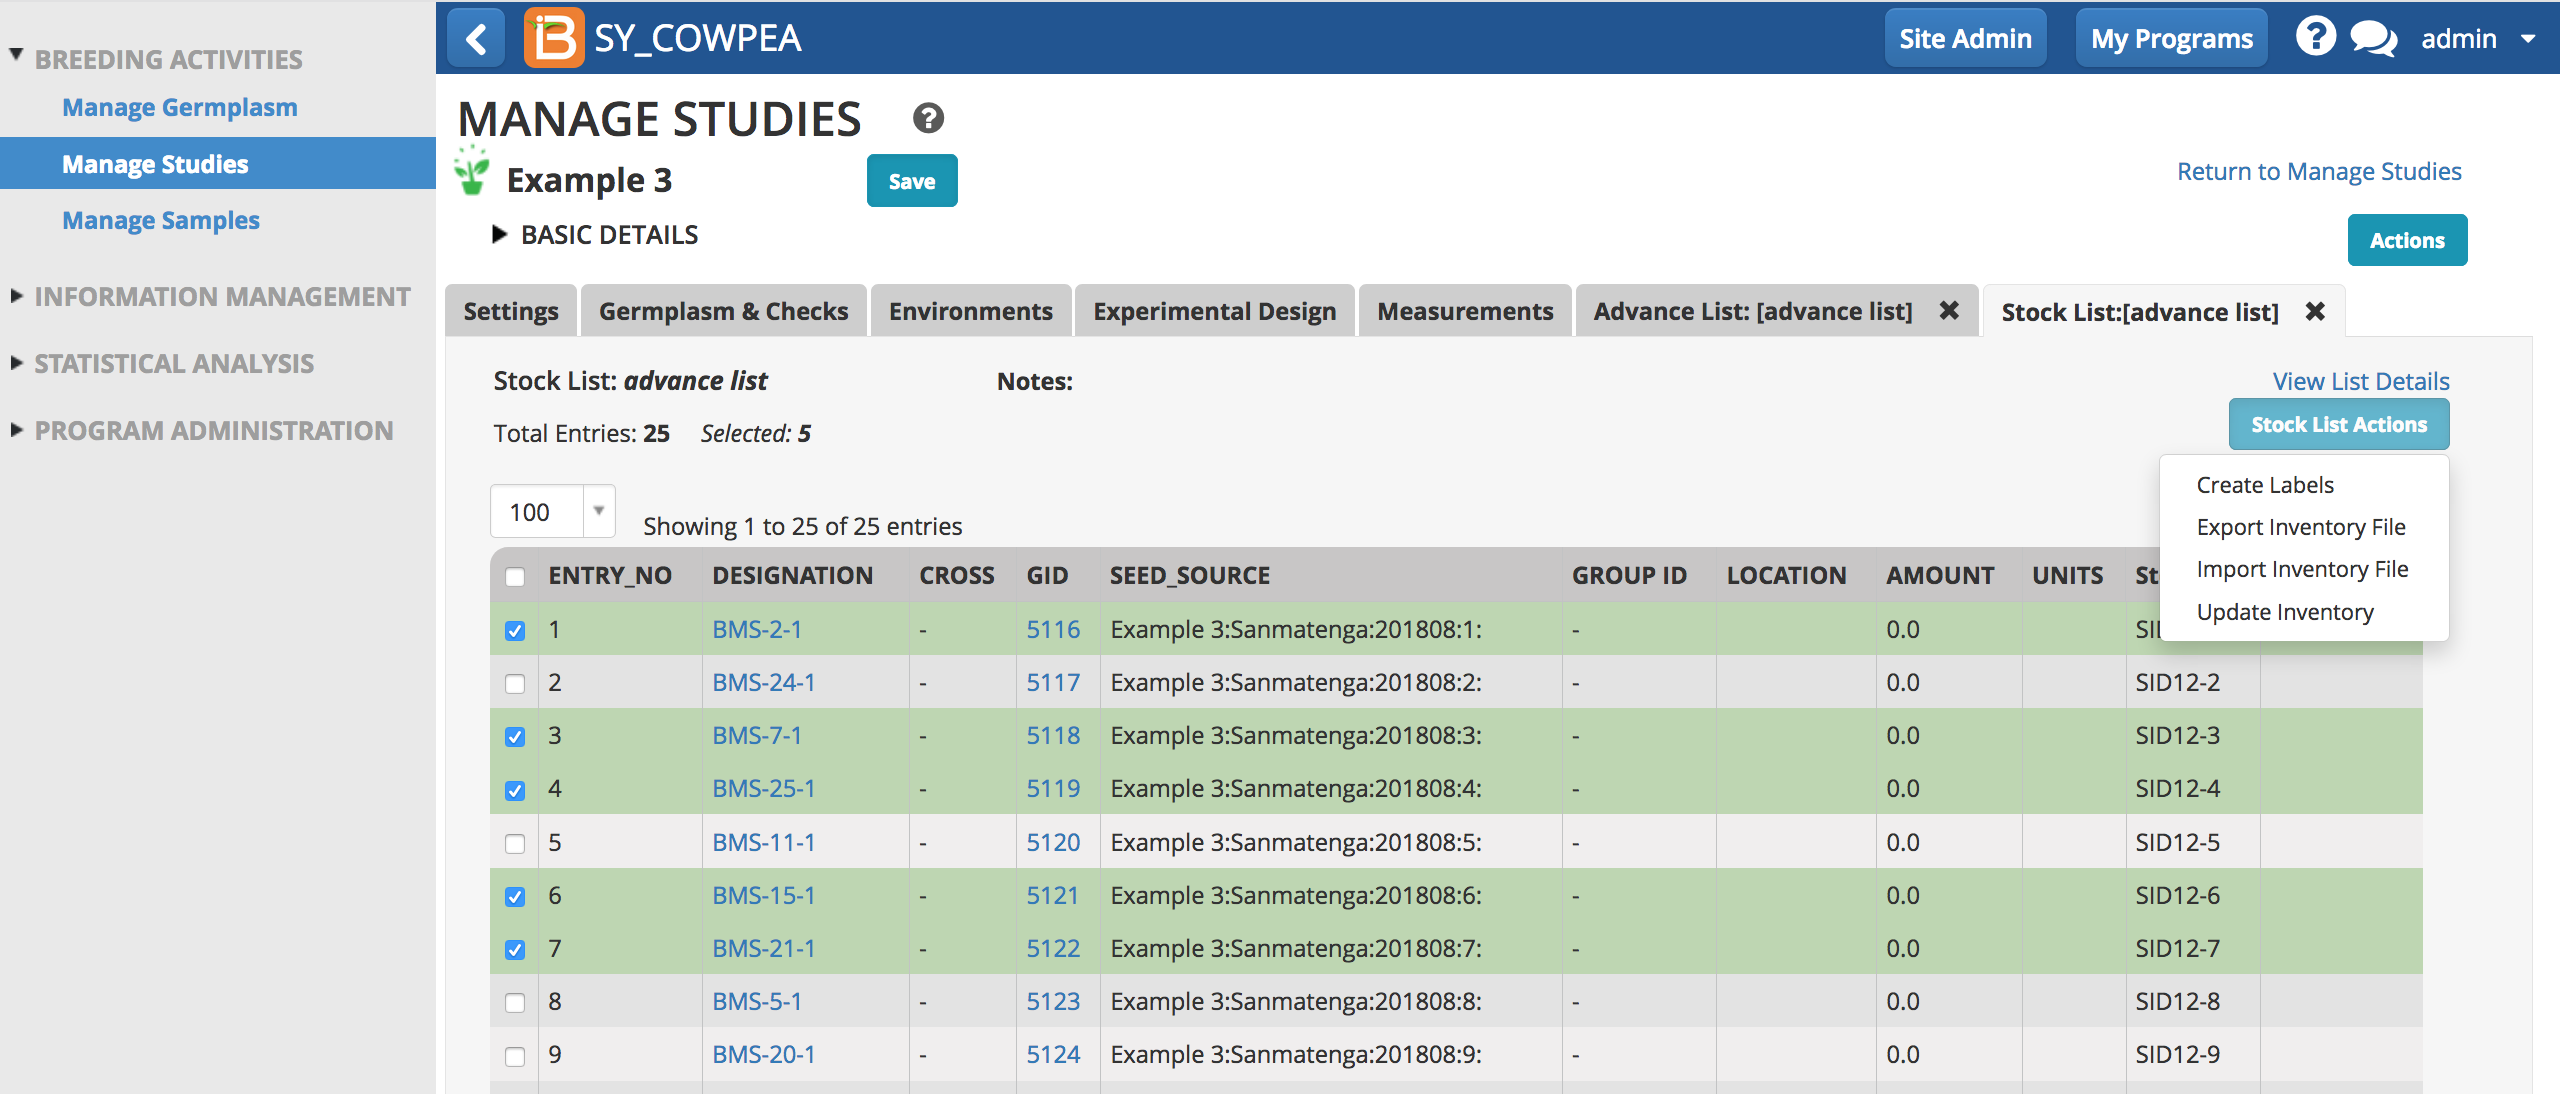
Add Inventory in User Interface
- Highlight entry or entries to update, and select Update Inventory.
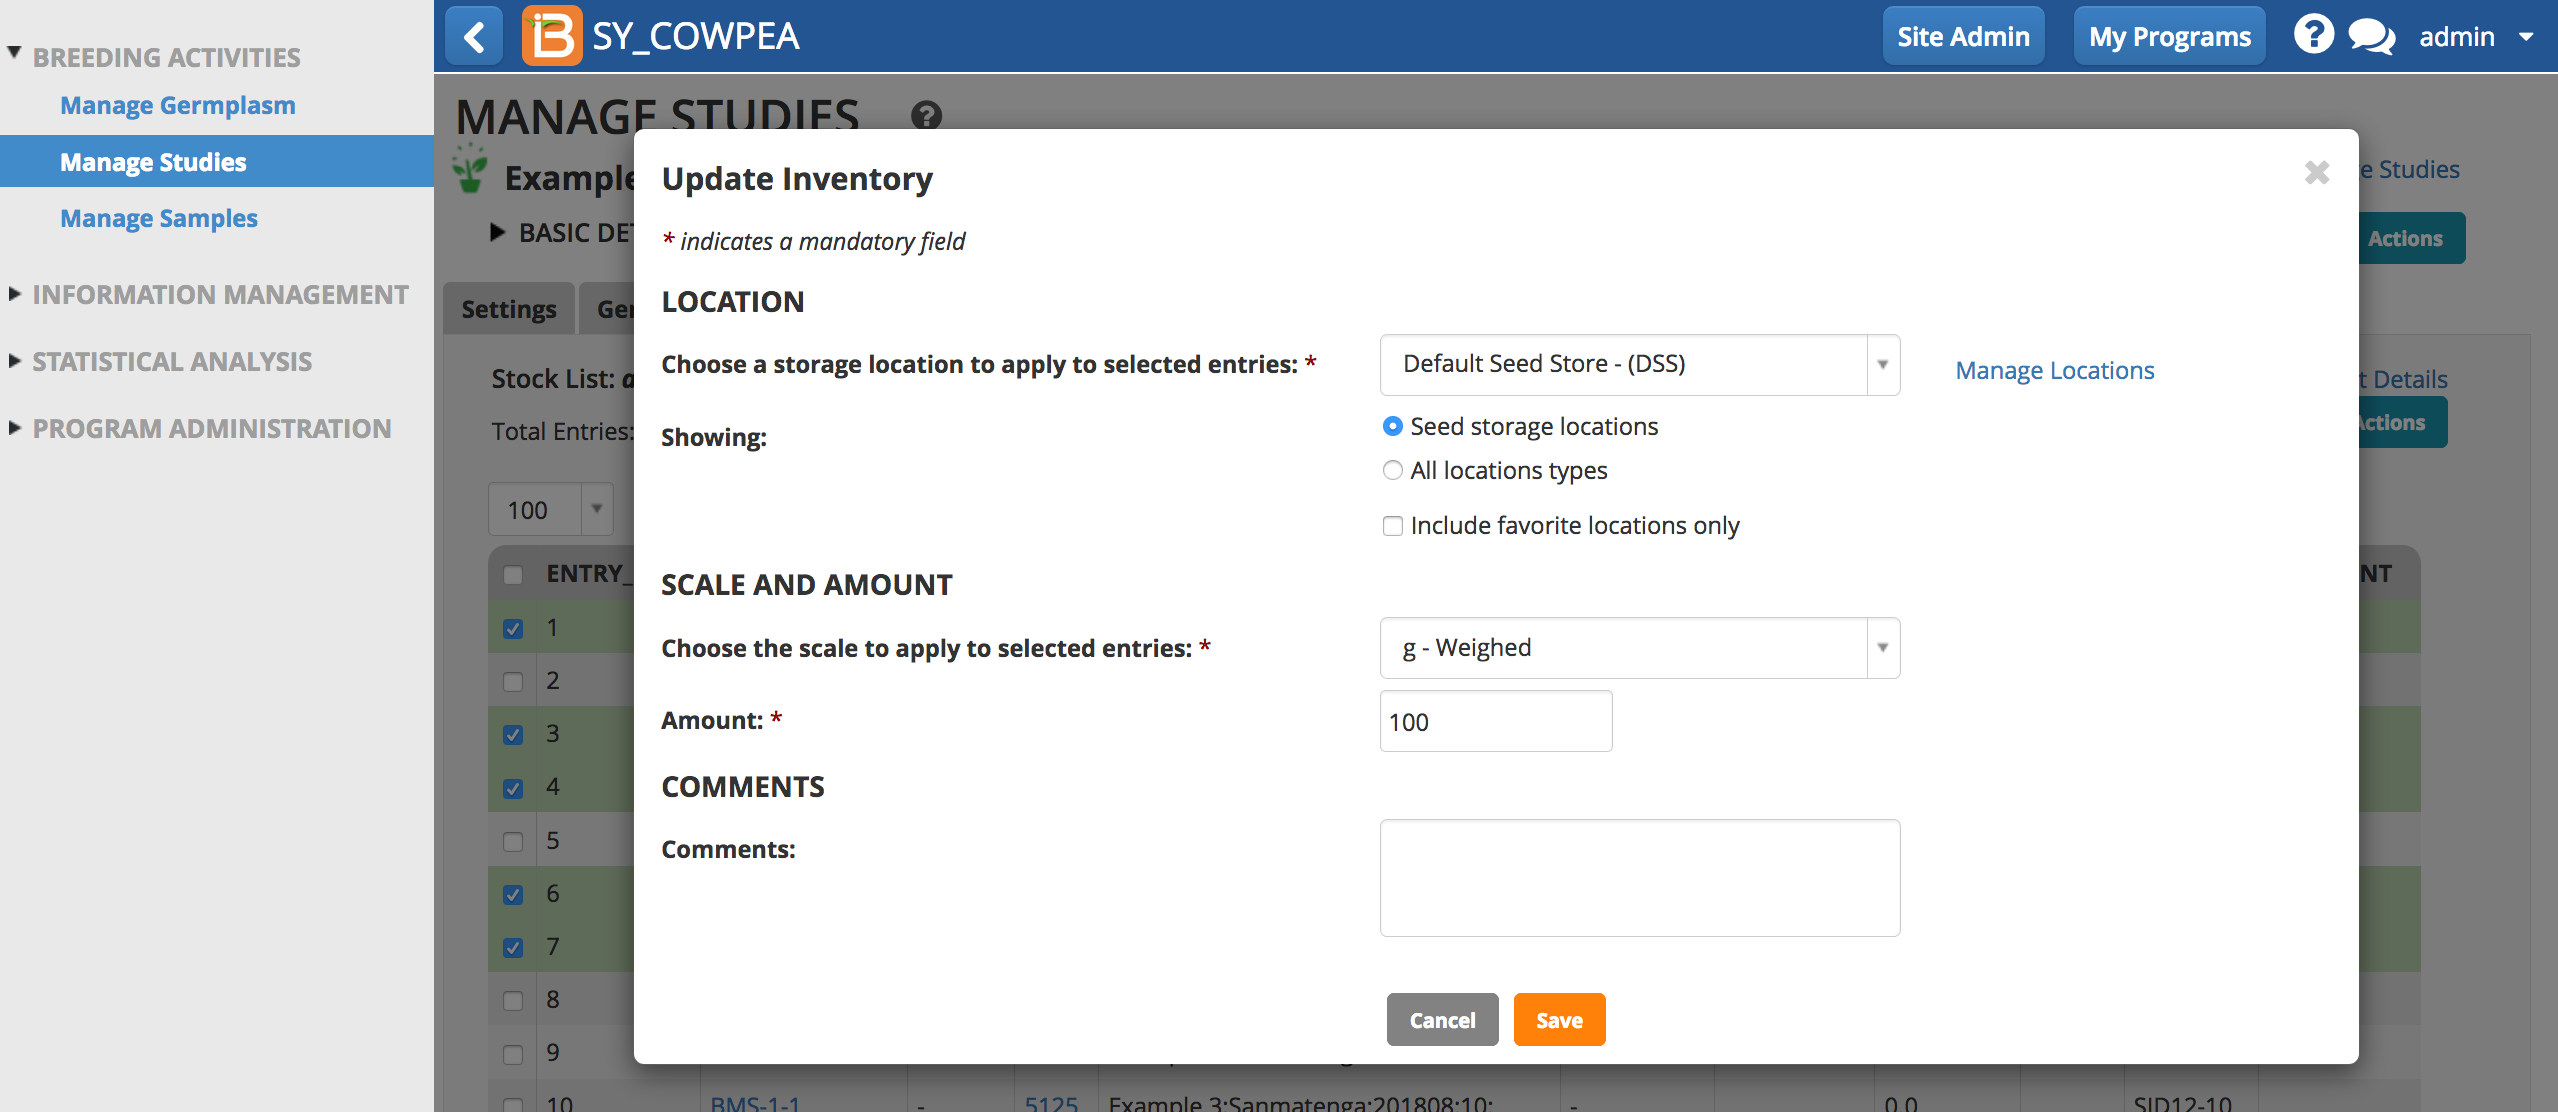
- Select the seed storage locations, the scale of inventory measurement, and the amount. Save.
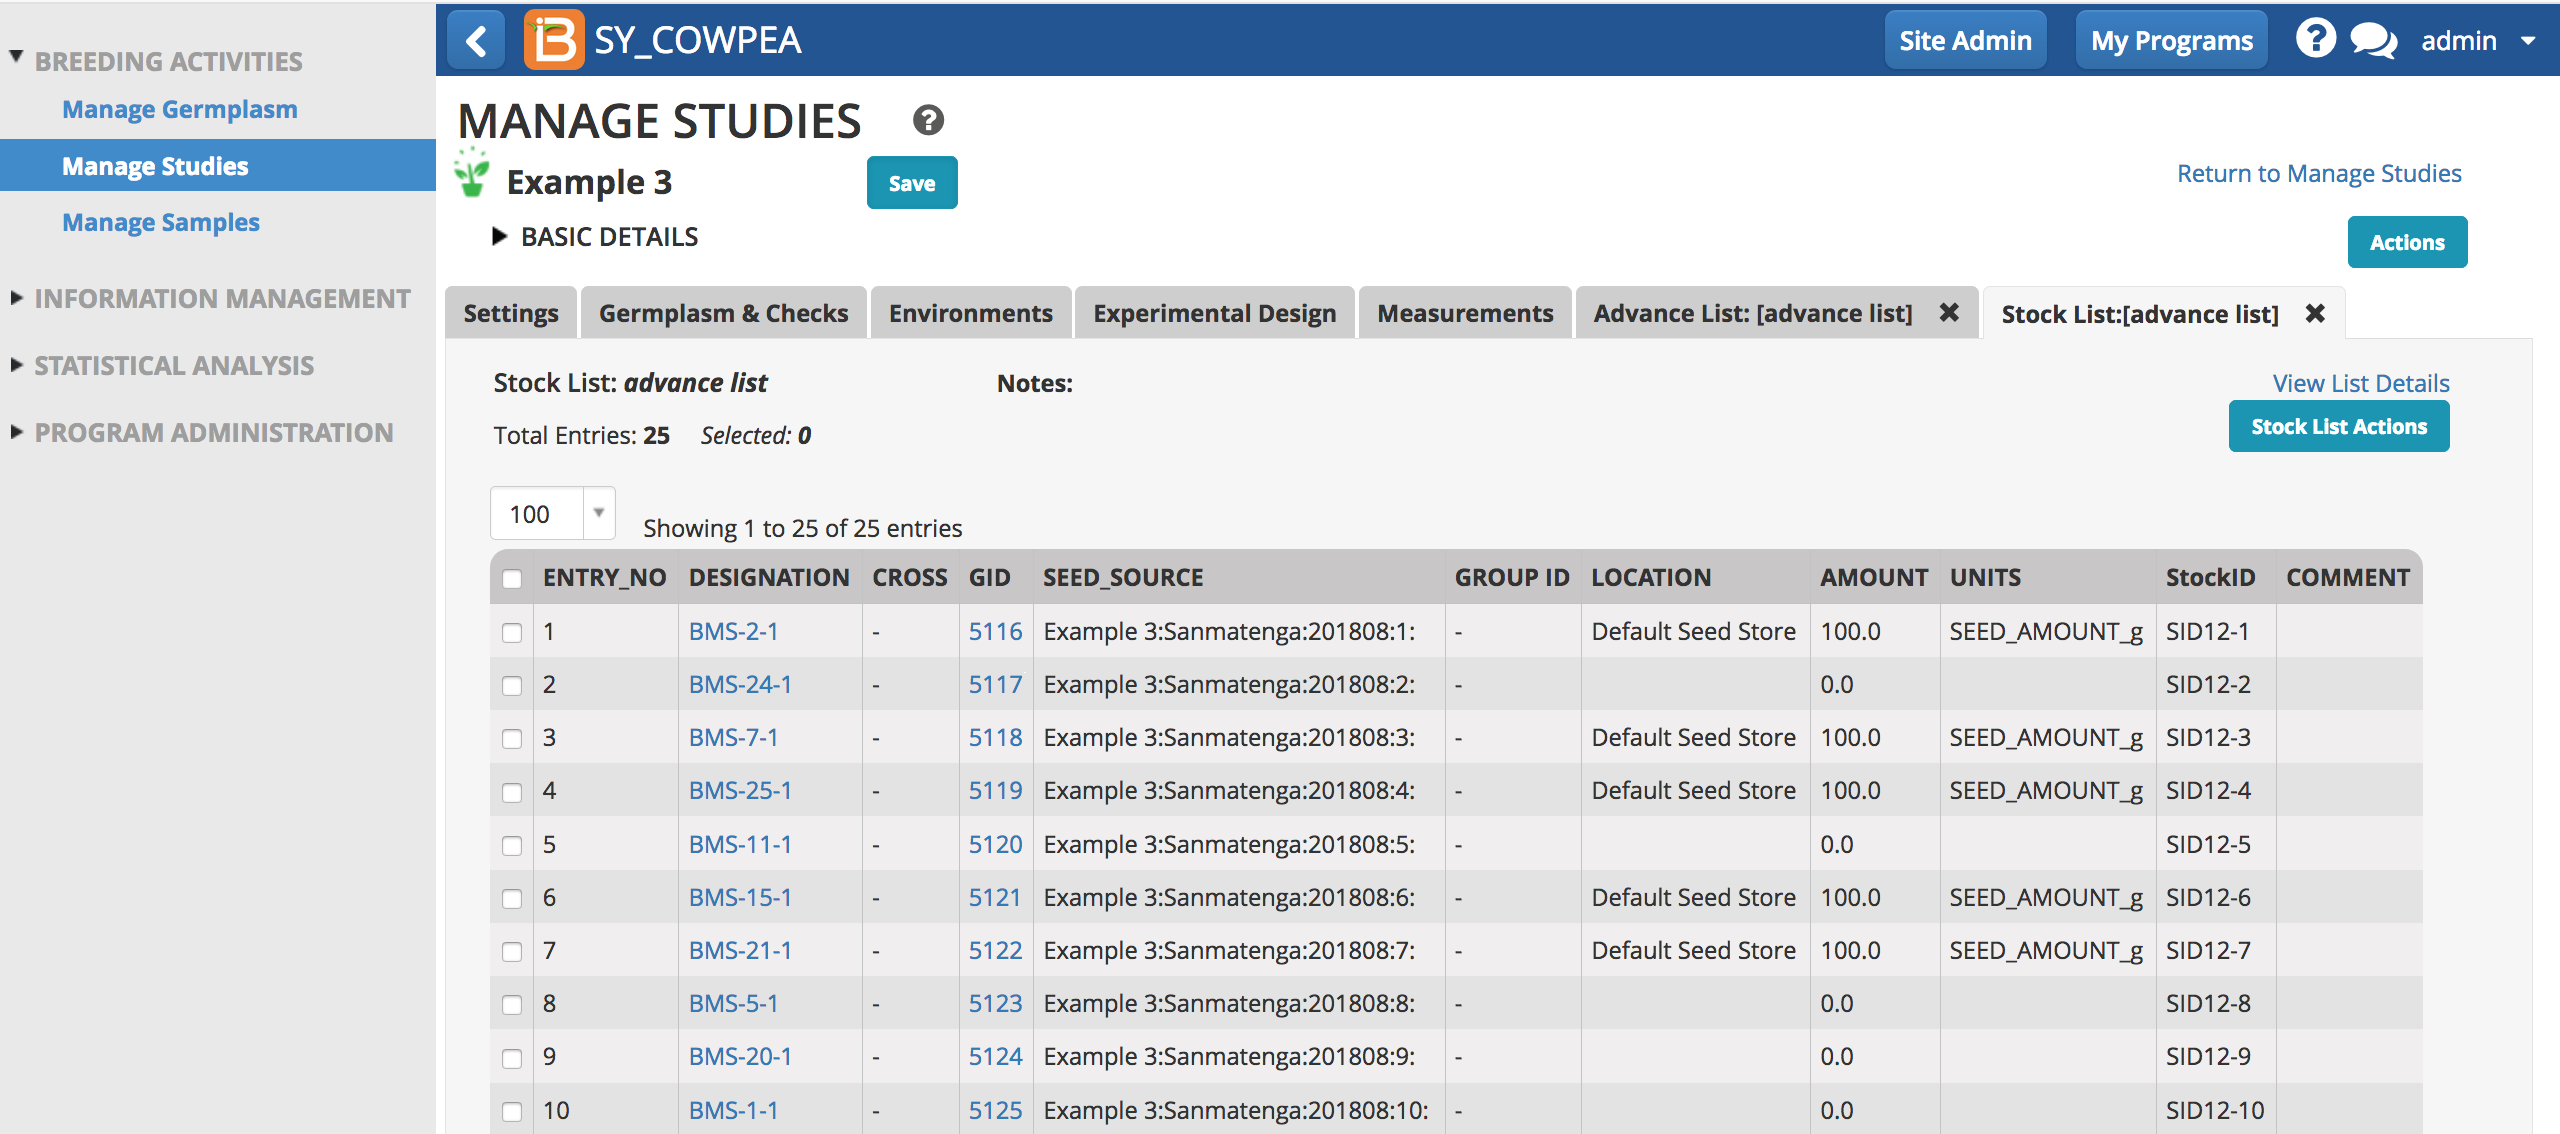
The seed inventory is now available for the updated entry.
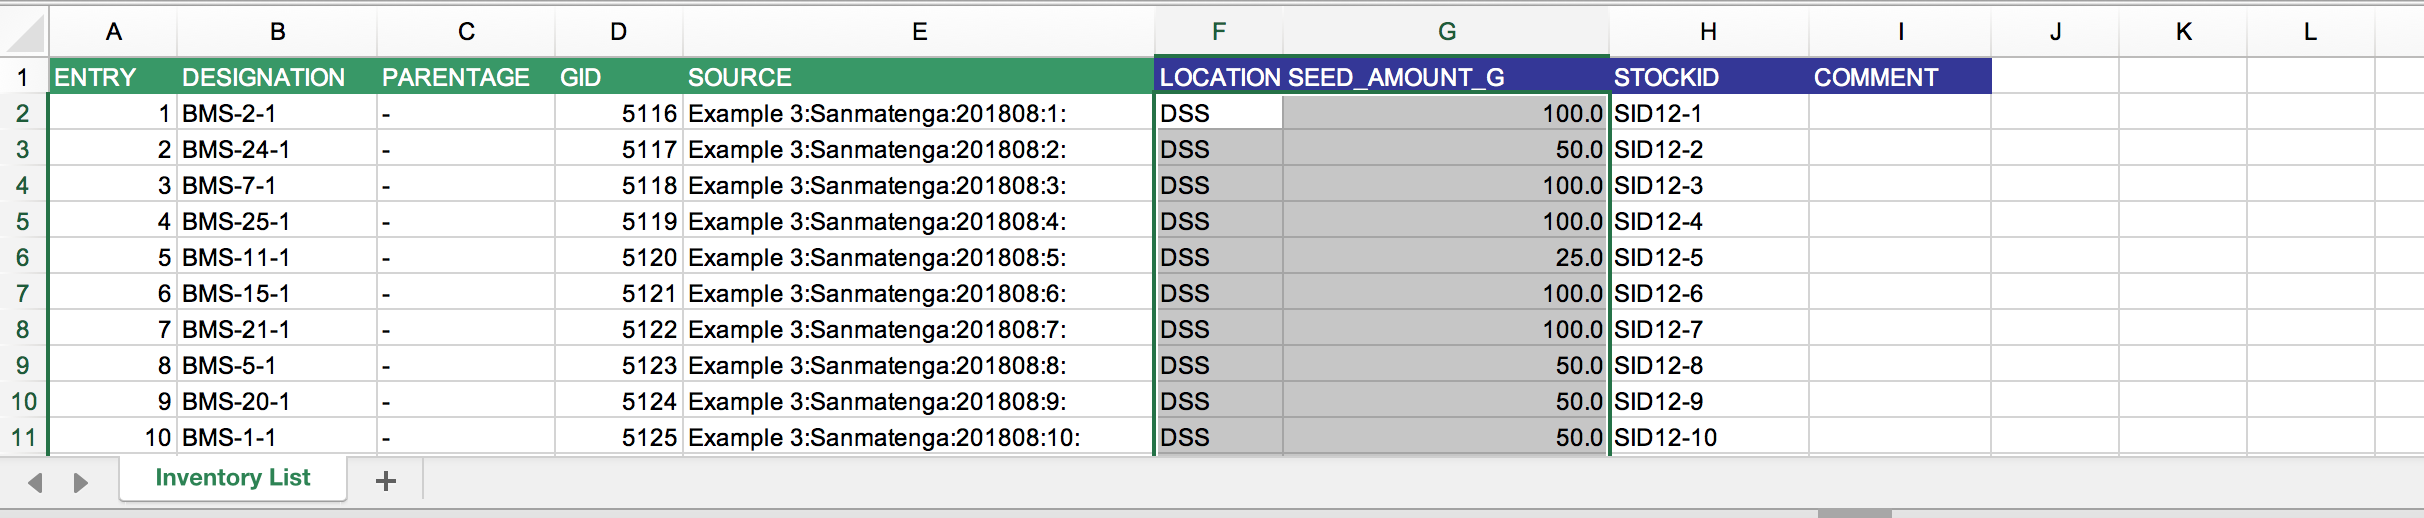
Add Inventory in .xls File
- Select Export Inventory File (.xls) from Actions menu.
The export file is pre-populated with details from the germplasm list. The Source Column is nursery name concatenated with plot number.

- Add or edit inventory amounts and abbreviation for seed storage location (see more on Managing Locations). Comments are optional. Save file.
- Select Import Inventory File (.xls) from Actions men. Upload the file and Submit.

- Save the nursery to save the associated inventory. Now this inventory is available for reservation and withdrawal from the Manage Germplasm tool.