- Start New Study
- Settings
- Save
- Germplasm and Checks
- Environments
- Experimental Design
- Observations
- Sub-Observations
- Conclusion
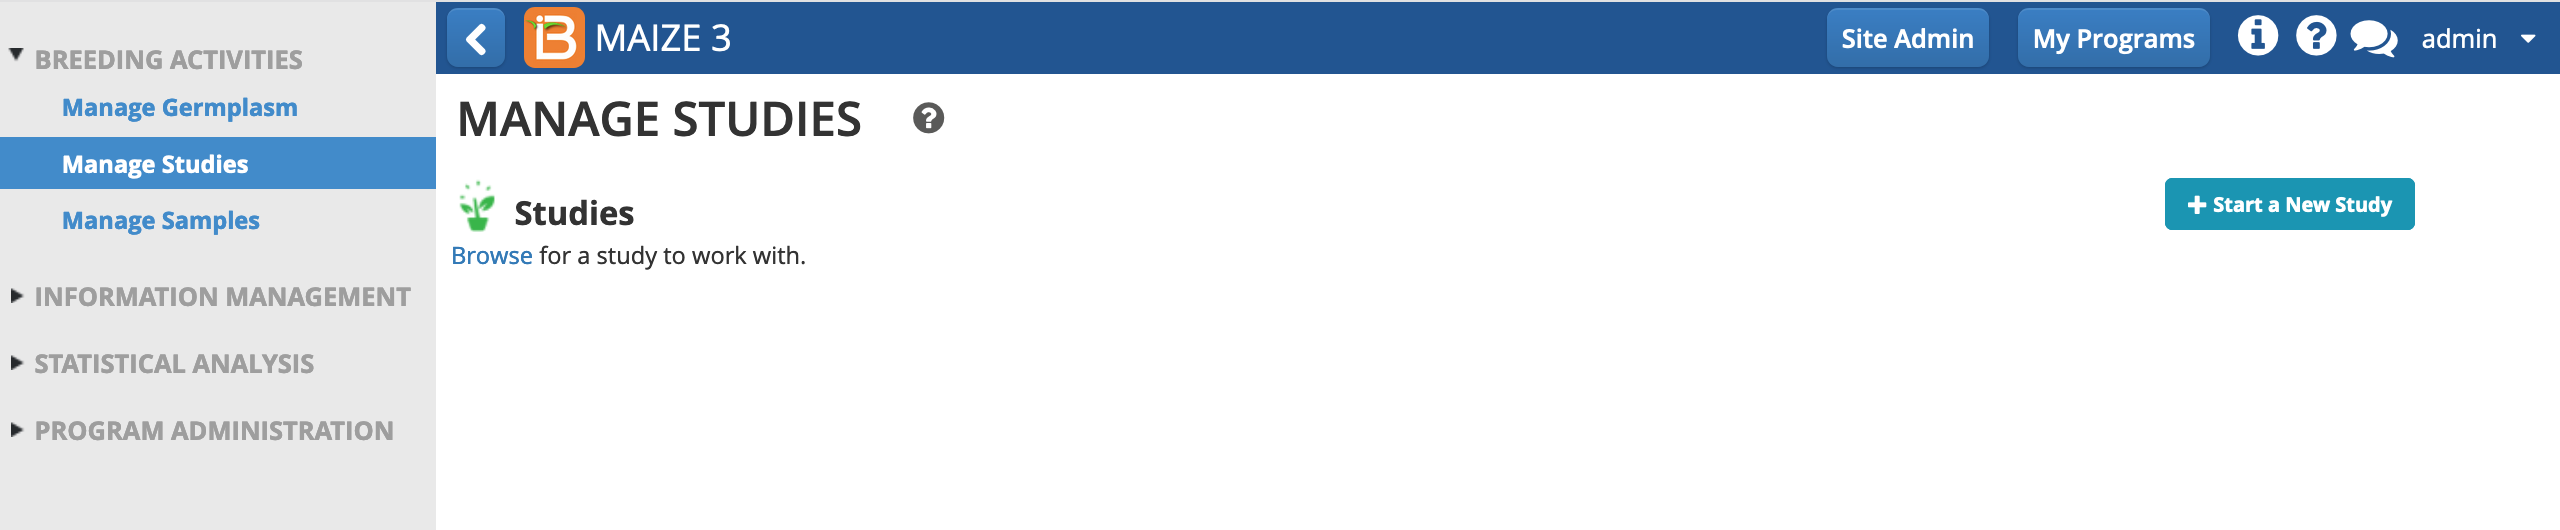
Start New Study
- From Manage Studies, Start a New Study.
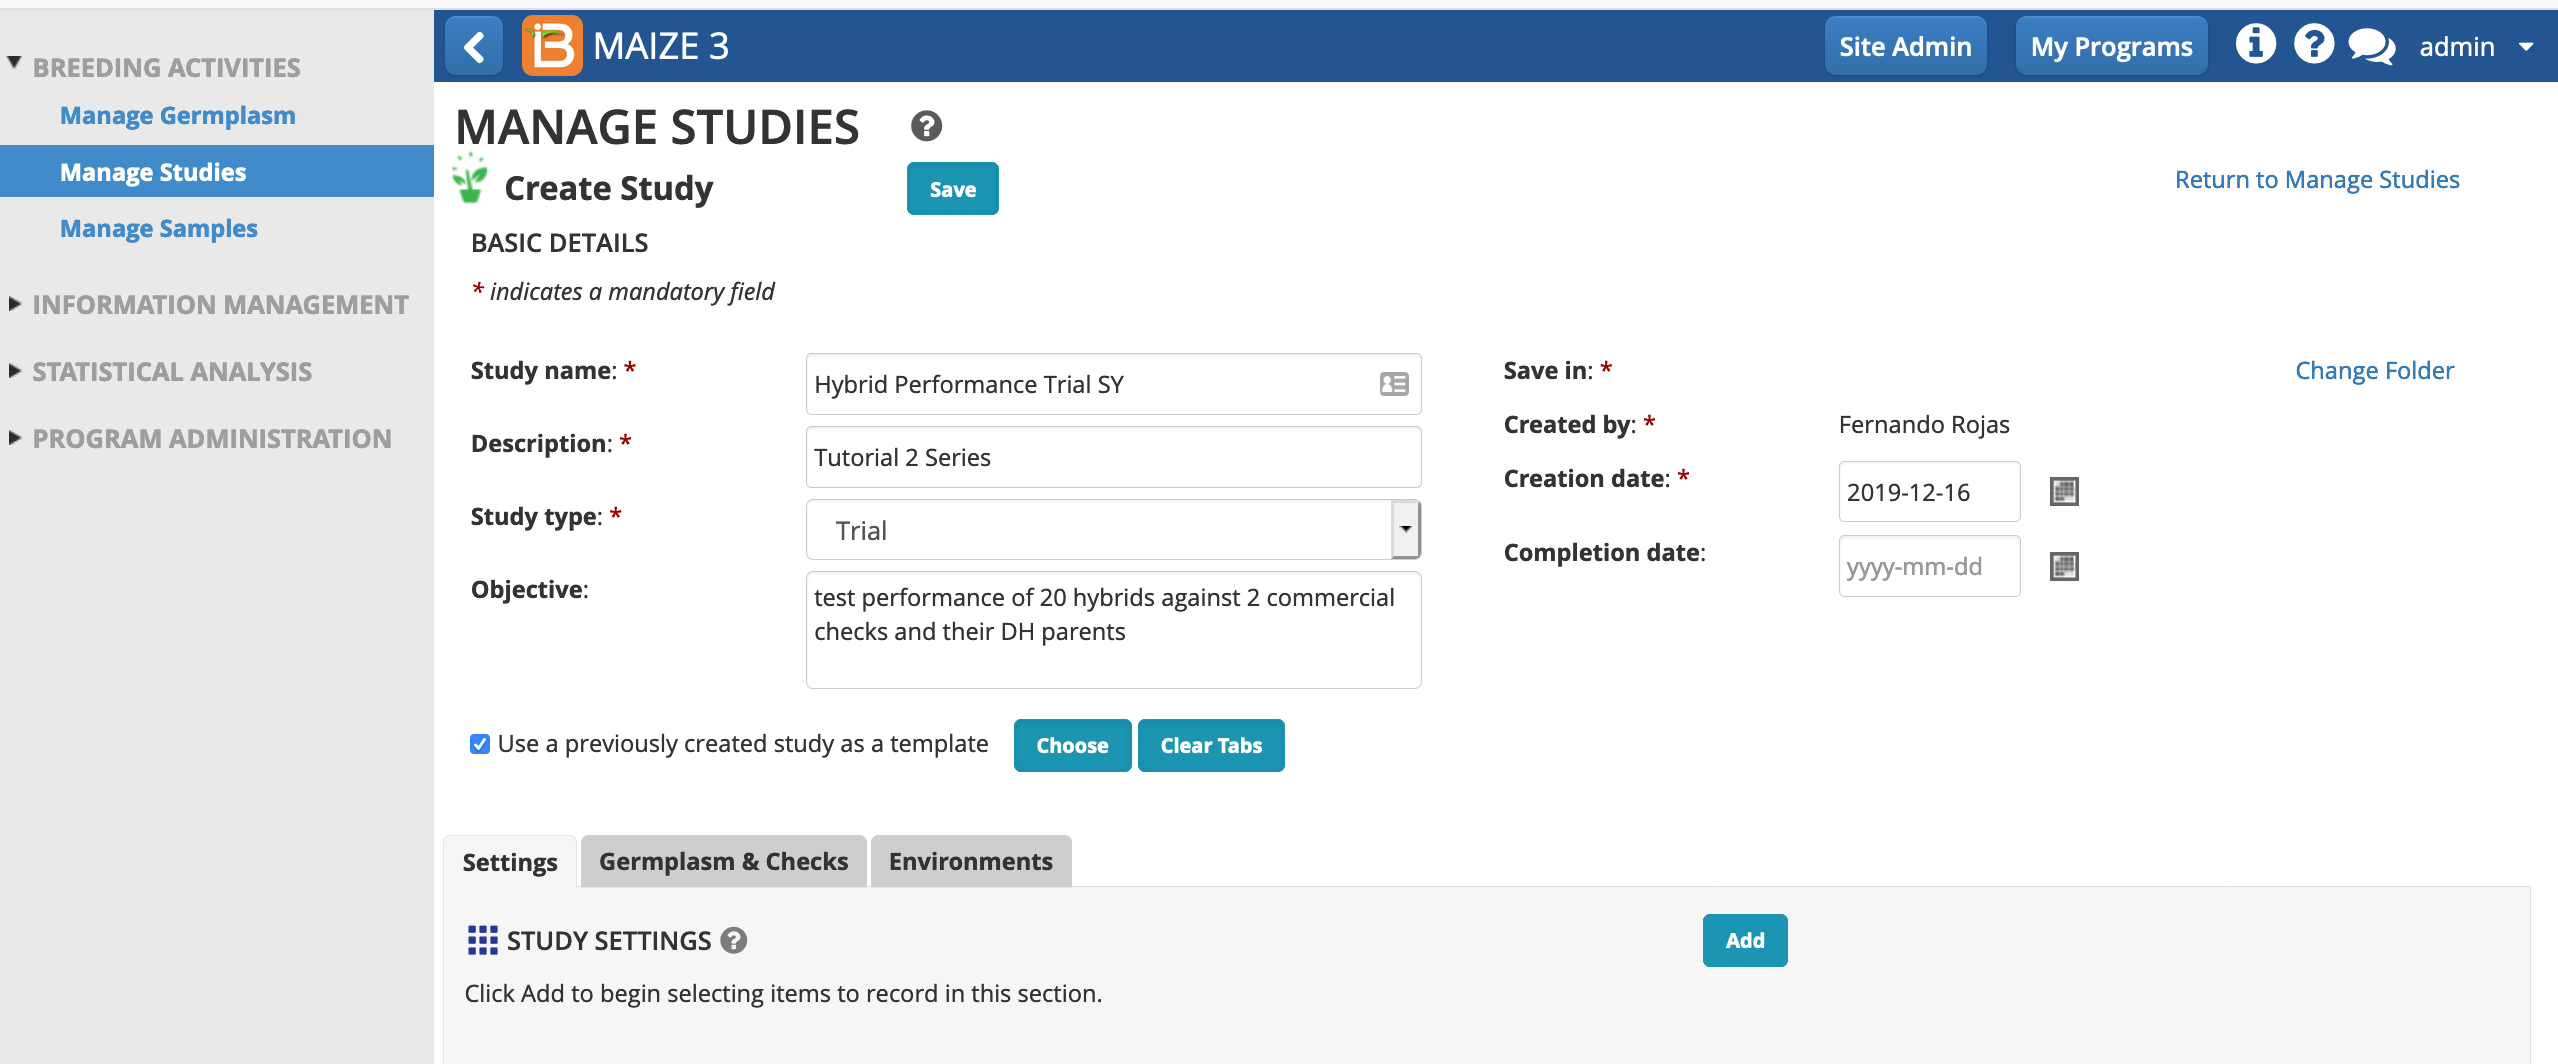
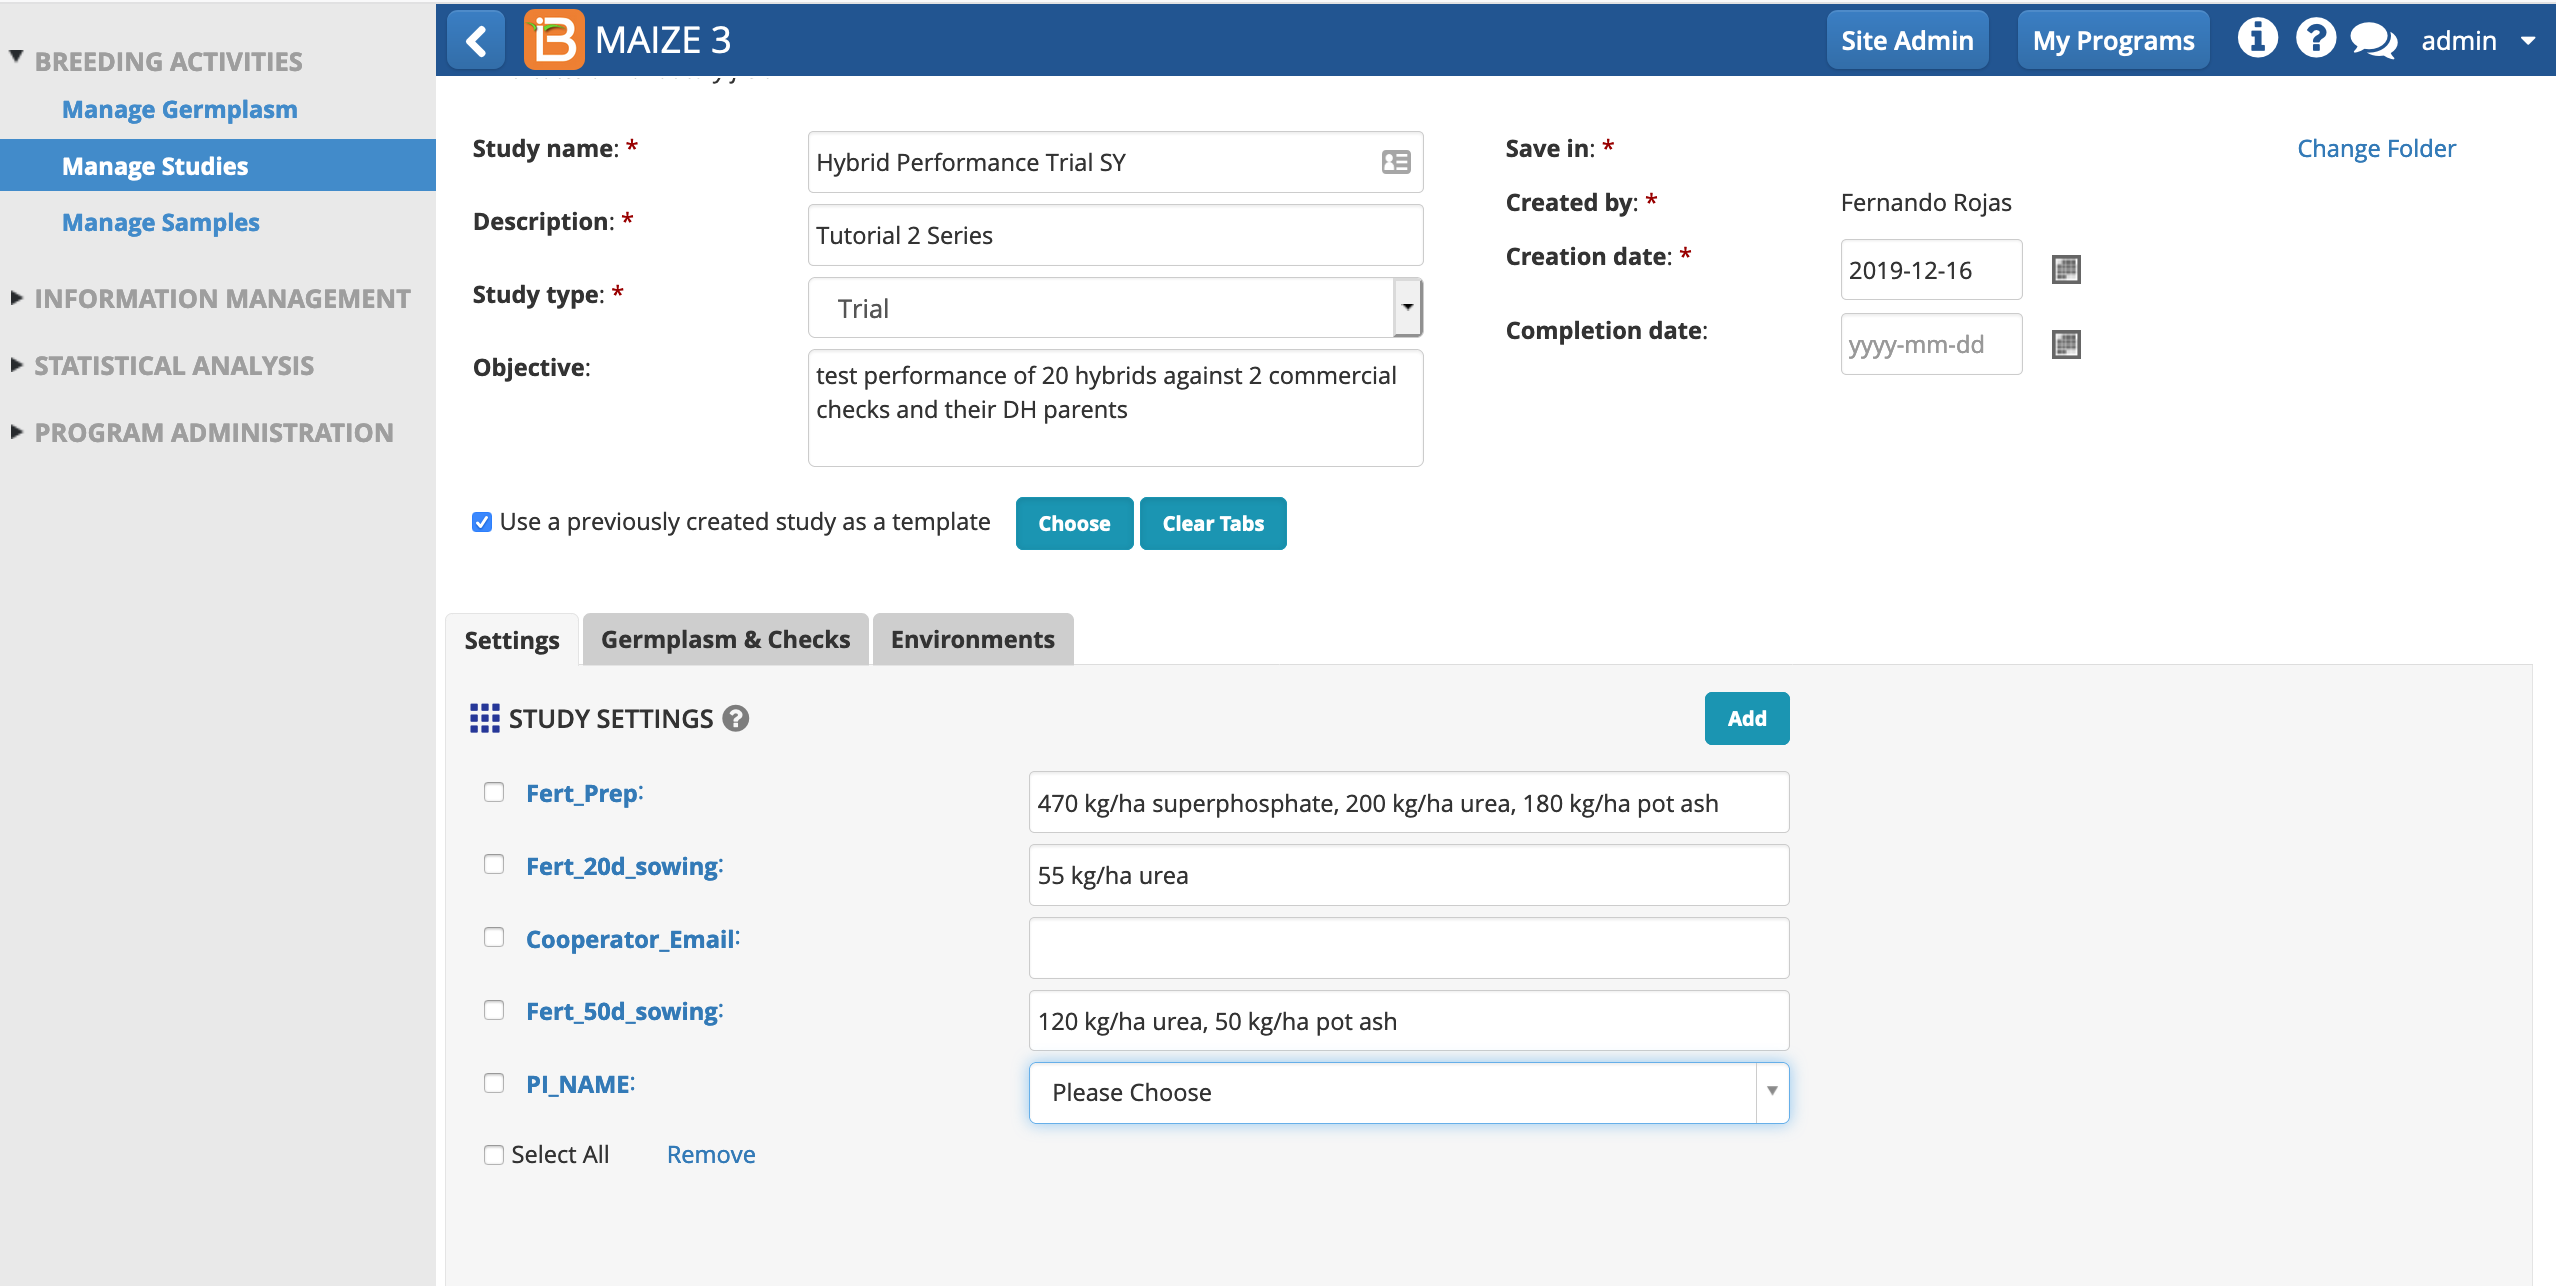
- Name and describe the study. If you are in a workshop and sharing the database with others, you might want to append your study name with your initials to ensure that the study name is unique. Choose the study type, Trial. Select "Use a previously created study as a template." This will pre-populate the study with some variables from the template. Select Choose.
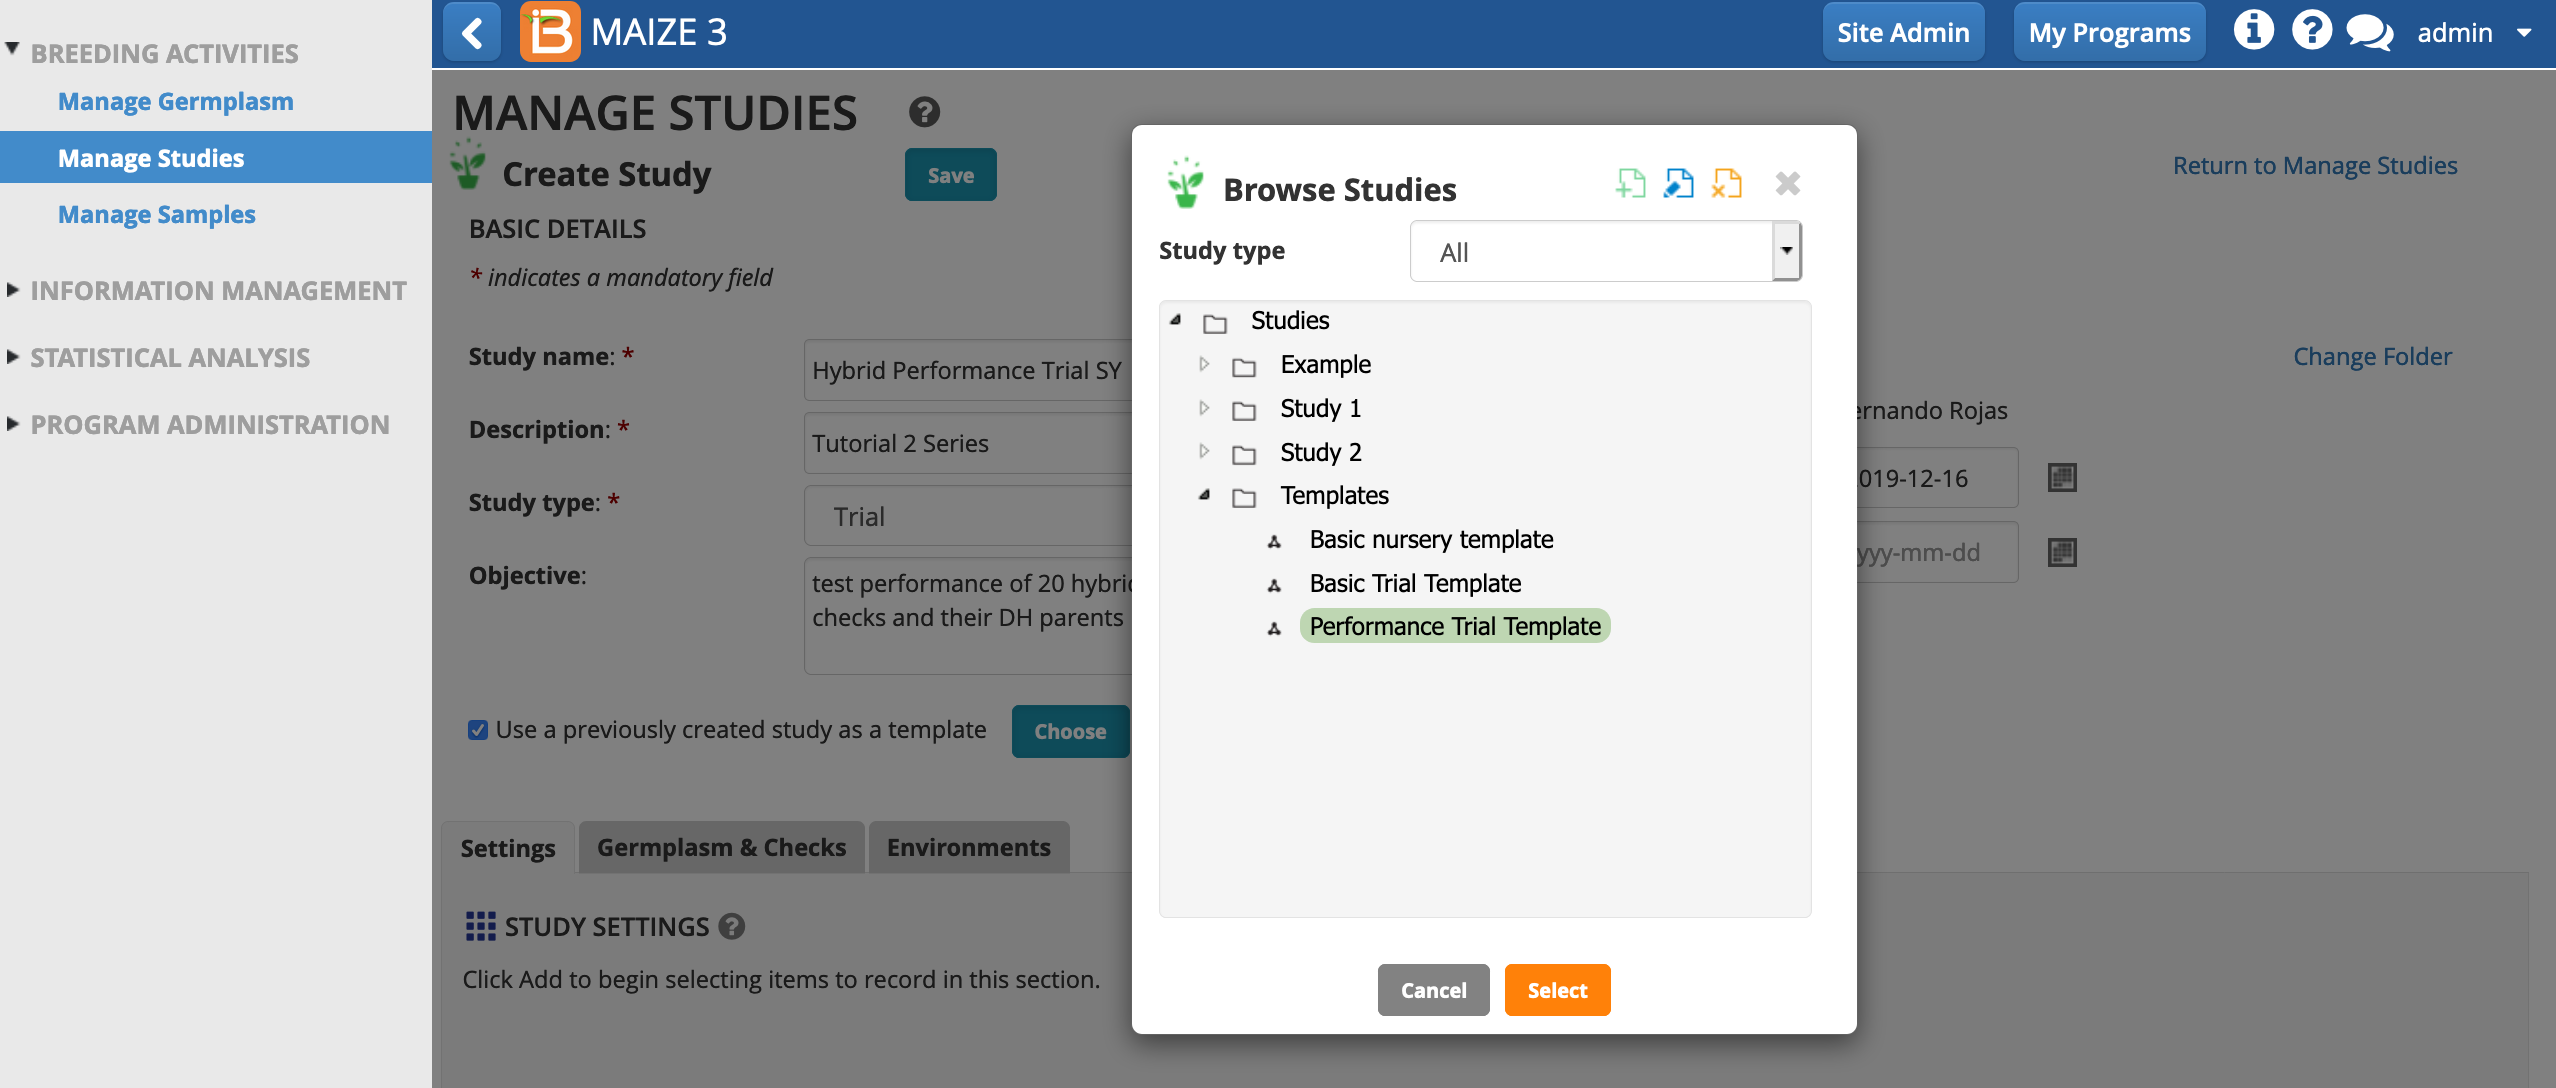
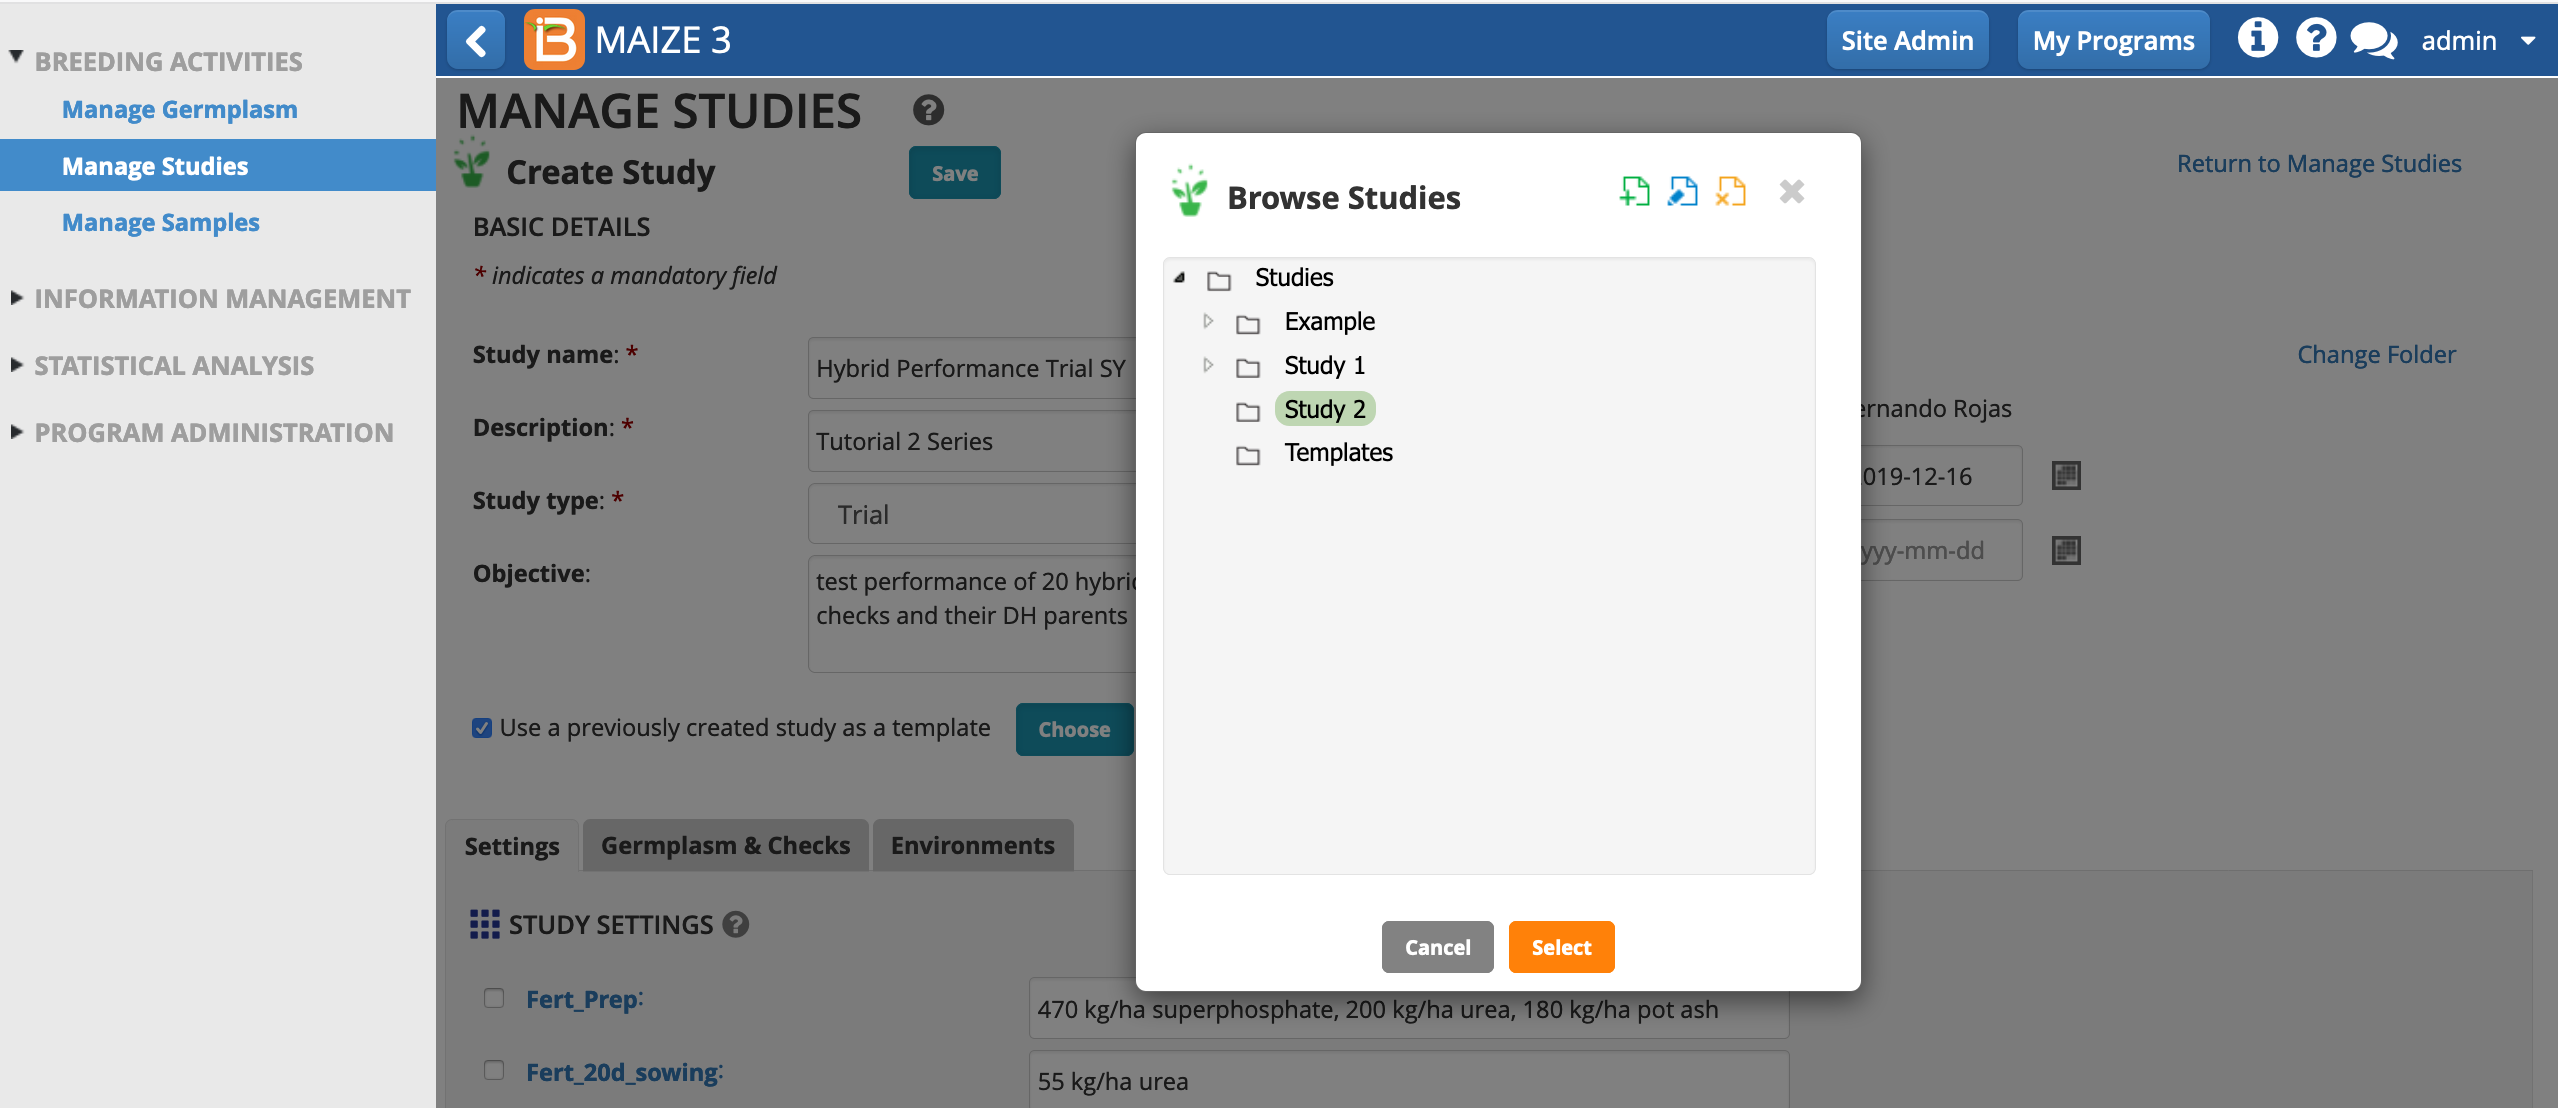
- Highlight Performance Trial Template and Select.
Settings
- Notice that the Settings are now populated with variables from the template. Enter your email (free text) and choose your name from the PI_NAME drop down menu. Leave the pre-populated fertilizer regime as specified by the template.
Save
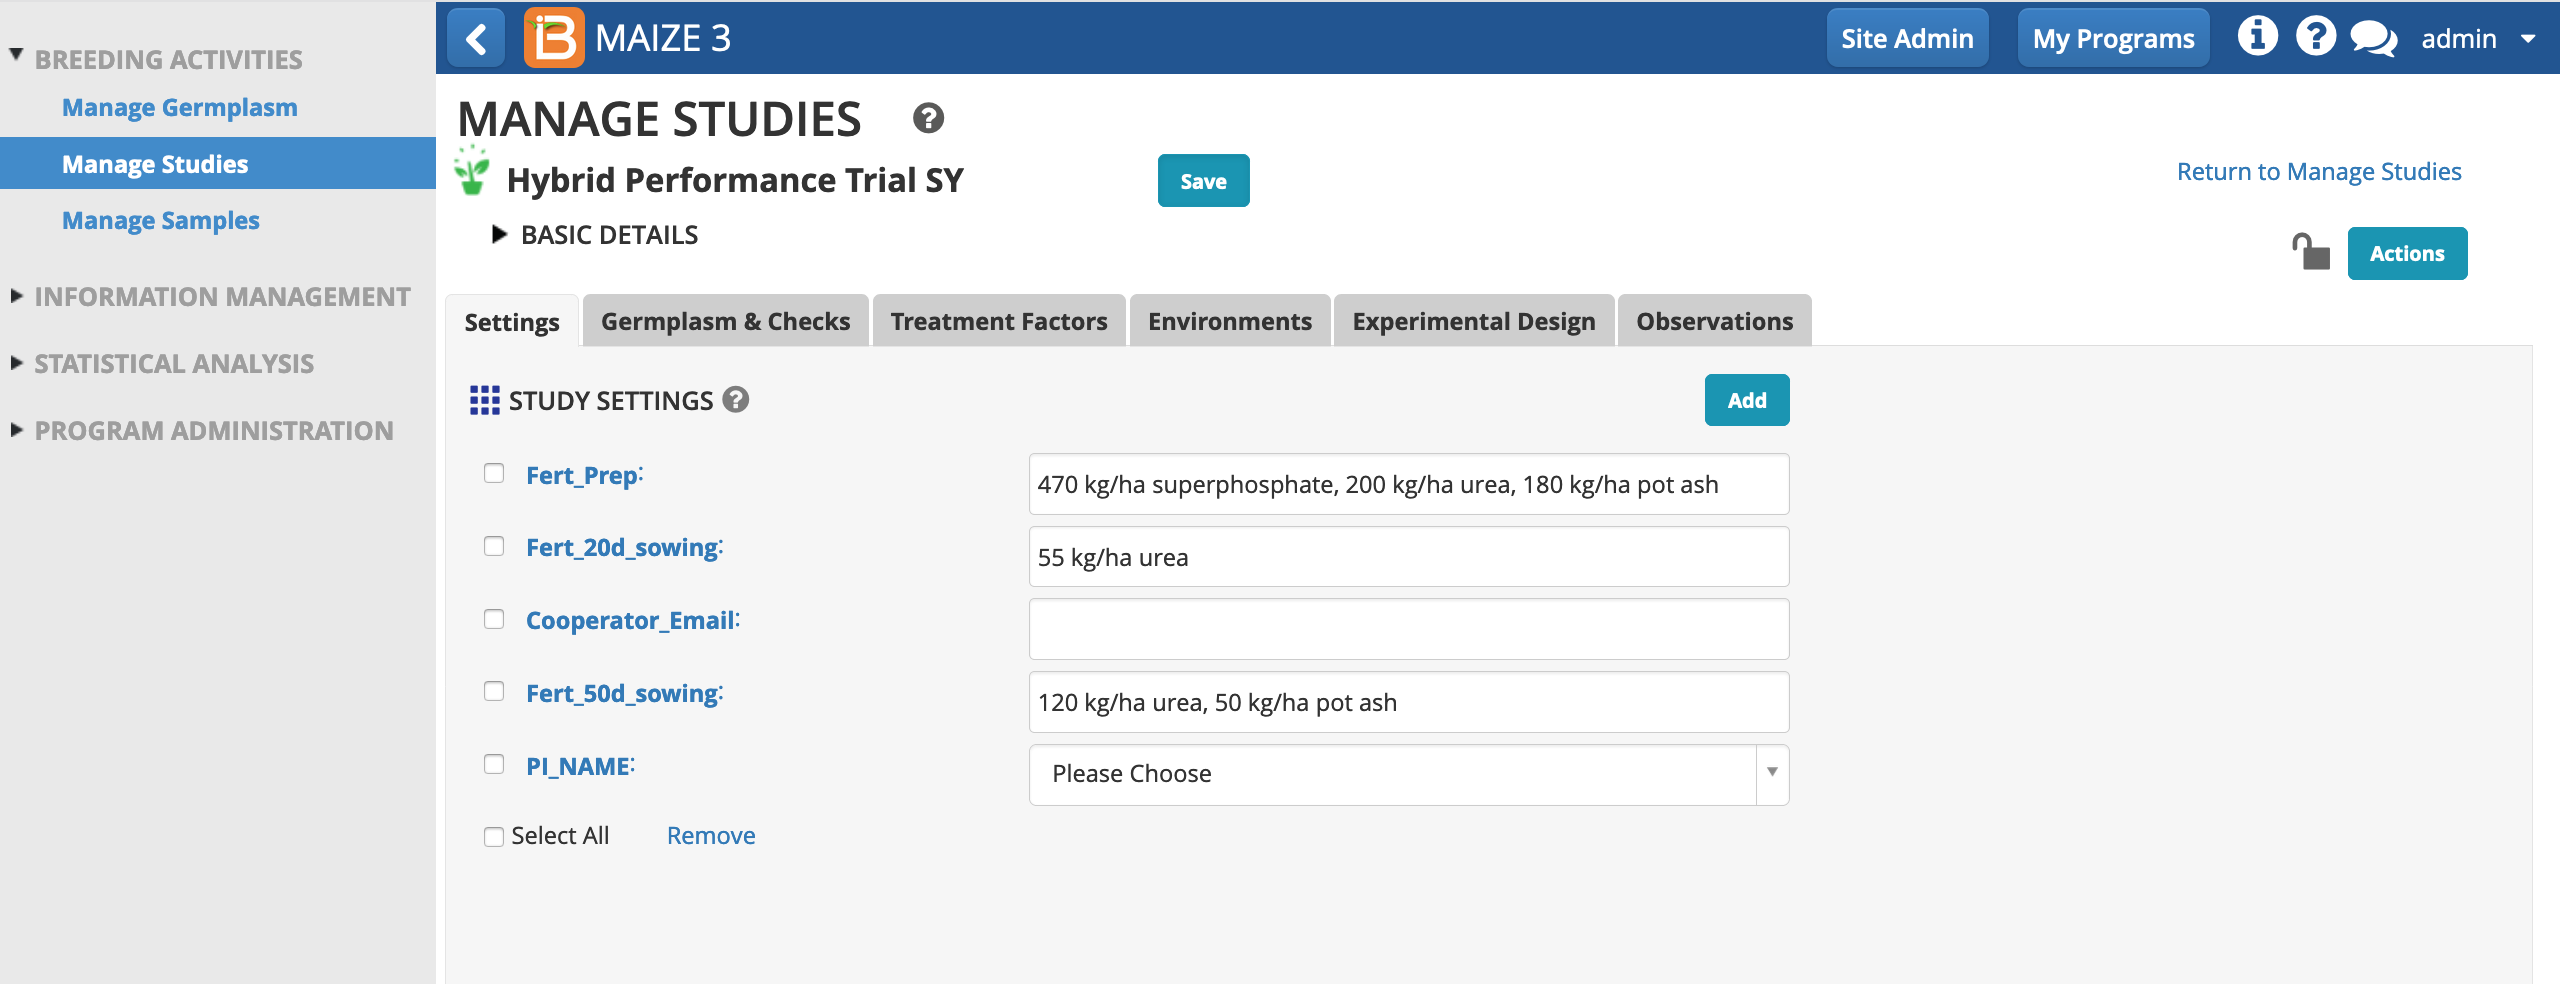
- Select Save and specify that the study will be saved in the Study 2 folder.
Once saved, the study is created within the BMS. The browser window will refresh and the basic details will collapse. Selecting the triangle beside Basic Details will reveal the contents.
Germplasm and Checks
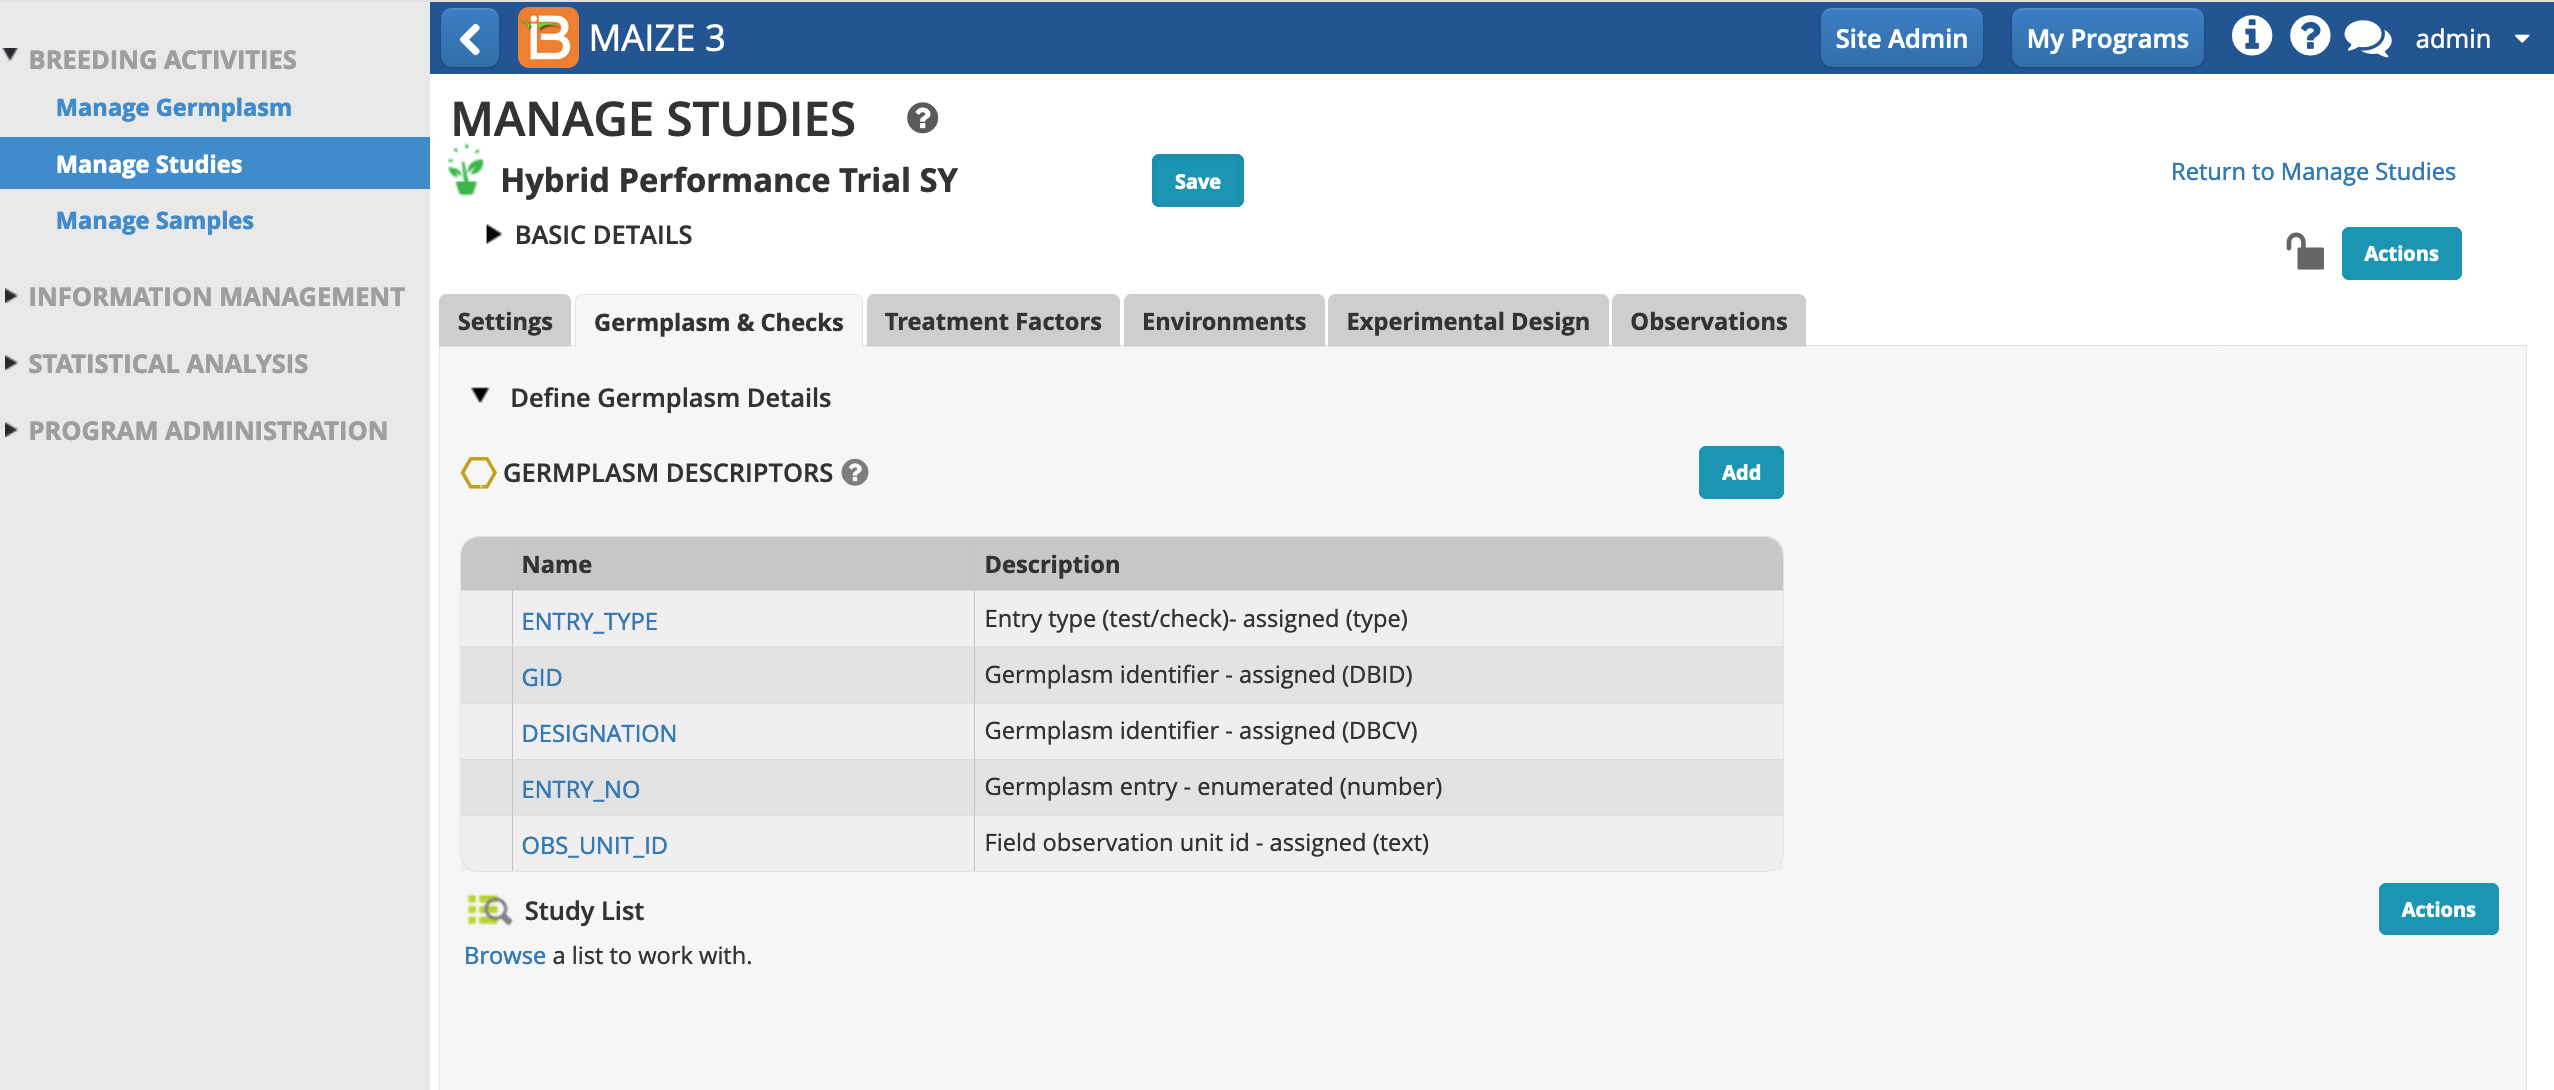
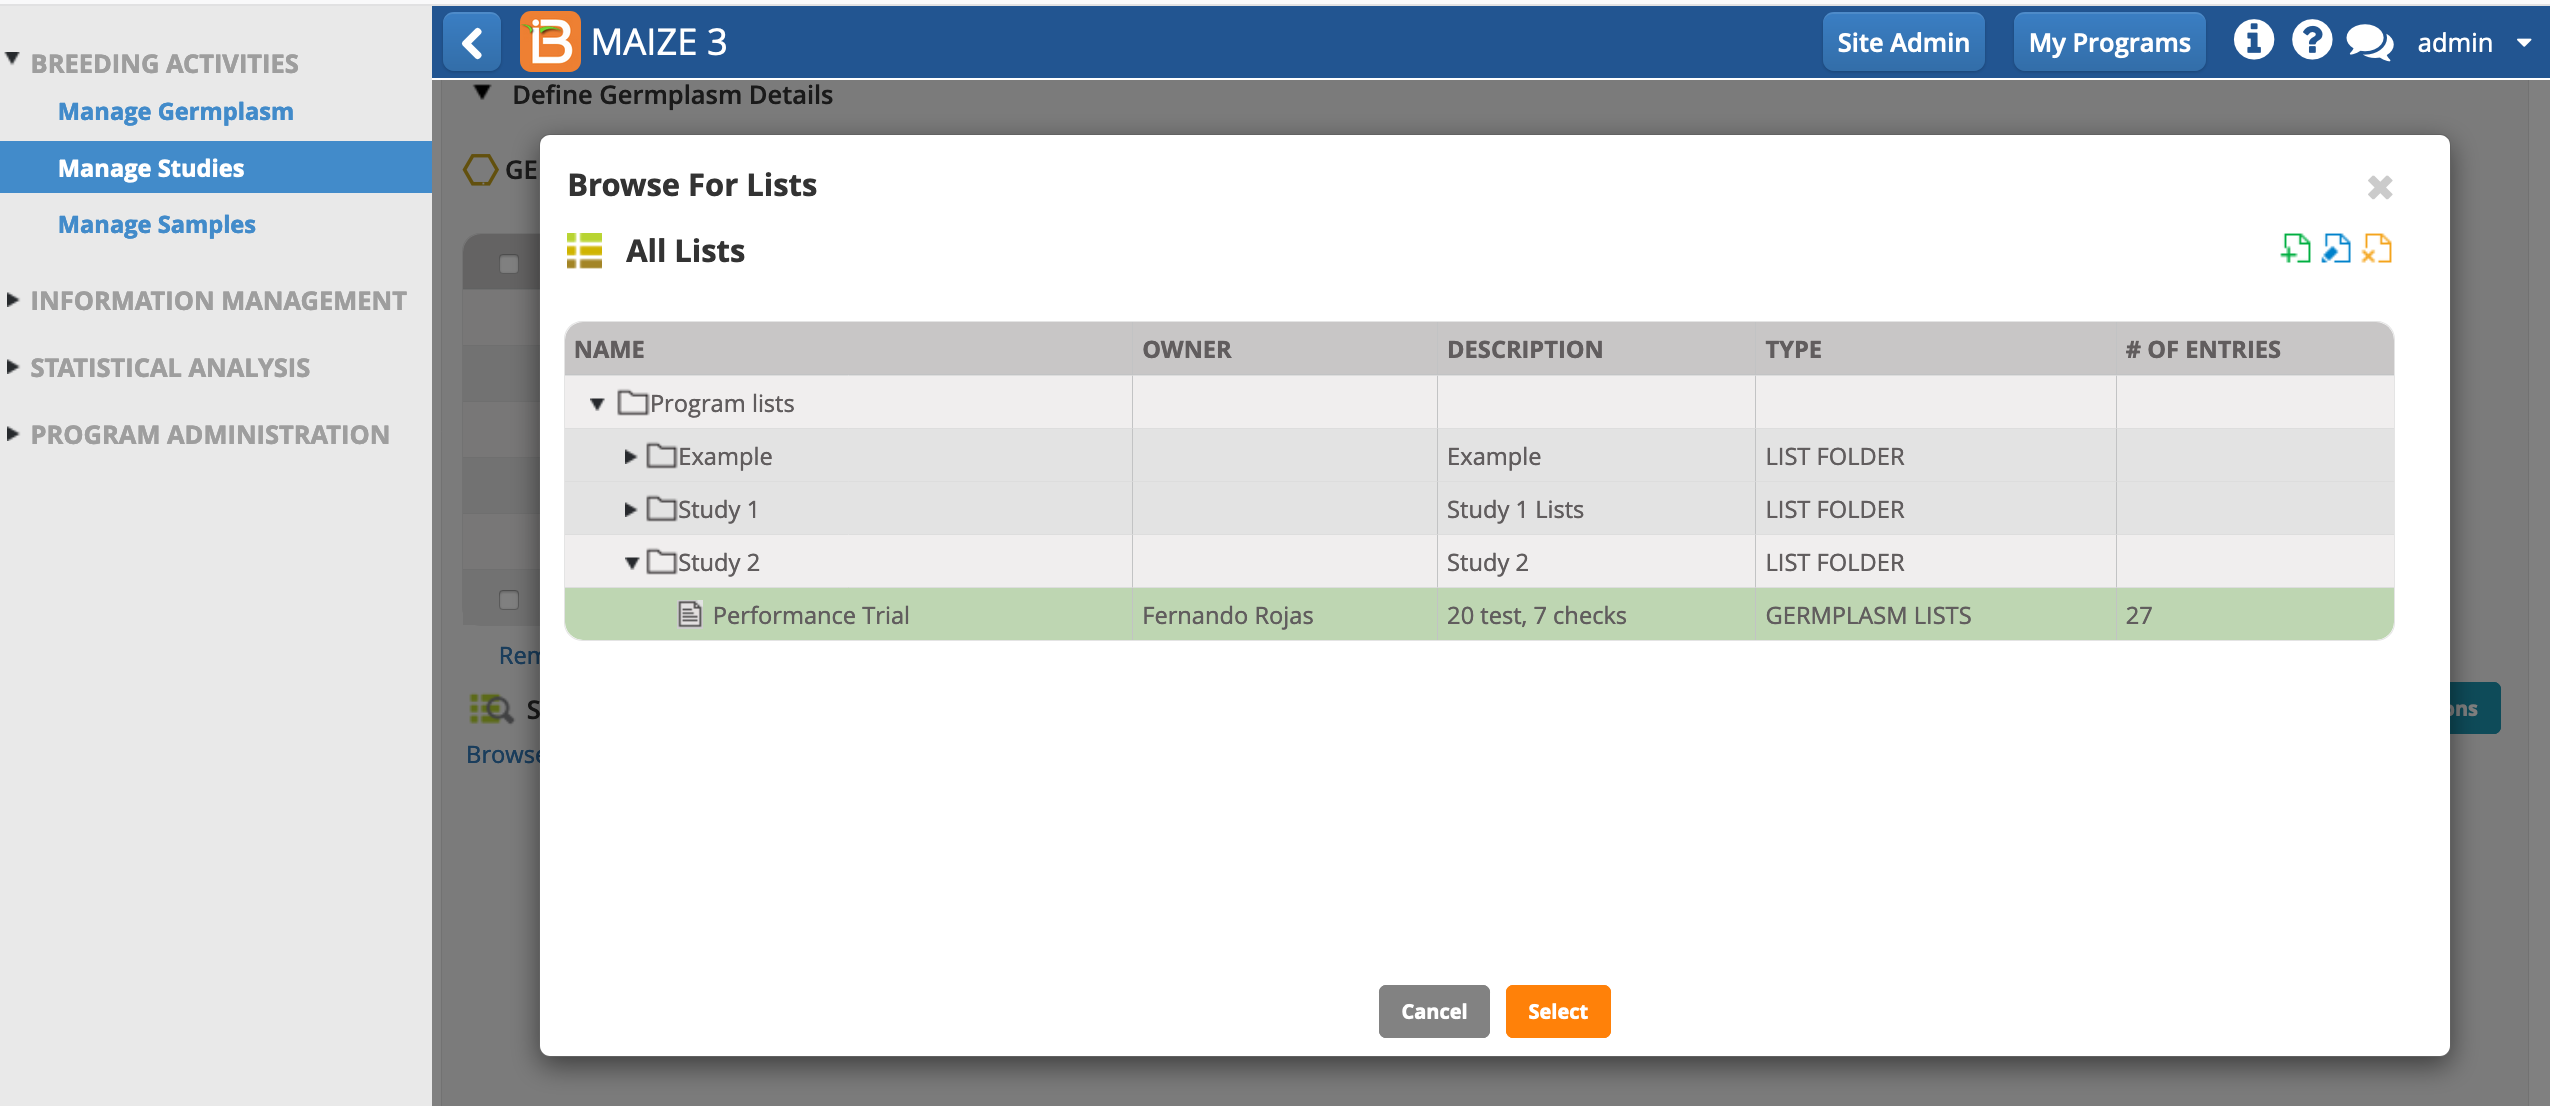
- Open the Germplasm and Checks tab. Notice that the study includes 5 mandatory germplasm descriptors. Select Browse to find the list of 27 germplasm that will be planted in this study.
- Highlight the list of 27 germplasm that you made in the first tutorial of this series. Select.
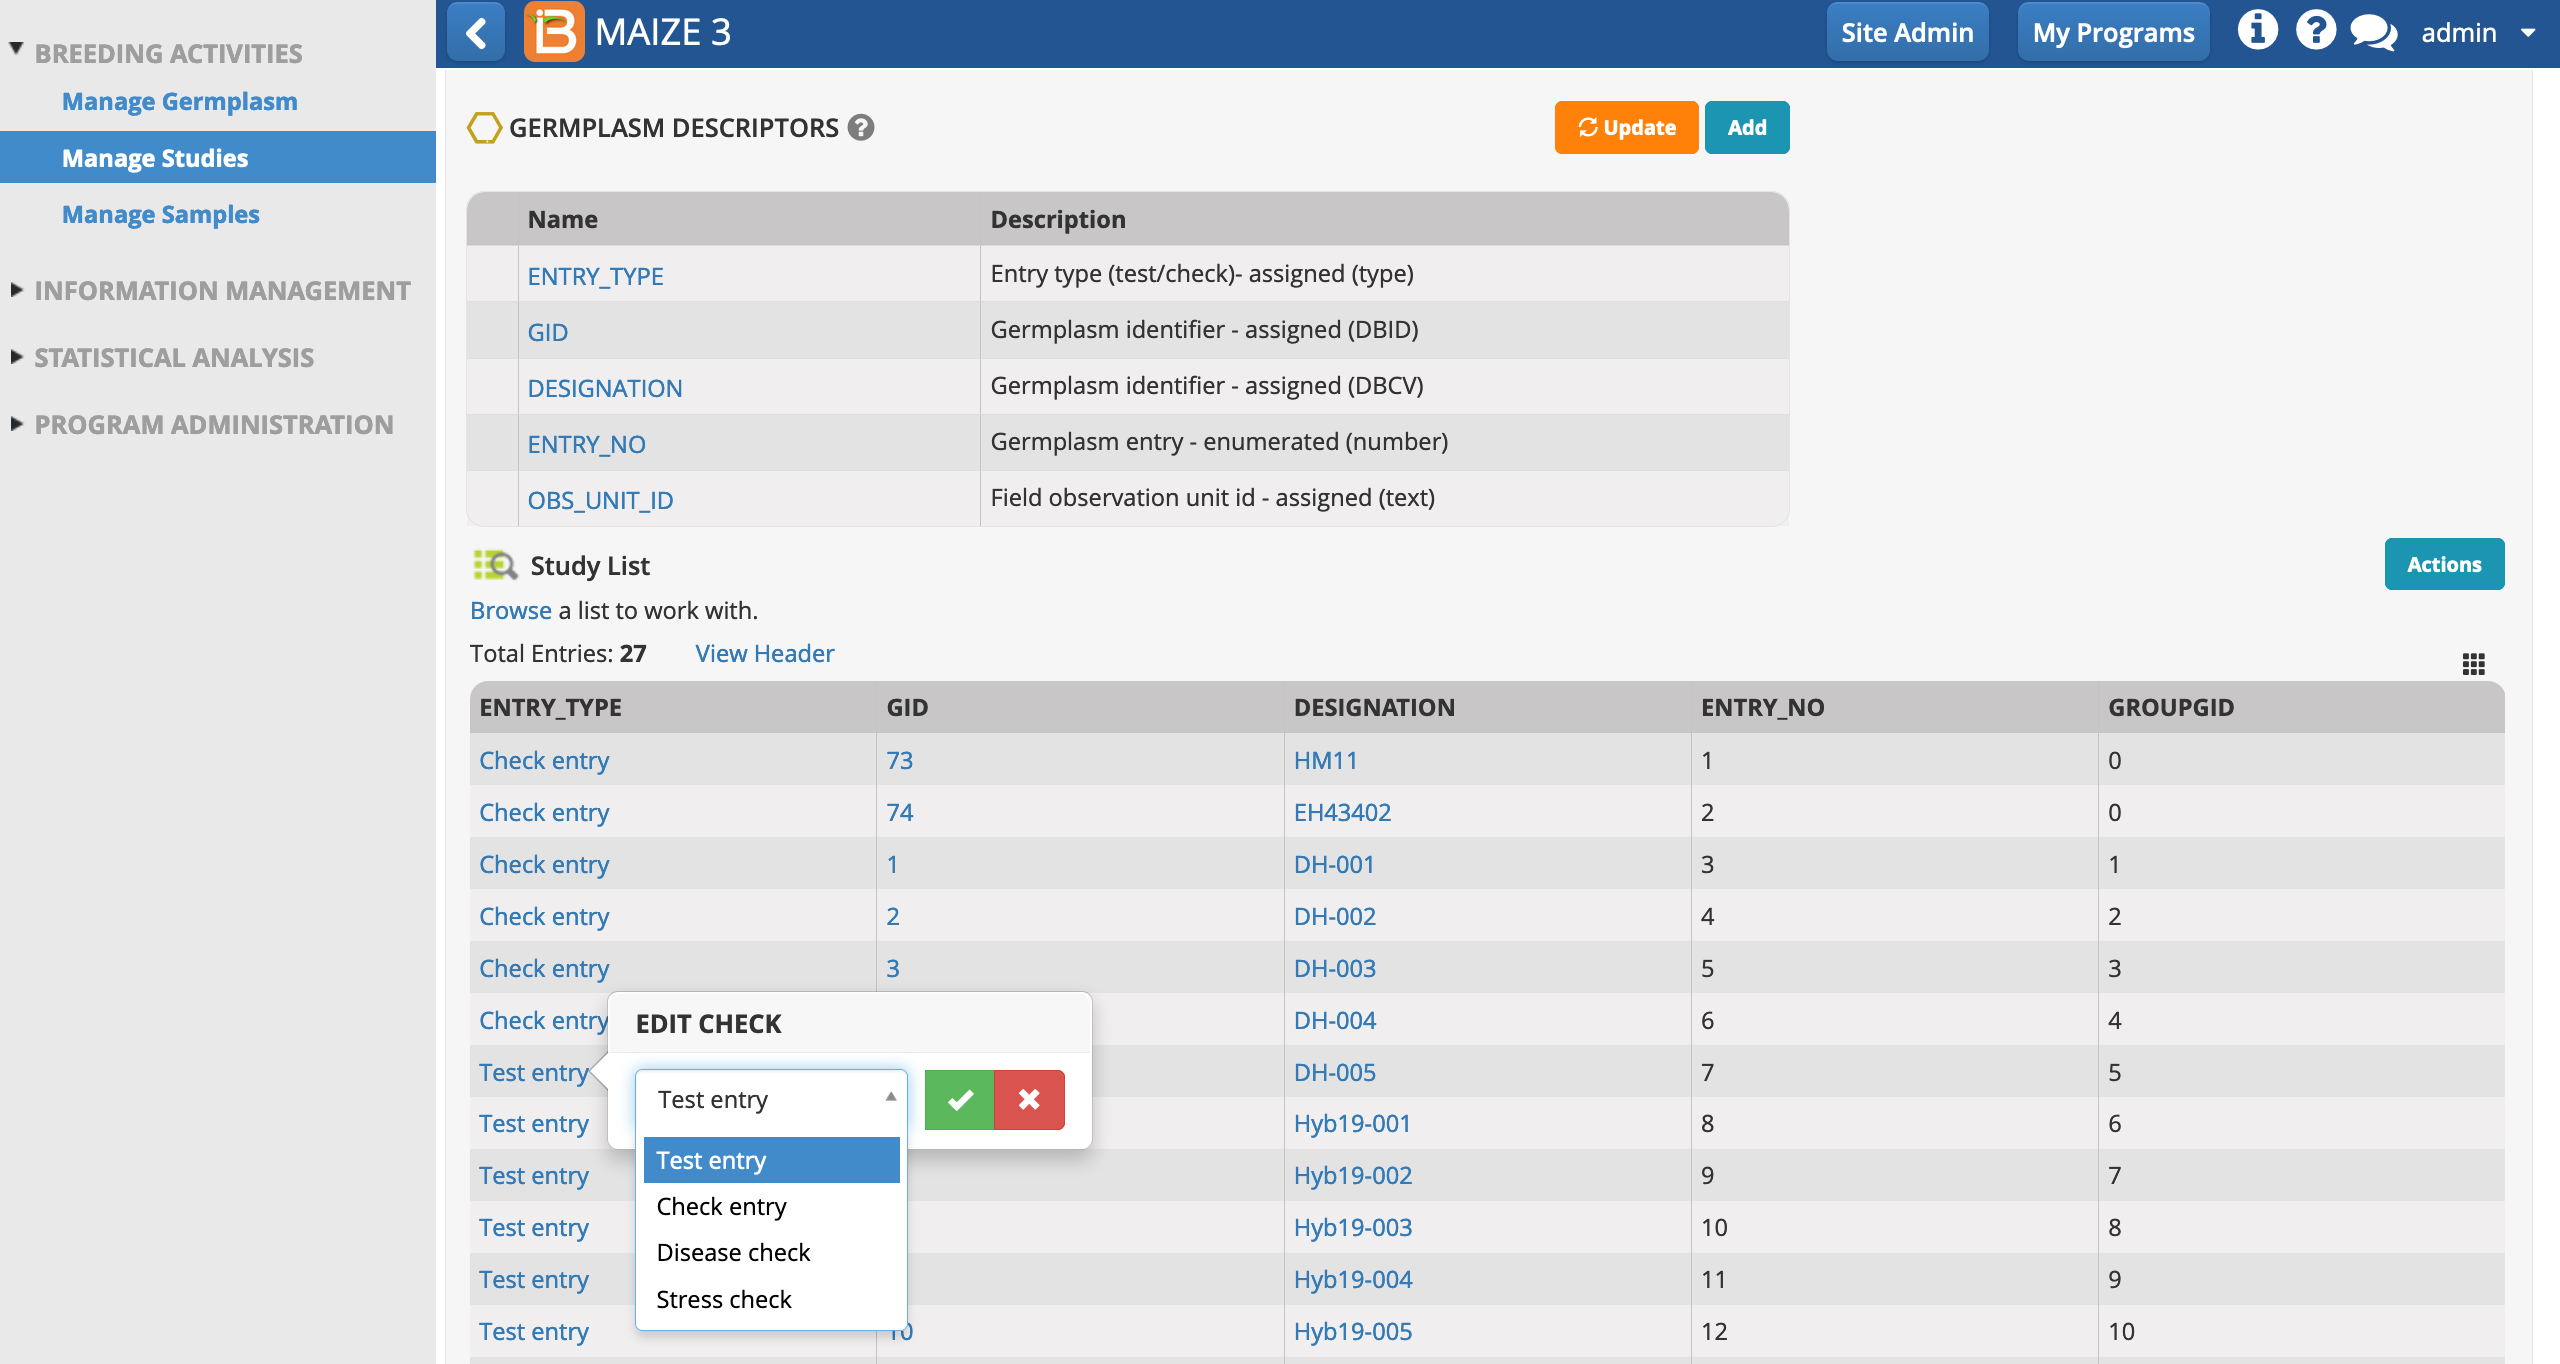
By default all germplasm will be loaded into a study as test entries. You have the option to specify check entries by right-clicking on the entry type and selecting Check Entry. Experimental designs, like augmented and p-rep designs, require you to specify checks. In this study we will use an incomplete block design, where specifying checks is optional since checks do not impact the experimental design.
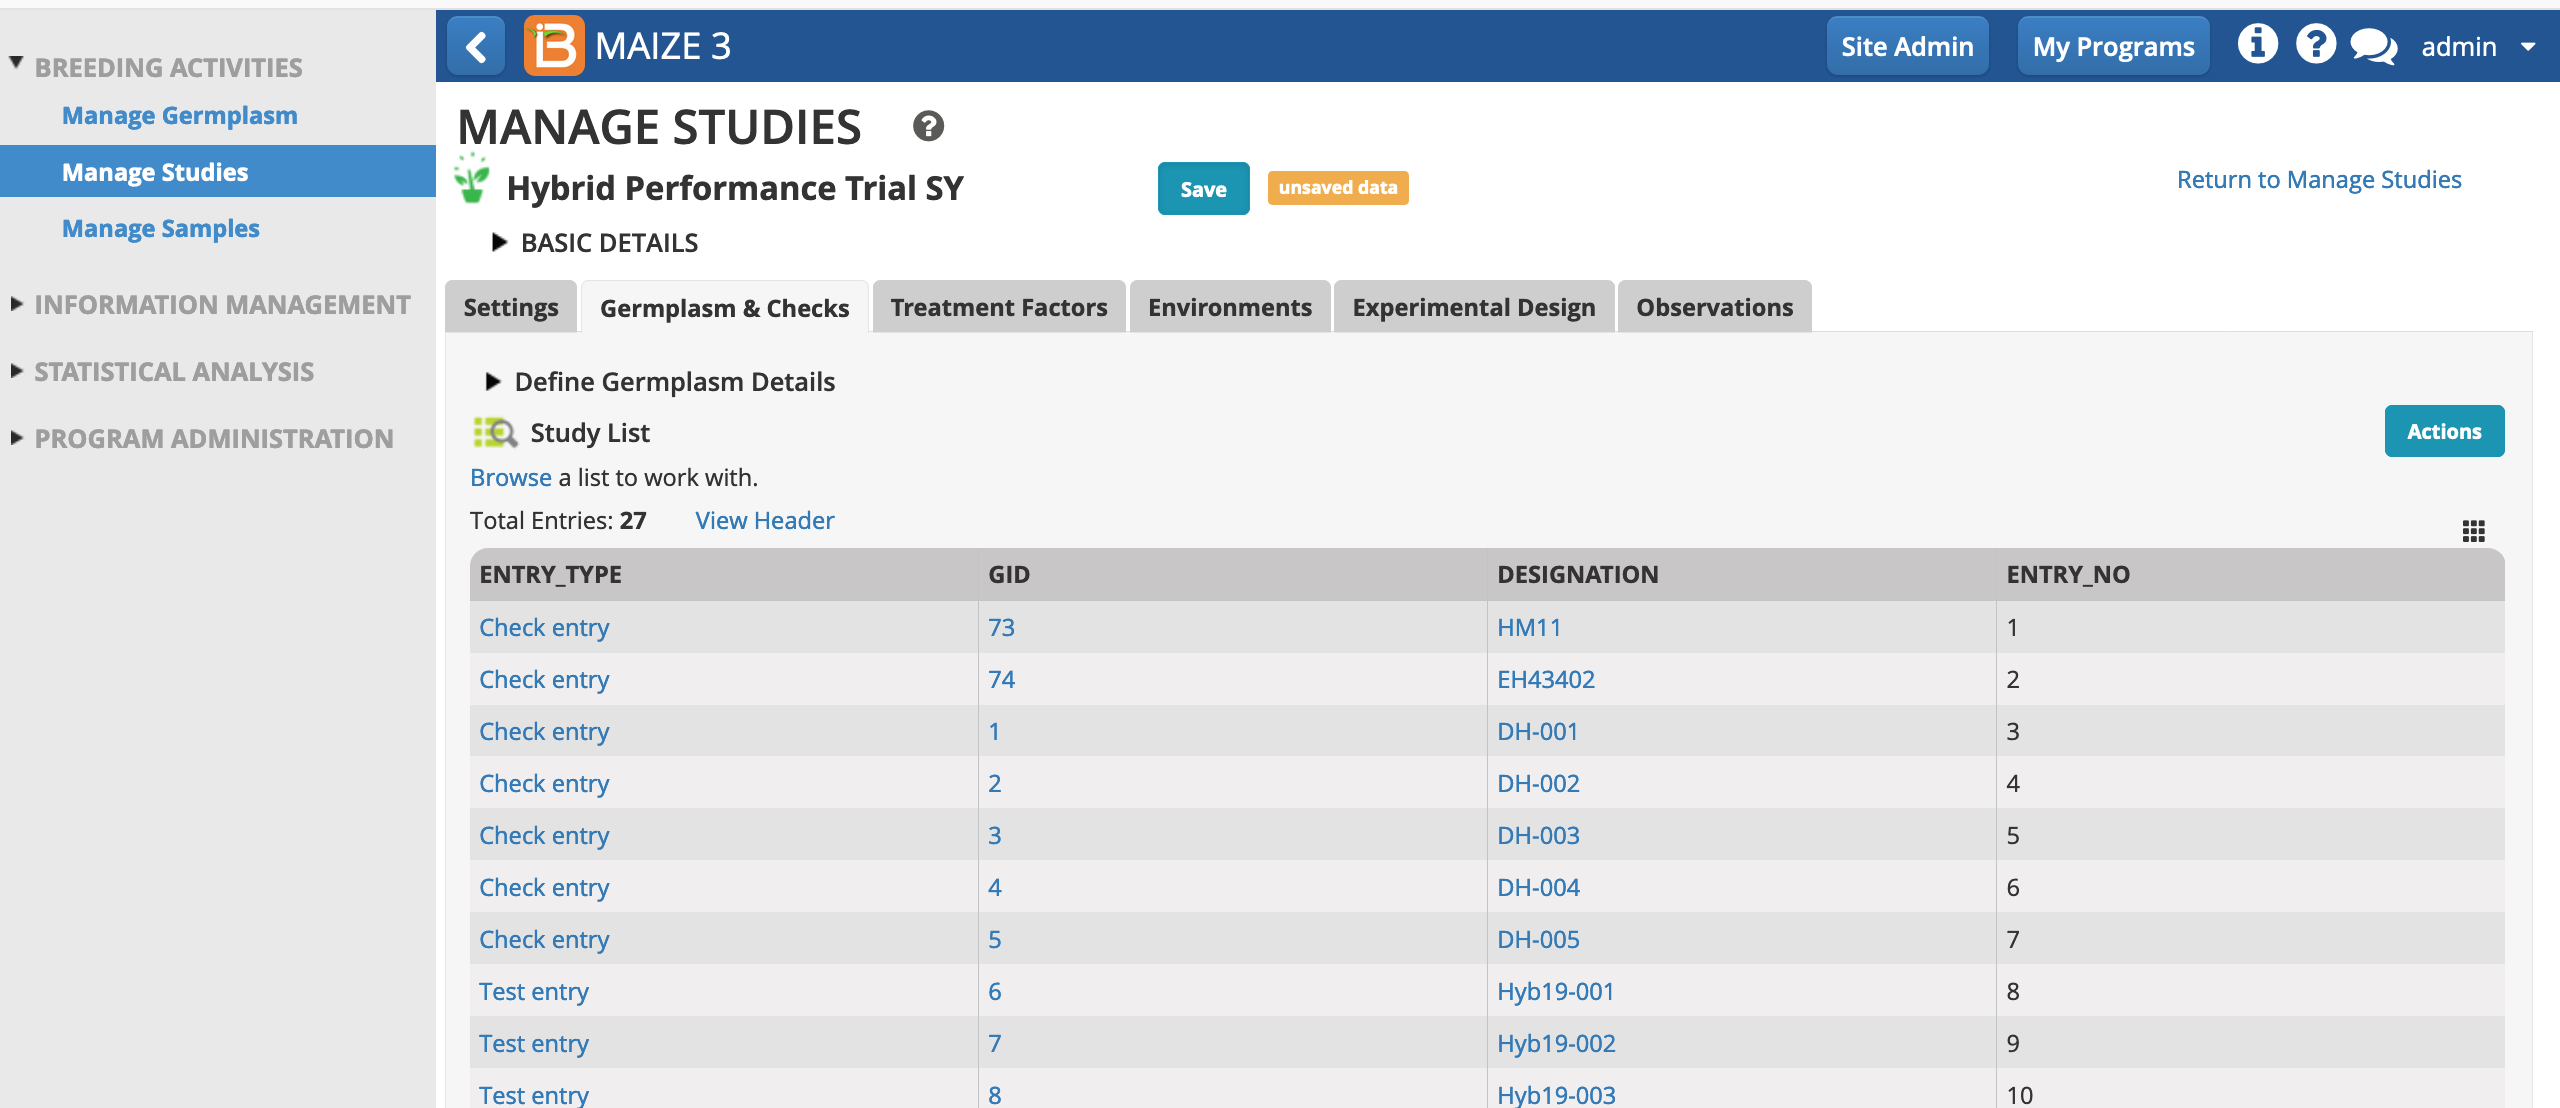
Additional Activity: You will remember from the previous tutorial series that HM11 and EH43402 are released hybrid varieties and DH-001, 002, 003, 004 & 005 are the doubled haploid parents. These 7 entries can be considered checks against which the performance of the 20 new hybrids (test entries) will be compared. For additional clarity, edit the ENTRY_TYPE of these 7 entries to be Check Entries.
- Save the study.
Environments
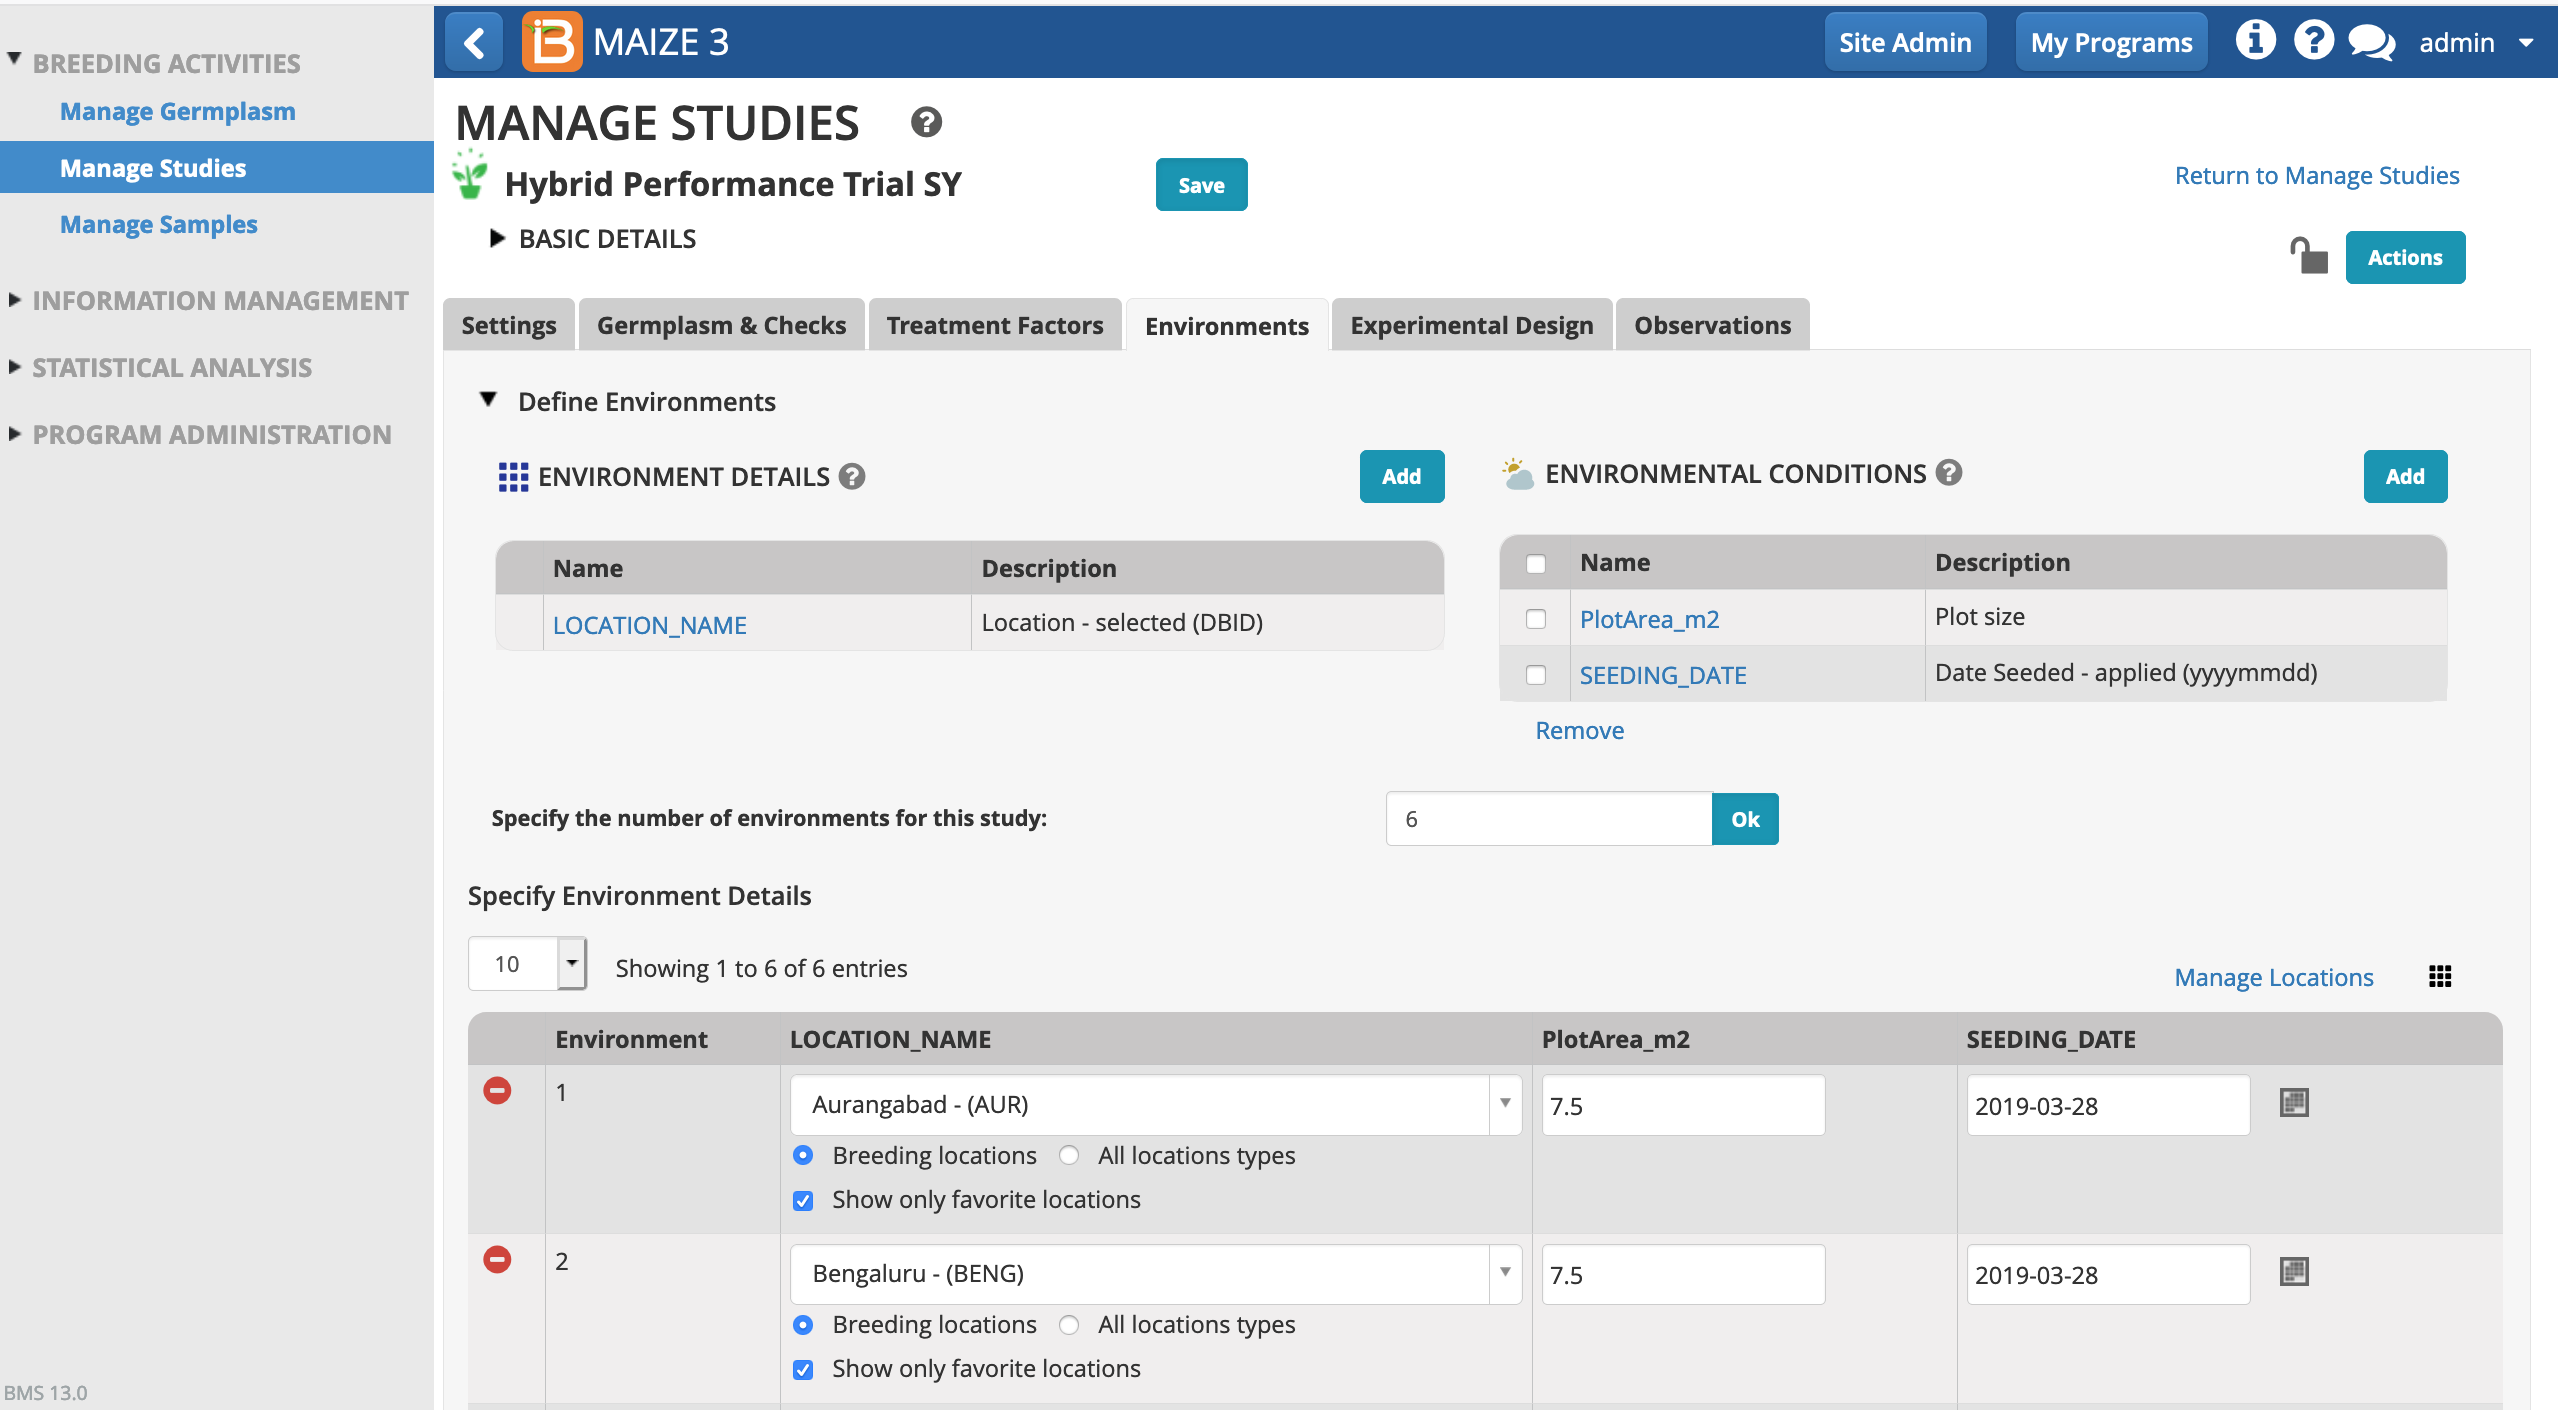
- Open the Environments tab and review details. (This study doesn't include Treatment Factors, so this tab can be ignored.) The template has pre-populated the Environments tab with information about 6 study locations across India. We will re-use the 6 environments and plot sizes from the template. We will also re-use the seeding date from the template - which would be unlikely in a real world scenario but will later match up with the fictional example data.
Experimental Design
- Open the Experimental Design tab.
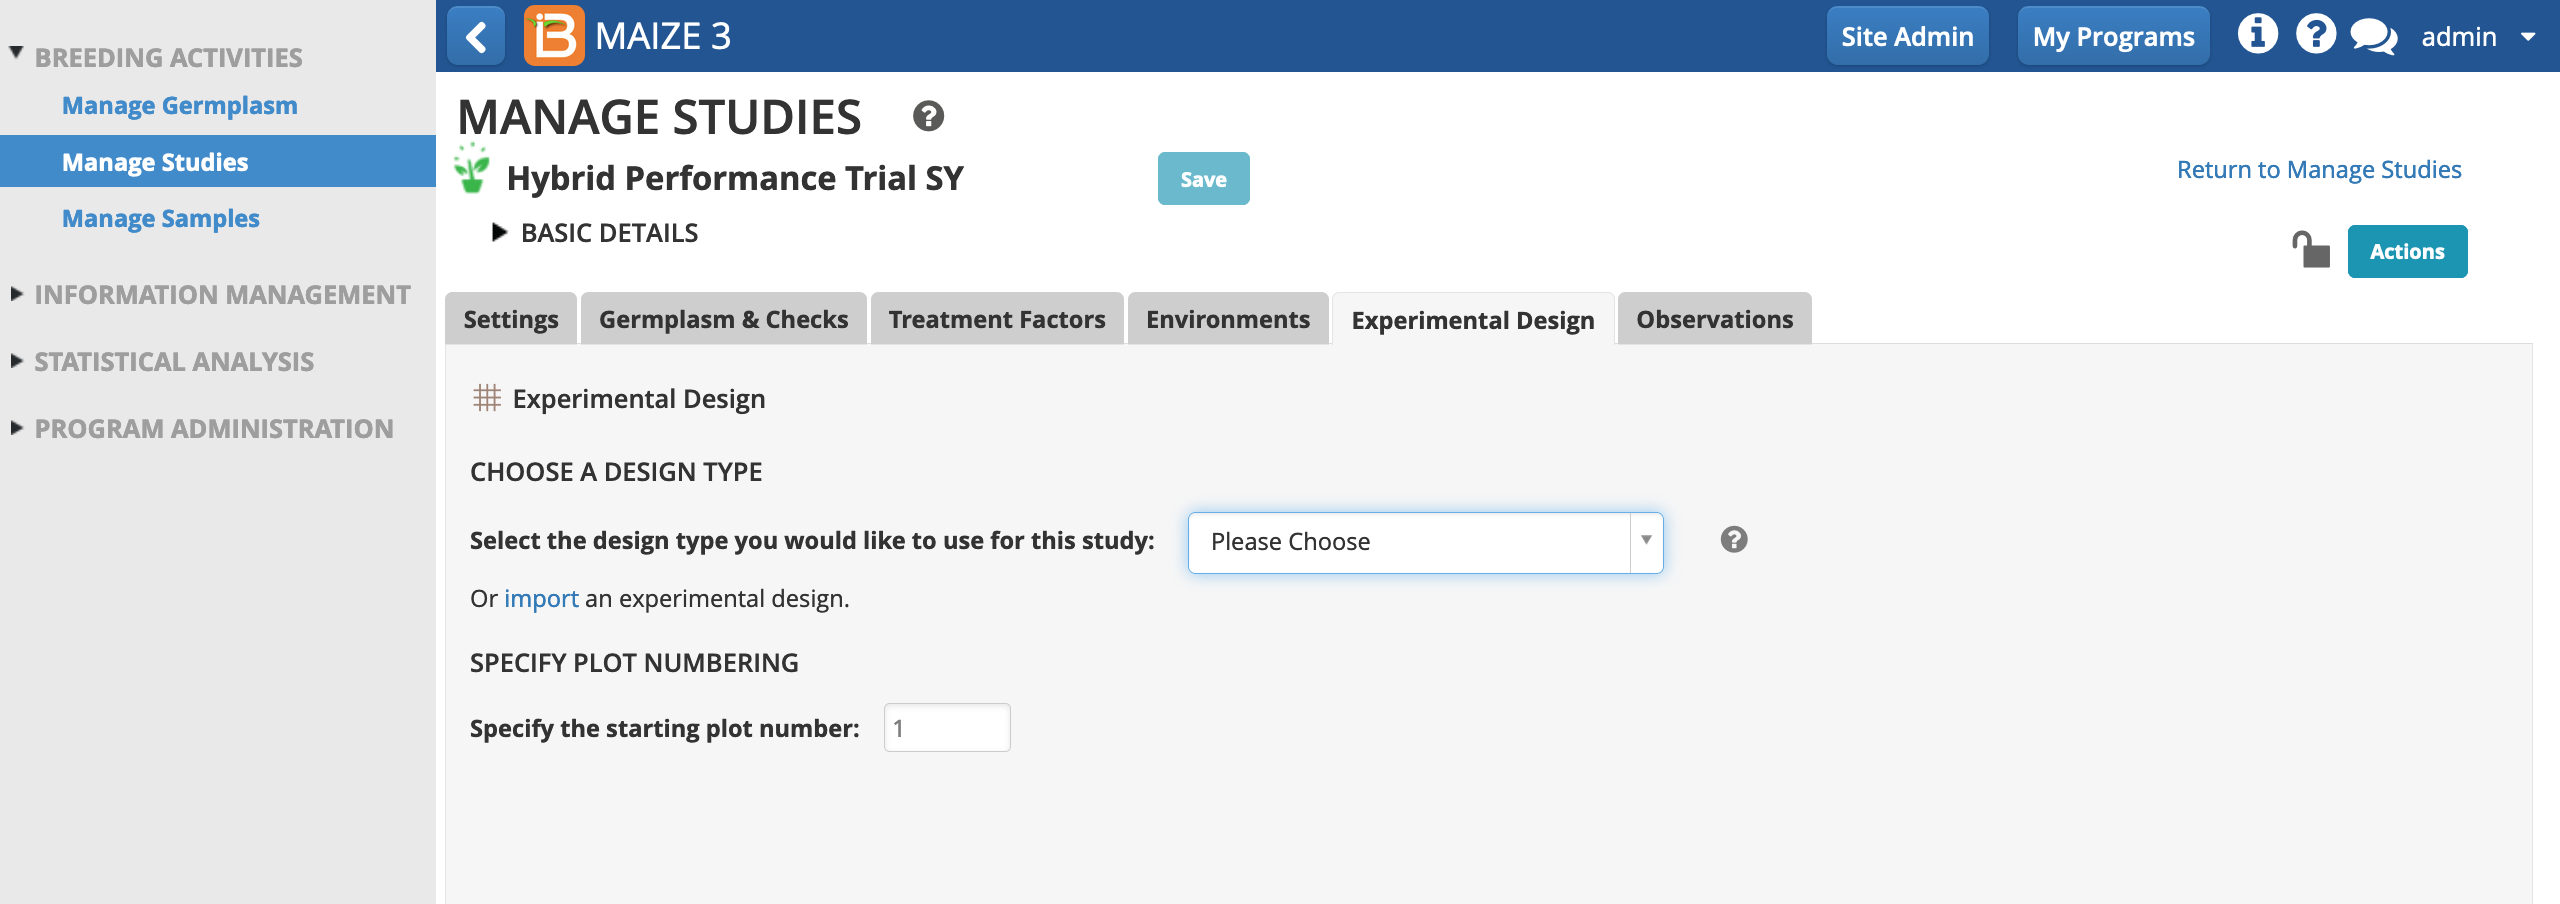
Resolvable Incomplete Block Design Note
Resolvable incomplete block design can be used when there is variability within the field to increase the precision of the experiment. Small blocks are more homogeneous than large blocks, hence experimental error is lower. A resolvable incomplete block design can be more precise than a randomized complete block design by reducing the error sum of square and helping to detect small treatment differences. Resolvable incomplete block designs can also be analyzed as randomized complete block designs. Resolvable incomplete block designs can only be generated with a non-prime number of germplasm entries, because block size must be greater than 1 and a common denominator of the number of germplasm entries. (see more Singh, P. & Bhatia, D. 2017. Incomplete block designs for plant breeding experiments. Agricultural Research Journal. 10.5958/2395-146X.2017.00119.3)
- Choose Resolvable Incomplete Block Design (aka Alpha Lattice). Specify 3 replications and a block size of 3. Generate Design.

Observations
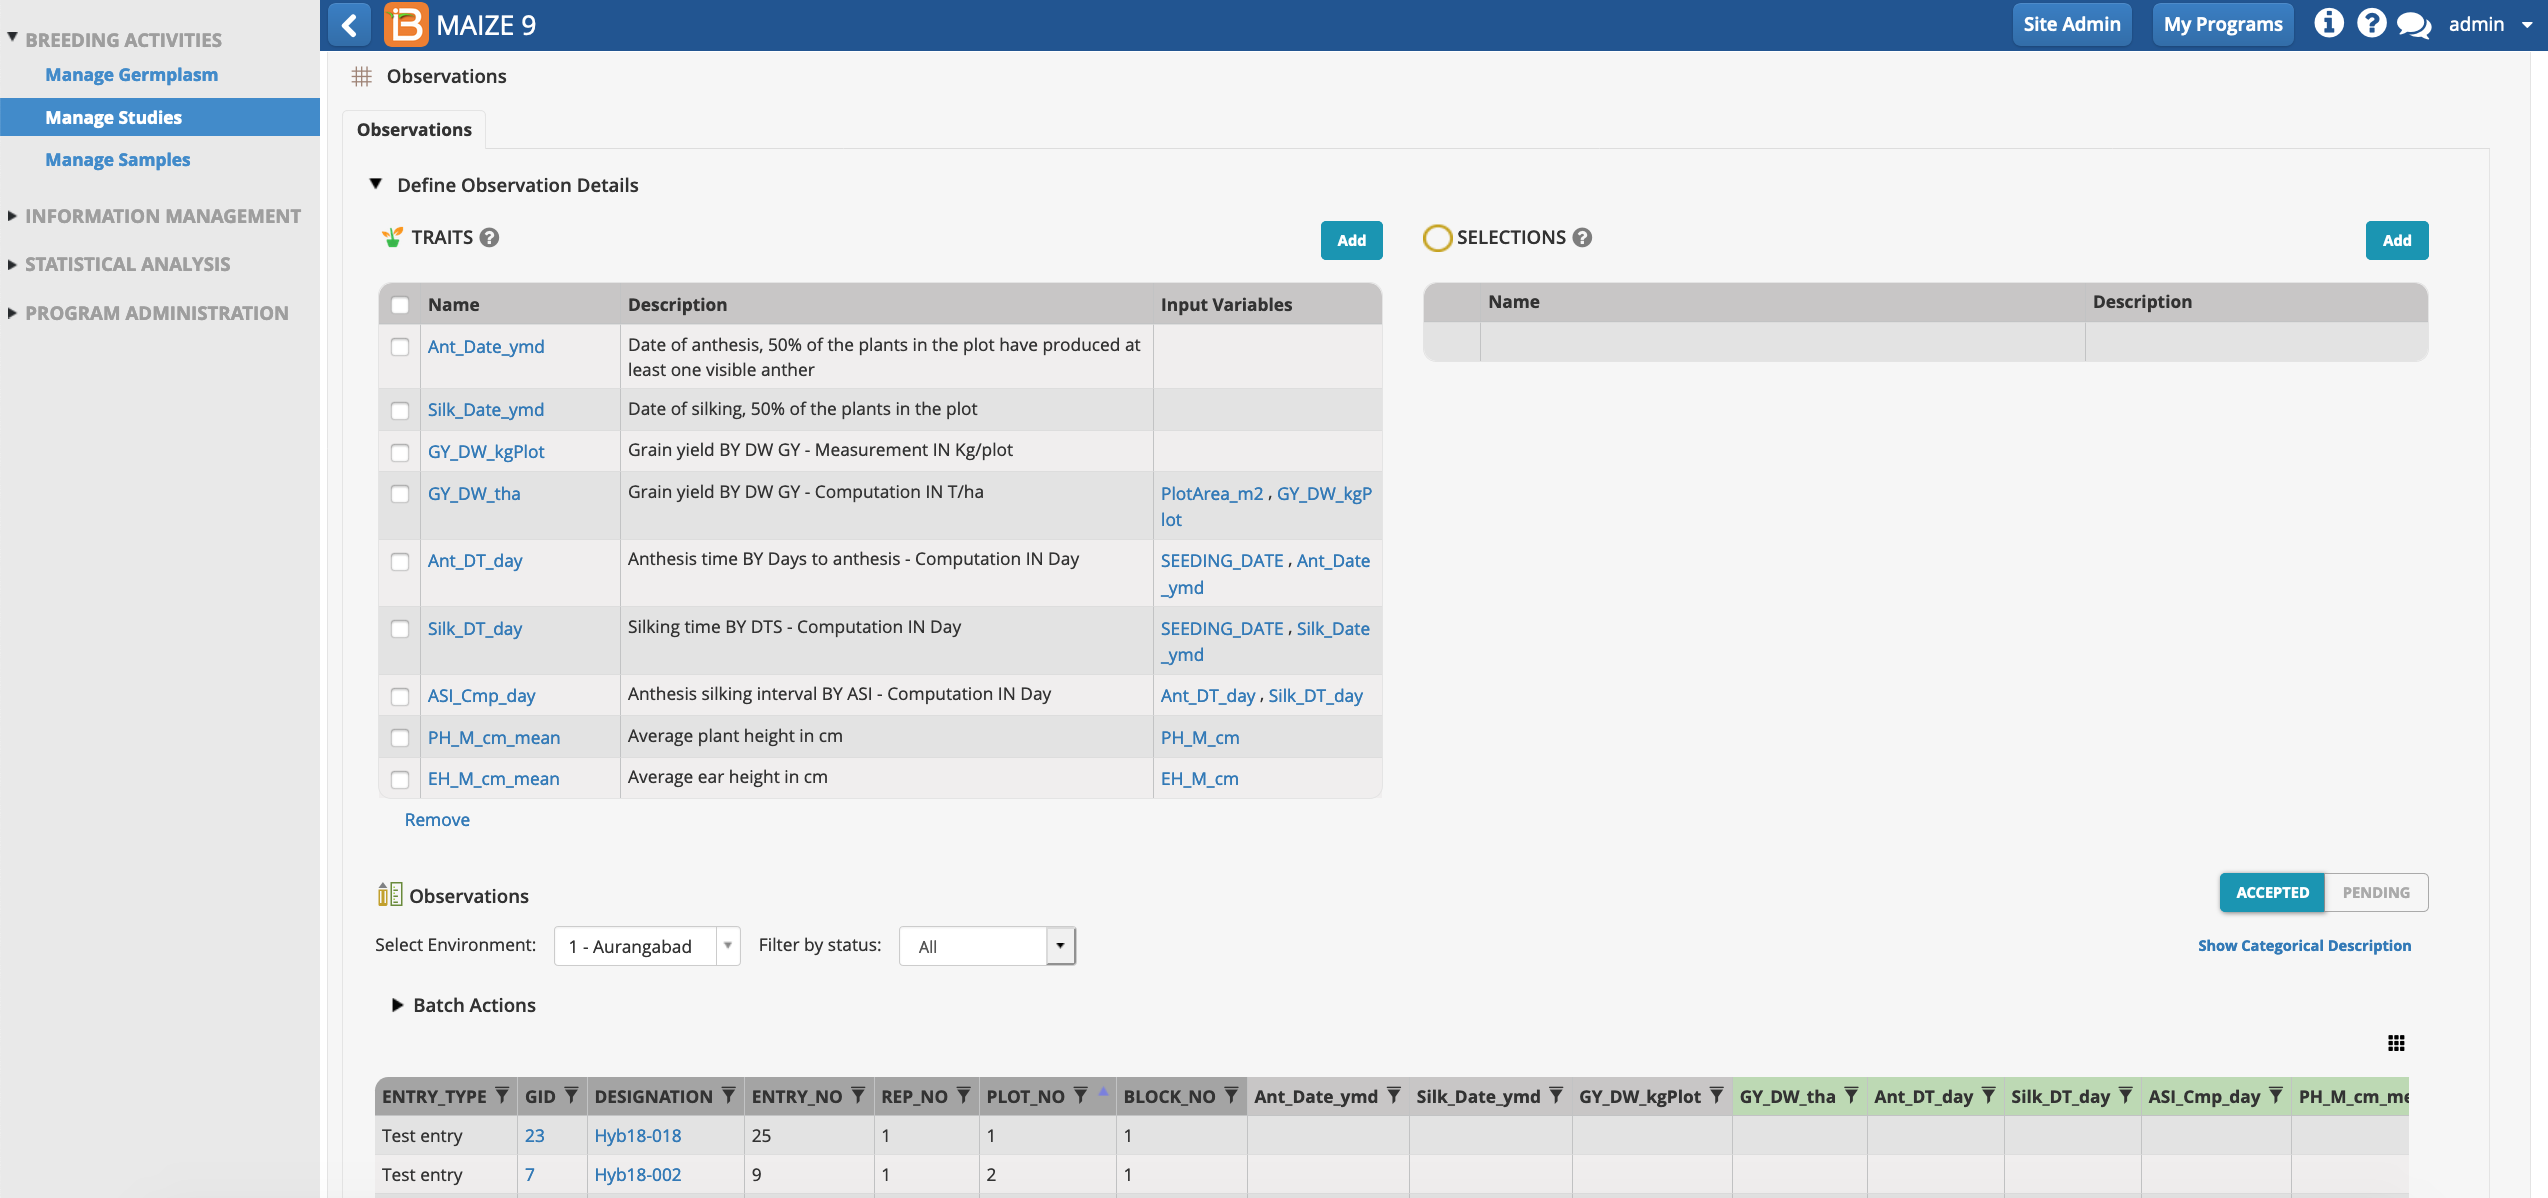
Once the design is generated, the observations tab is available for review. The rows of observations table correspond the experimental design units. In this case the observations table will be used to record/calculate the 9 plot-level traits specified by the template. Notice that the first 3 traits are raw data and the last 6 traits are derived from calculations. The derived traits require data from input variables.
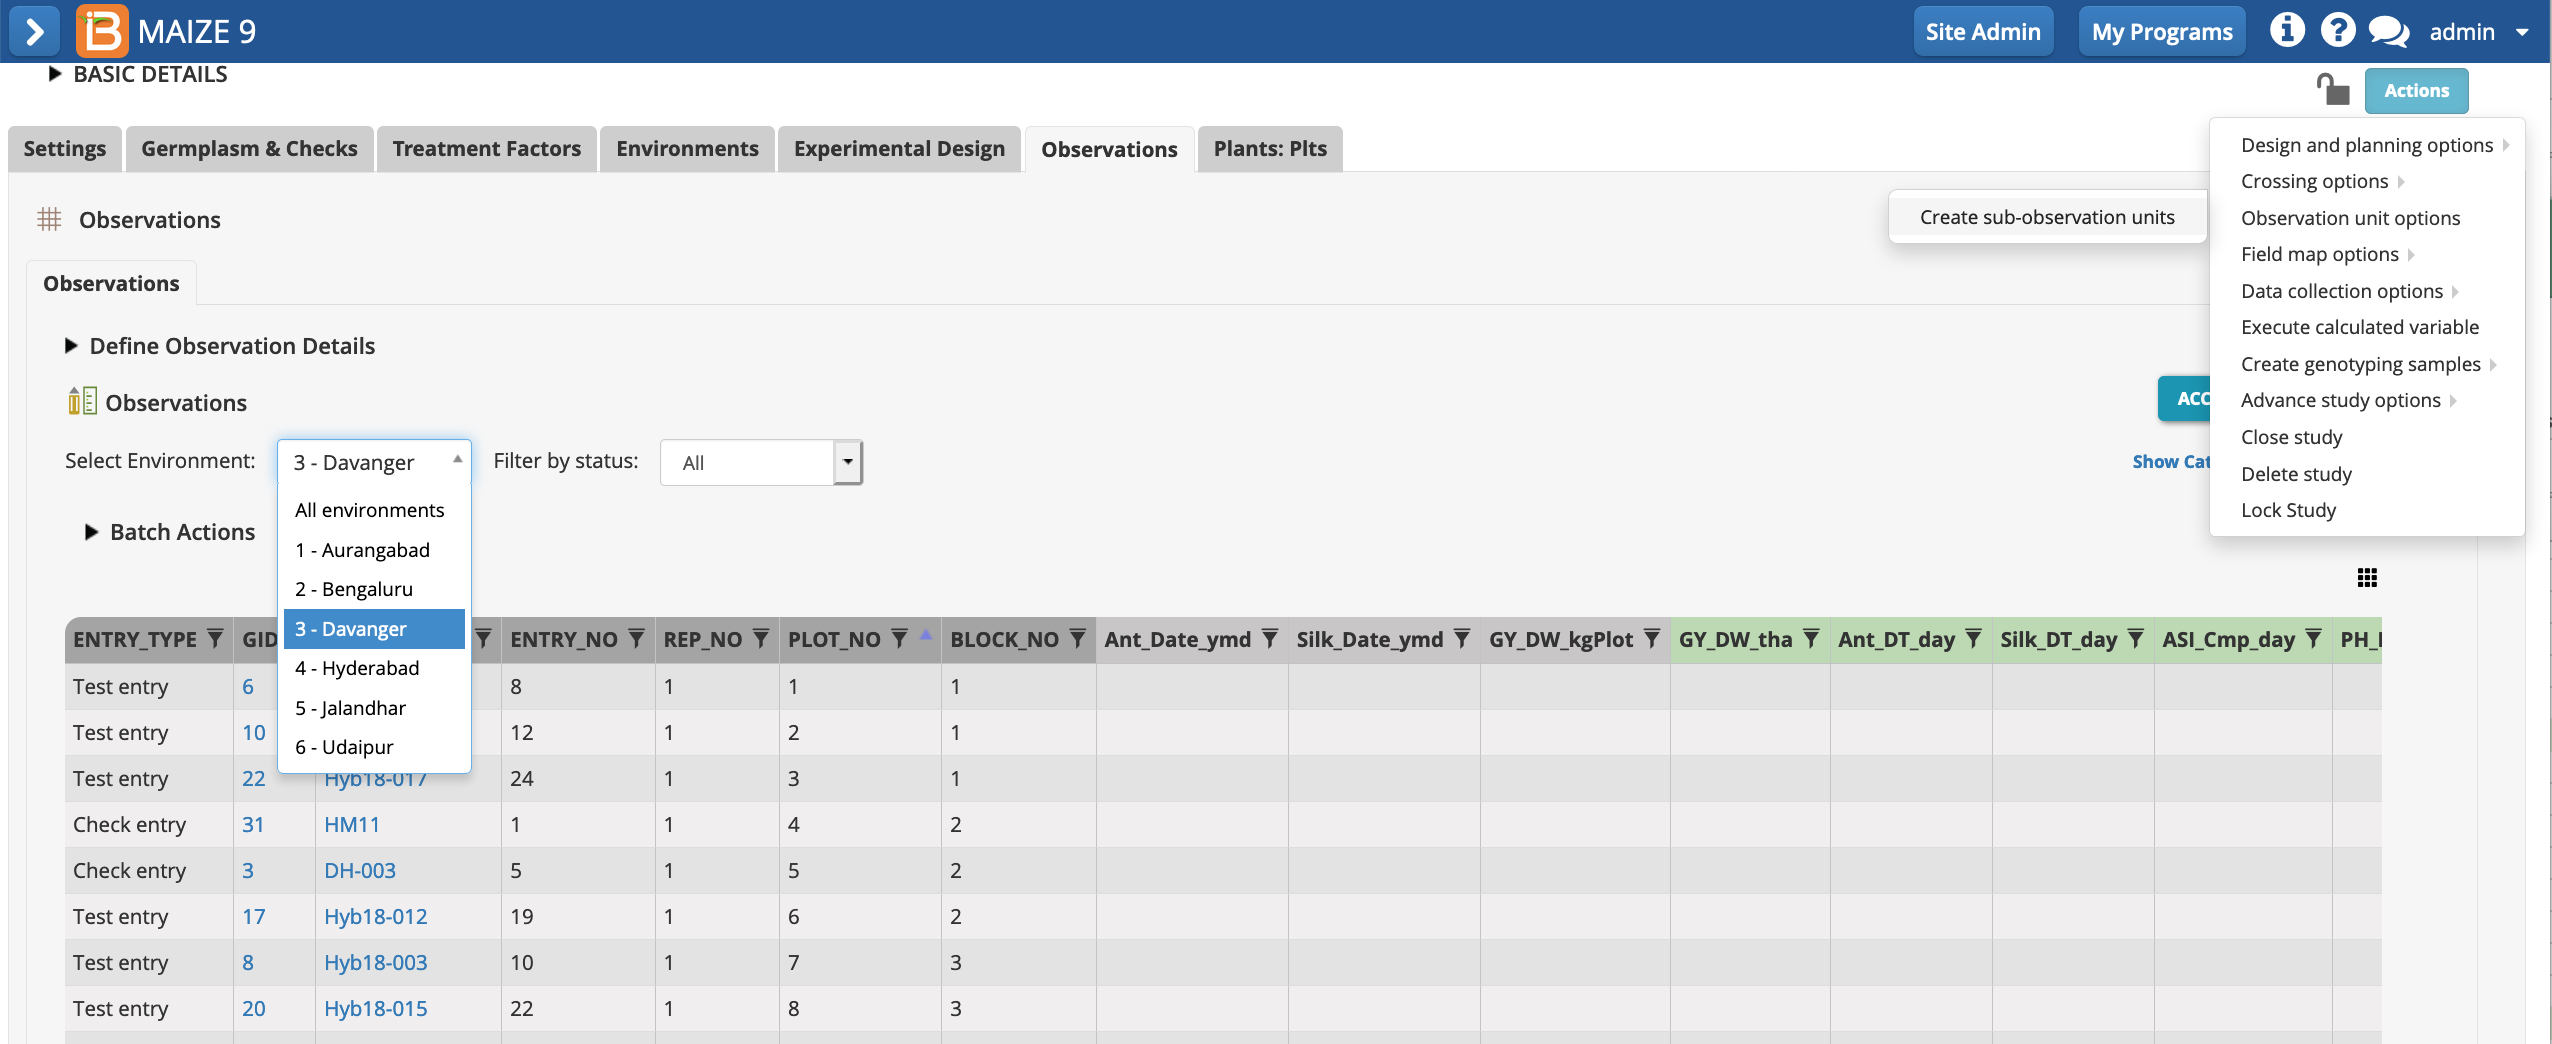
- Focus on the table by collapsing information. Toggle the black triangle by Traits to hide trait details. Toggle the white arrow to hide the left hand main menu. Switch between the 6 locations by selecting the location name.
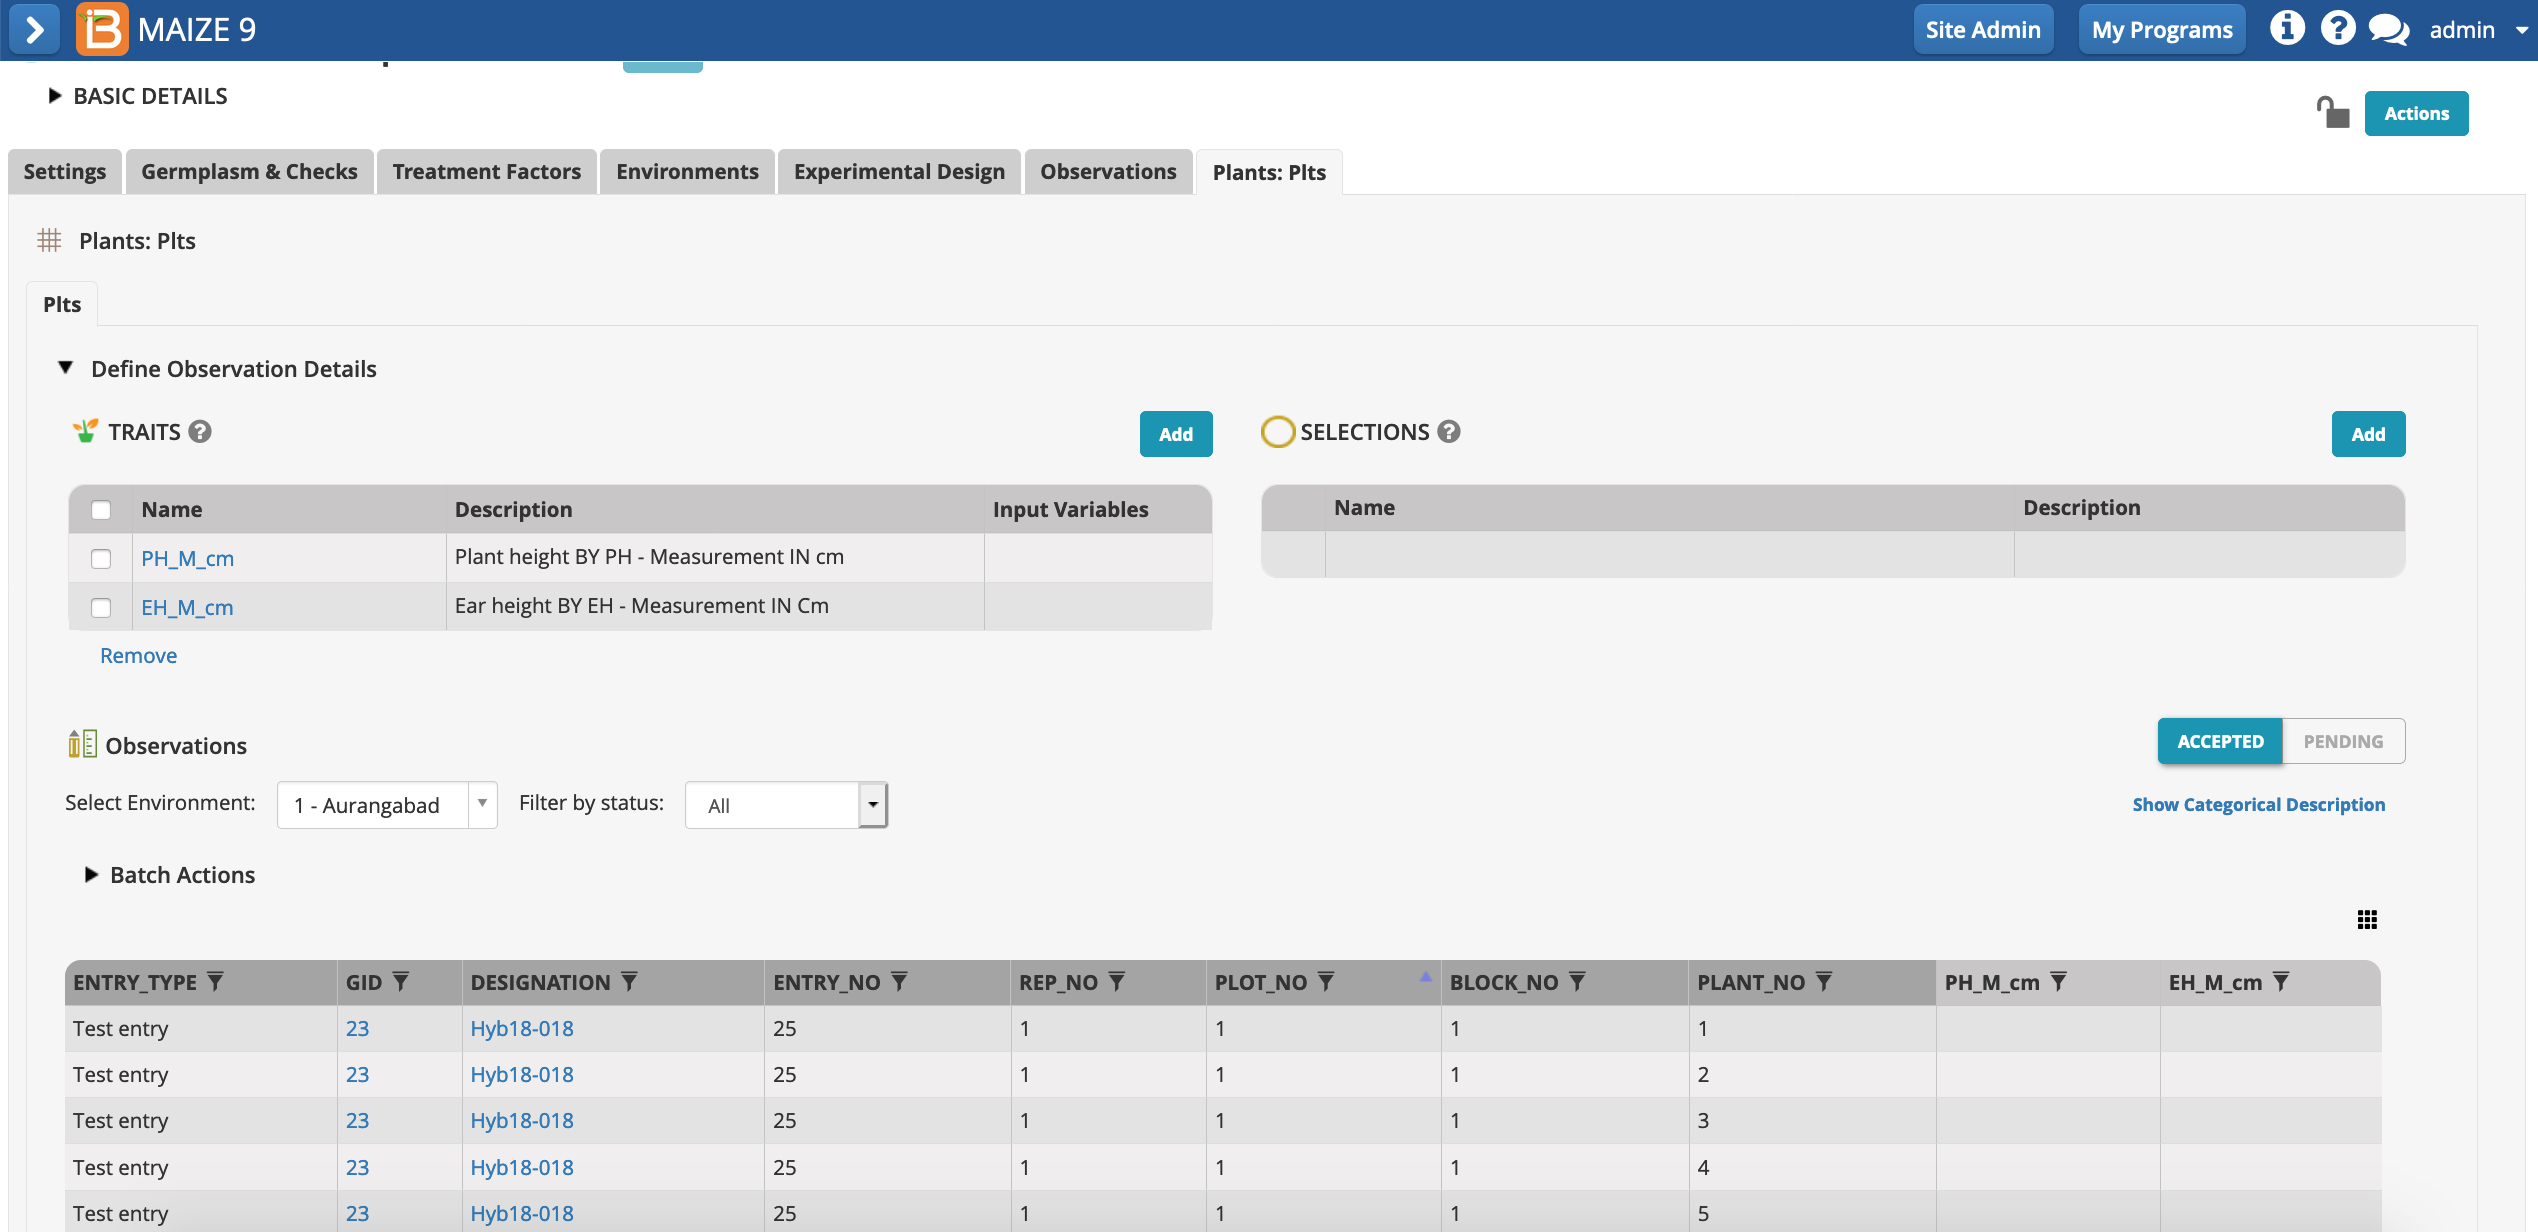
Sub-Observations
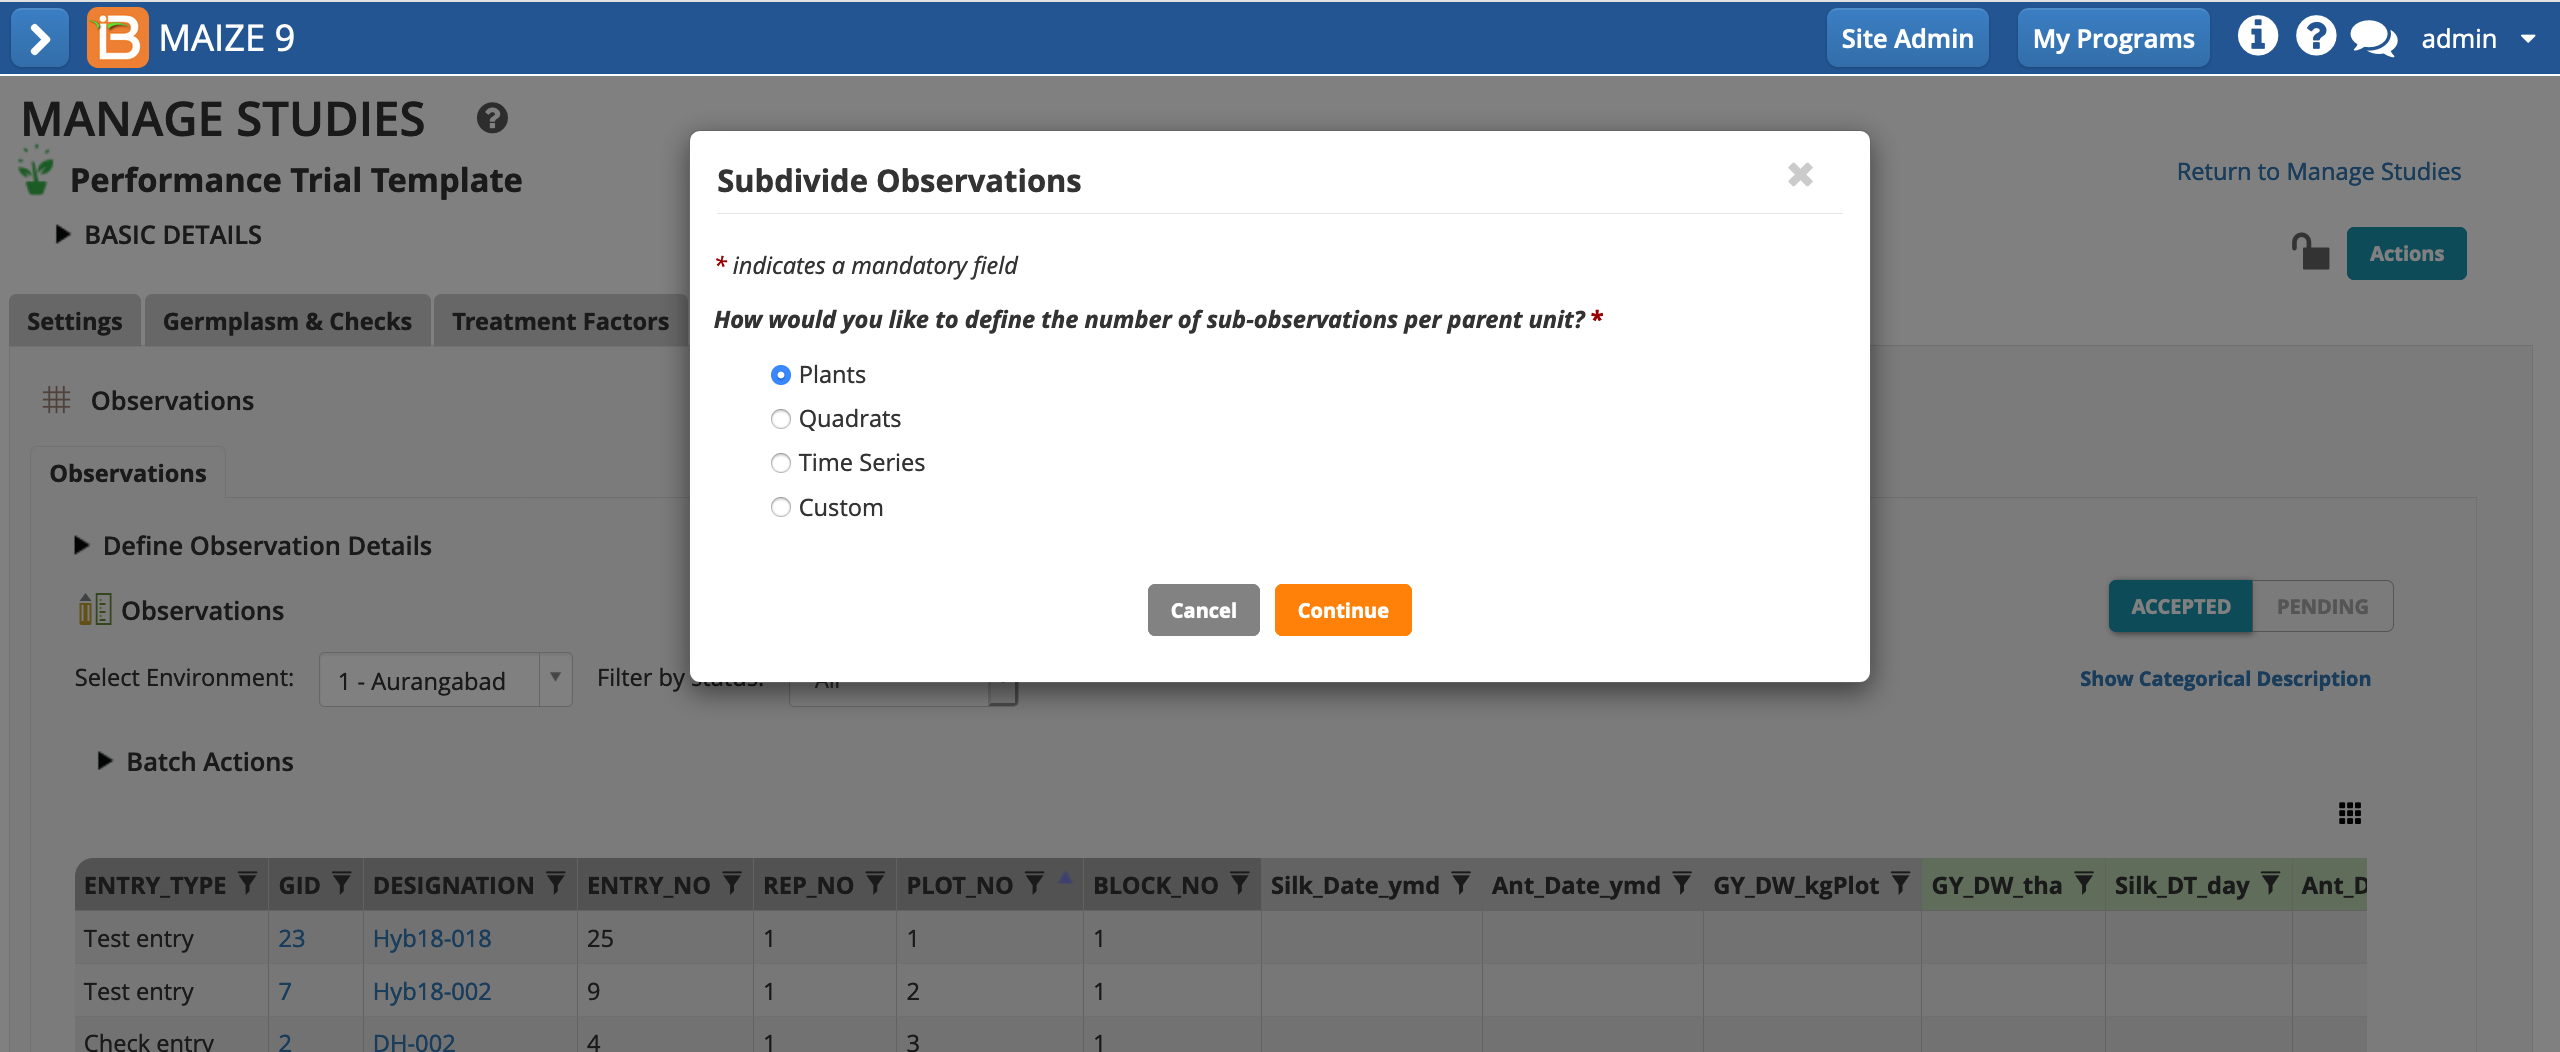
Notice that two of the plot level traits, PH_M_cm_mean & EH_M_cm_mean rely on input variables that are not specified by the template. The input variables, PH_M_cm & EH_M_cm, are repeated measures of individual plants within each plot. Repeated measures require the creation of a sub observation dataset.
- Select "Create sub-observation units" from Actions menu.
- Define your sub-observations as plants. Continue.
- Name the dataset. Specify that a maximum of 5 measurements will be taken per plot. Save.
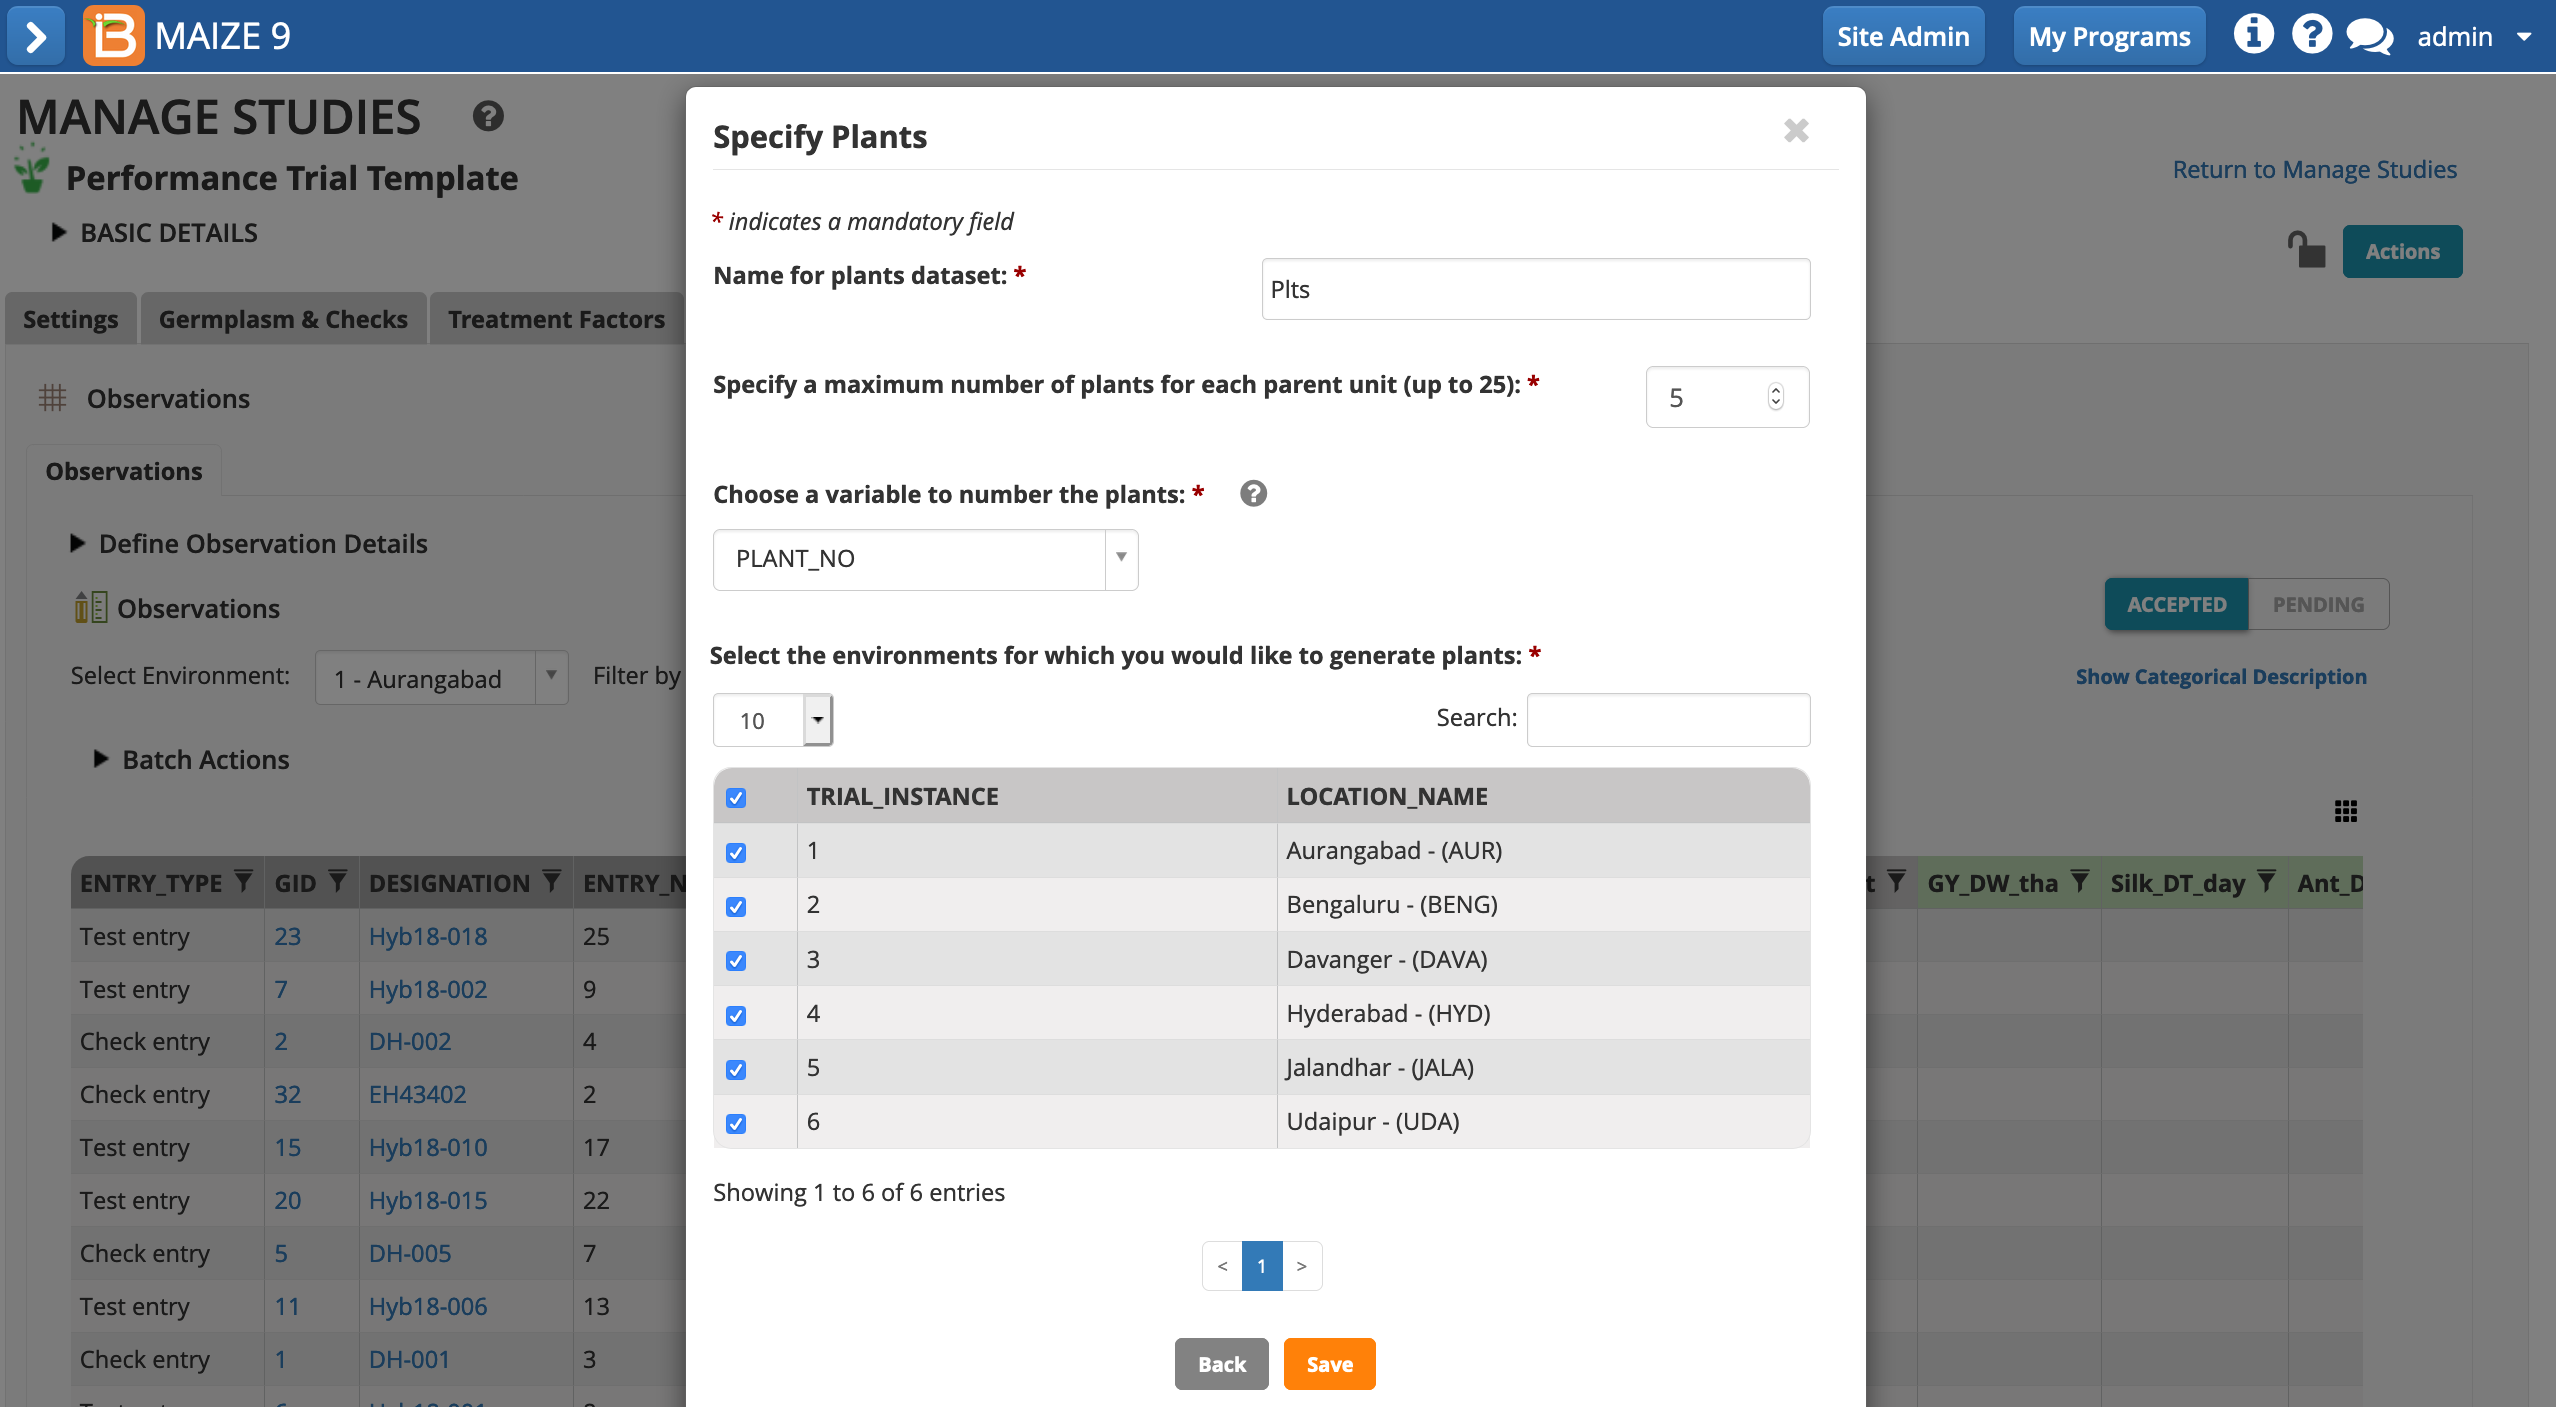
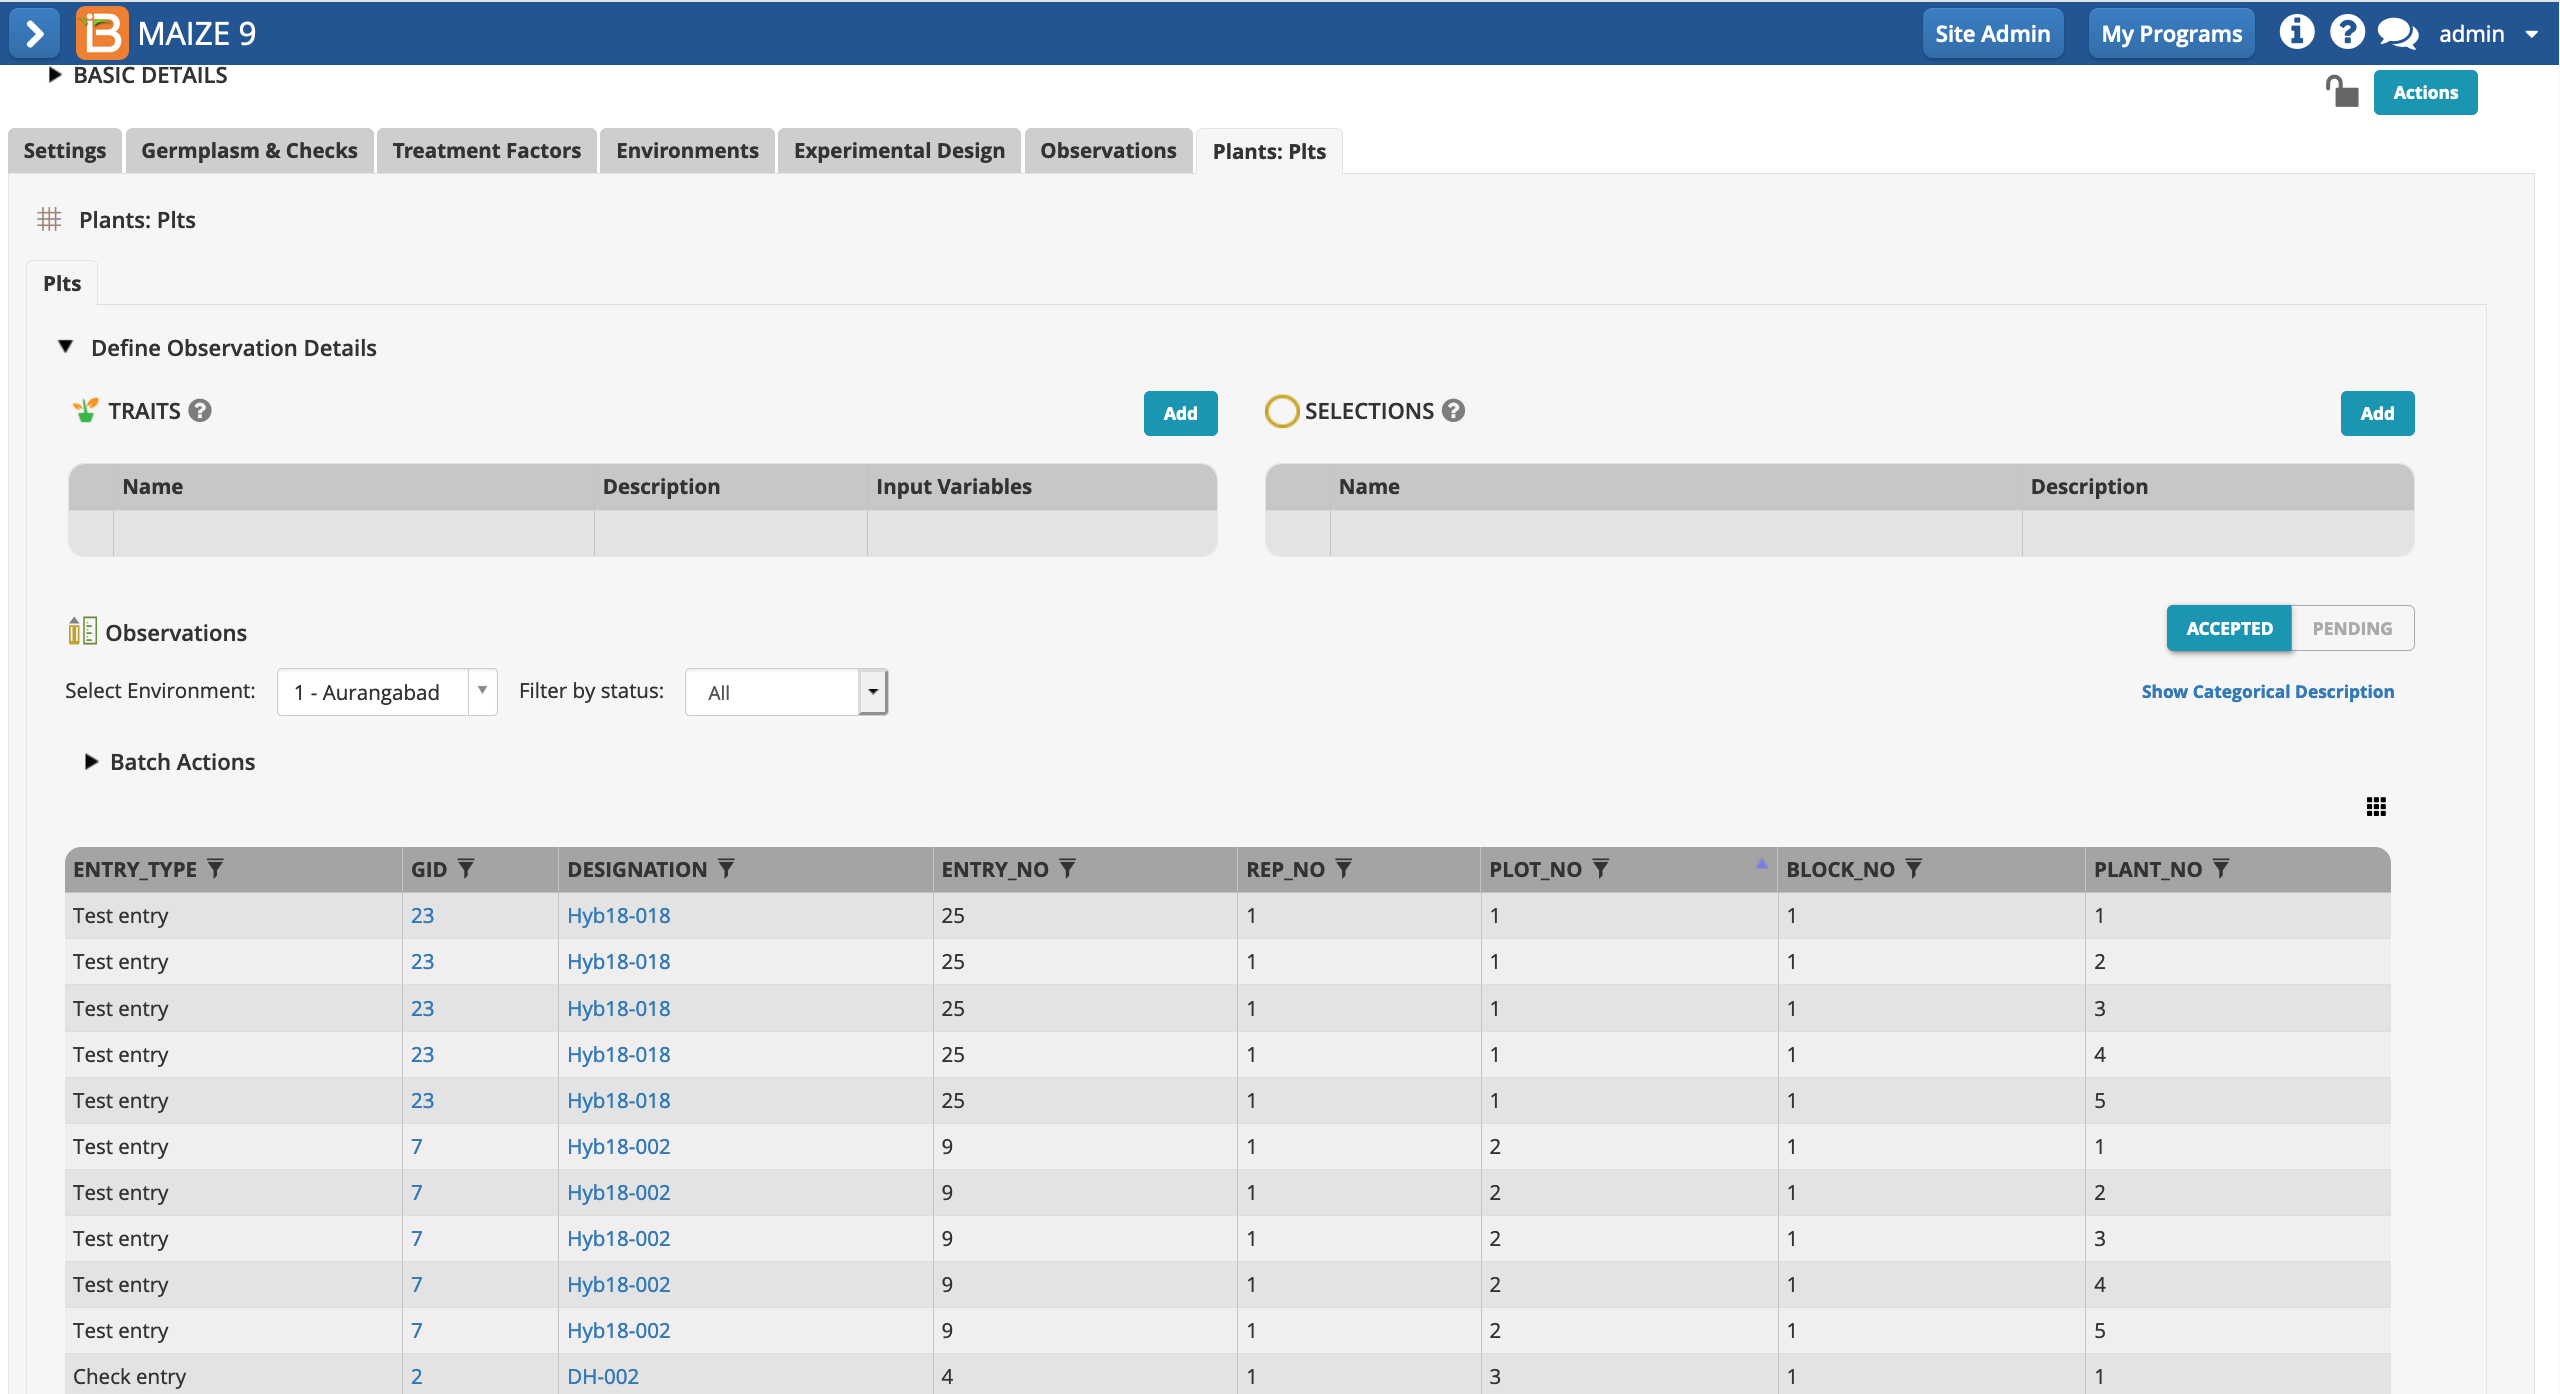
The plants sub-observation dataset is now available to collect 5 measurements per plot.
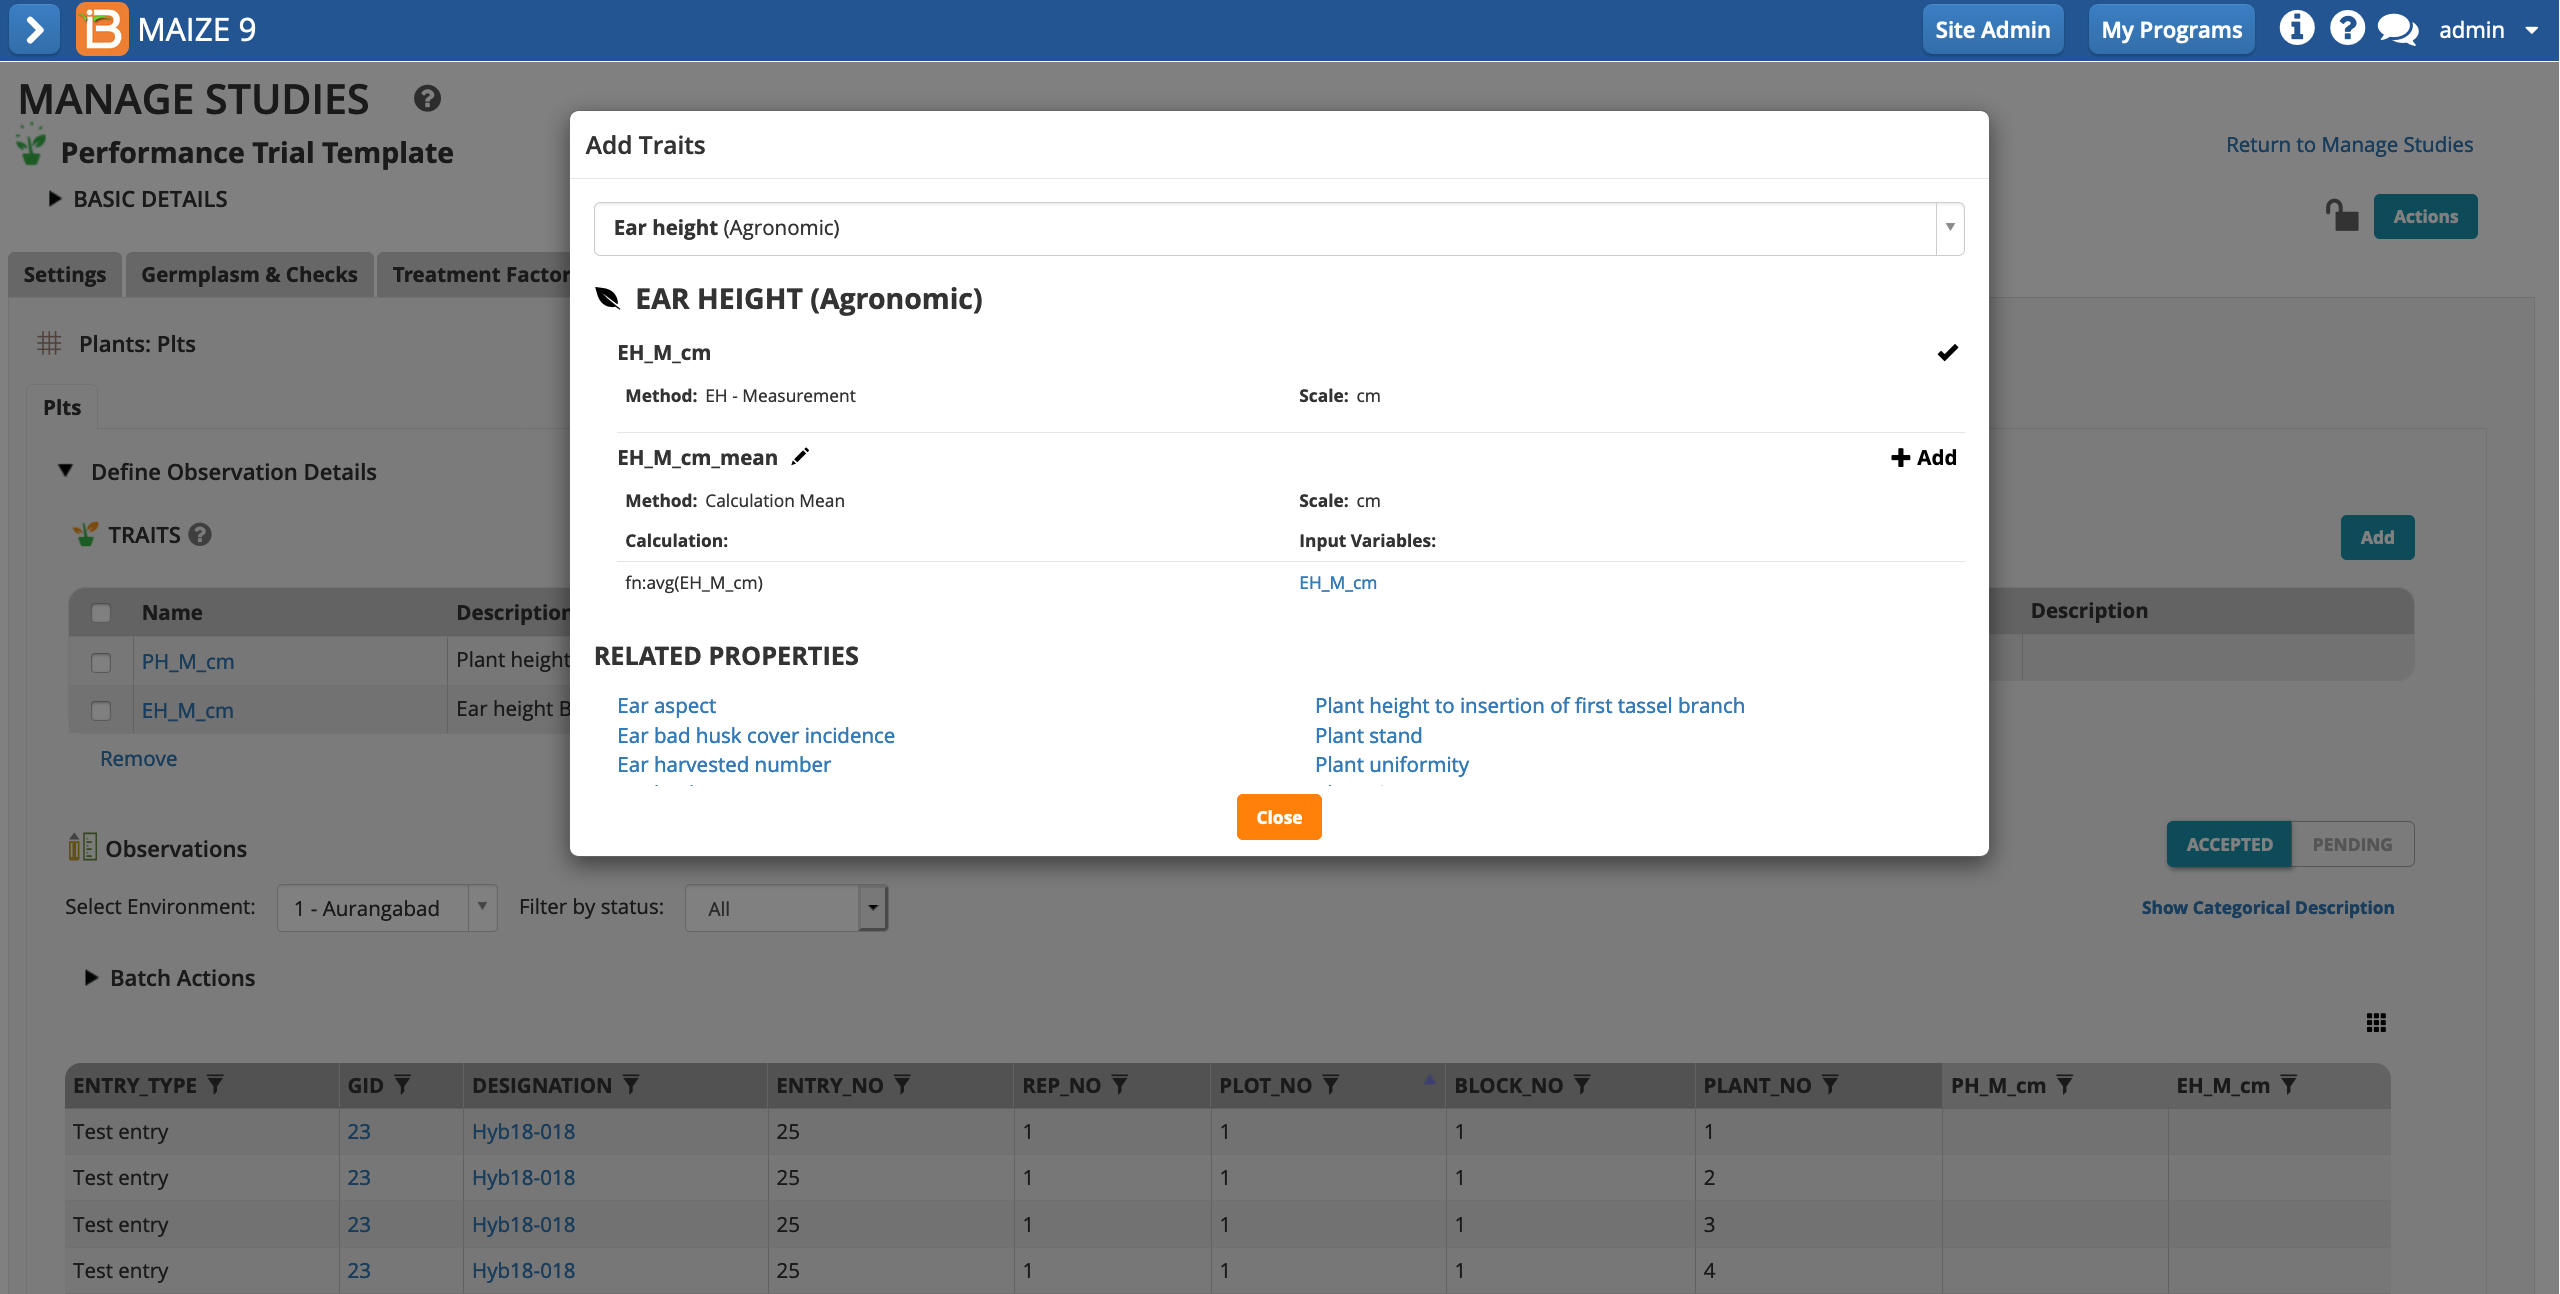
- Select Add Traits.
- Add the traits PH_M_cm & EH_M_cm. The mean of these two traits will be calculated at the plot level in the observations tab.
Conclusion
At this point the hybrid performance trial design is complete for our purposes. We can use this design to create plot and plant labels, create a field map, and collect measurement data at the plot and plant levels. Keep in mind that at any time additional traits and selections can be added any time.