Functionality
- Search and browse germplasm and germplasm lists.
- Build new germplasm lists.
- For import see (Germplasm Import)
- Review, reserve, and withdraw seed inventory (see Manage Inventory)
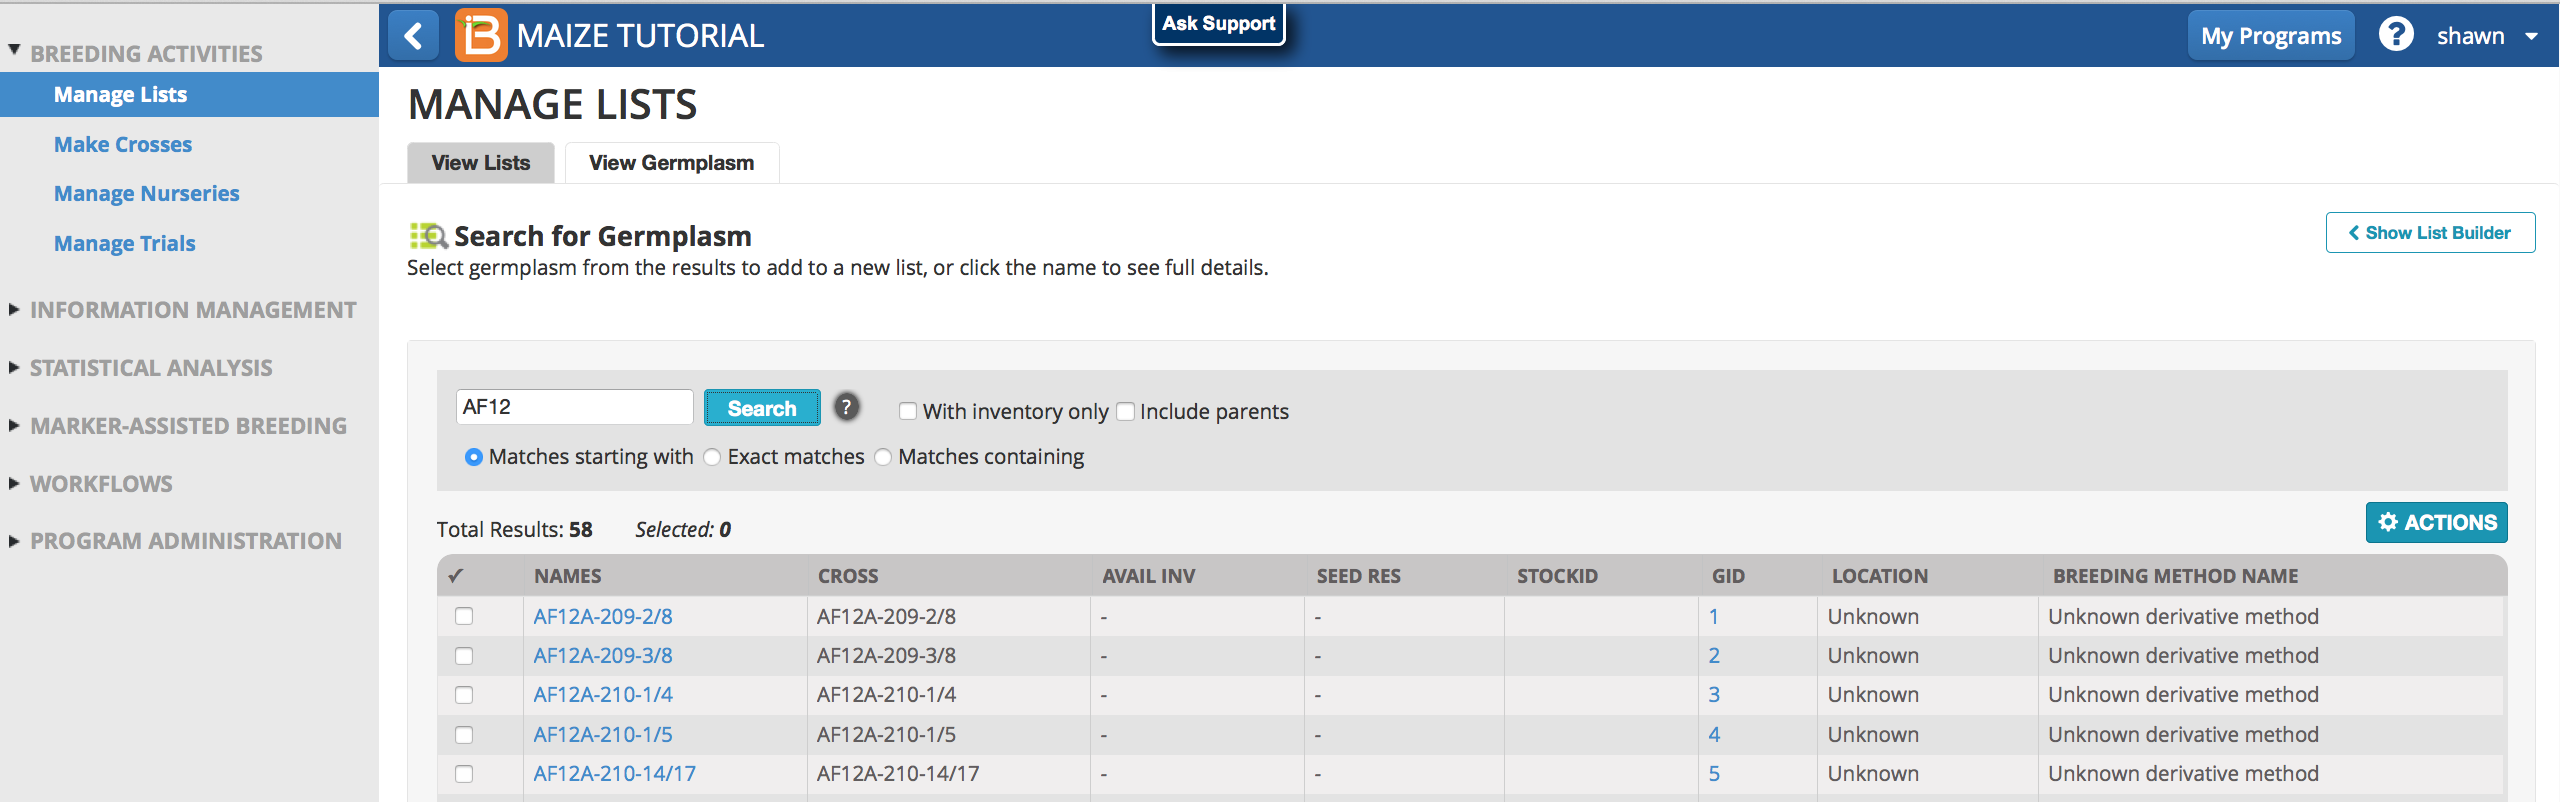
Search Germplasm
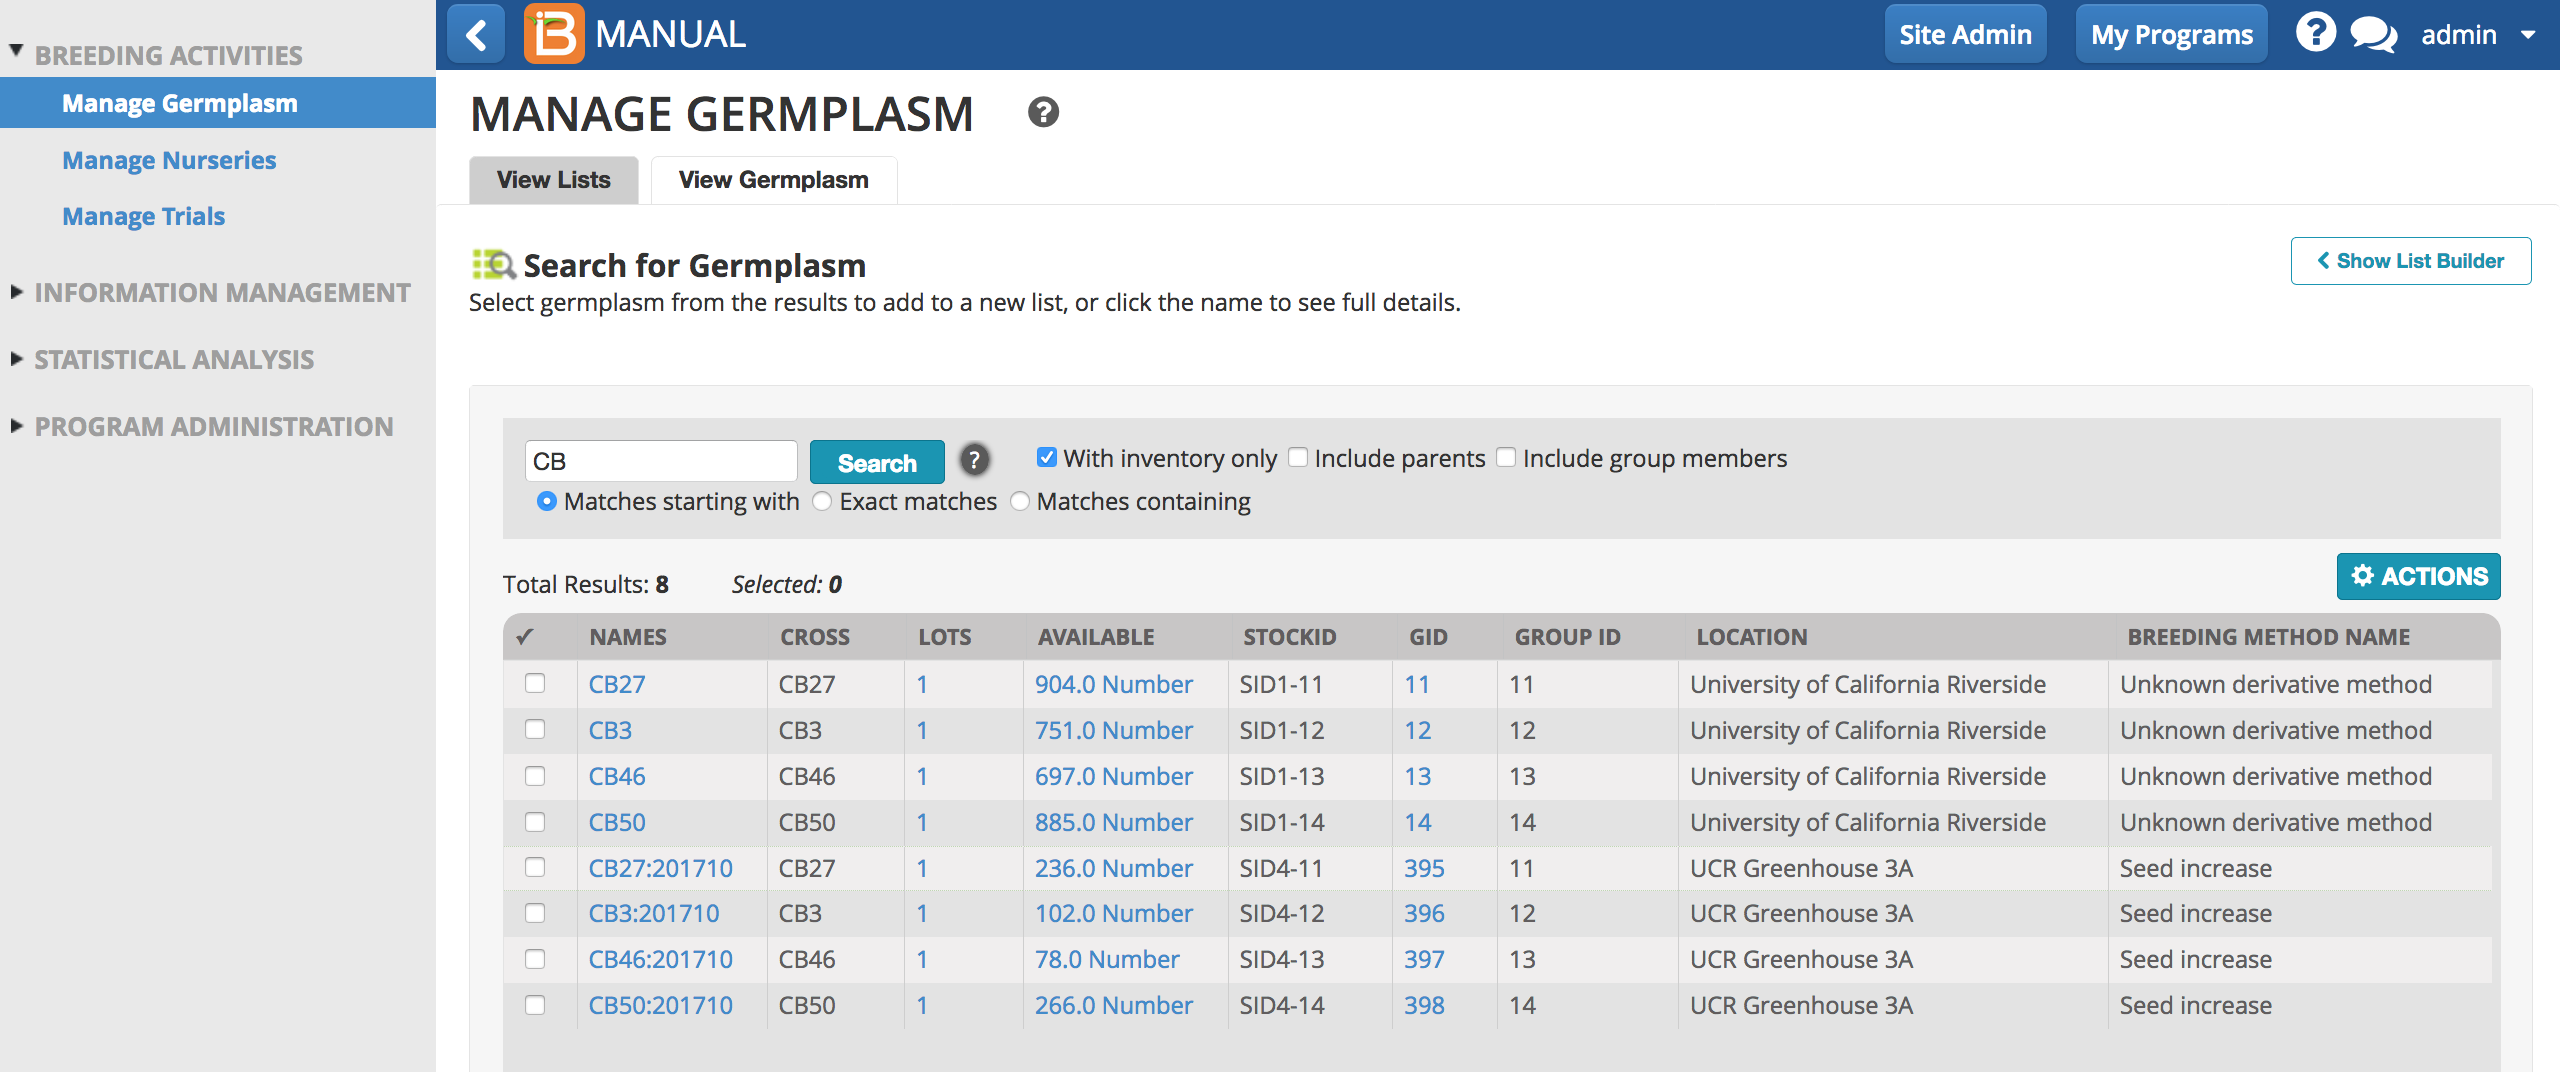
- Search germplasm by partial name, GID, or StockID.
Expand or narrow the search by selecting options.
- With inventory only
- Include parents
- Include group members
- Matches starting with
- Exact matches
- Matches containing
Germplasm Details
- Select individual Designations or GIDs (germplasm identifiers) to reveal germplasm details.
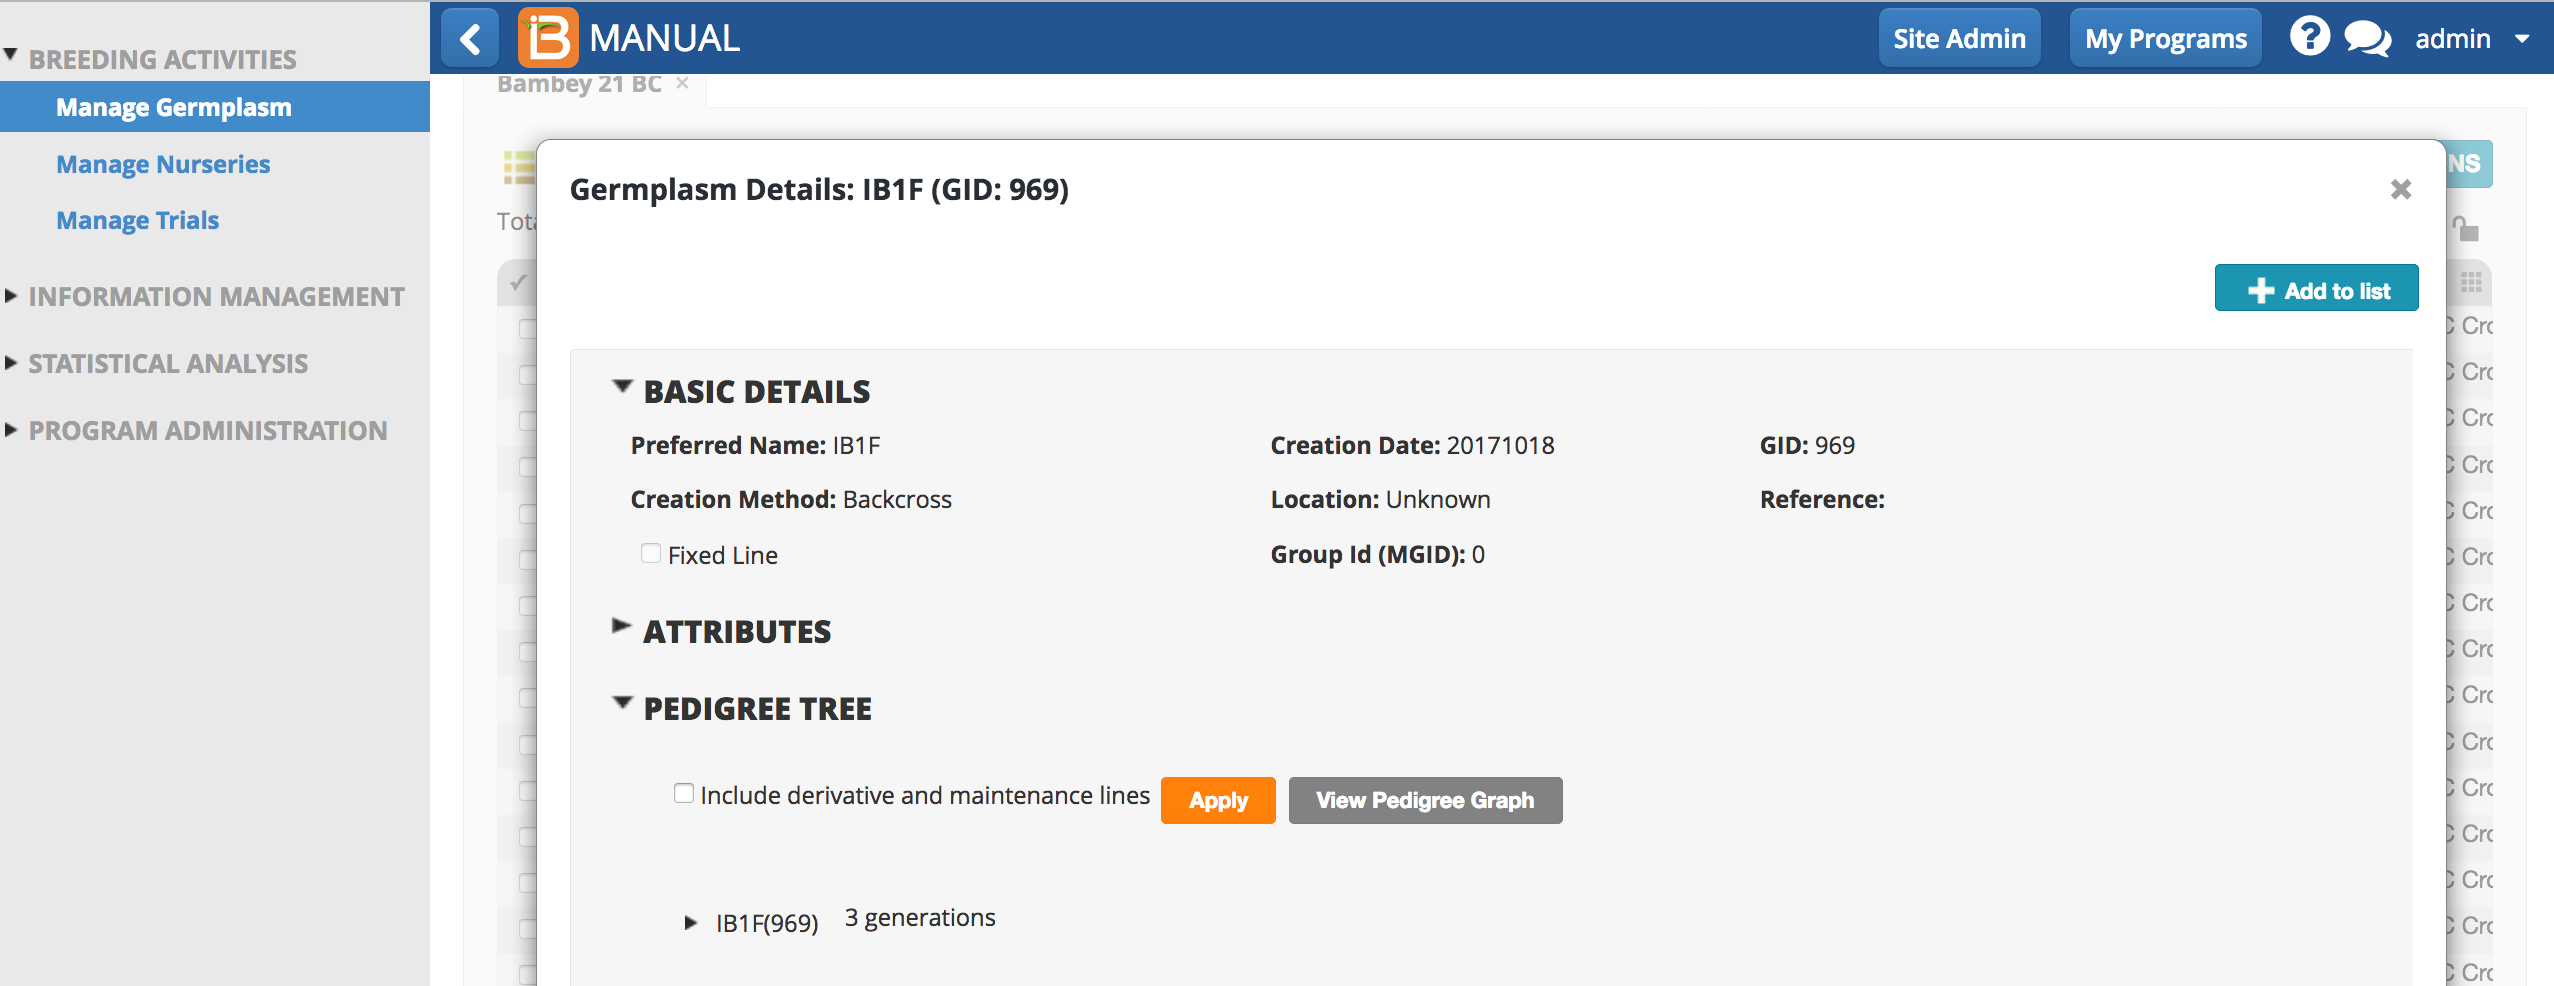
Pedigree
- Expand Pedigree Tree and select View Pedigree Graph. The default view shows only generative steps in the pedigree.
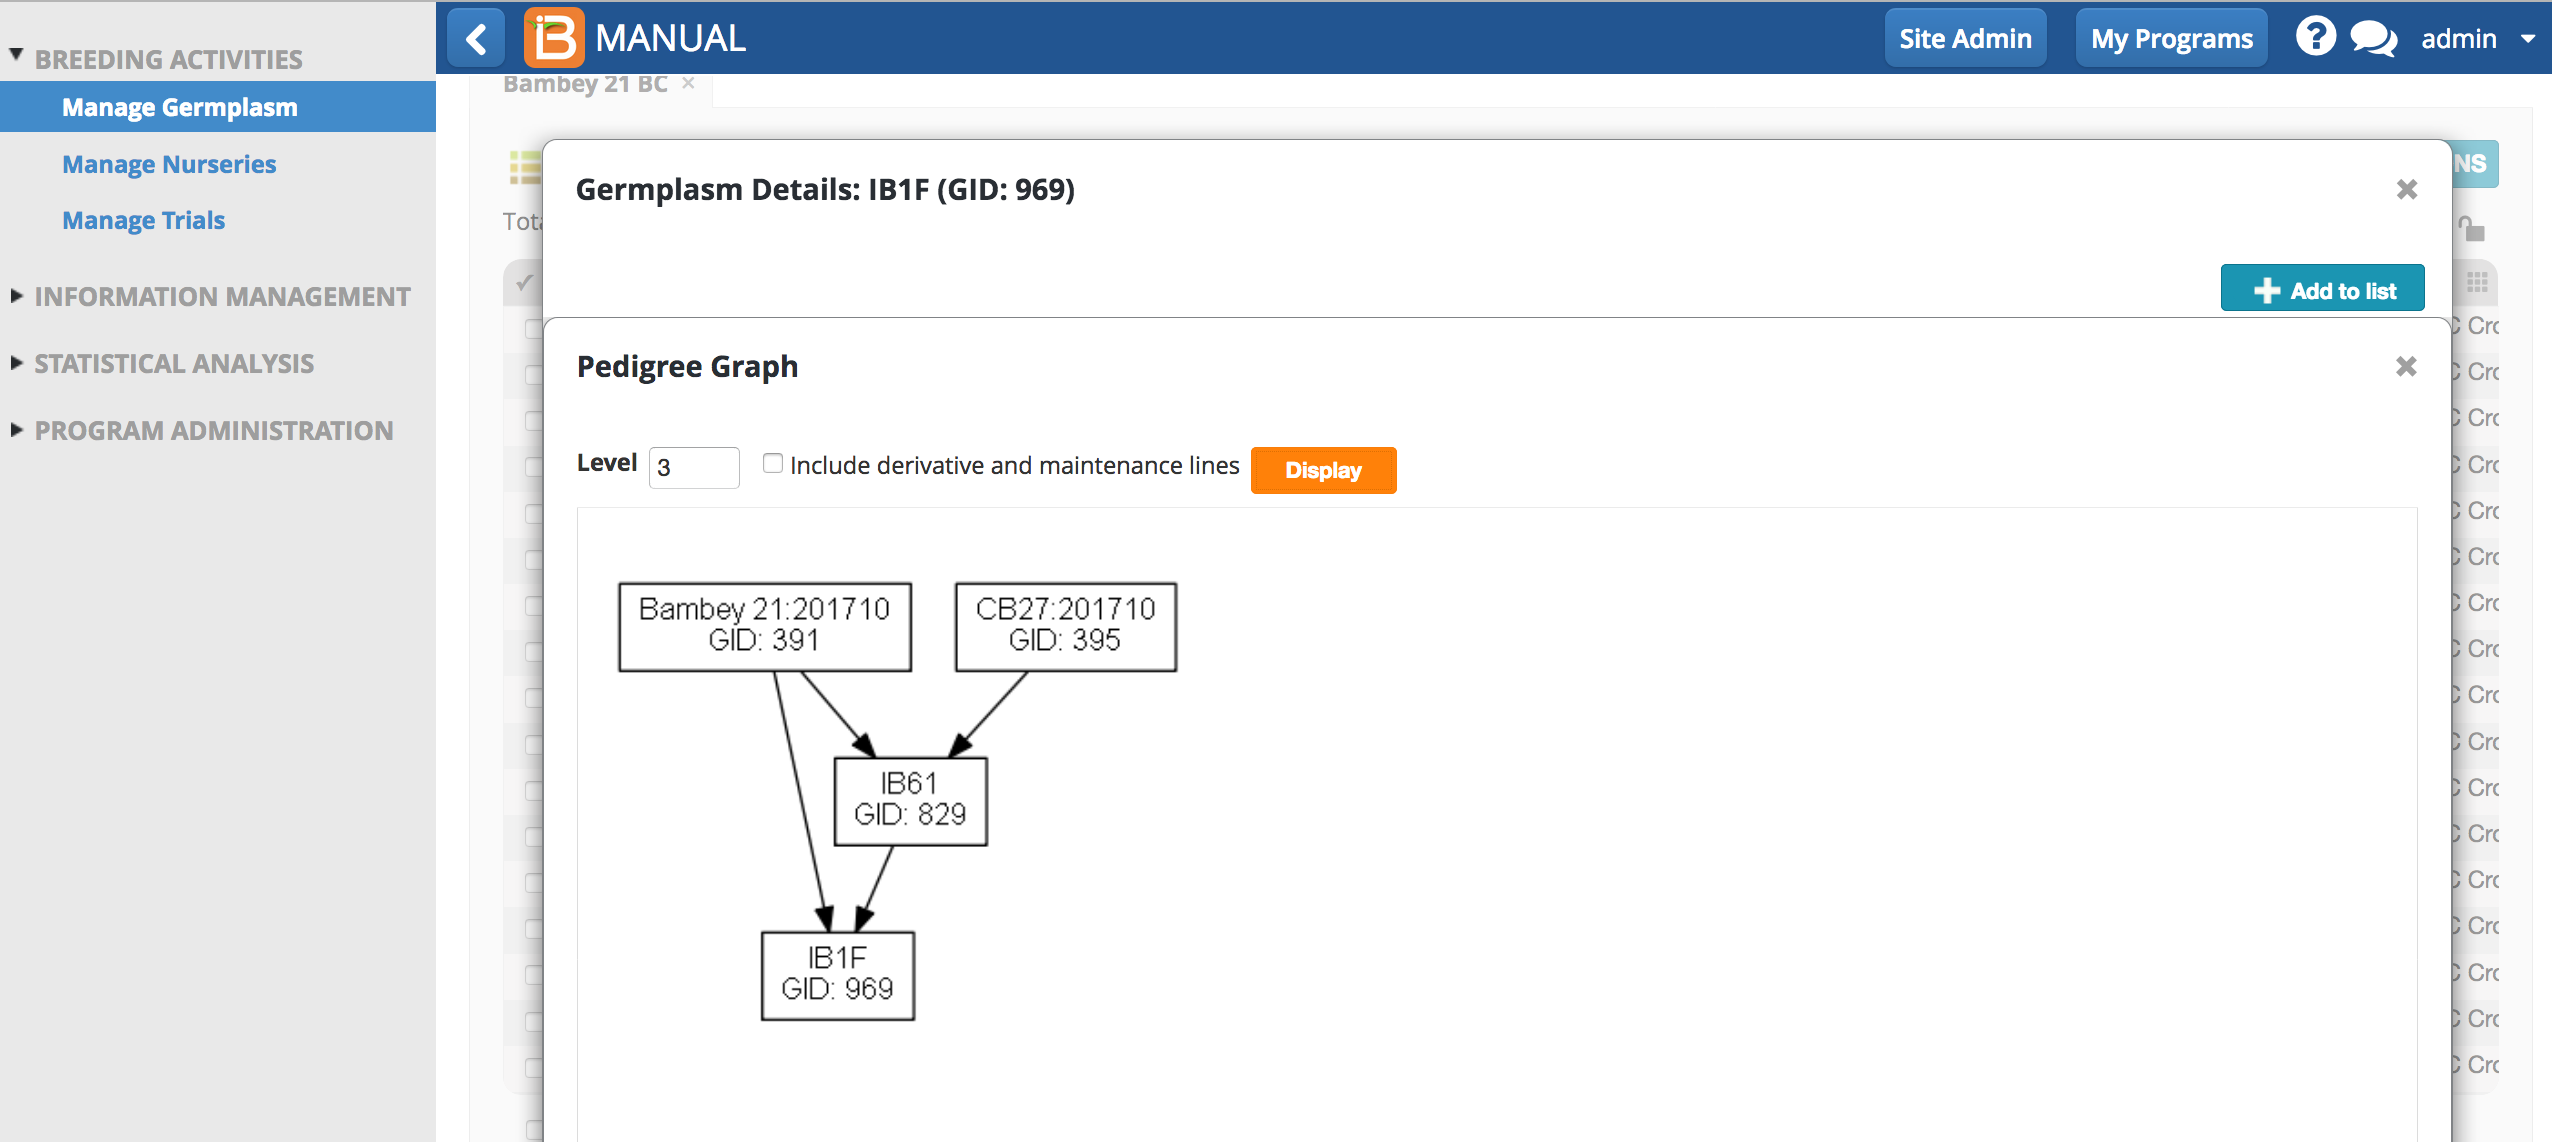
IB1F is the result of backcrossing. The recurrent parent, Bambey21:201710, is female.
- Select include derivative and maintence lines to view steps, like seed increase.
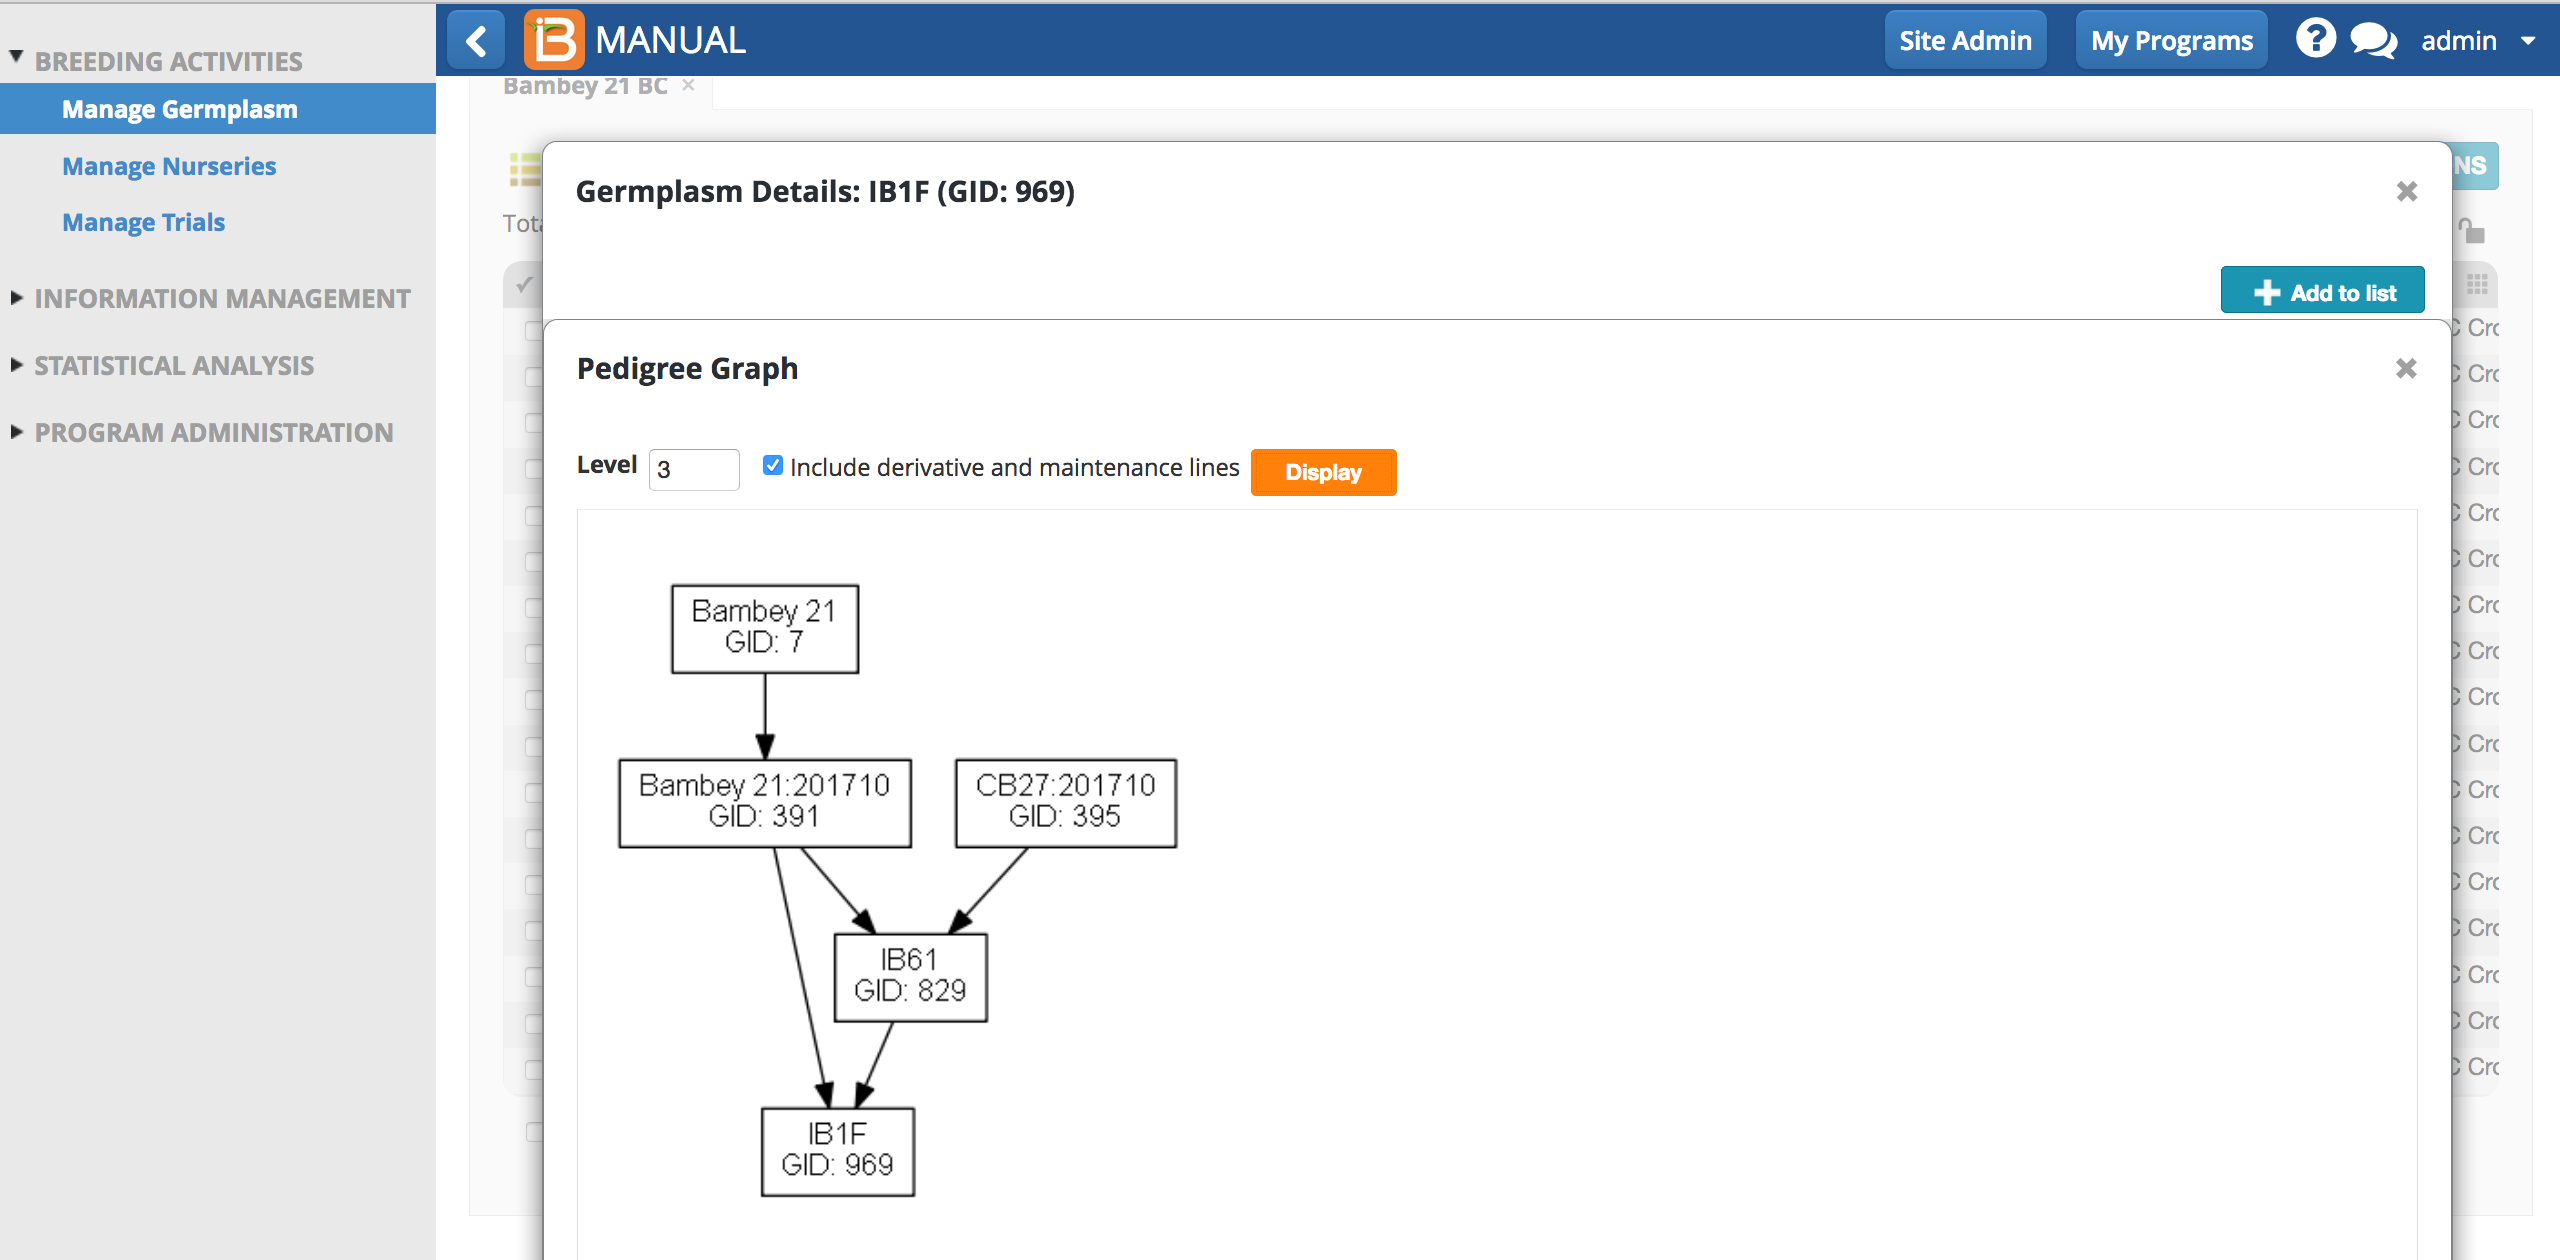
The recurrent female parent, Bambey21:201710, is derived by seed increase from Bambey 21.
The BMS database keeps a record of pedigree connections throughout the process of crossing and nursery advancement.
Germplasm Lists
Germplasm lists are the basis for nursery and trial design, as well as seed inventory management. Browse and search existing lists from the program and public databases with the Germplasm Manager. To introduce new germplasm to the system, see Germplasm Import.
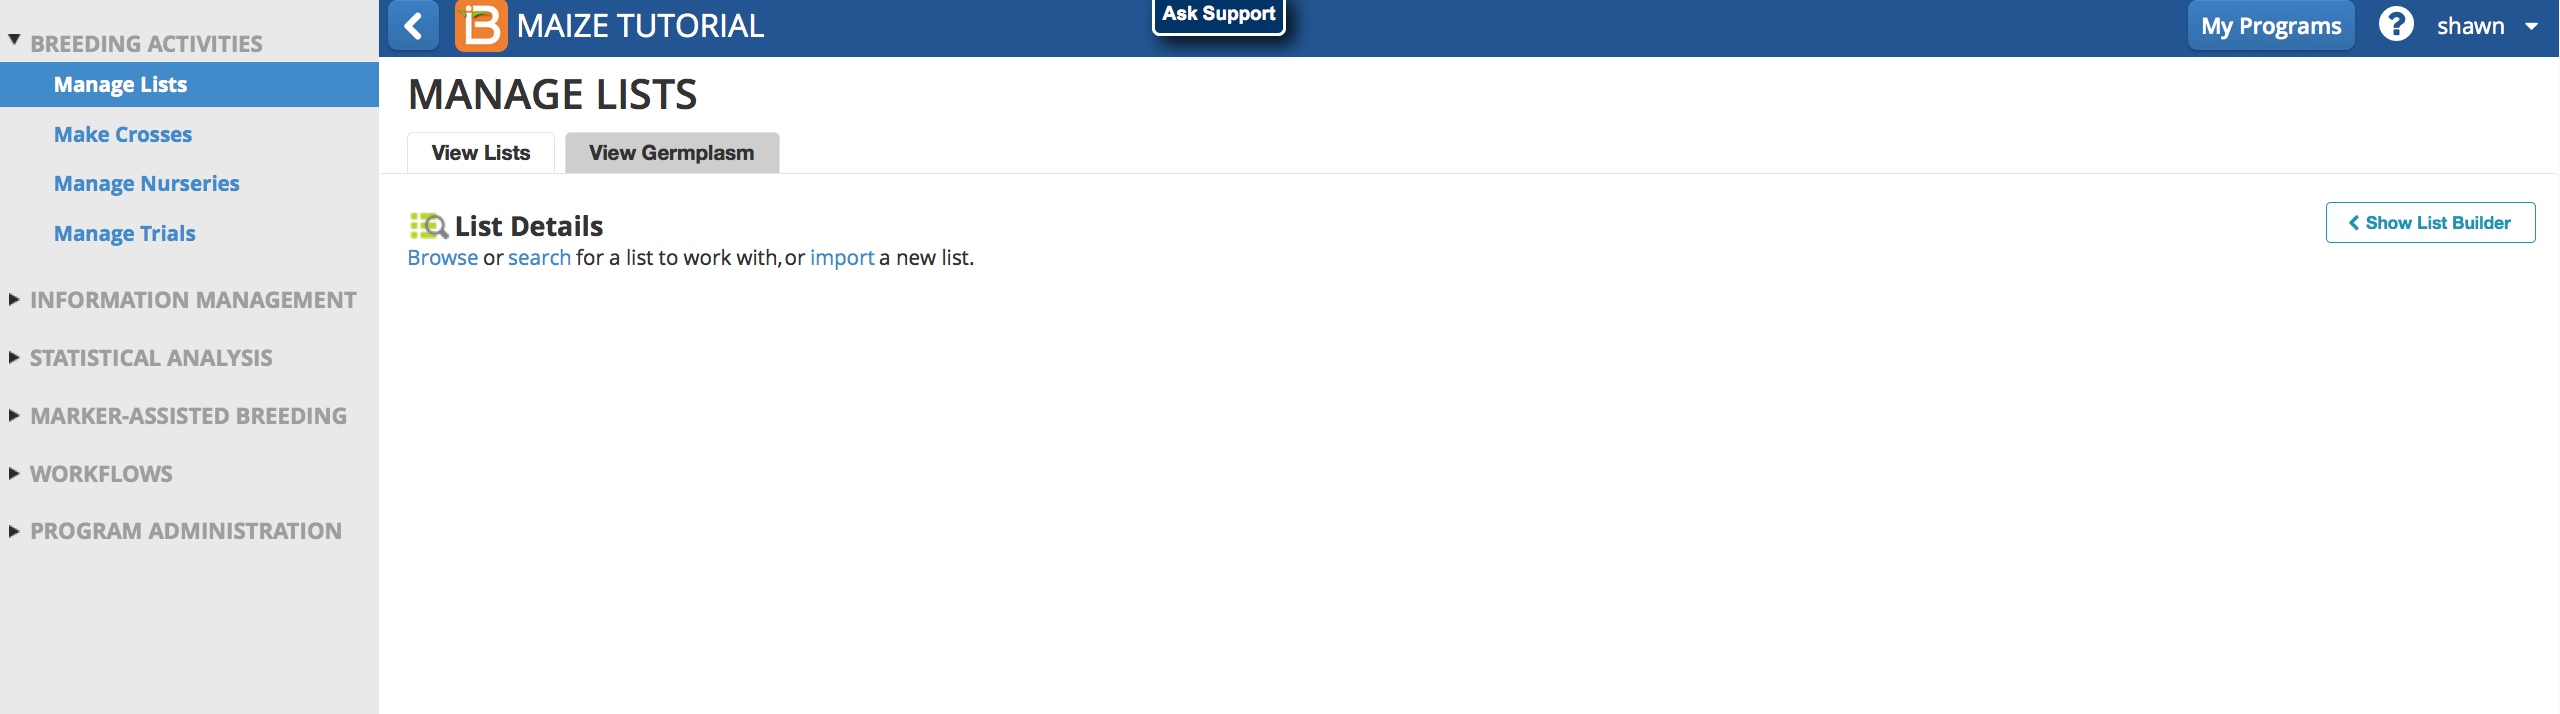
- View lists allows you to browse, search, or import germplasm lists.
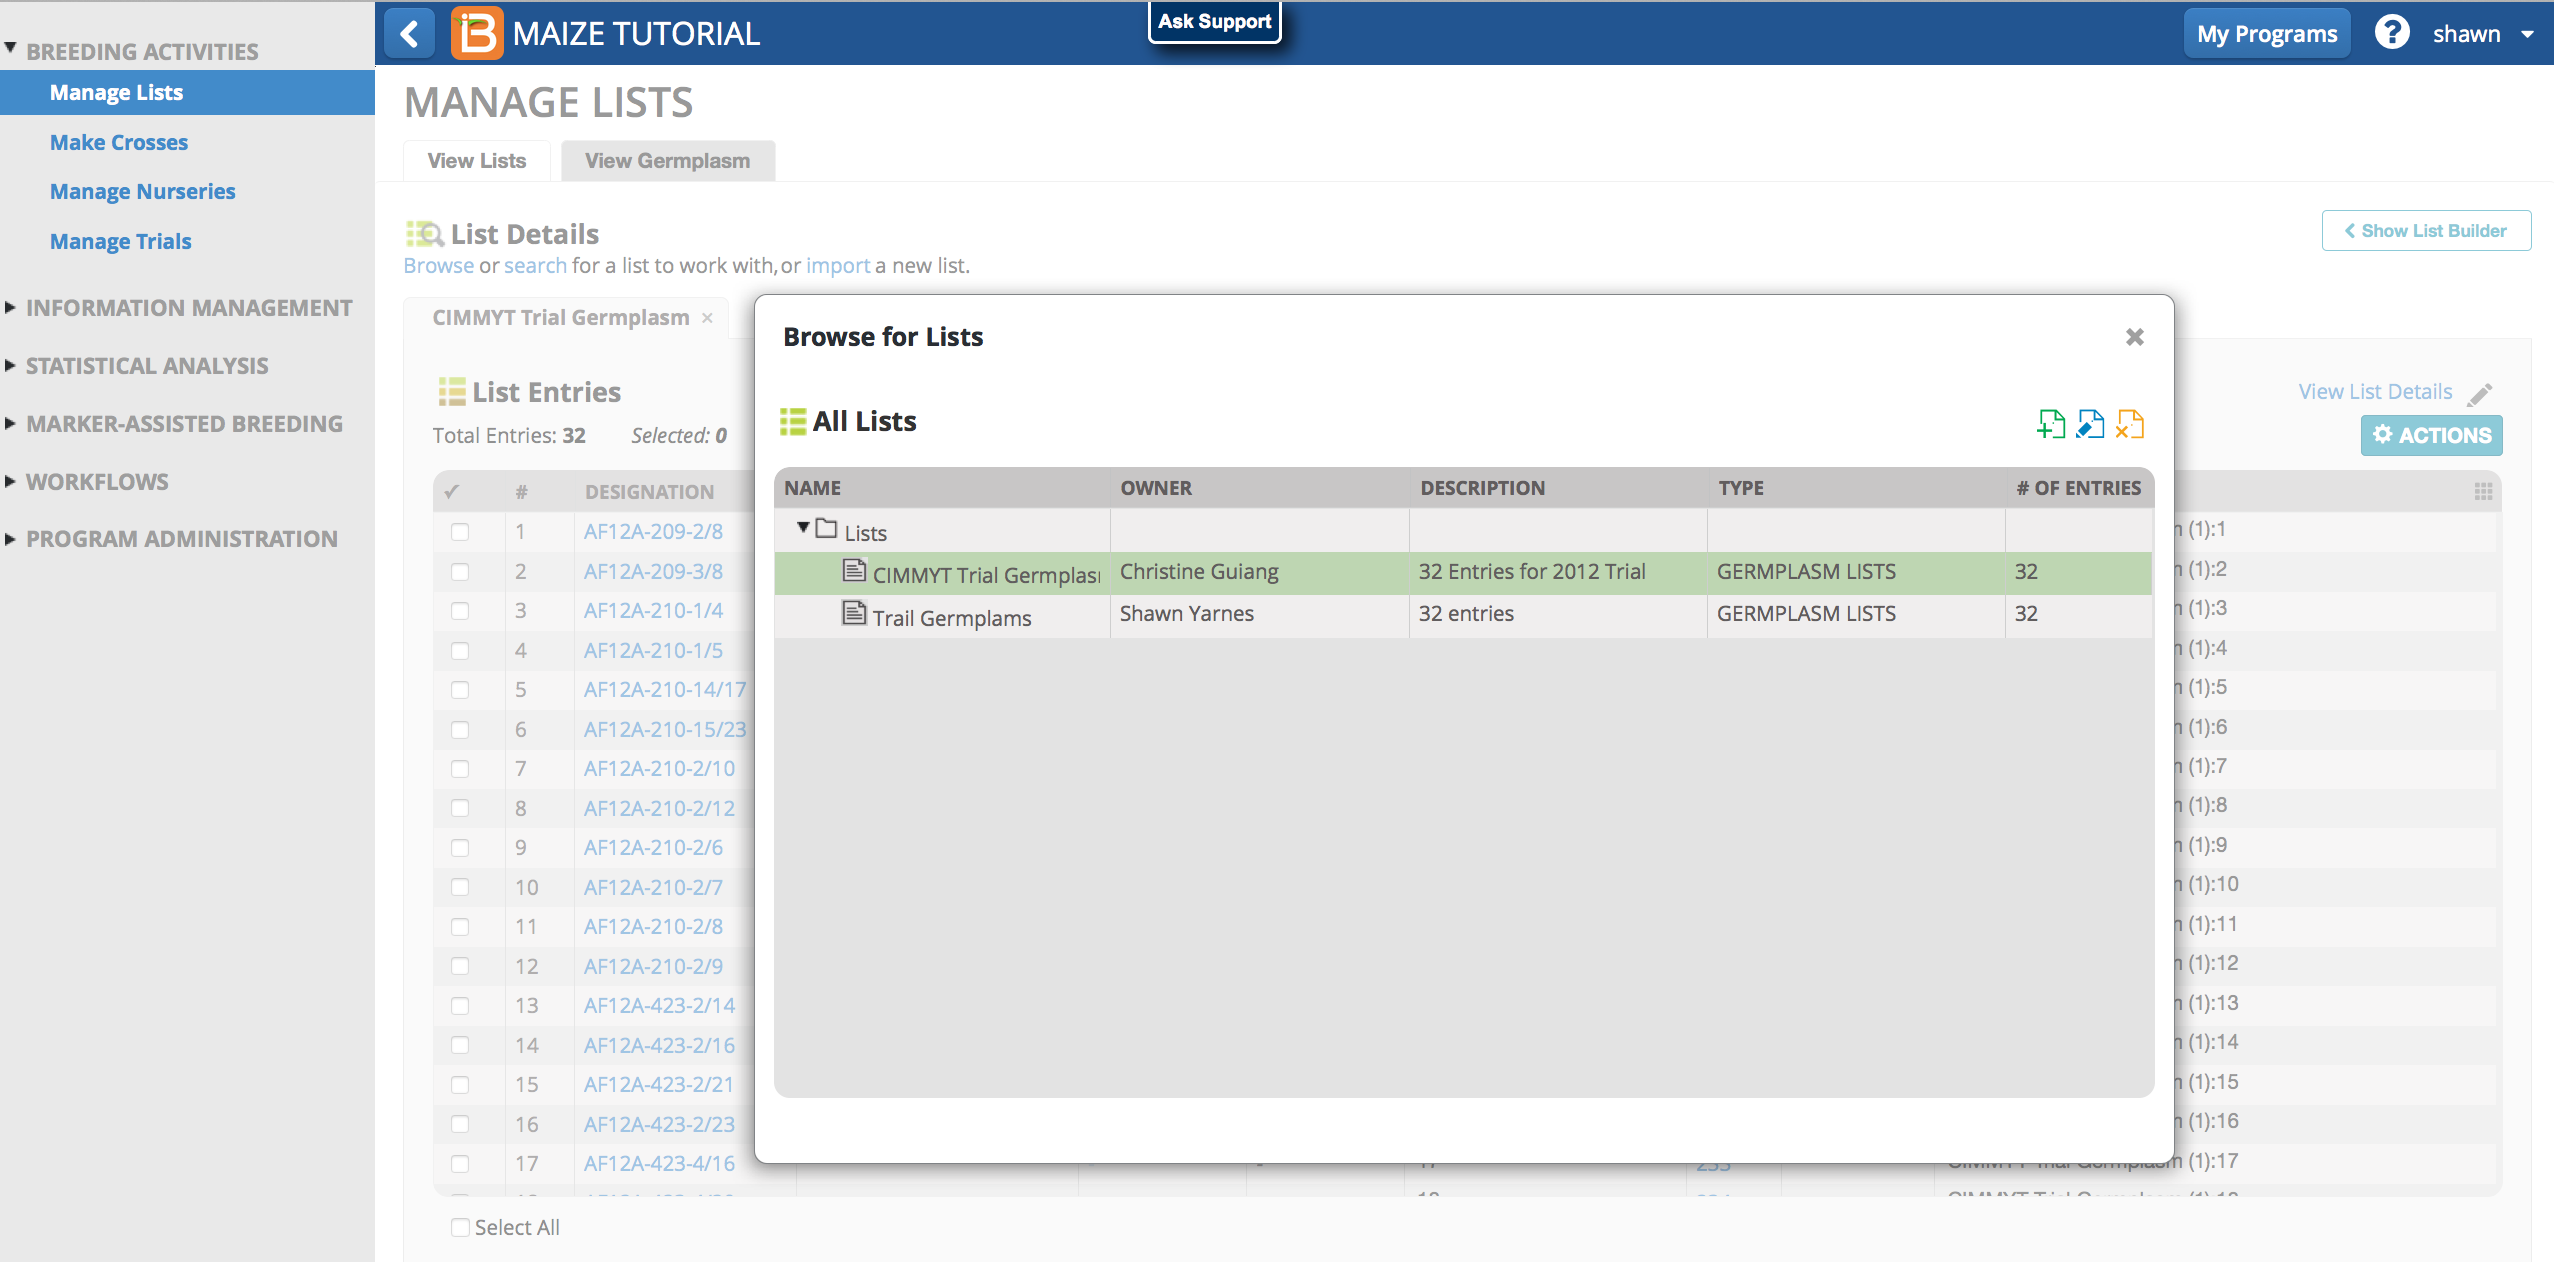
Browse Lists
- Select browse to see all germplasm lists in the BMS list directory. Select the list of interest in the directory popup window. Close the popup window to review List details.
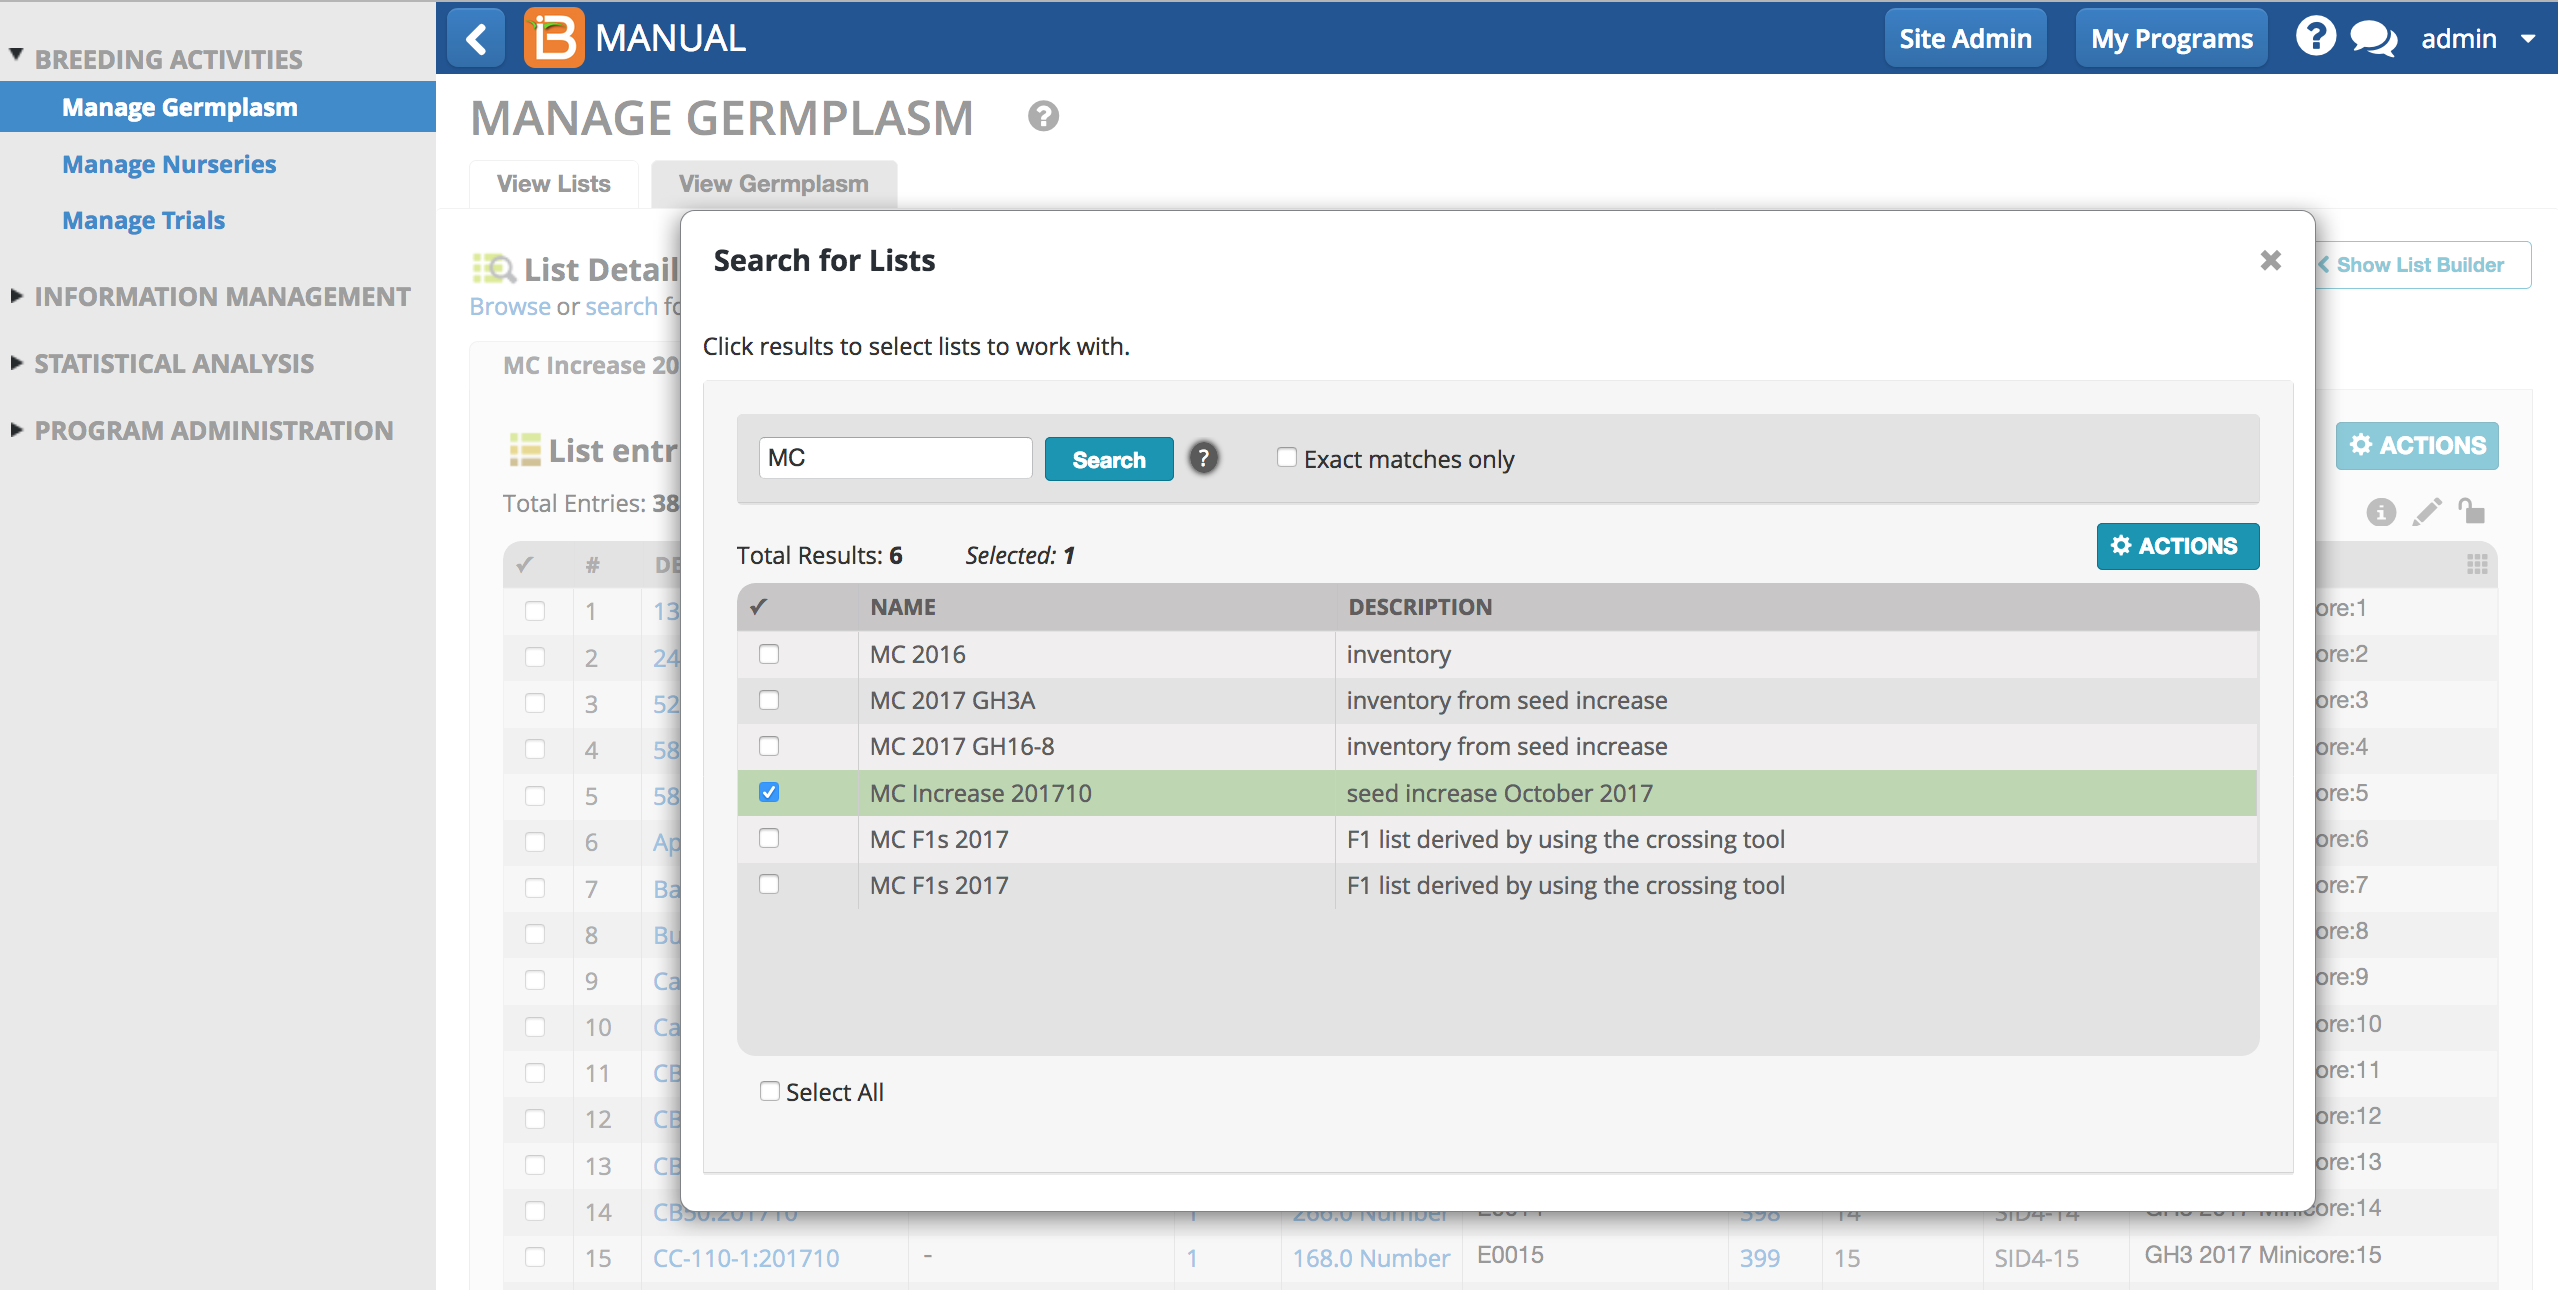
Search Lists
- Searches are not case-sensitive. Search for germplasm lists by partial or exact matches to list name.
- Select a list or multiple lists. The lists open behind the search list popup window. Close the popup window to review the list(s).
List View
From list view you can review and sort germplasm details, including inventory details by selecting the blue text in the table (See more Manage Inventory).
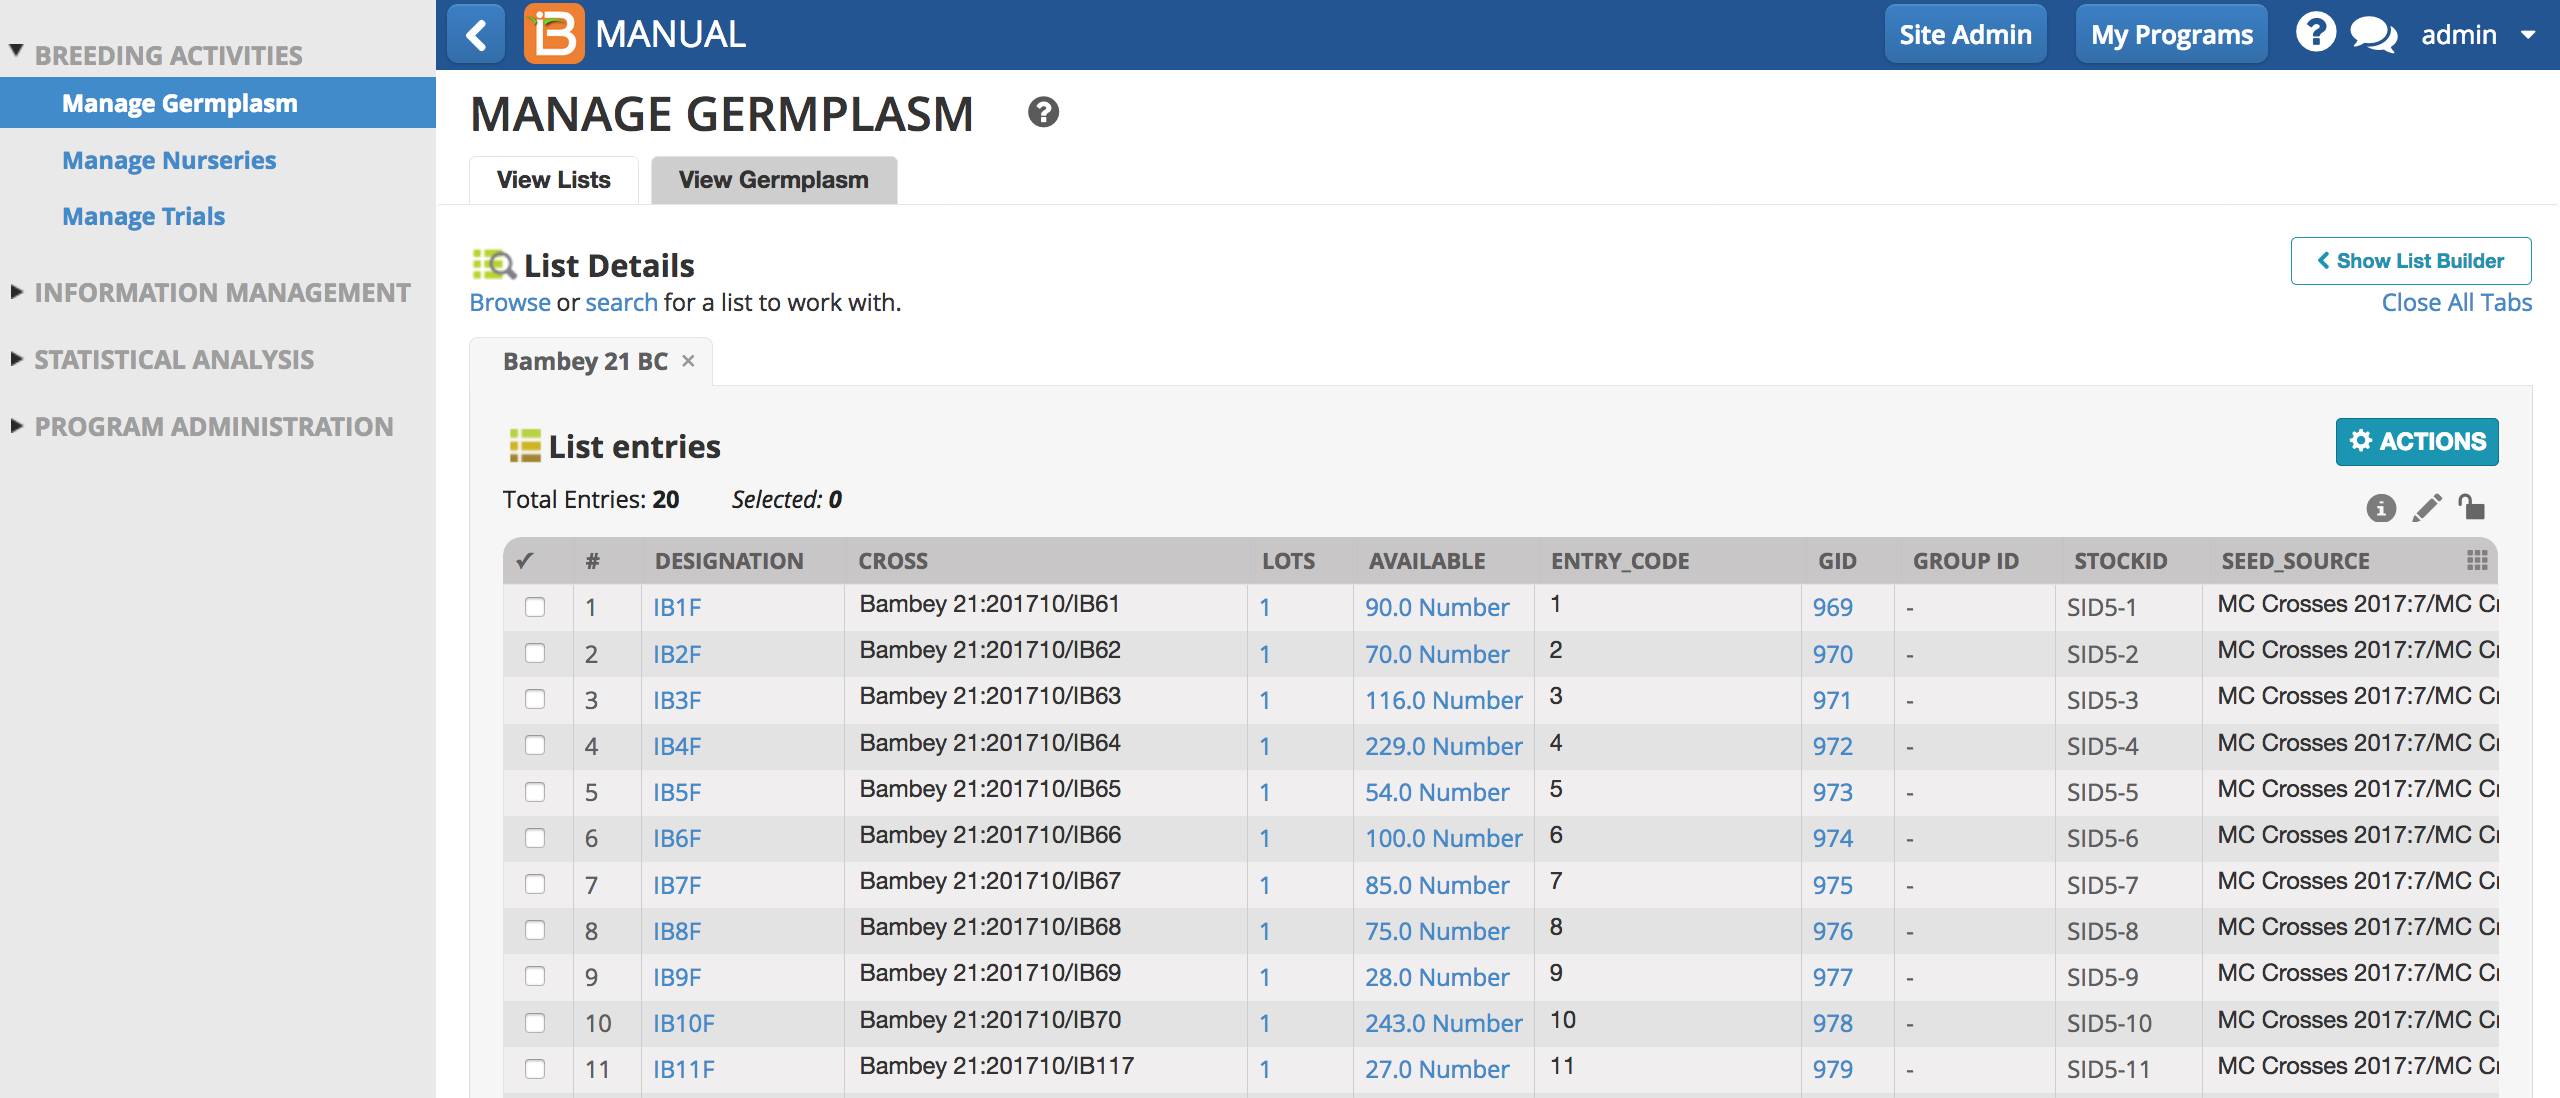
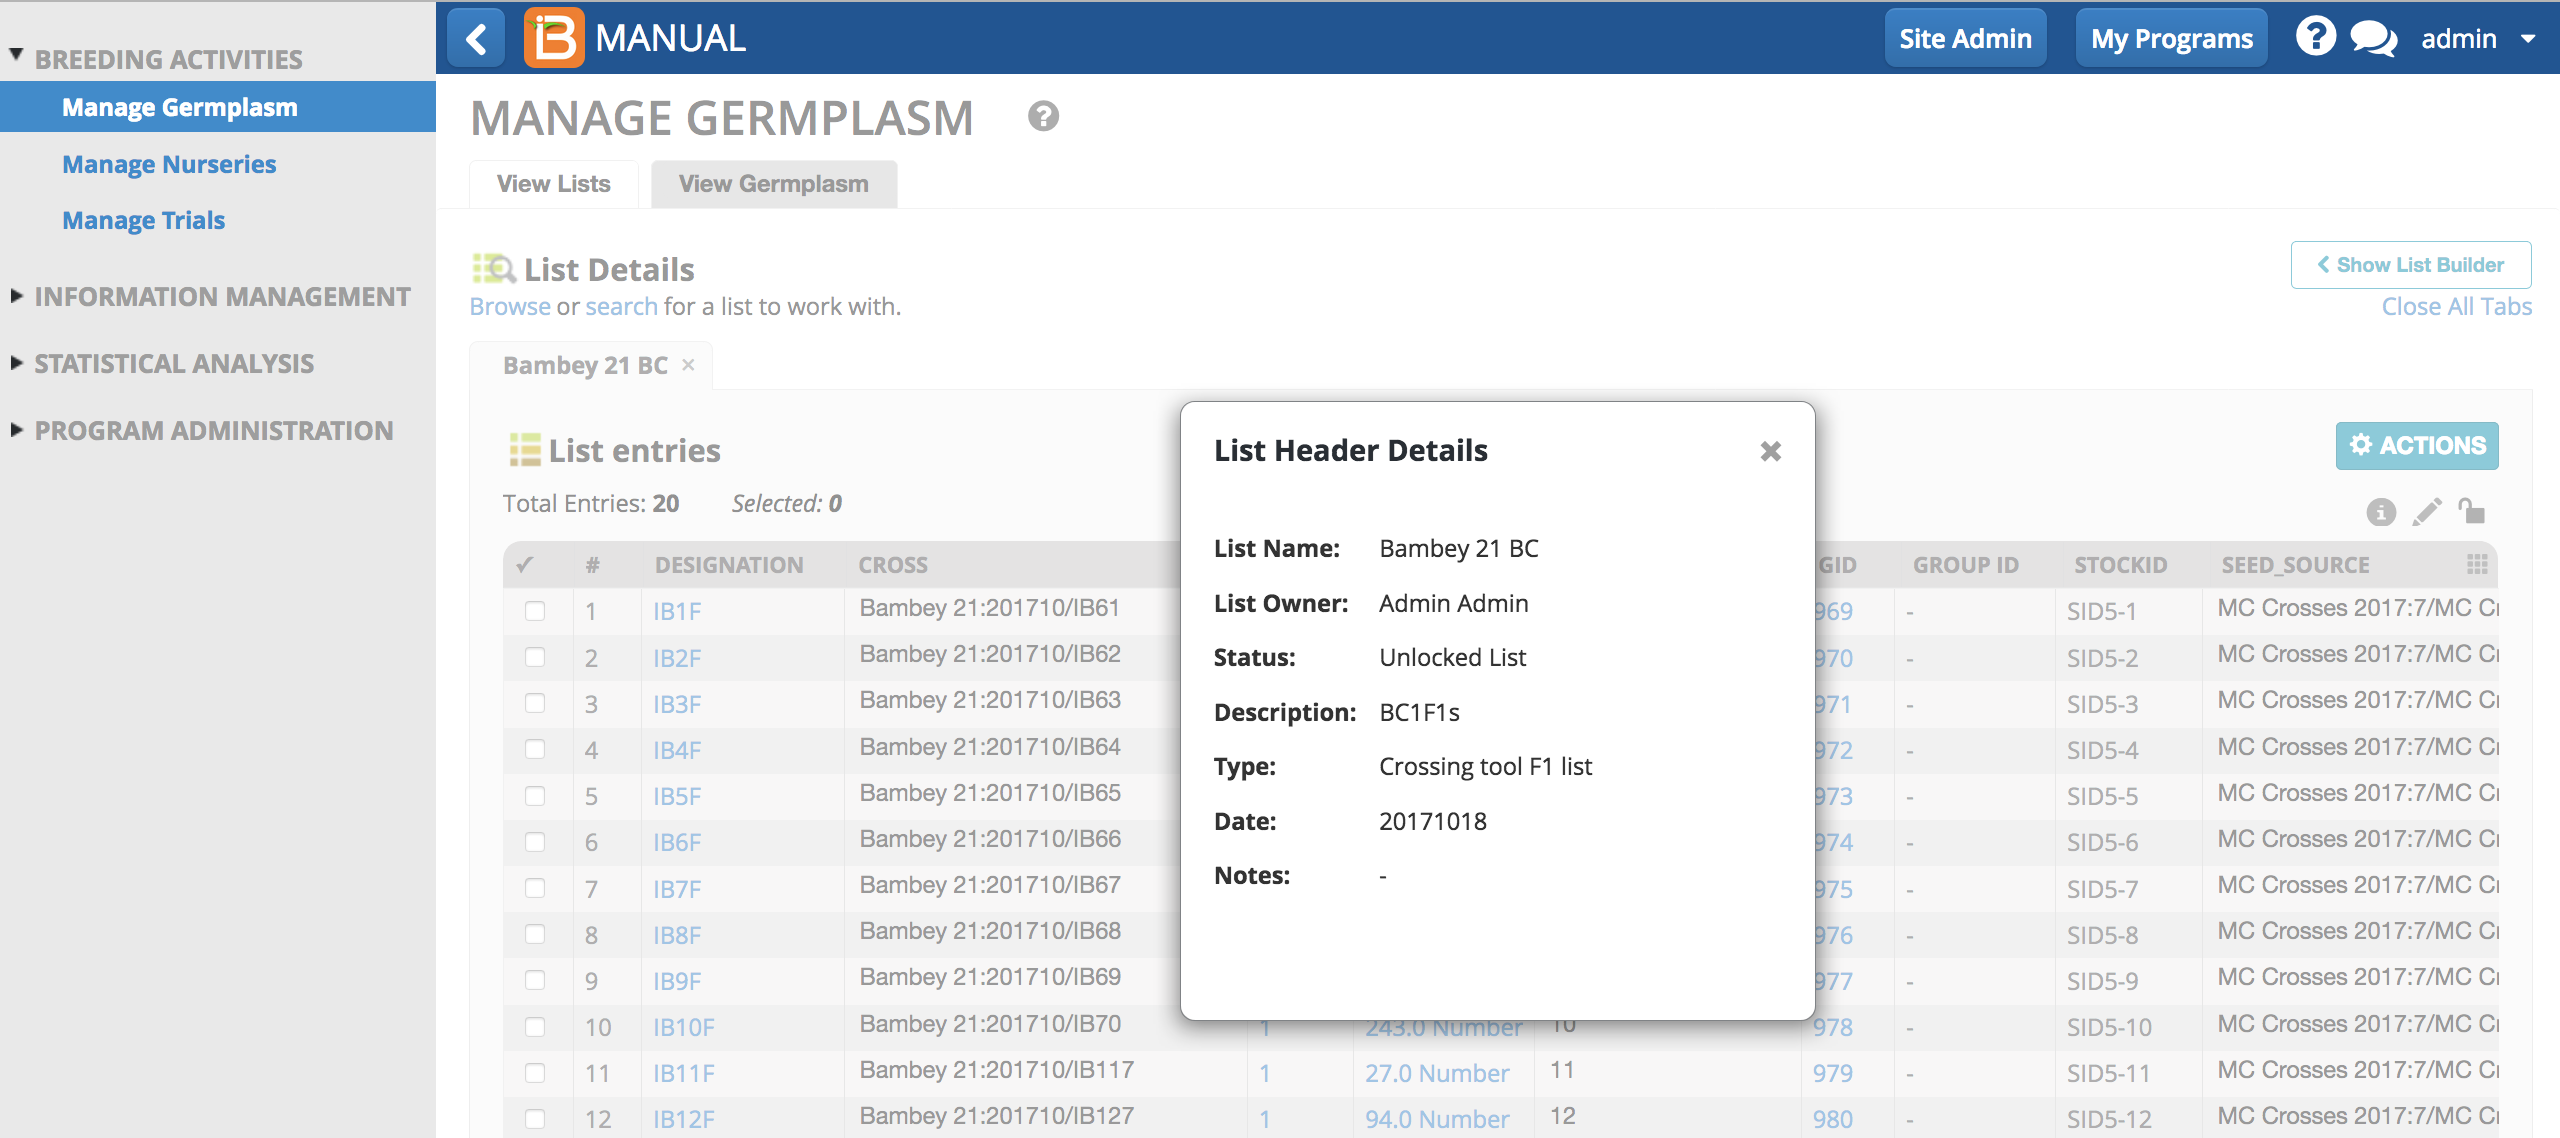
-
Select the "i" information icon to review list details.
- Select any column heading to sort list in ascending order. Select column heading again to sort in descending order.
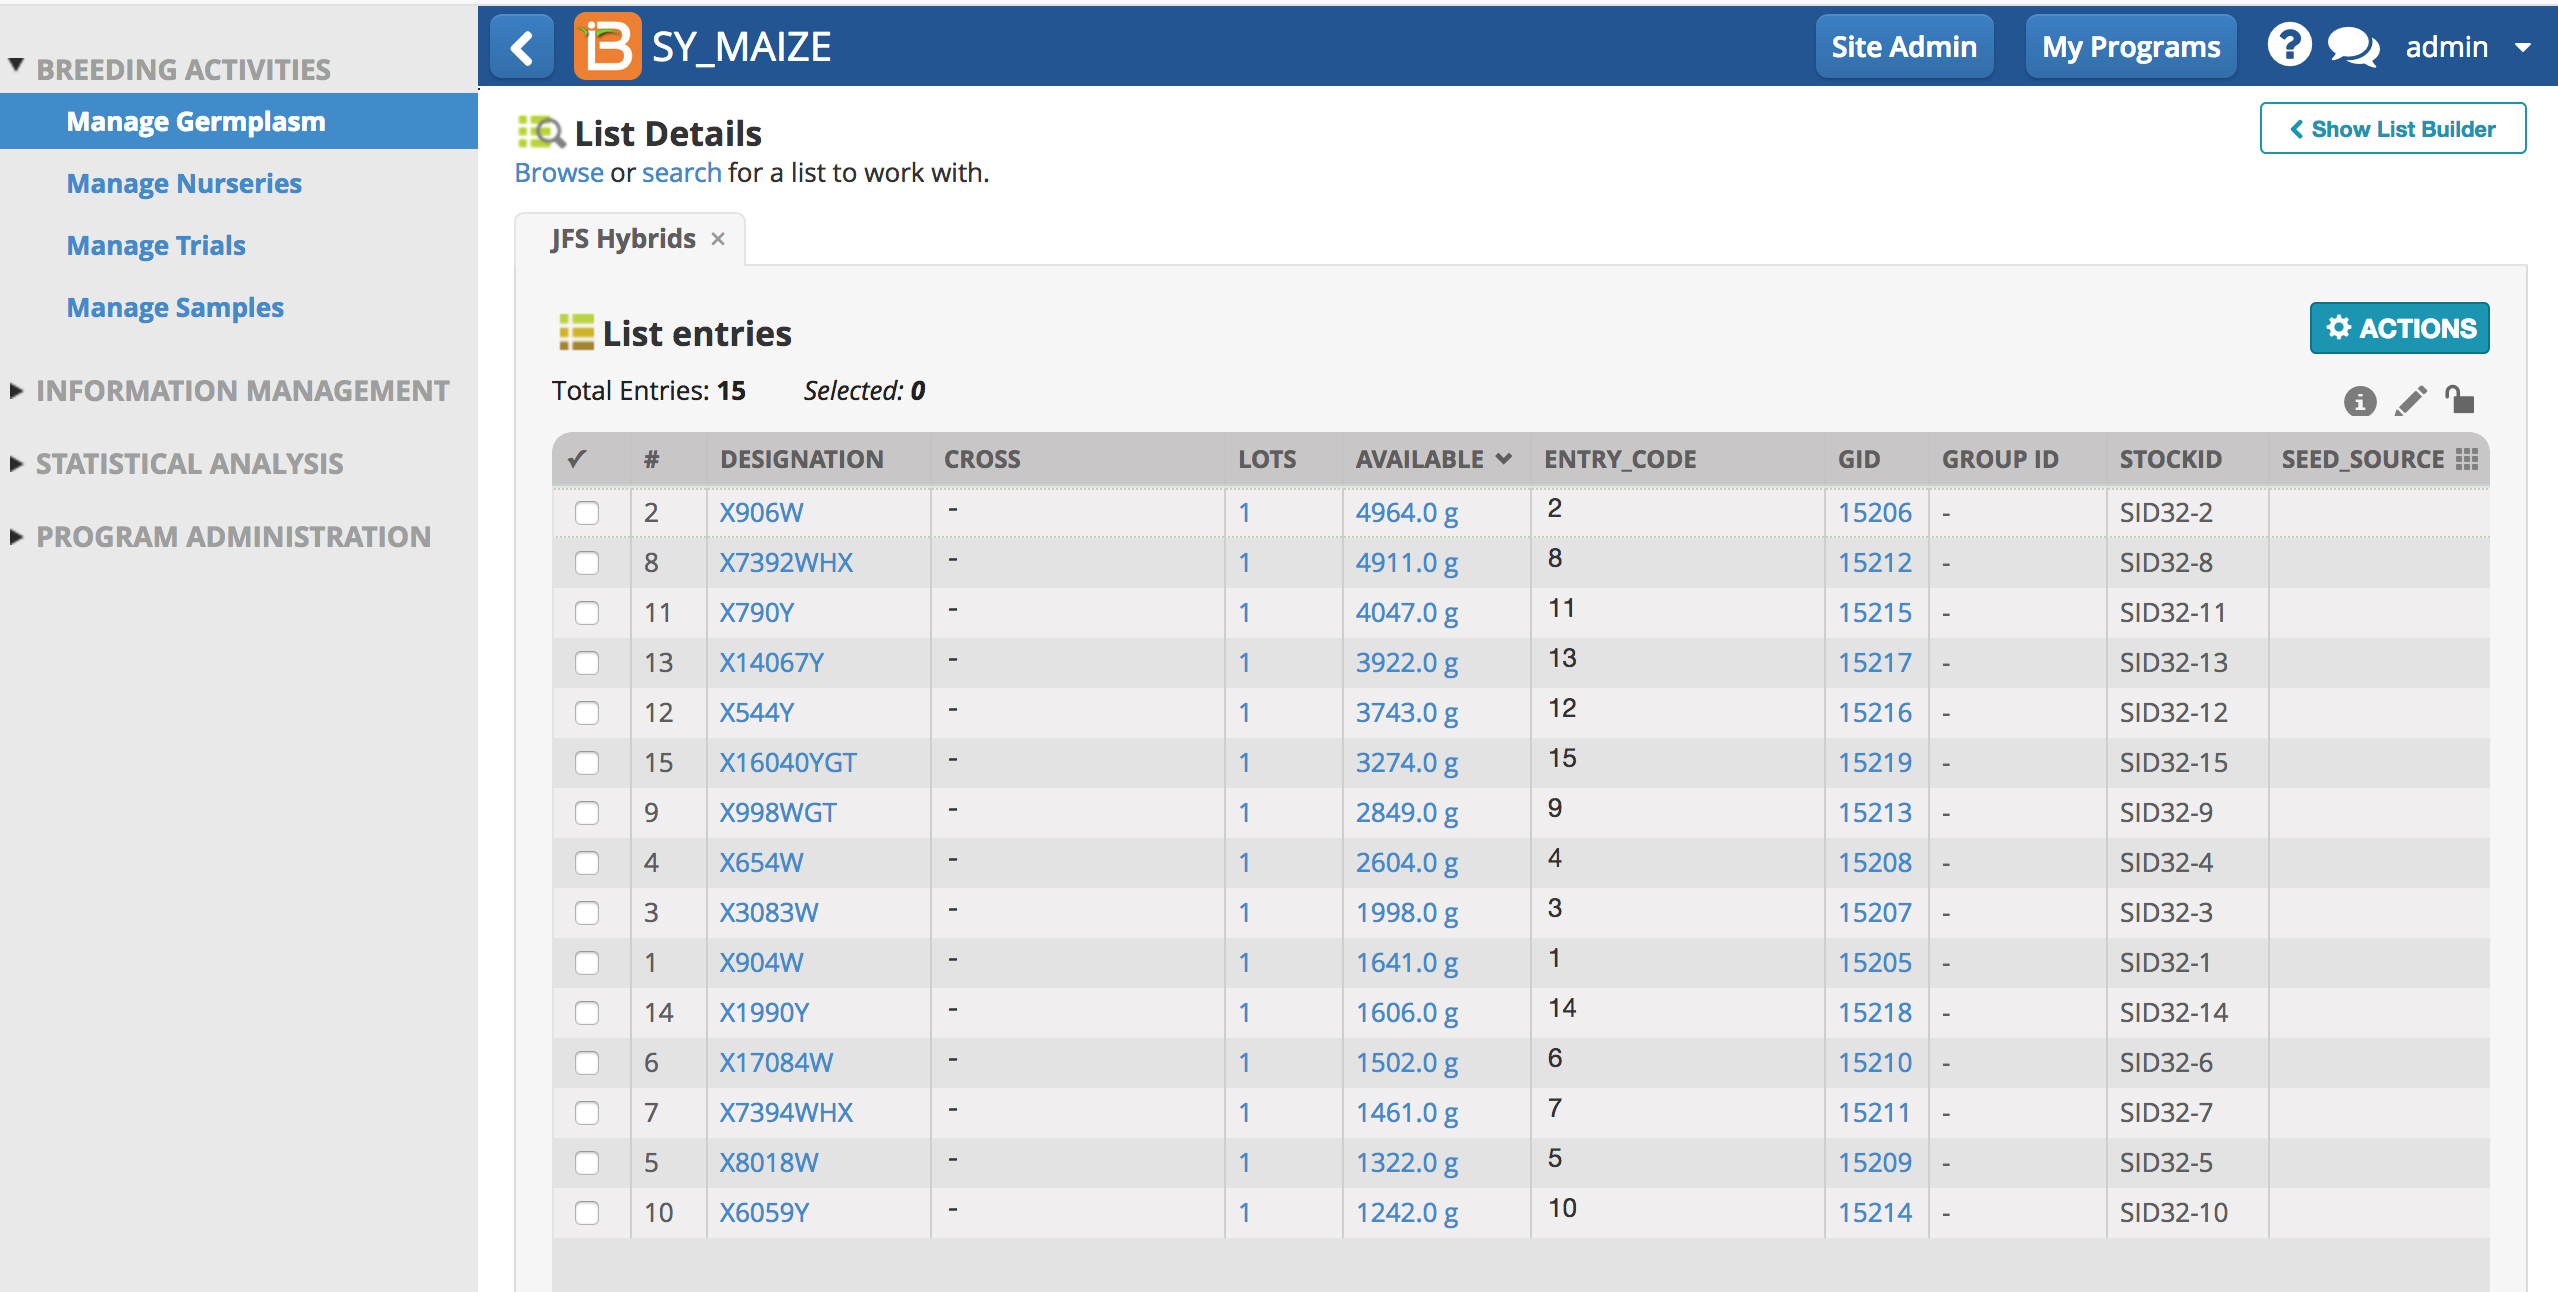
This list is sorted by Available Seed in descending order.
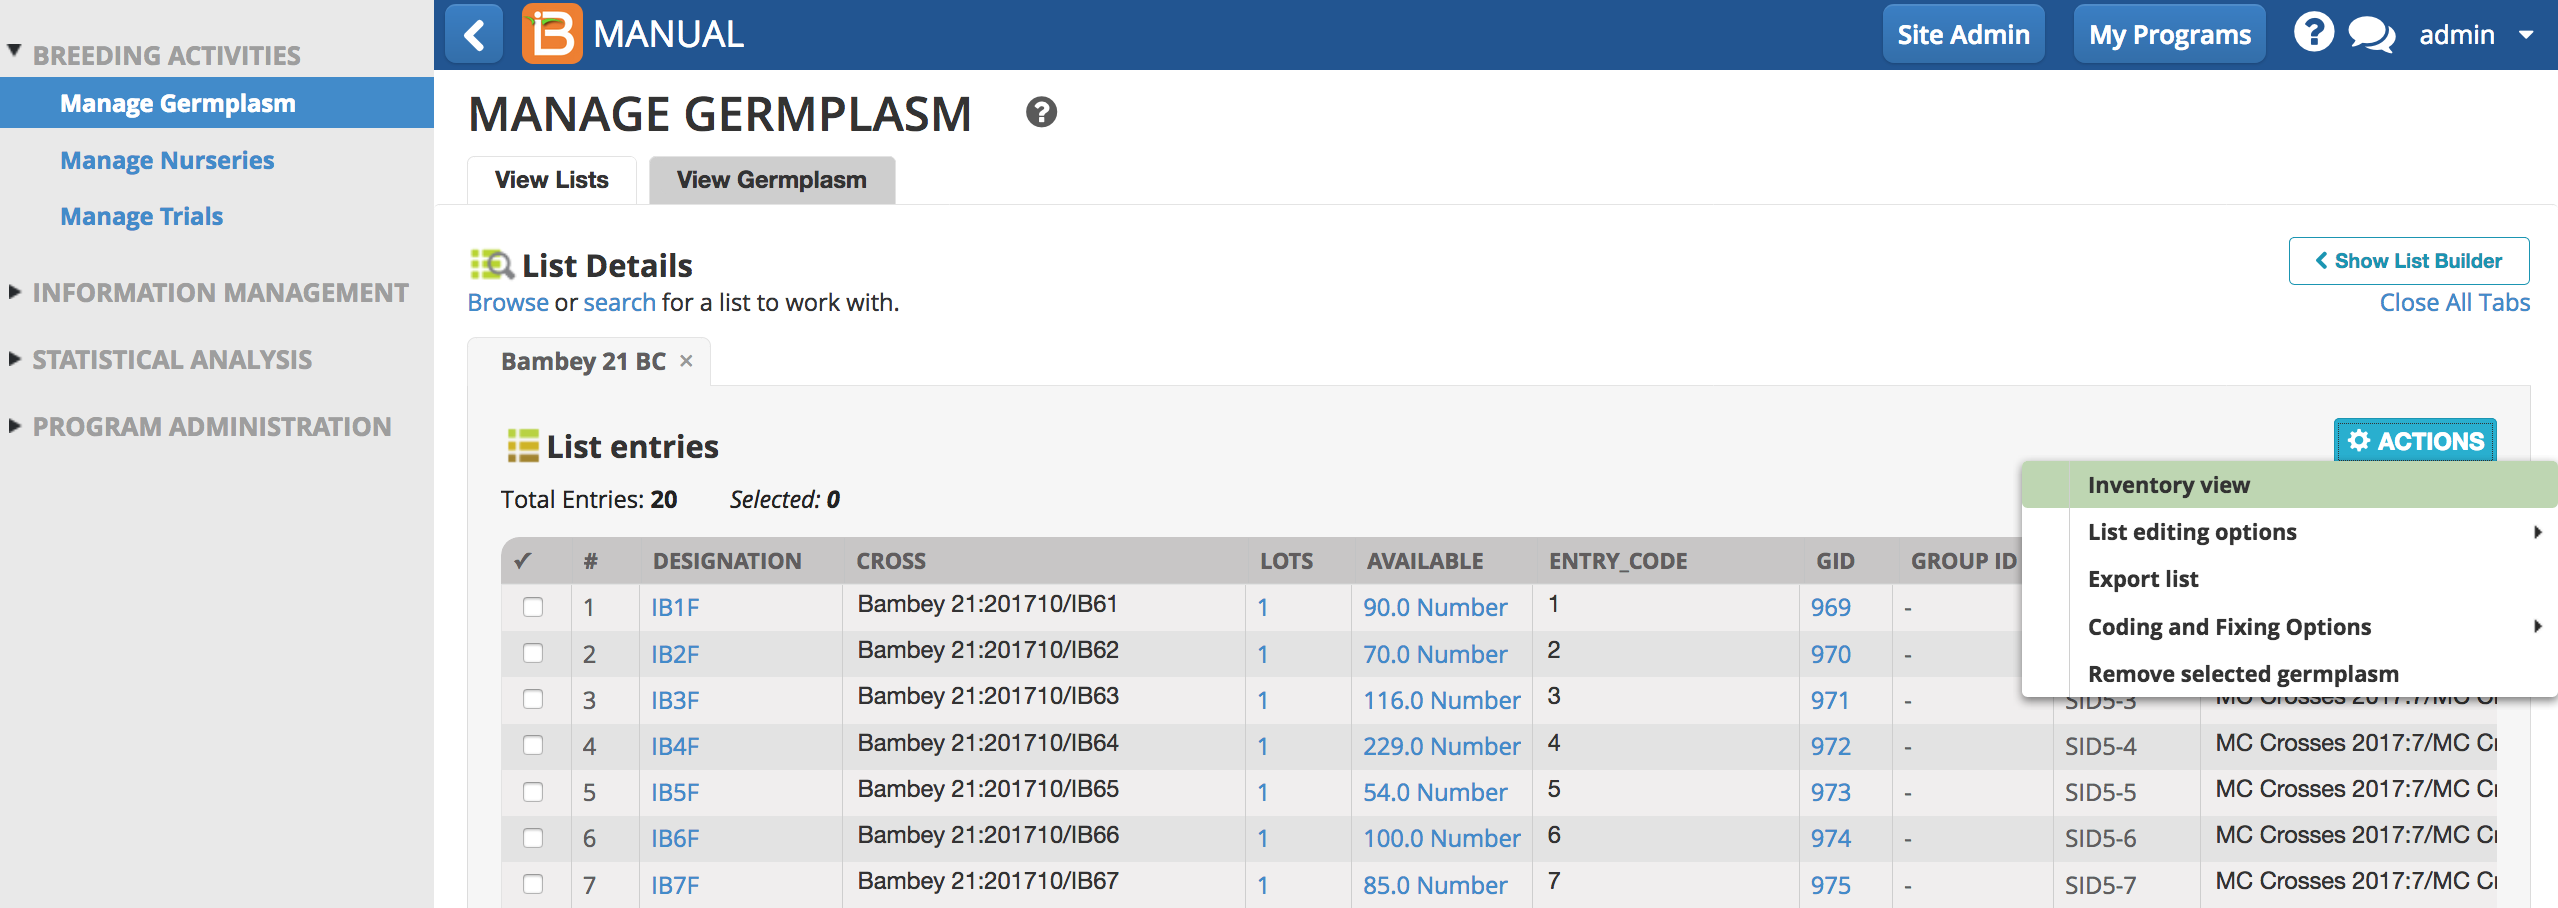
List Actions
Inventory View
- Select Inventory View to see all inventory entries for germplasm within a list (see more Manage Inventory).
List Editing Options
Select List Editing Option to reveal options for list editing. Most list editing options are self-explanatory, but a few with more complicated options are explained here.
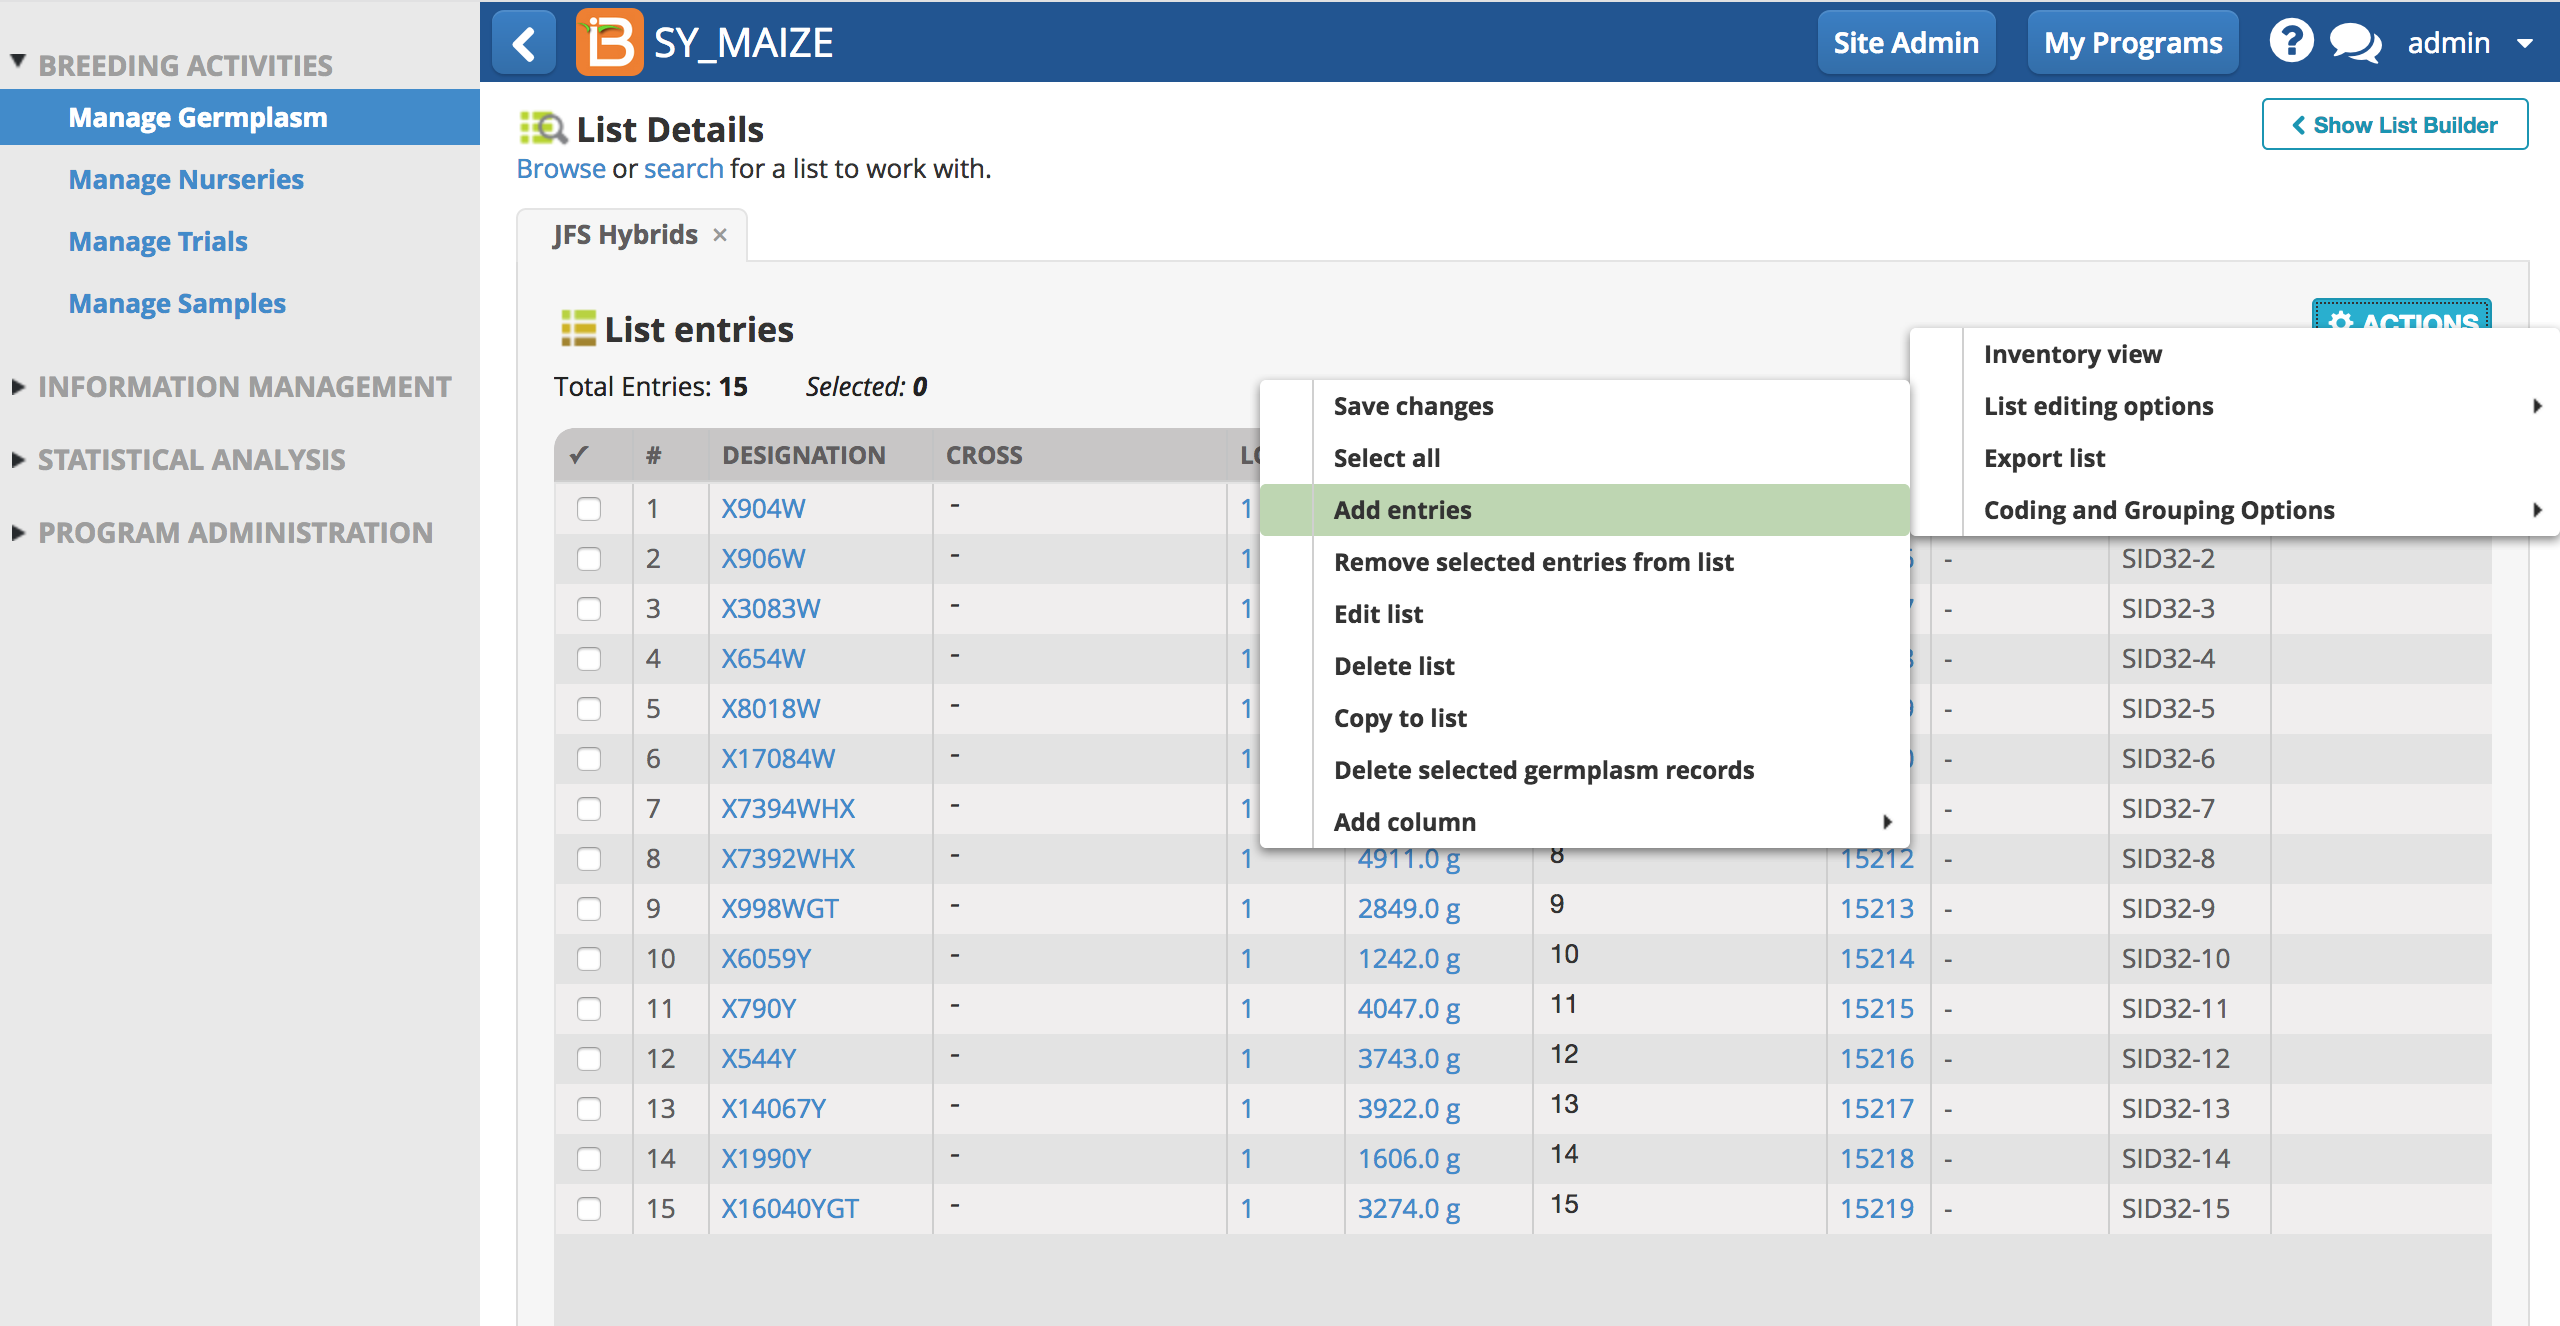
Add Entries to List
- Select Add Entries.
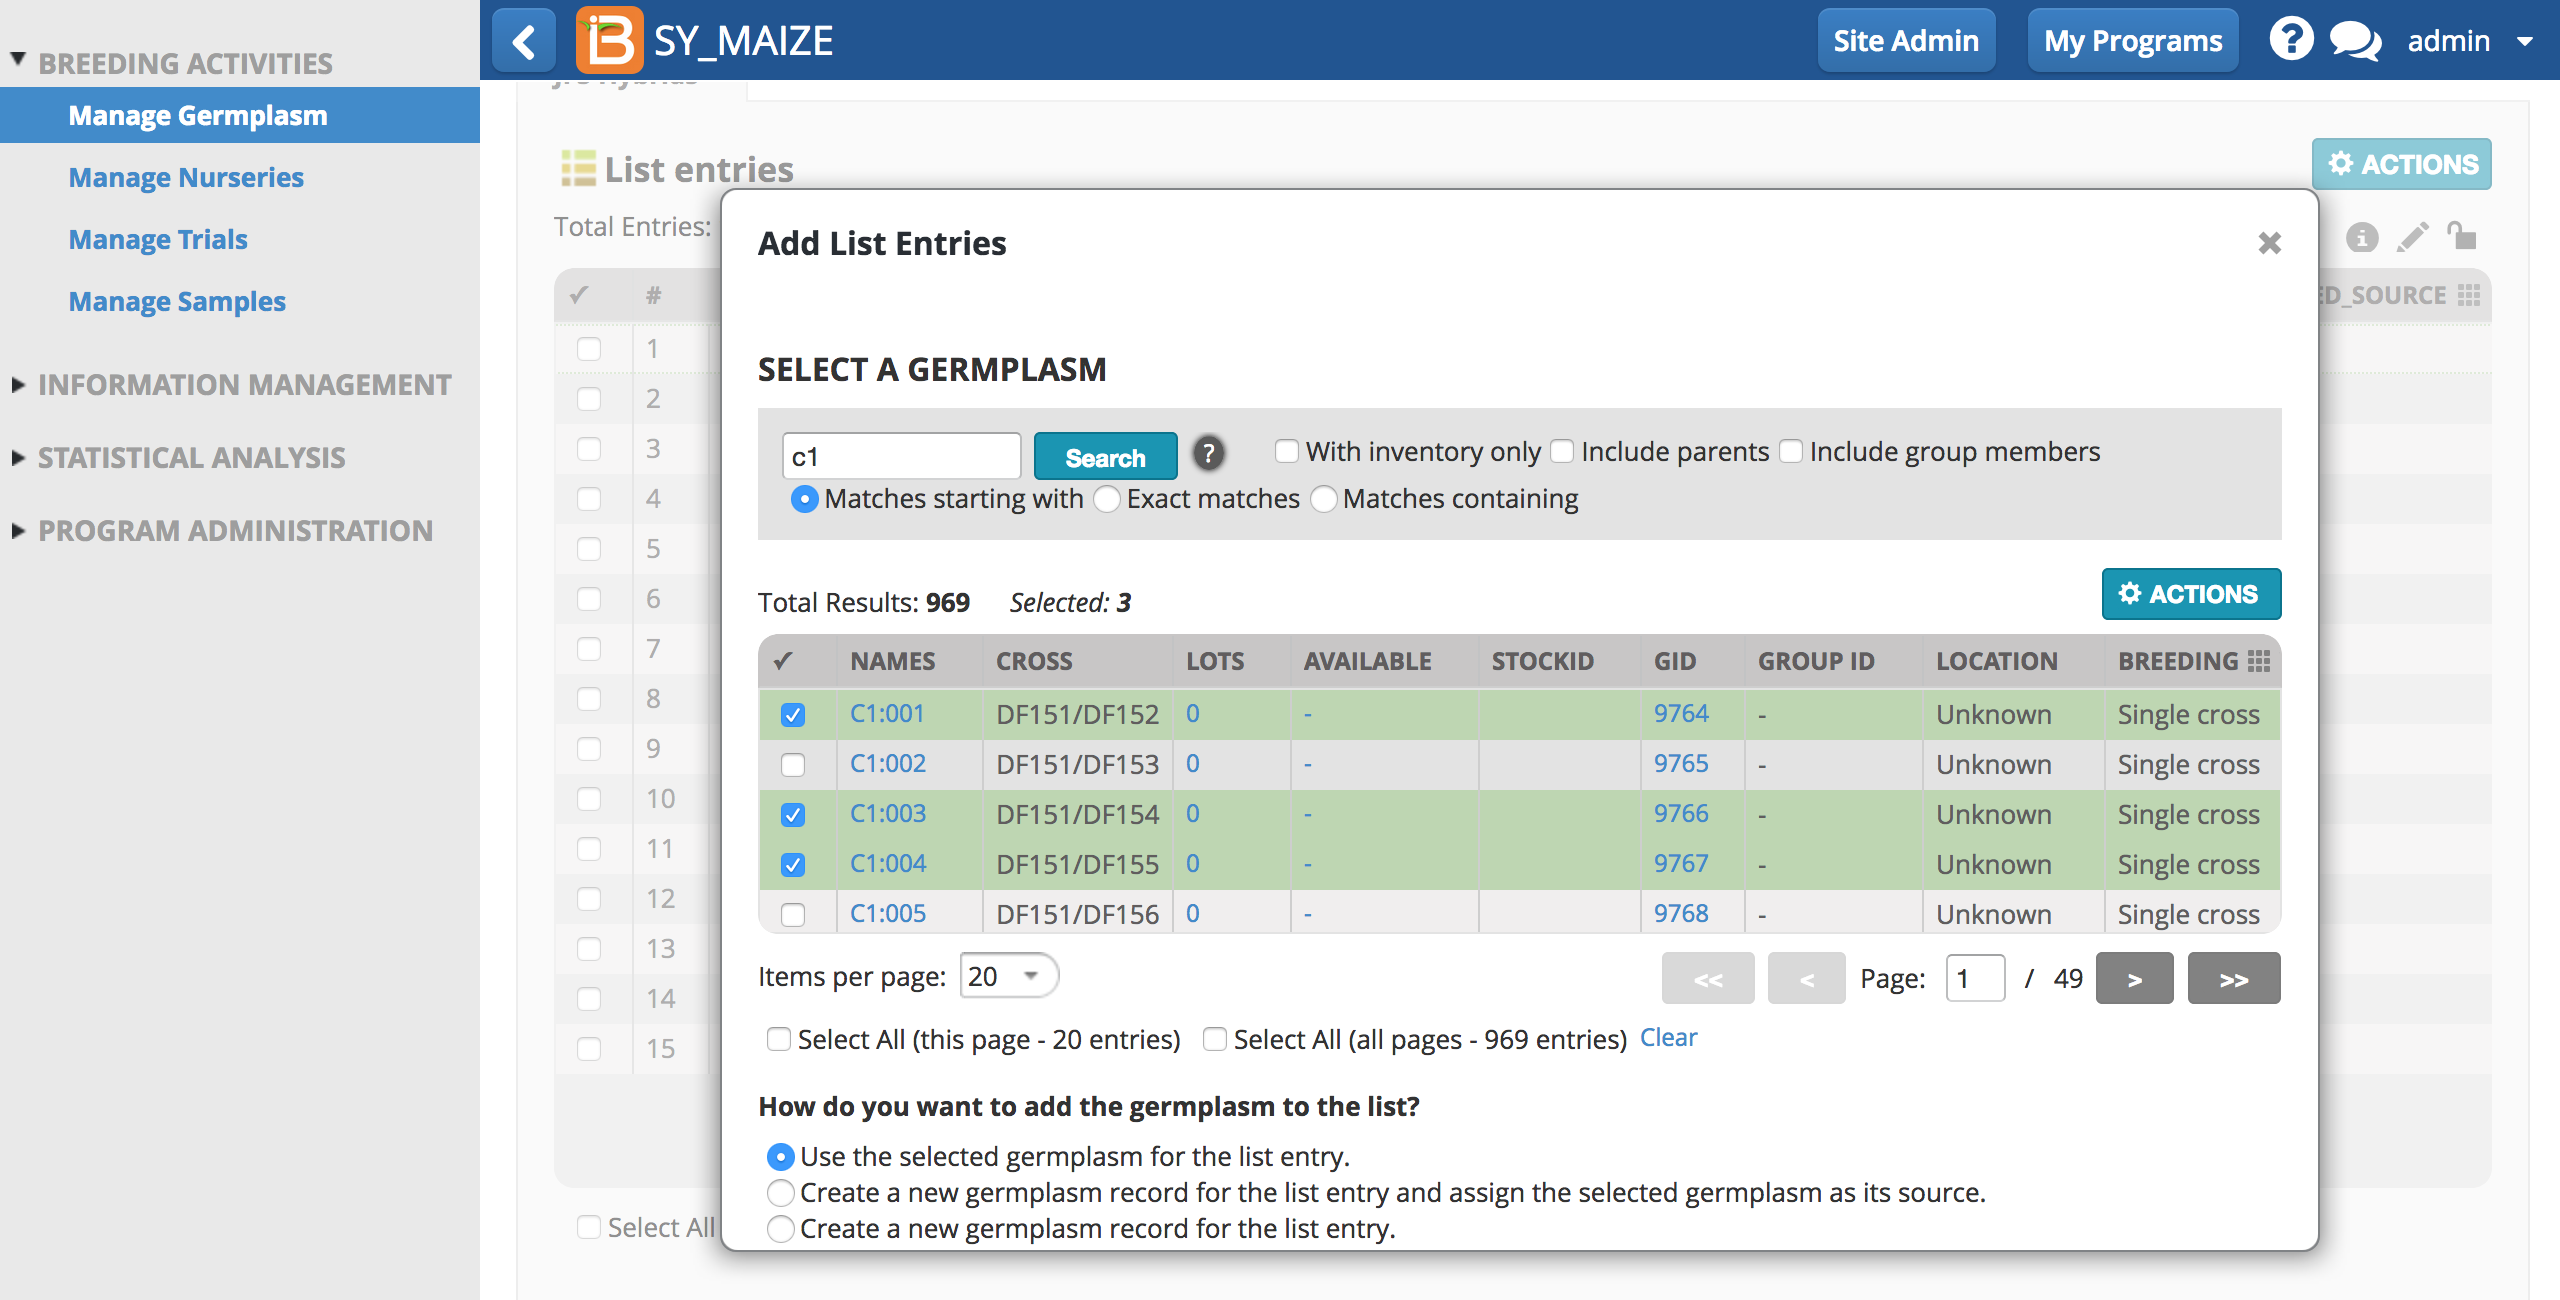
- Search for and select germplasm to add to the list. Chose how you want to add new germplasm to the list. Select Done at the bottom of pop-up window.
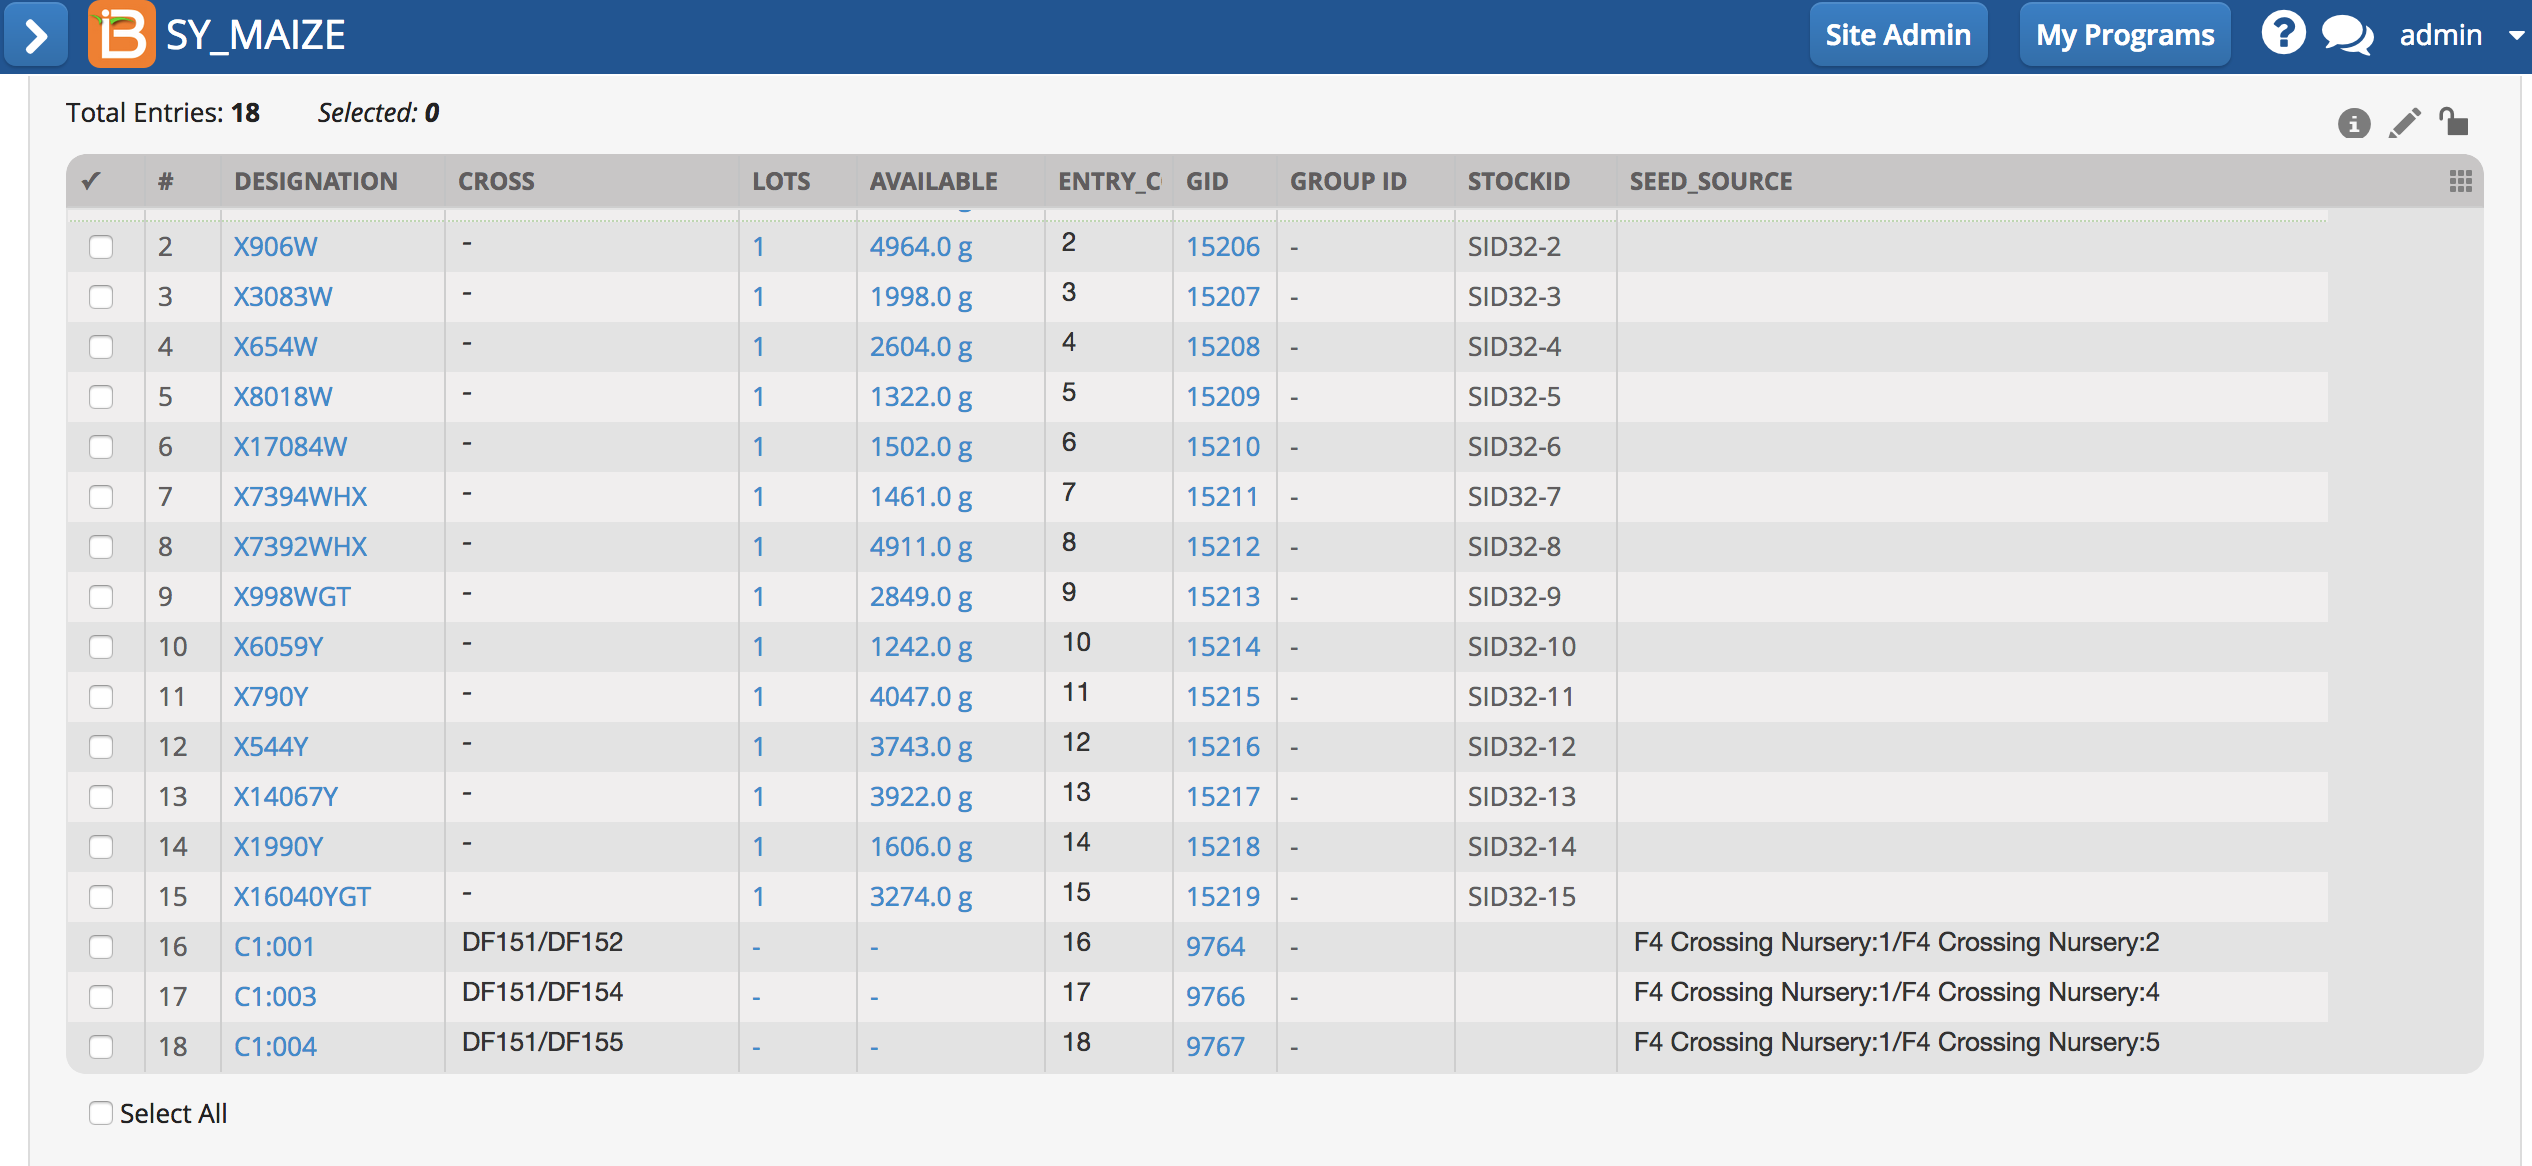
This selection results in the addition of the same GID and Seed Source as selected.
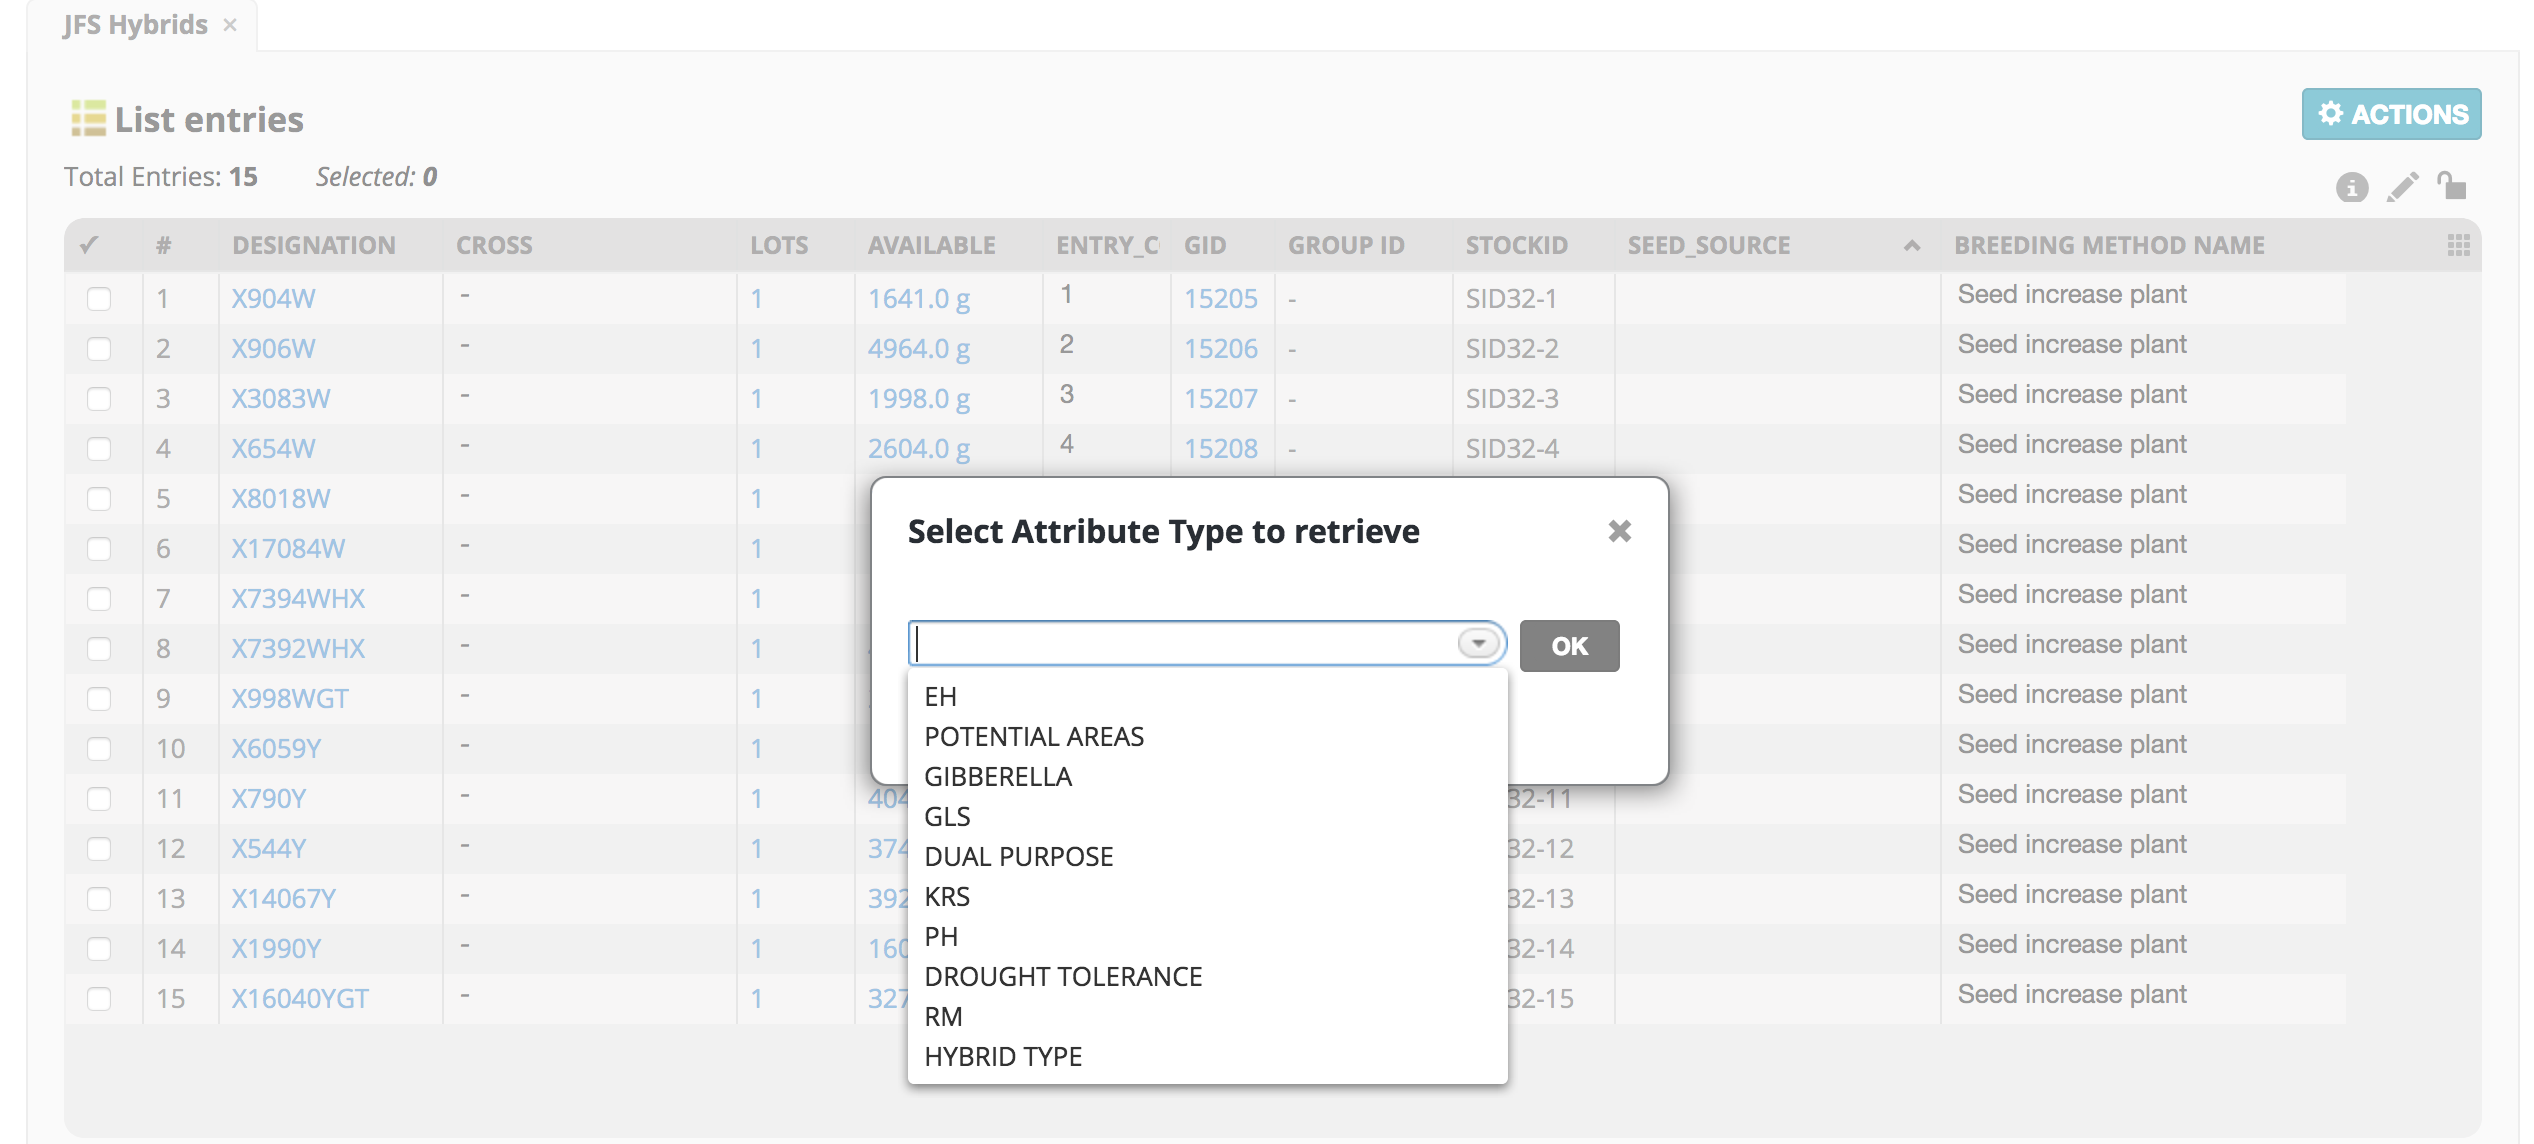
Add Columns to List
- Select Add Column and which type of information you would like to add, in this case attributes.

The attribute menu displays all of the attributes associated with germplasm in this list.
Selection of the attribute will reveal column details in the list view and allow for export.

In this example the attribute, drought tolerance, is being displayed in the germplasm list.
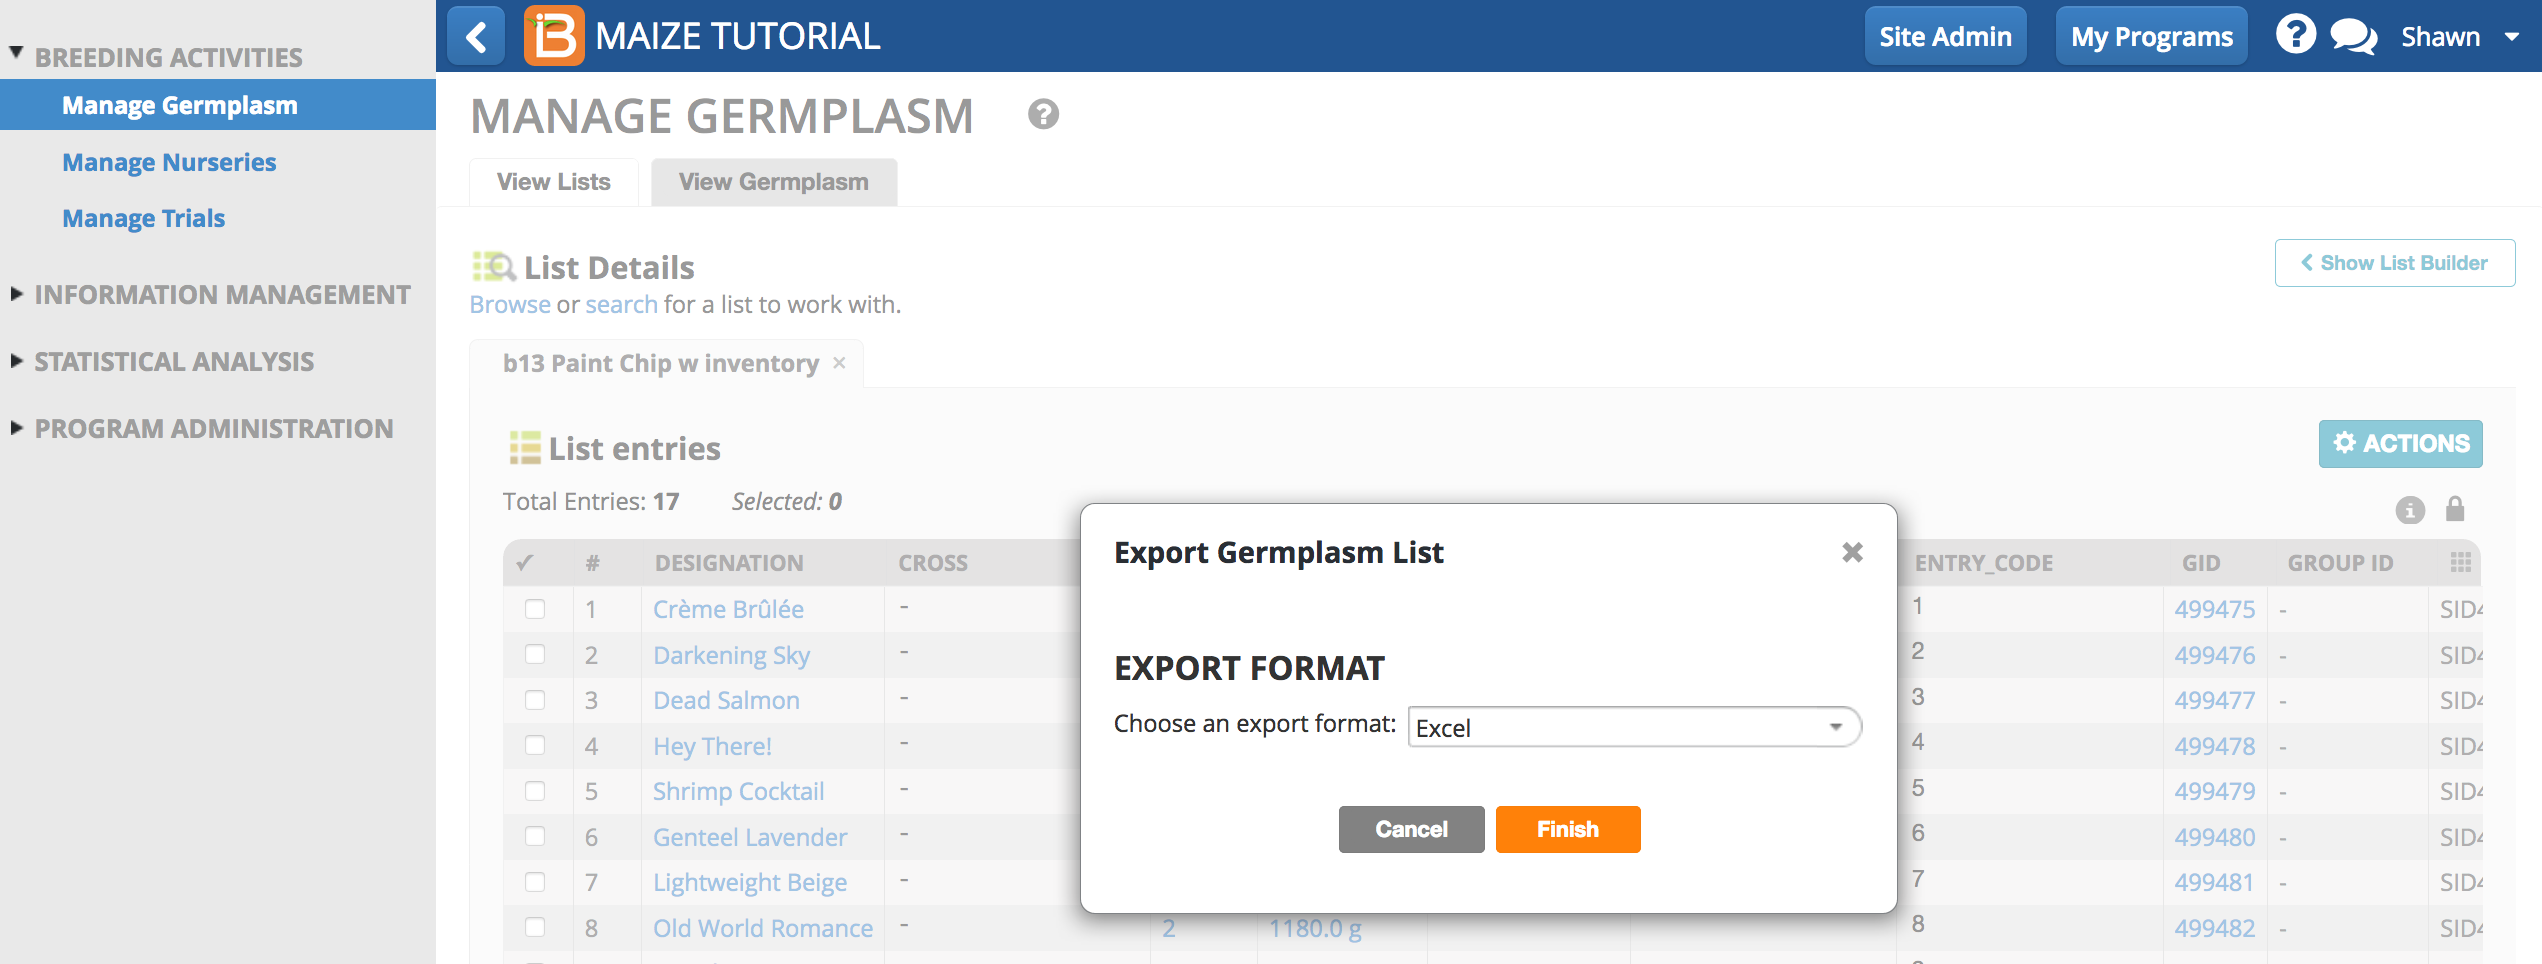
Export List
- Lock the list by selecting the padlock icon. Select the Actions button. Notice that locked lists offer fewer Actions options. Select Export List and select the appropriate output file type.
Grouping & Coding Options
Please see the Grouping & Coding section of the manual.
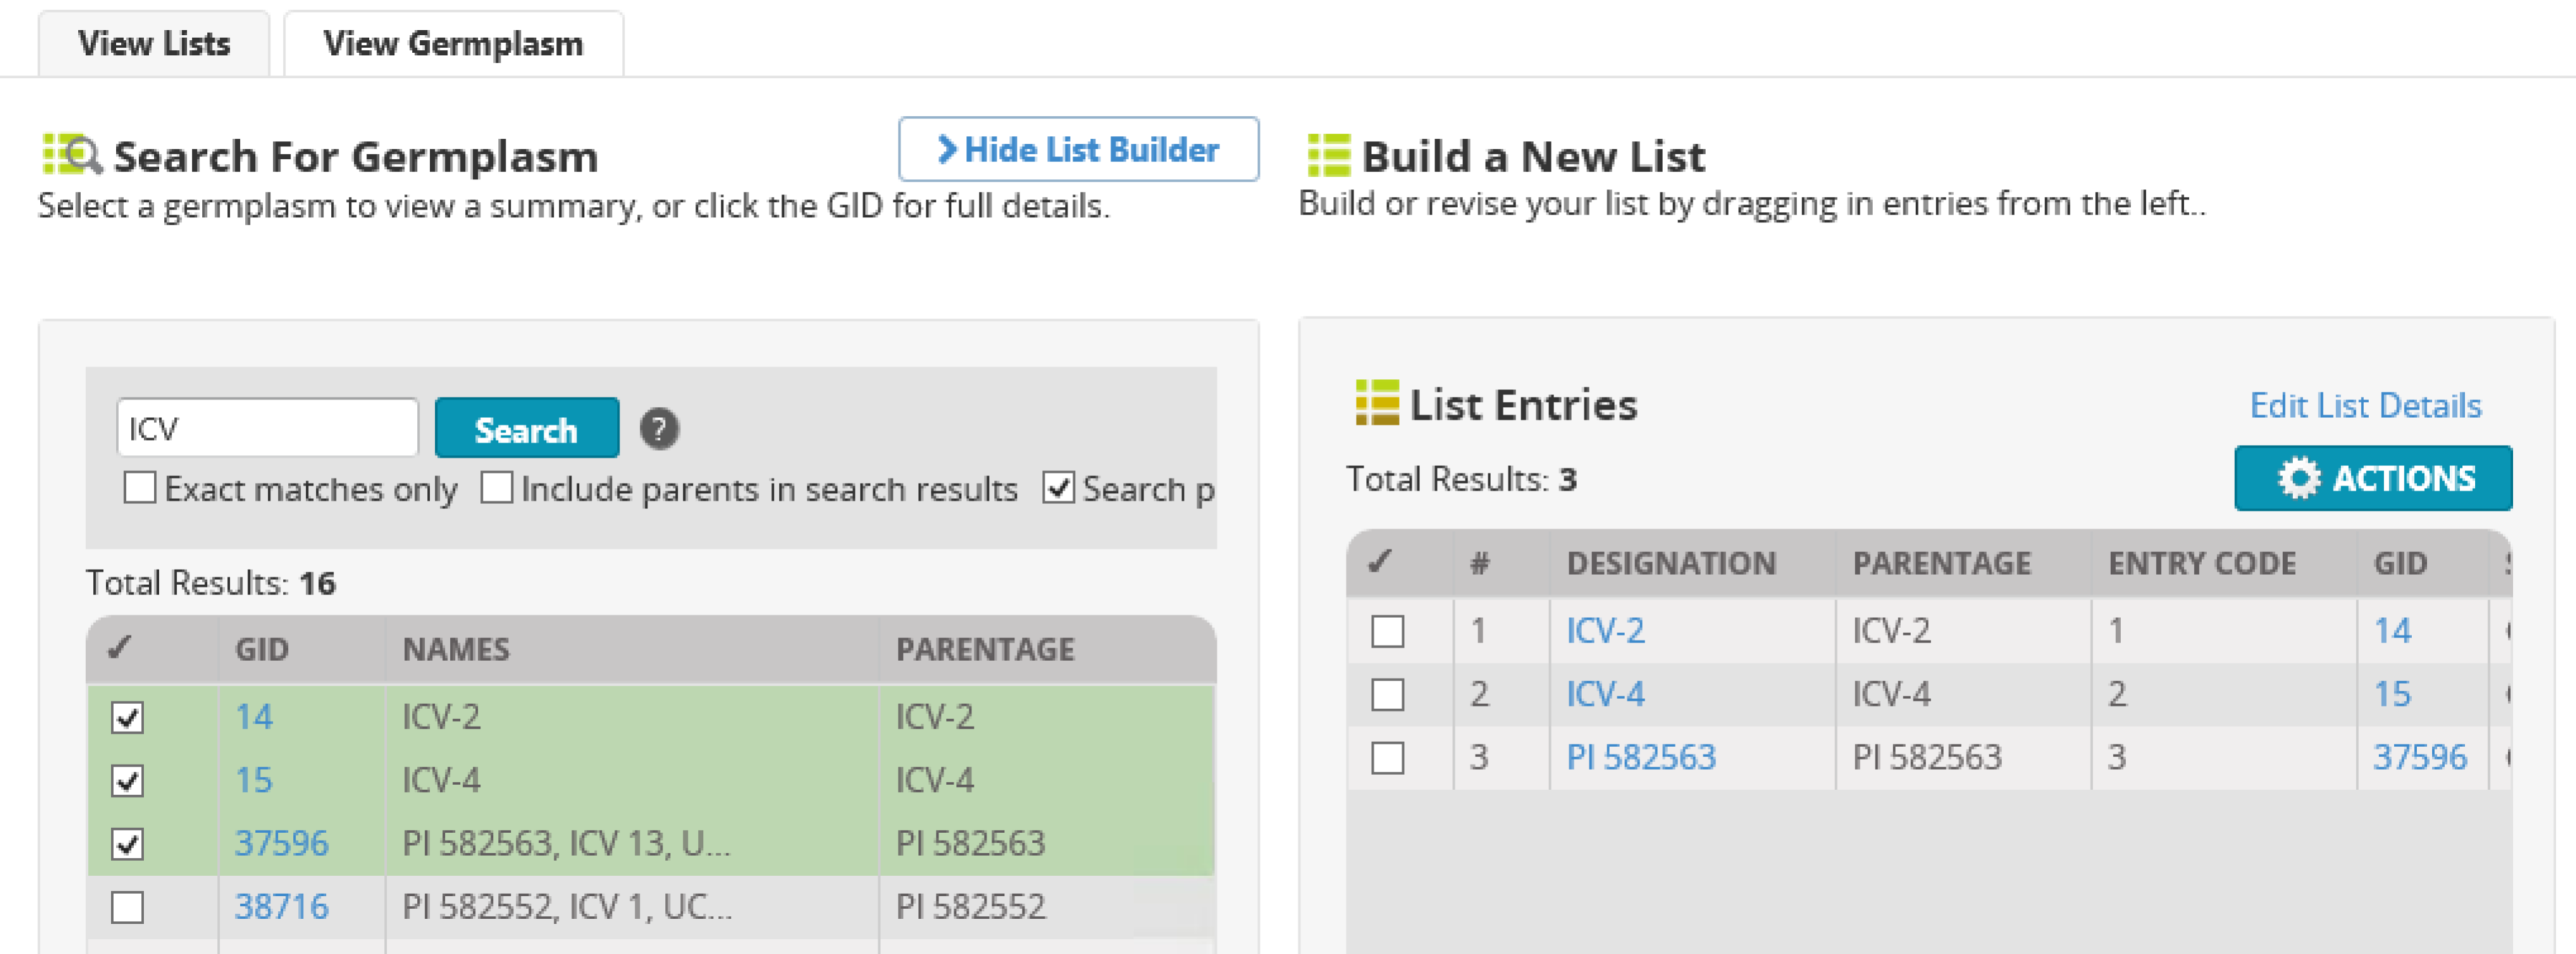
Build a New List
- Open the List Builder by clicking the ‘Show List Builder’ icon in the upper right hand corner.
- Select germplasm of interest in and drag and drop the selections into the build a new list window. Lists can be built up iteratively, moving back and forth between View Lists and View Germplasm
- Enter the list details. The list name must be unique to the program database. Select Save.
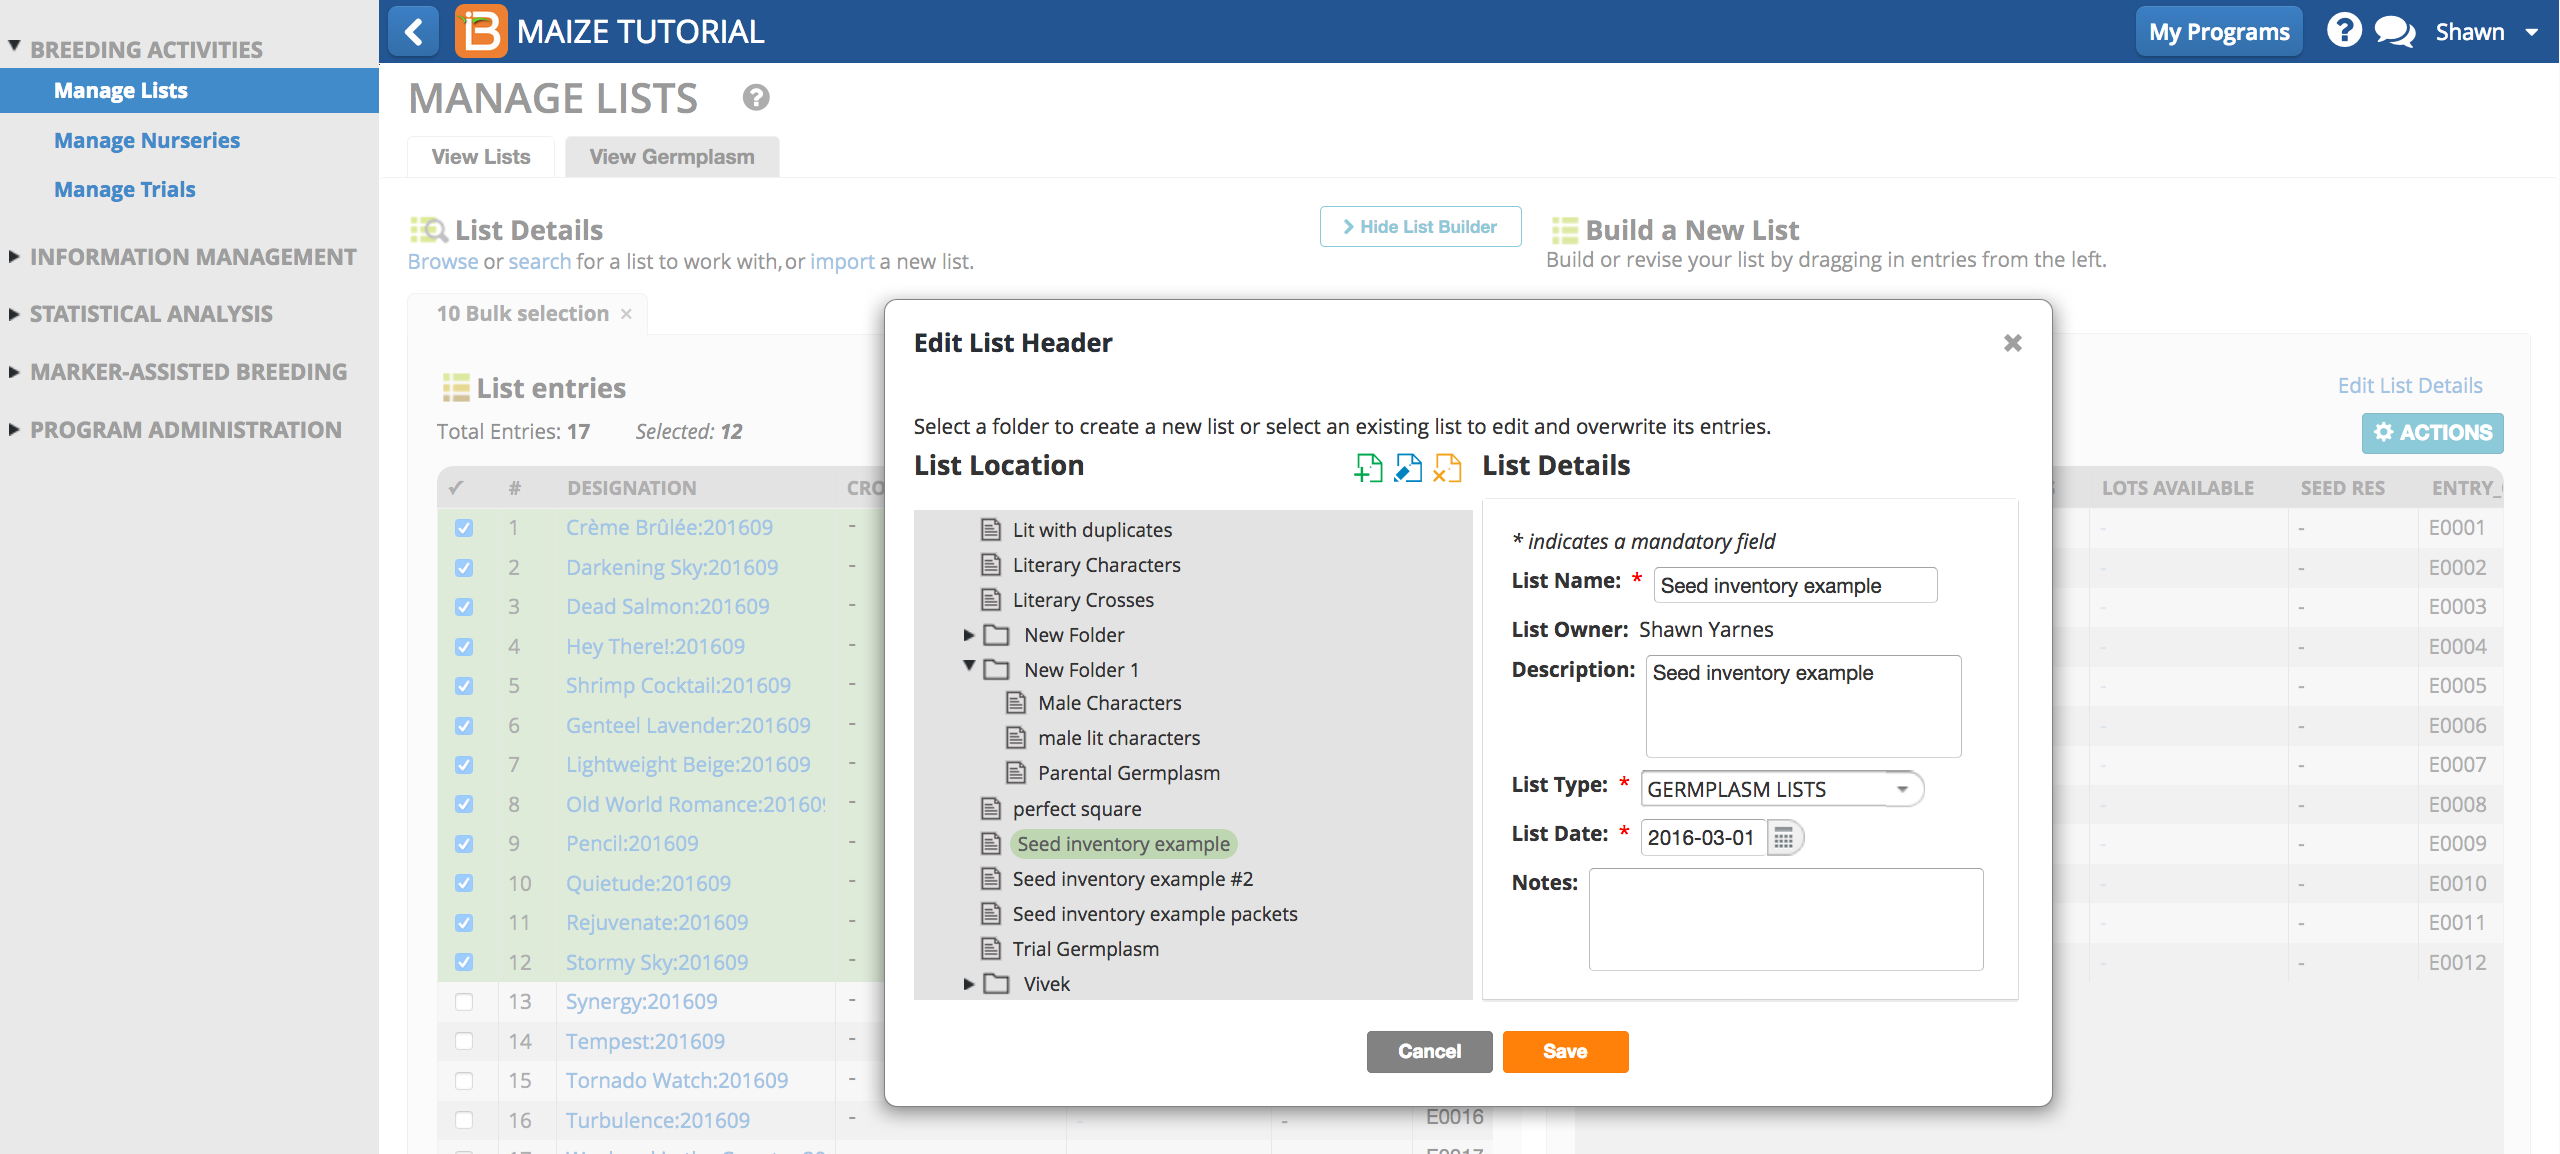
The newly created list now appears in the Program Lists file folder. The list can be renamed by selecting the pen icon and locked against further editing by selecting the lock icon. The Build a New List pane opened while browsing will remain open when you move to the Search tab.
Delete Germplasm
Germplasm created in the system erroneously can be deleted. Once deleted, the designation and GID will not appear in germplasm searches. The GID is not available for reuse after deletion.
The system will prevent deletion of germplasm:
- if the germplasm has inventory
- if the germplasm exists in multiple lists
- if the germplasm is associated with a nursery or trial
- if the germplasm is fixed
- if the germplasm has descendants
- Select the entries to be deleted. From the Actions menu, Delete selected germplasm record.
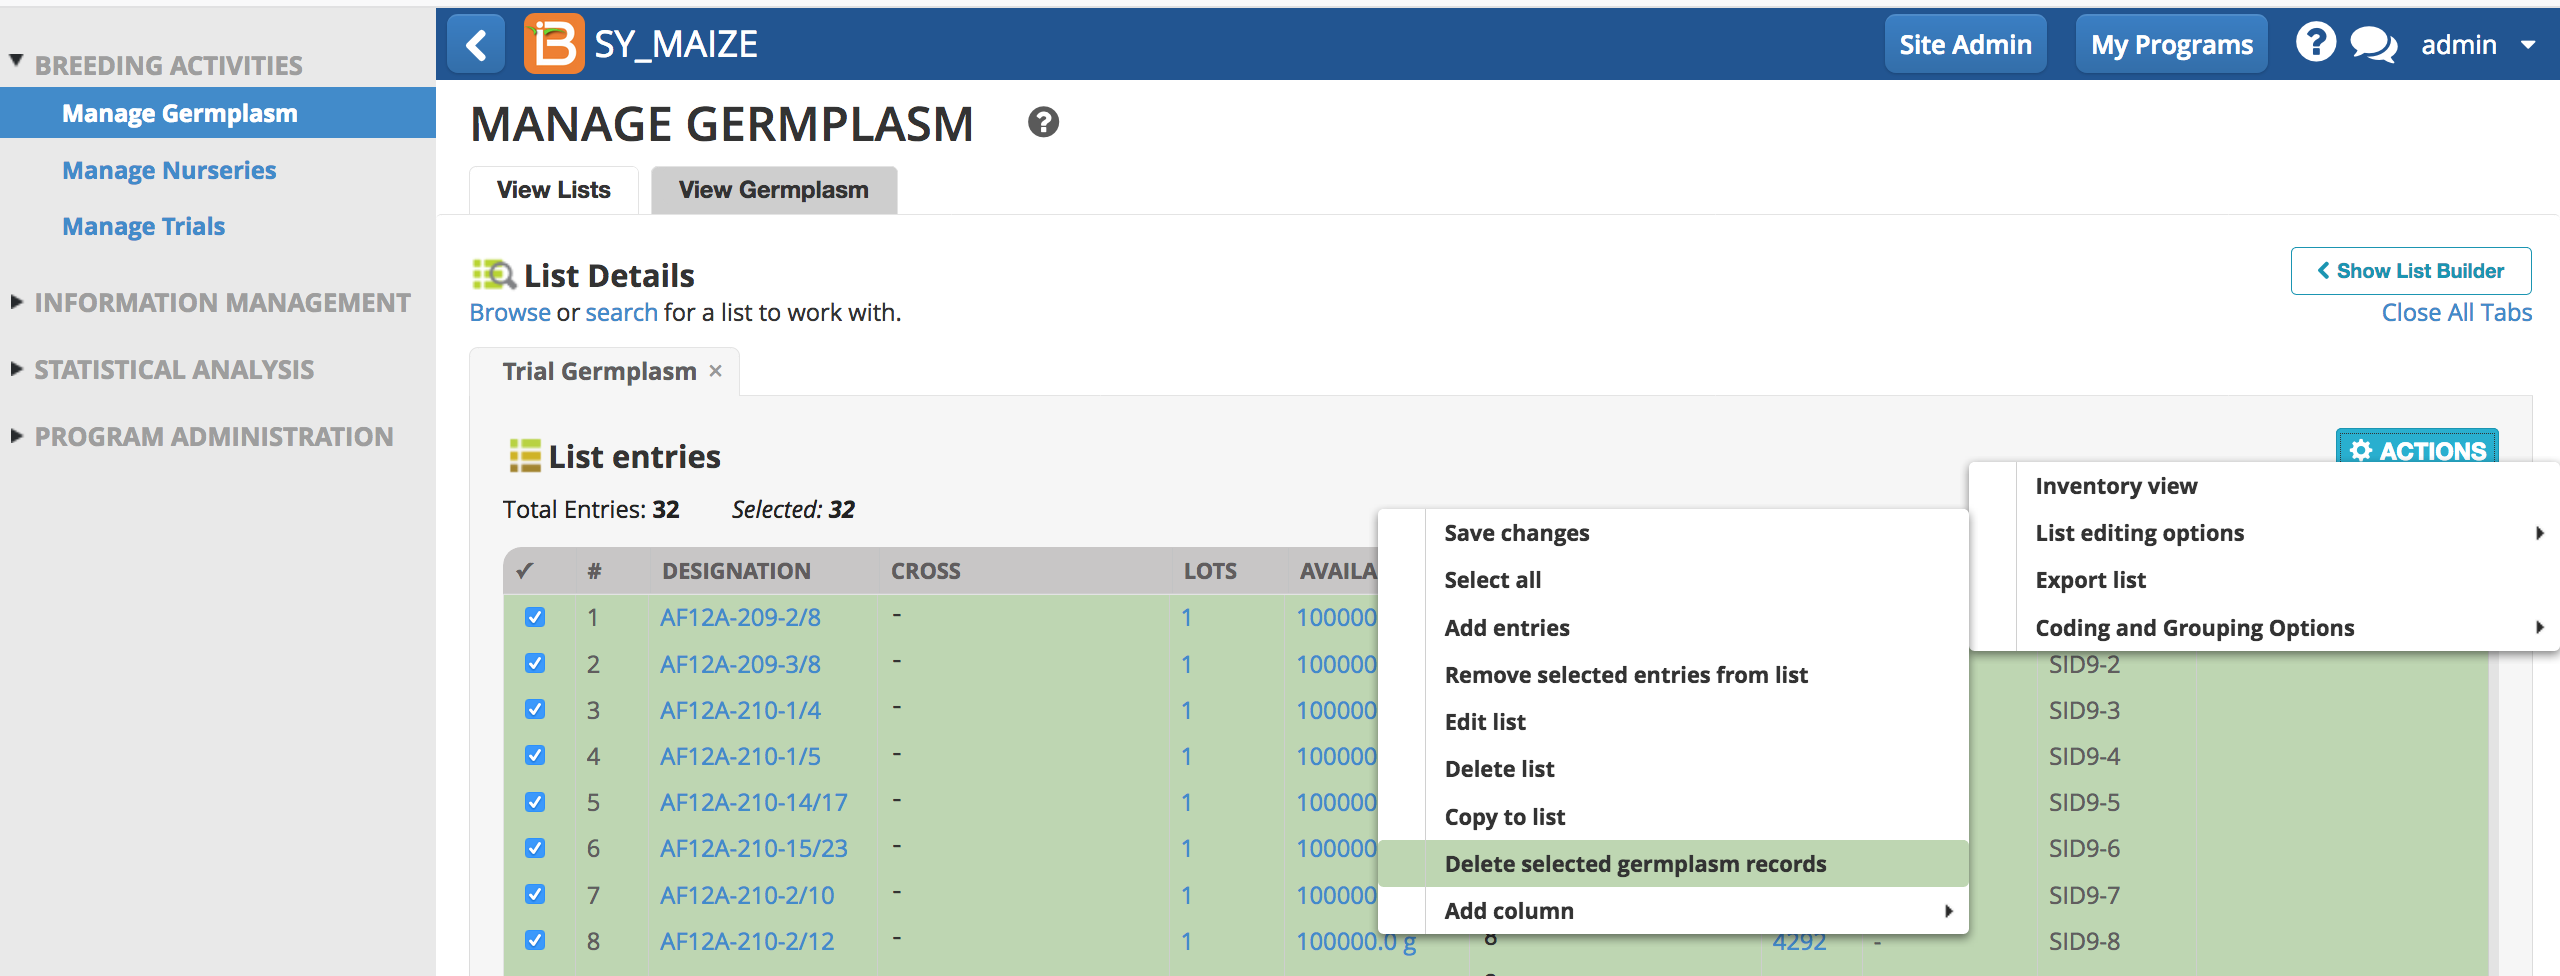
- Select Yes.

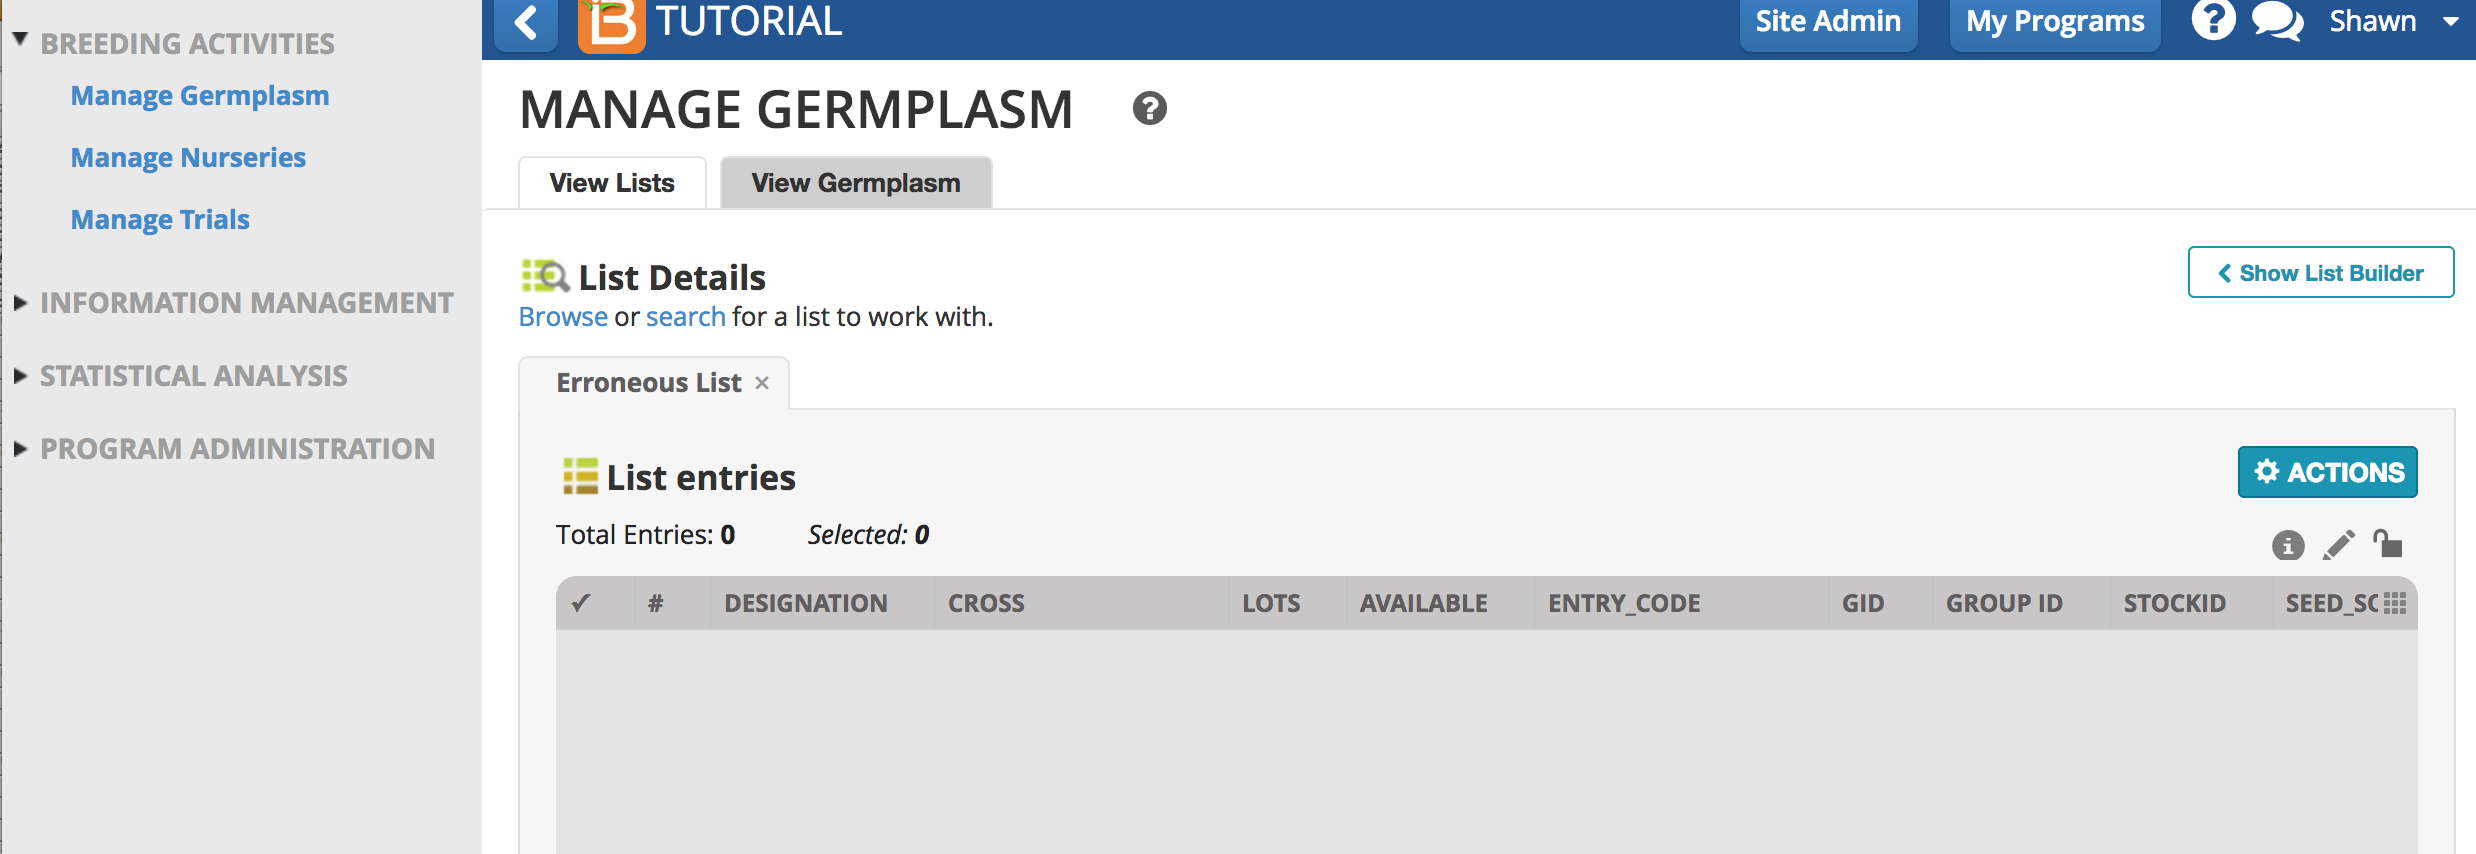
If the germplasm meets the deletion validations, the germplasm will be deleted The list can be re-populated with new germplasm or deleted
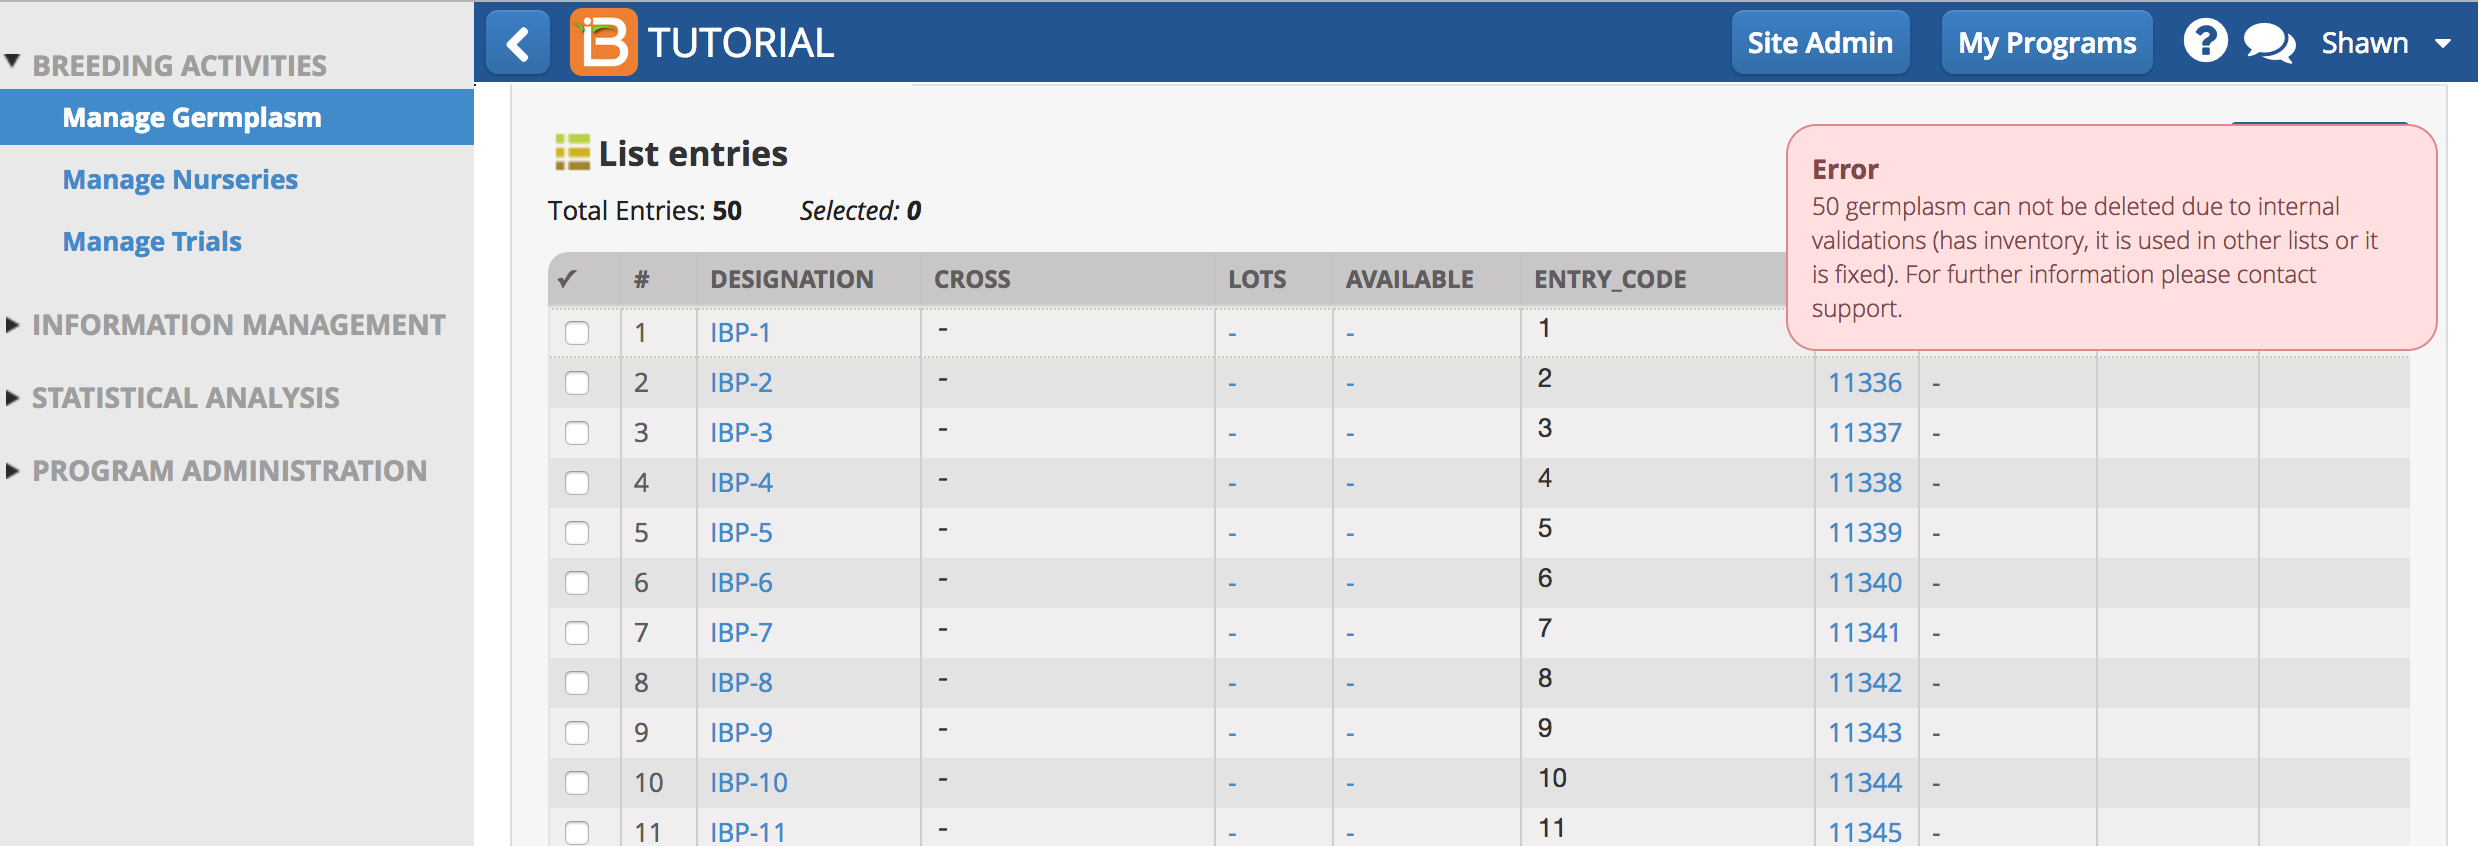
If the deletion validations are not met, an error message will indicate that the delete isn't possible.
Cannot delete germplasm that:
- Have Inventory - must close the lots before deletion.
- Are used in other lists - must remove from studies and delete associated lists
- Have descendants
- Are grouped - must ungroup to delete