

Inventory
Label Reserved Inventory
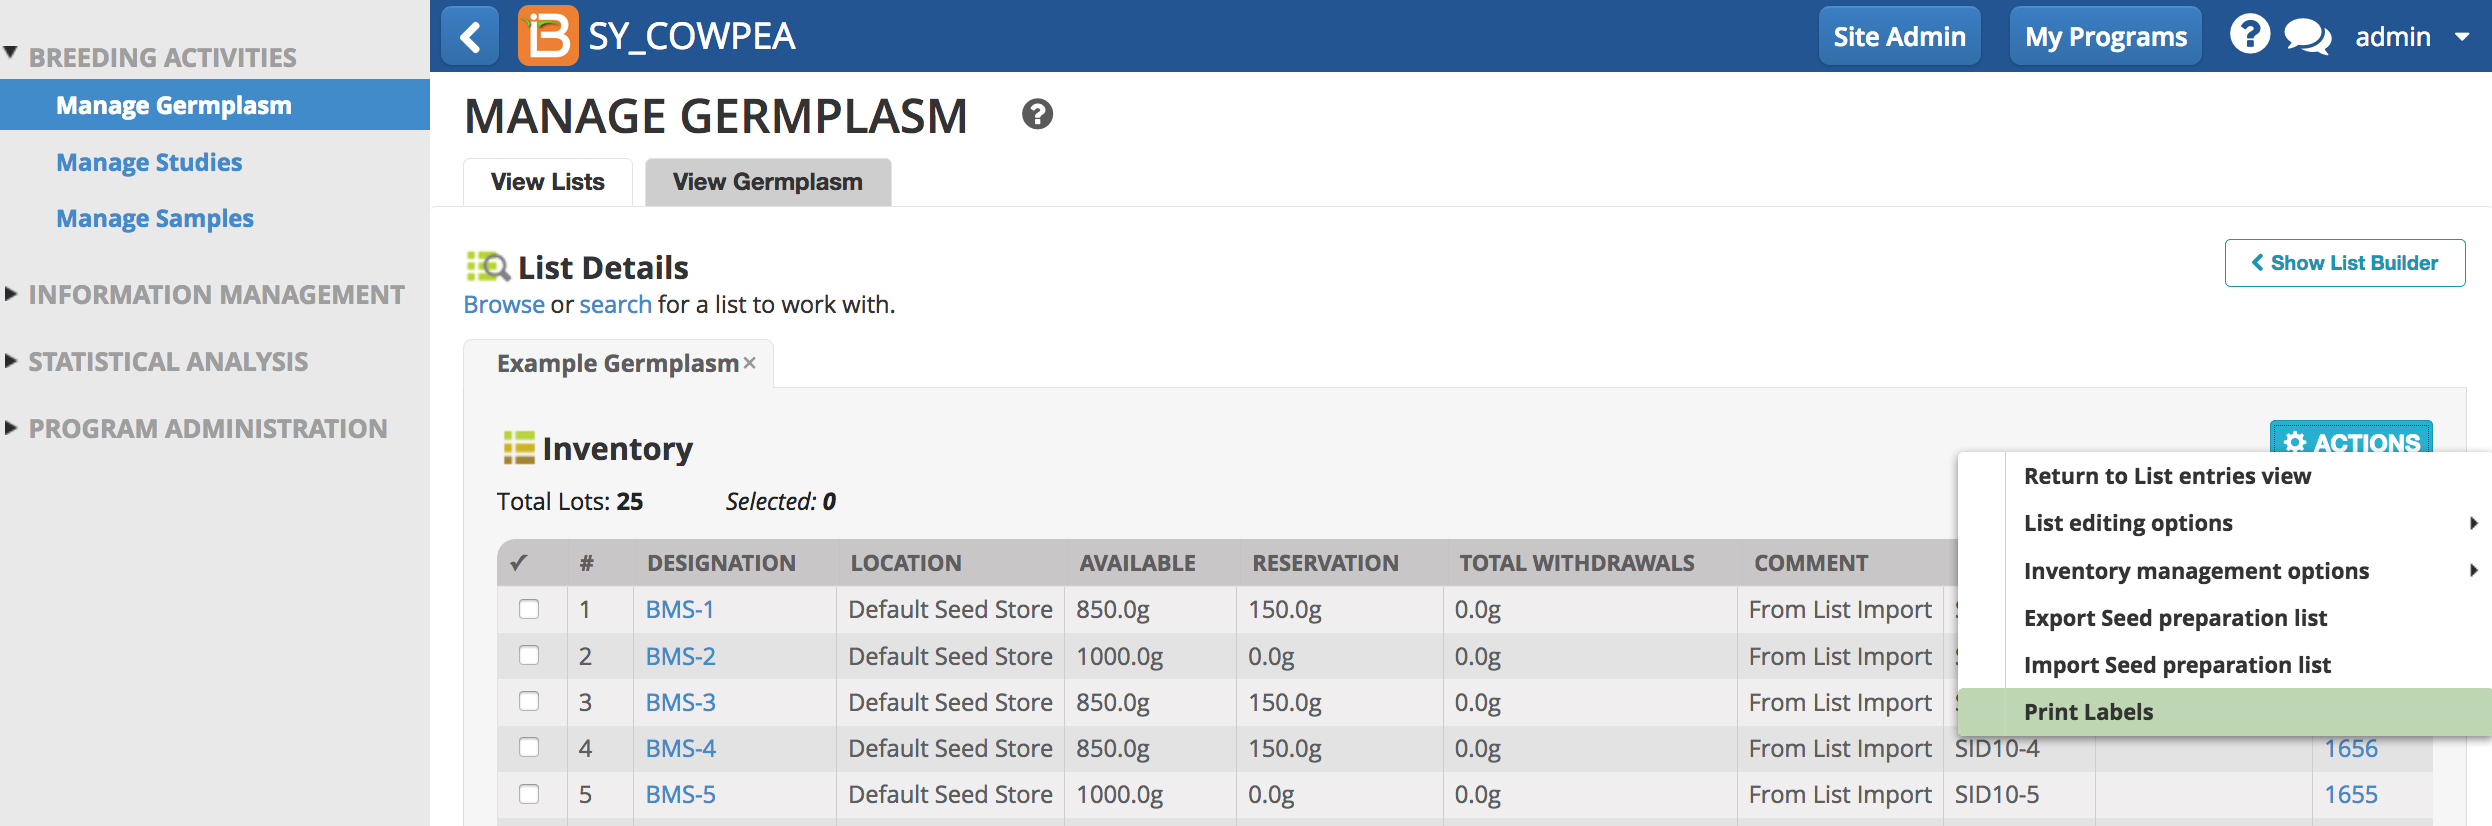
The Manage Germplasm tool allows for the reservation of seed inventory, export of seed preparation list, and label printing. Seed packing labels are available for reserved seed inventory. See more on Inventory Management.
- Select Print Labels from the actions menu of inventory view. Labels will be made only for reserved inventory.
Labels are available for inventory lots with pending reservations. Label details are provided in a variety of formats to support most label printers. Depending on your label printer, formatting changes may need to be applied to the output file.
Harvest Labels
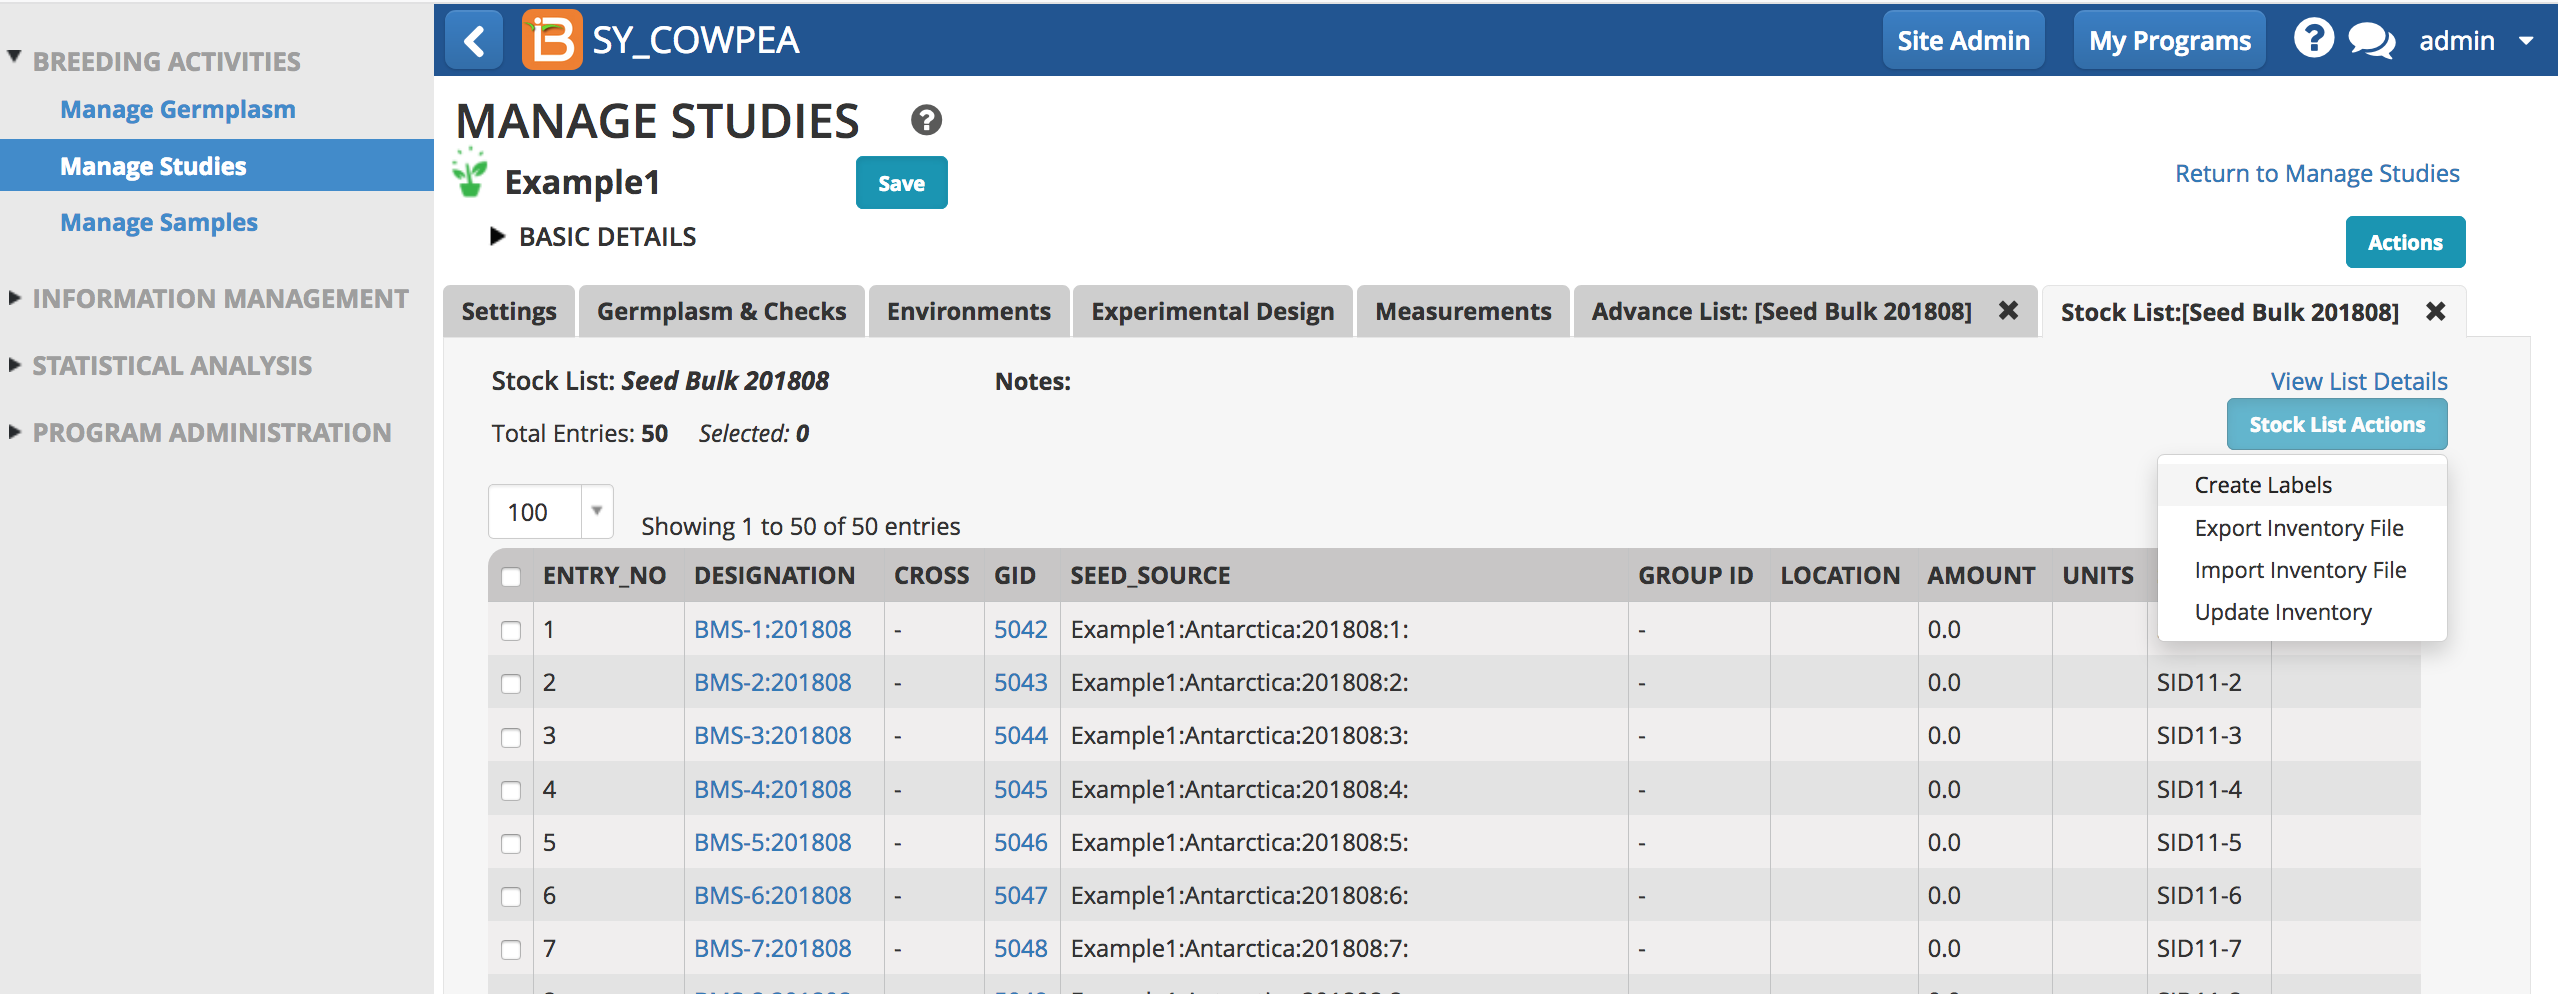
Stock lists can be generated from any cross and advance lists within a study (See more about Inventory Management) and labels made for harvest.
- Select Create Labels from the Stock List Actions menu.
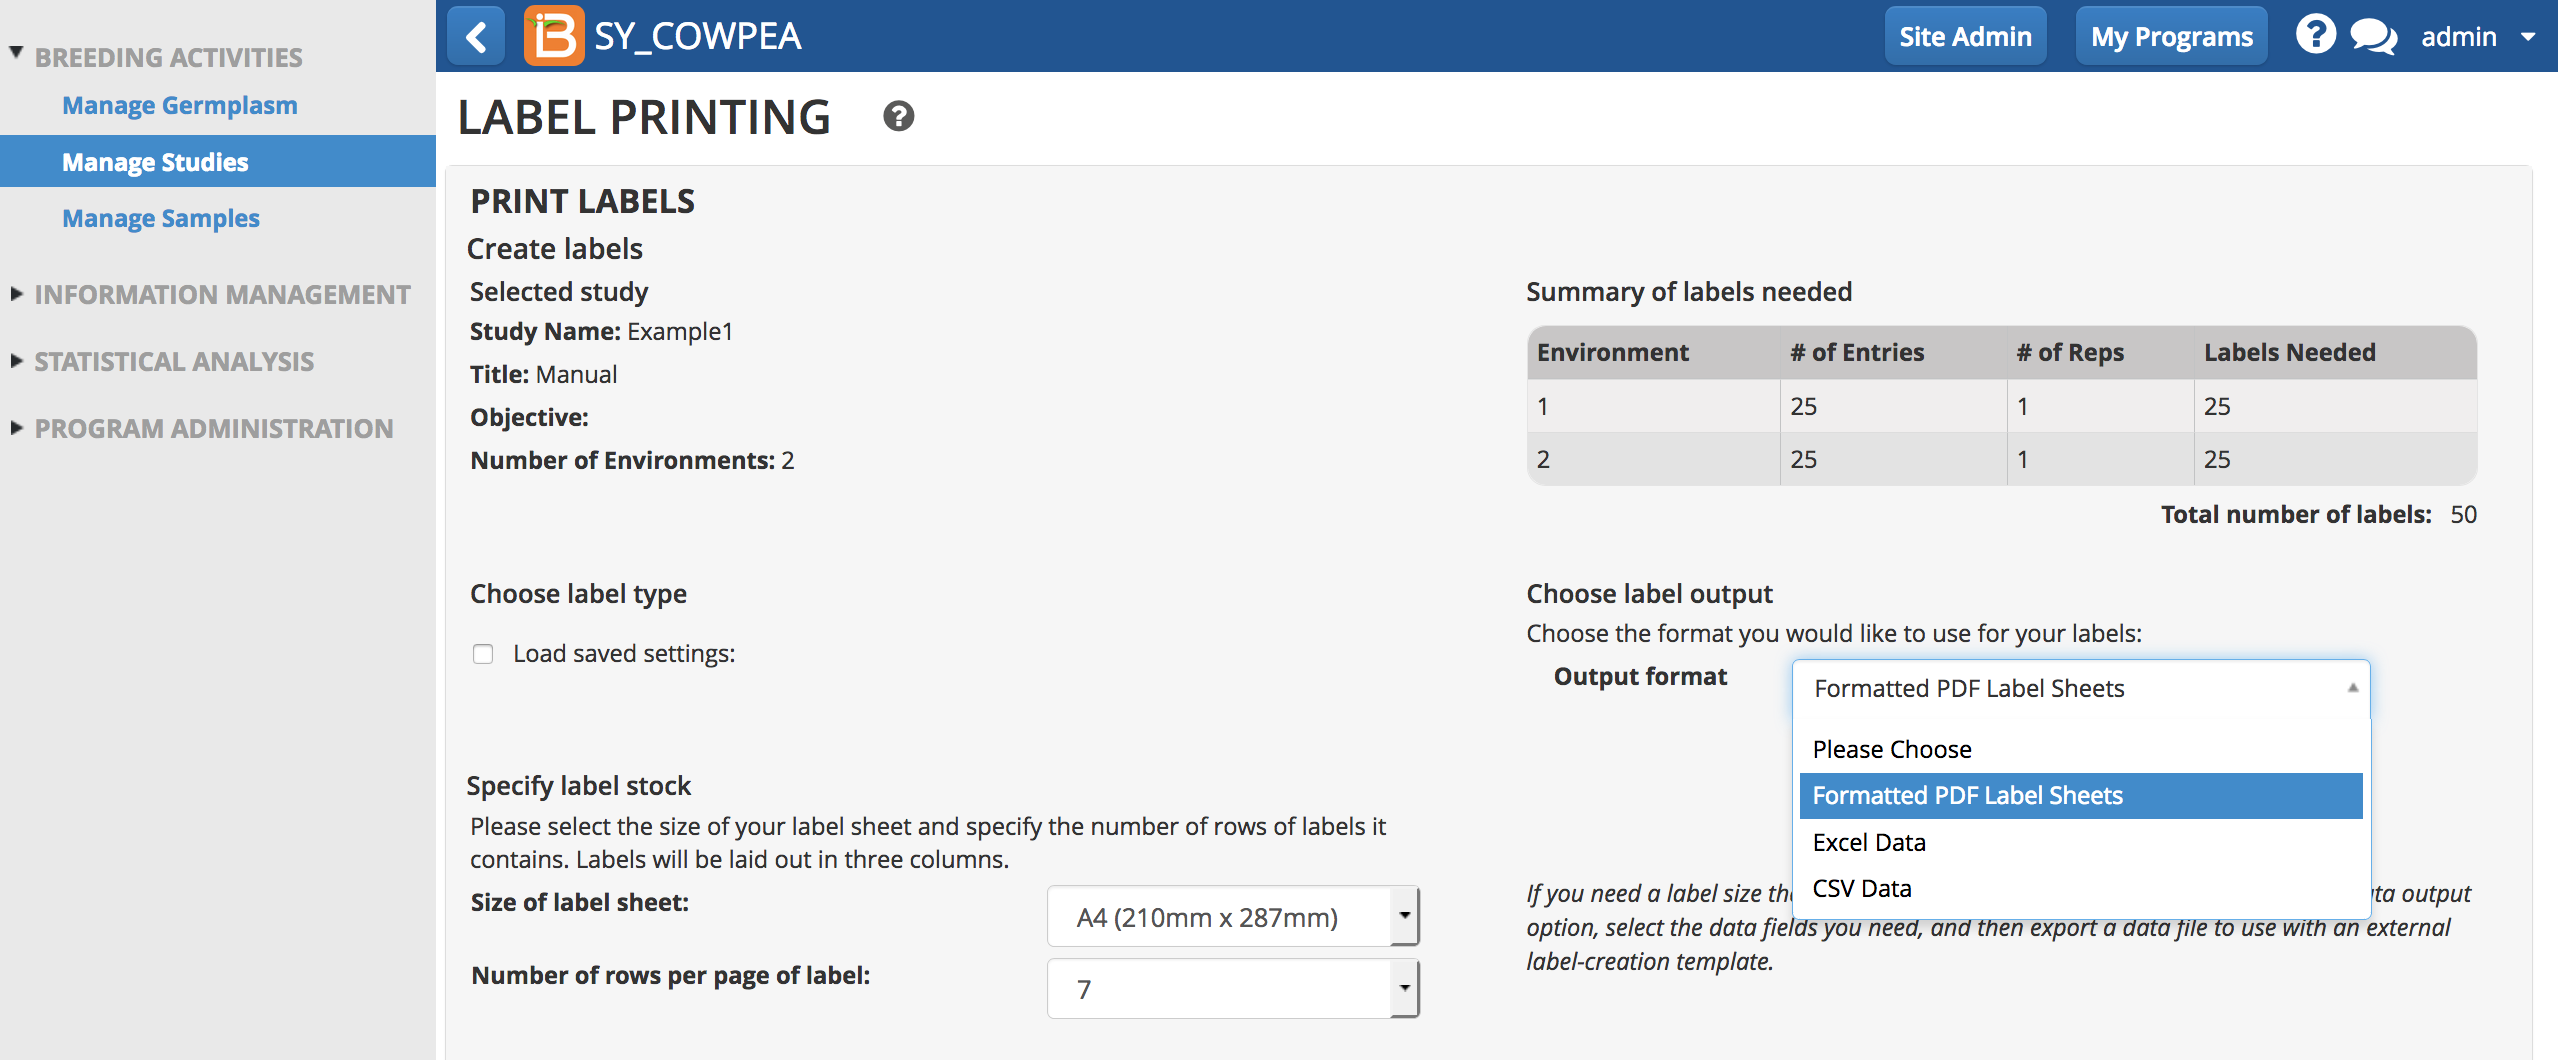
- Select label output details, including file format format for export (.pdf, .csv, .xsl). There are a few label stock formats available for .pdf output formatting.
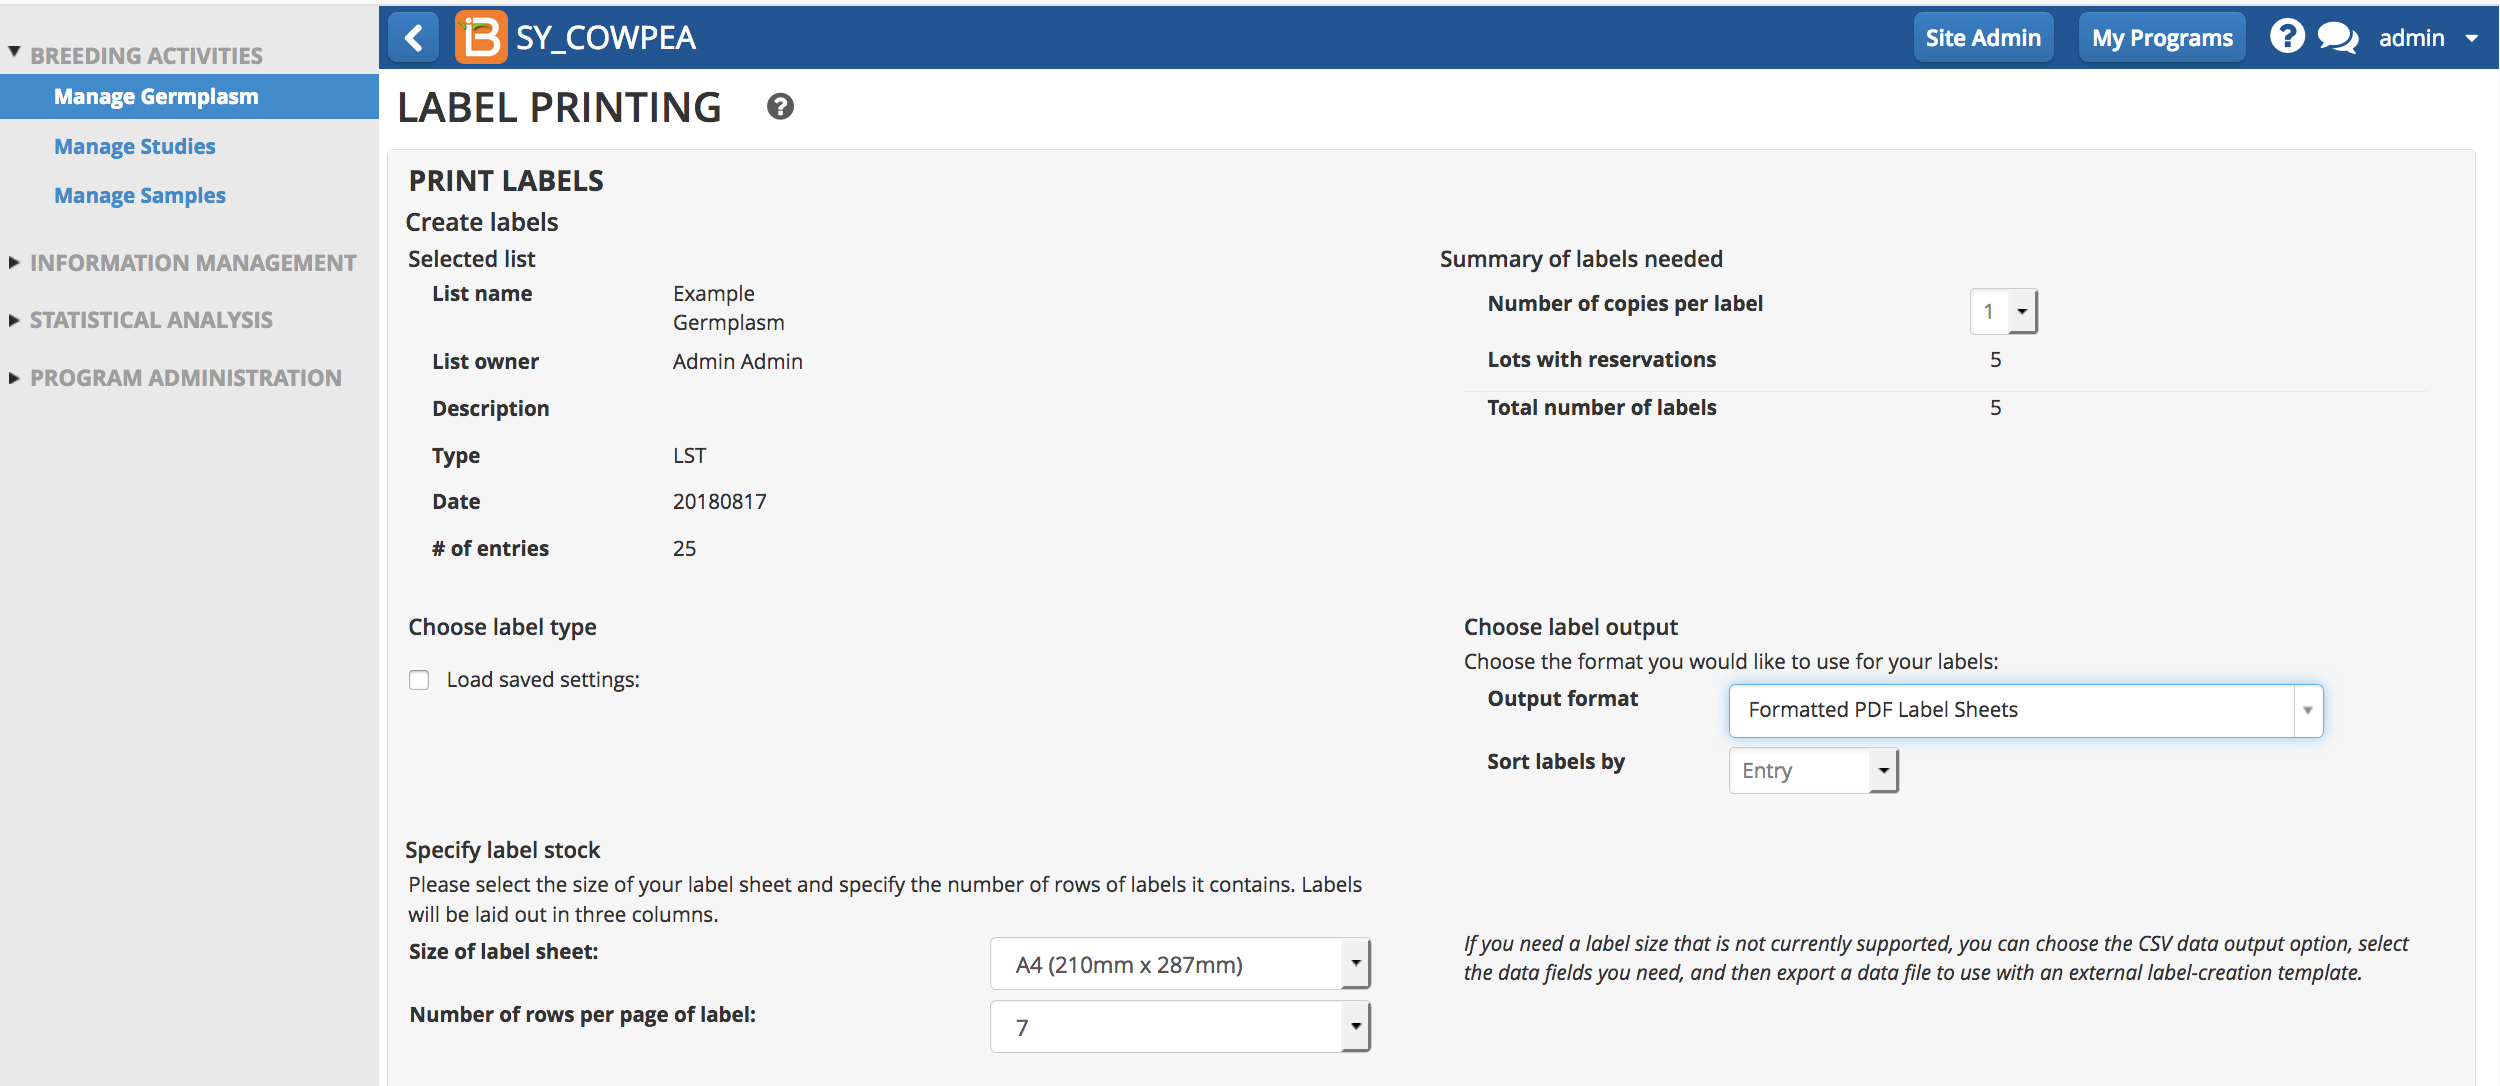
Notice that the 5 labels reflects the 5 reserved lots.
Label Format
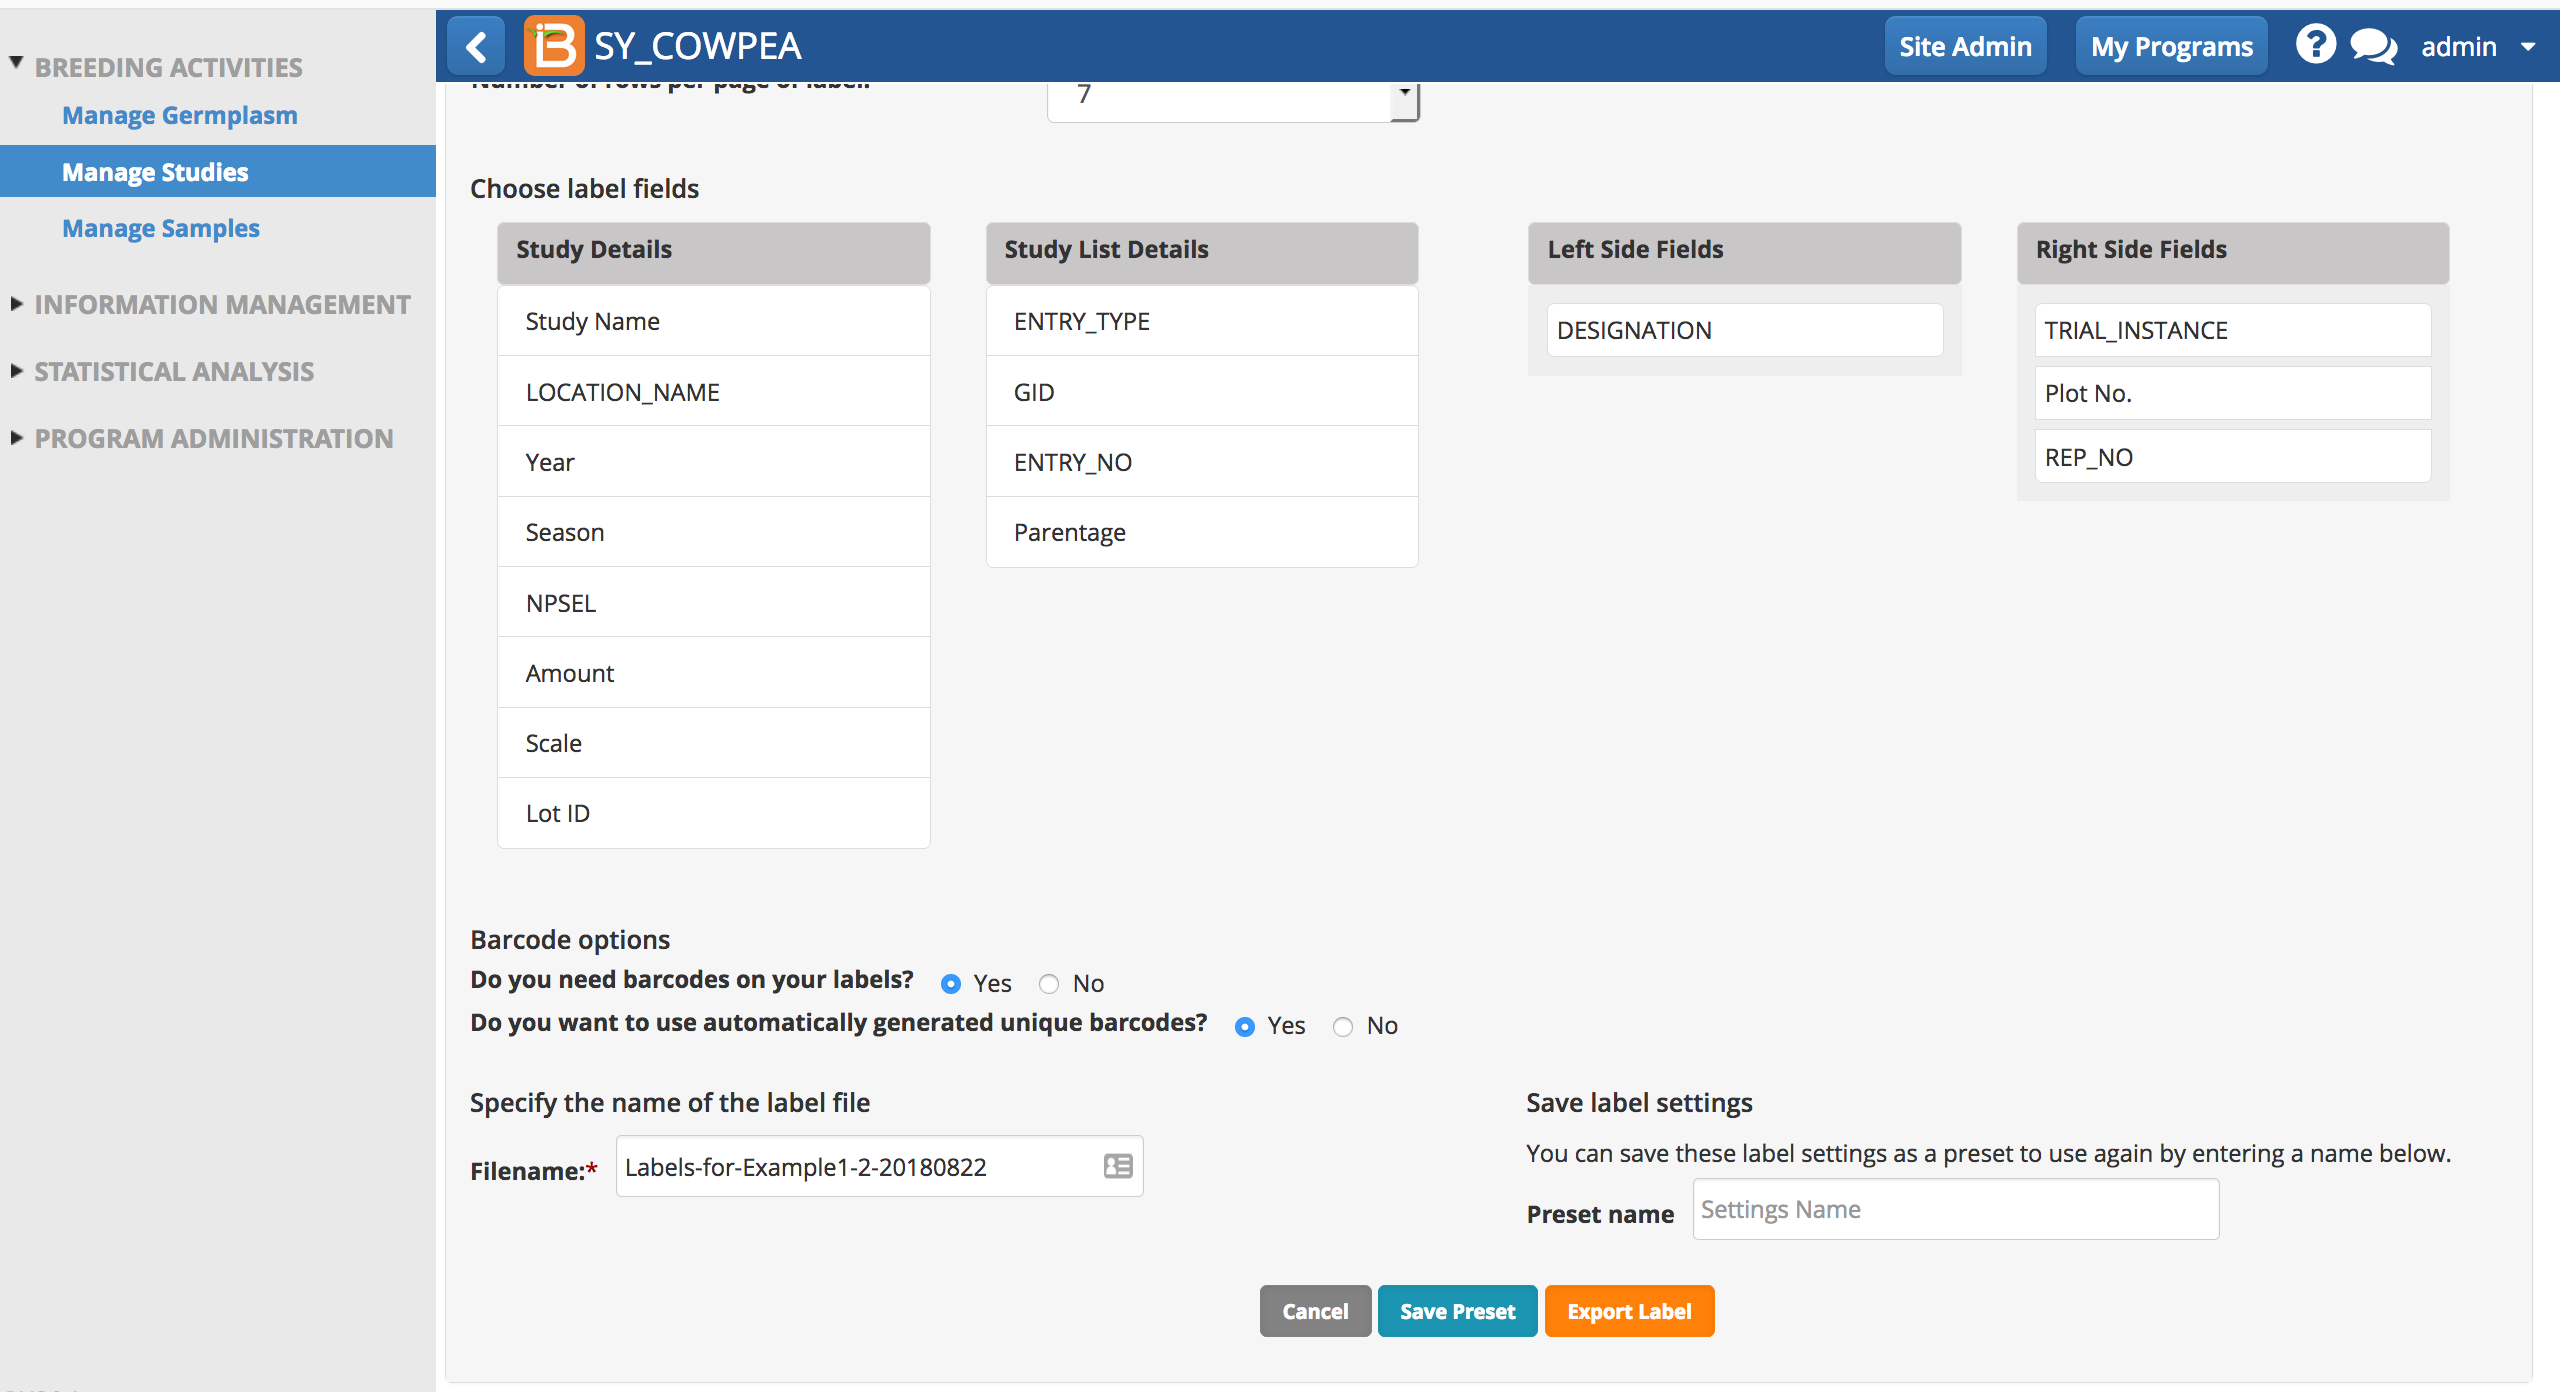
- Select list details to include on the label, including barcodes for machine reading. Select Export Label.
Details for Seed Packets
- GID: Unique database germplasm identifier
- Designation: Preferred name
- Cross: Parental cross string
- Stock ID: Individual contribution to Lot
- Seed Source: Concatenated study name and plot number, corresponding to origin of the seed.
- Lot ID: Unique inventory identifier
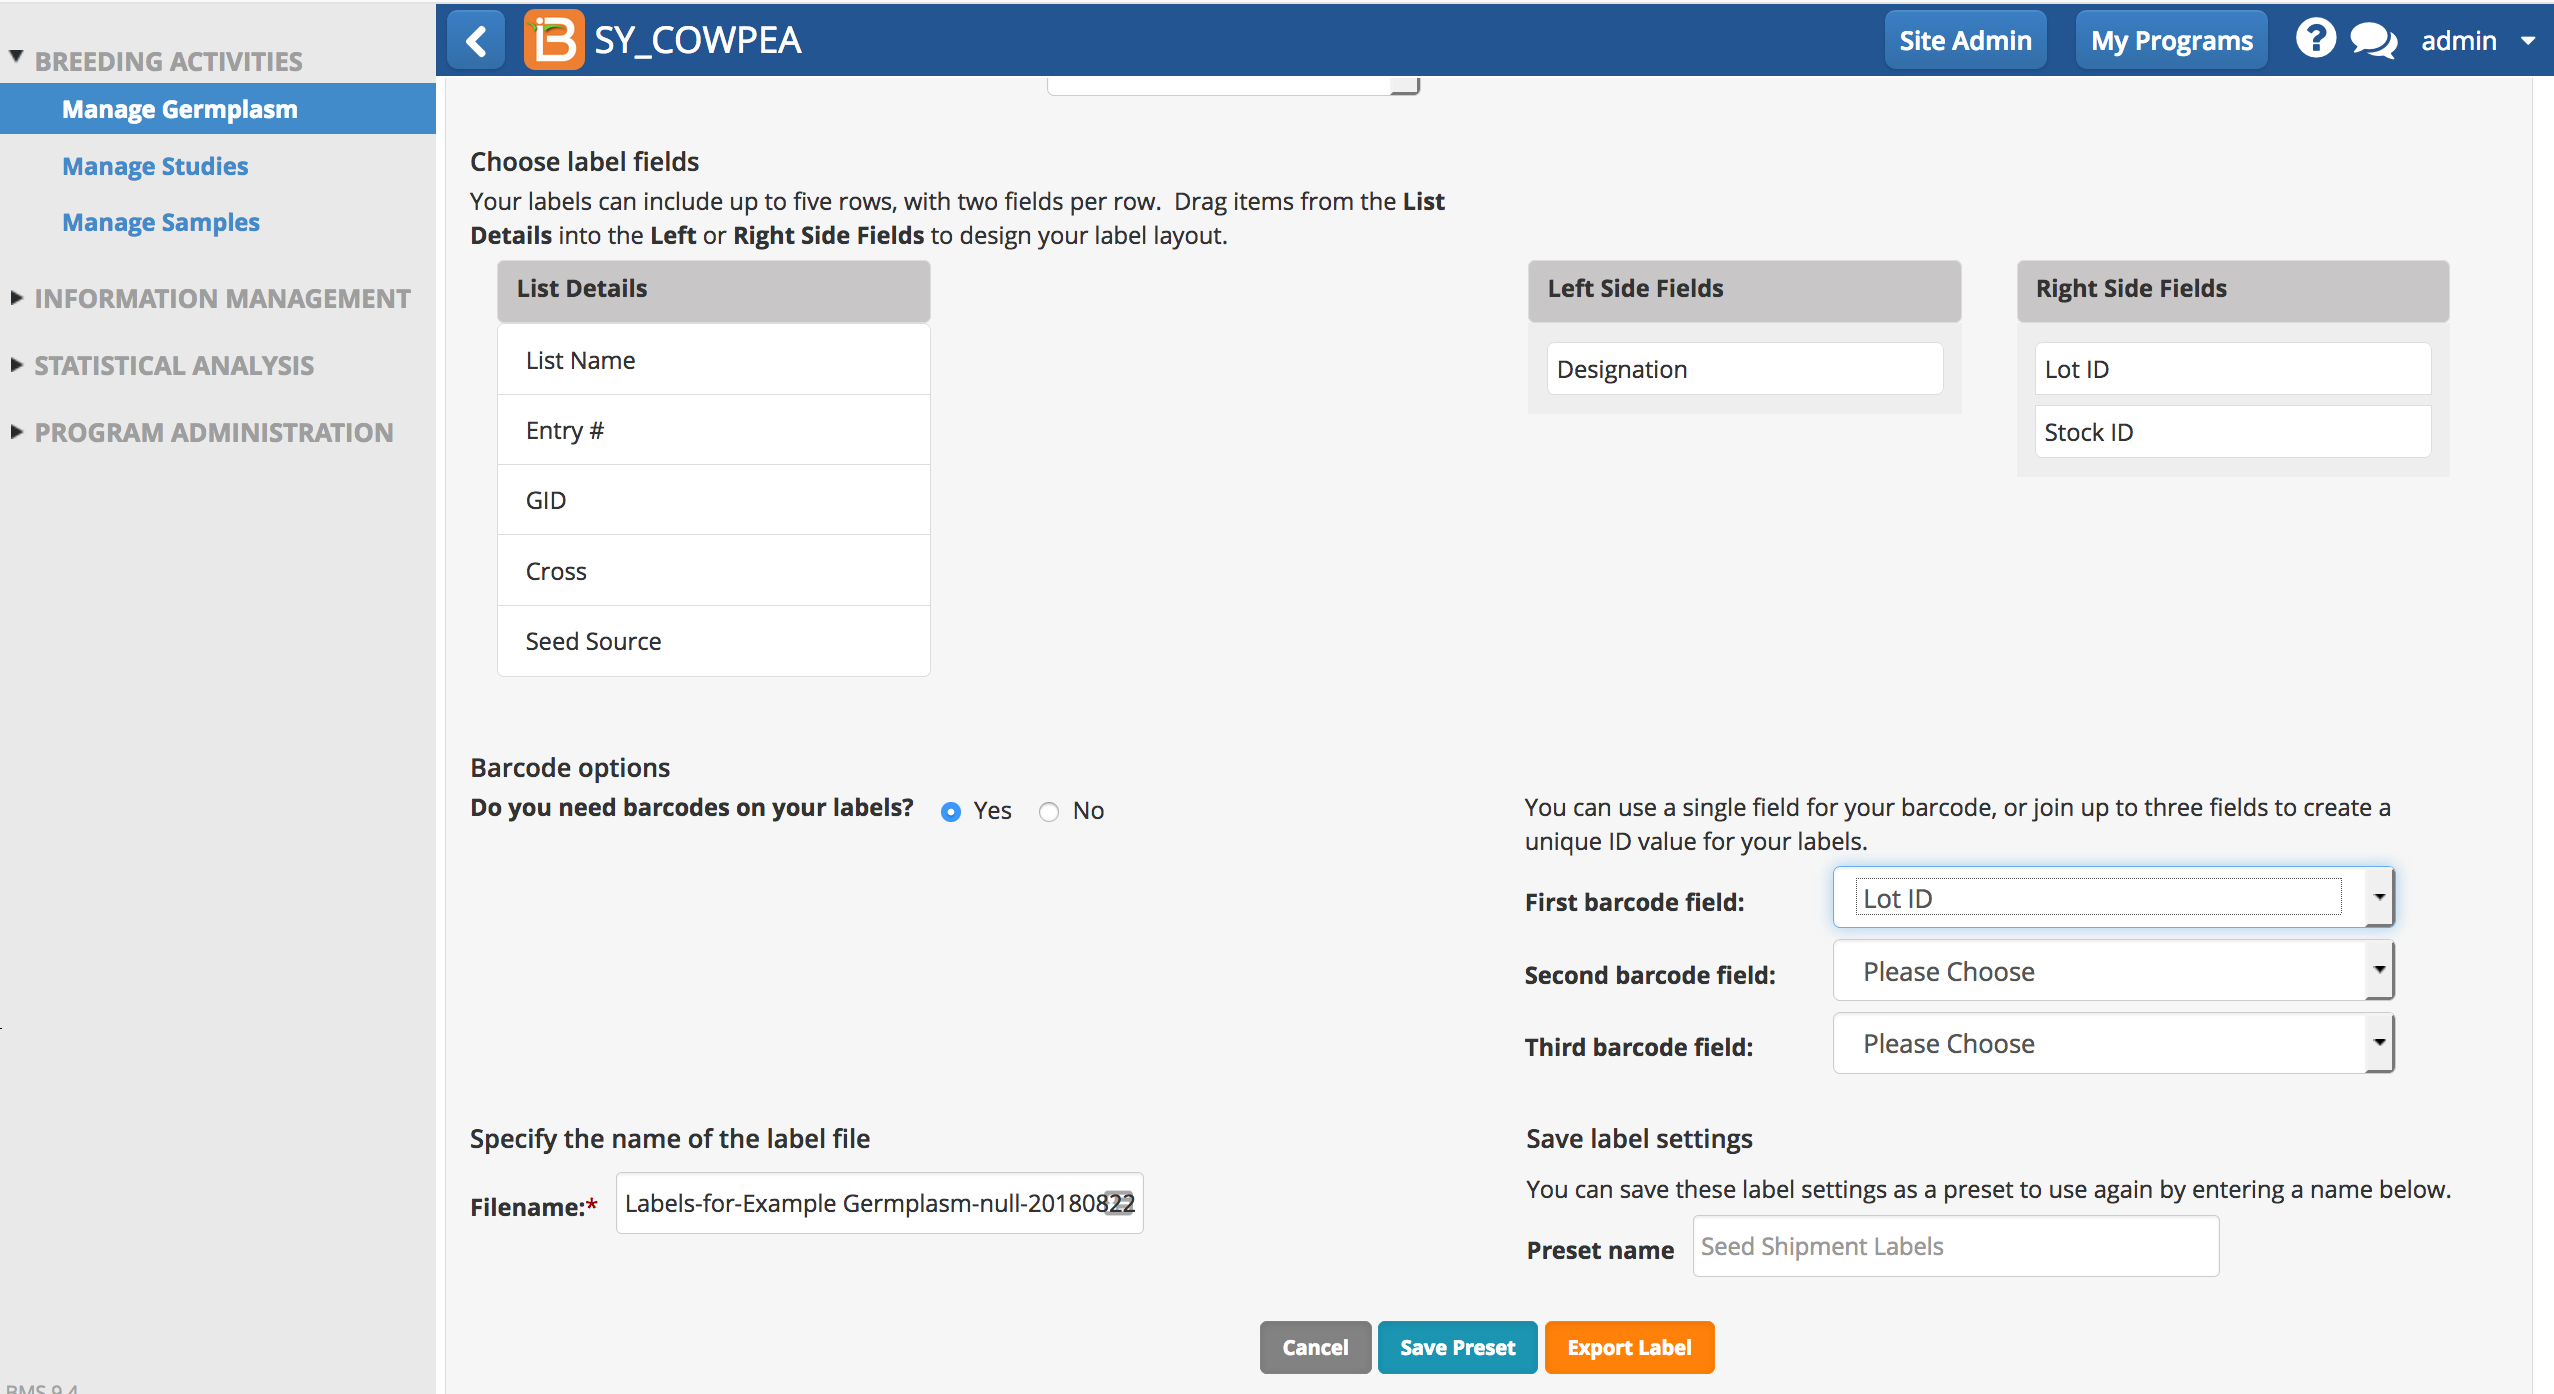
- Review label export file.

Example of .pdf labels with barcodes
Studies
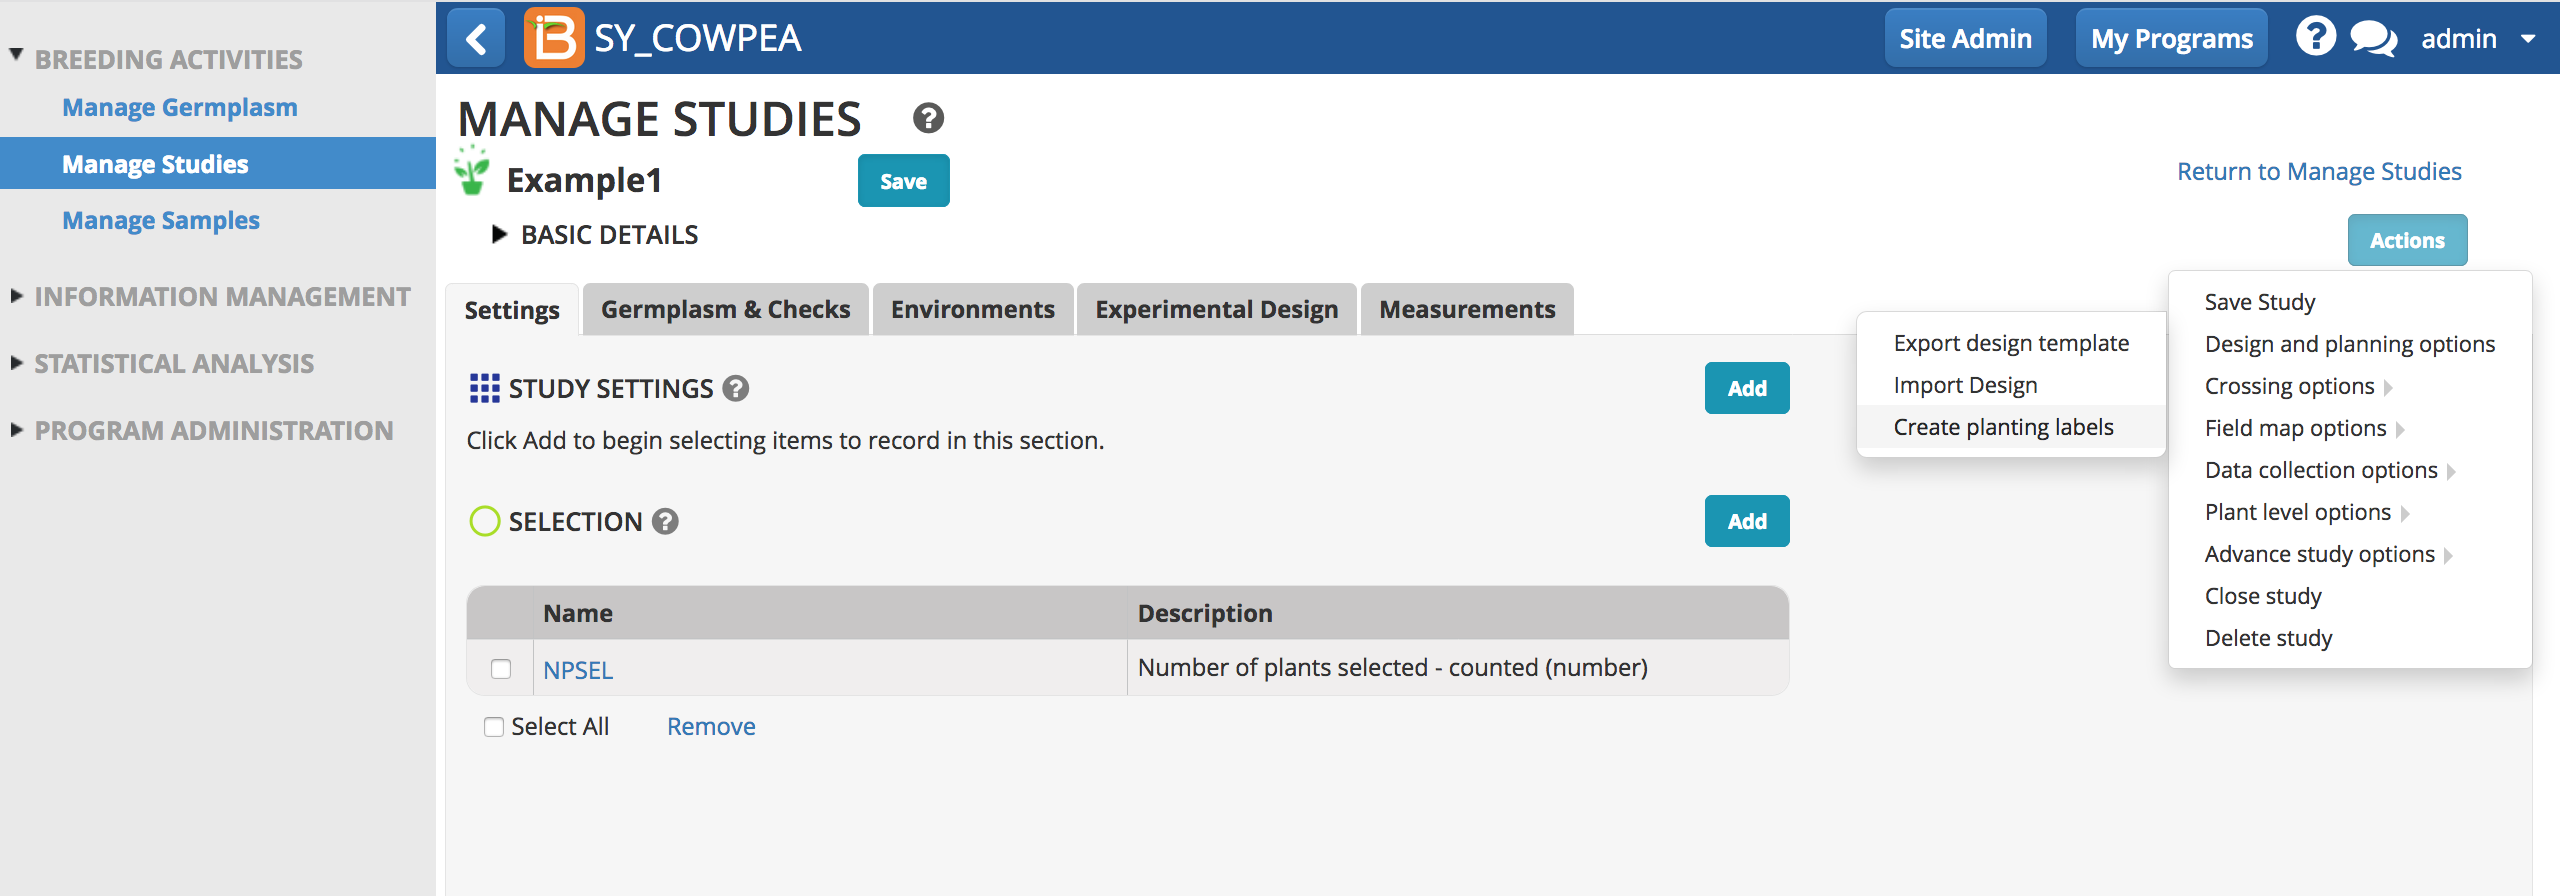
Study planting labels are accessible from the Actions menu from studies and field plans.
Planting labels
- Design the study and save. Select create planting labels from Action menu.
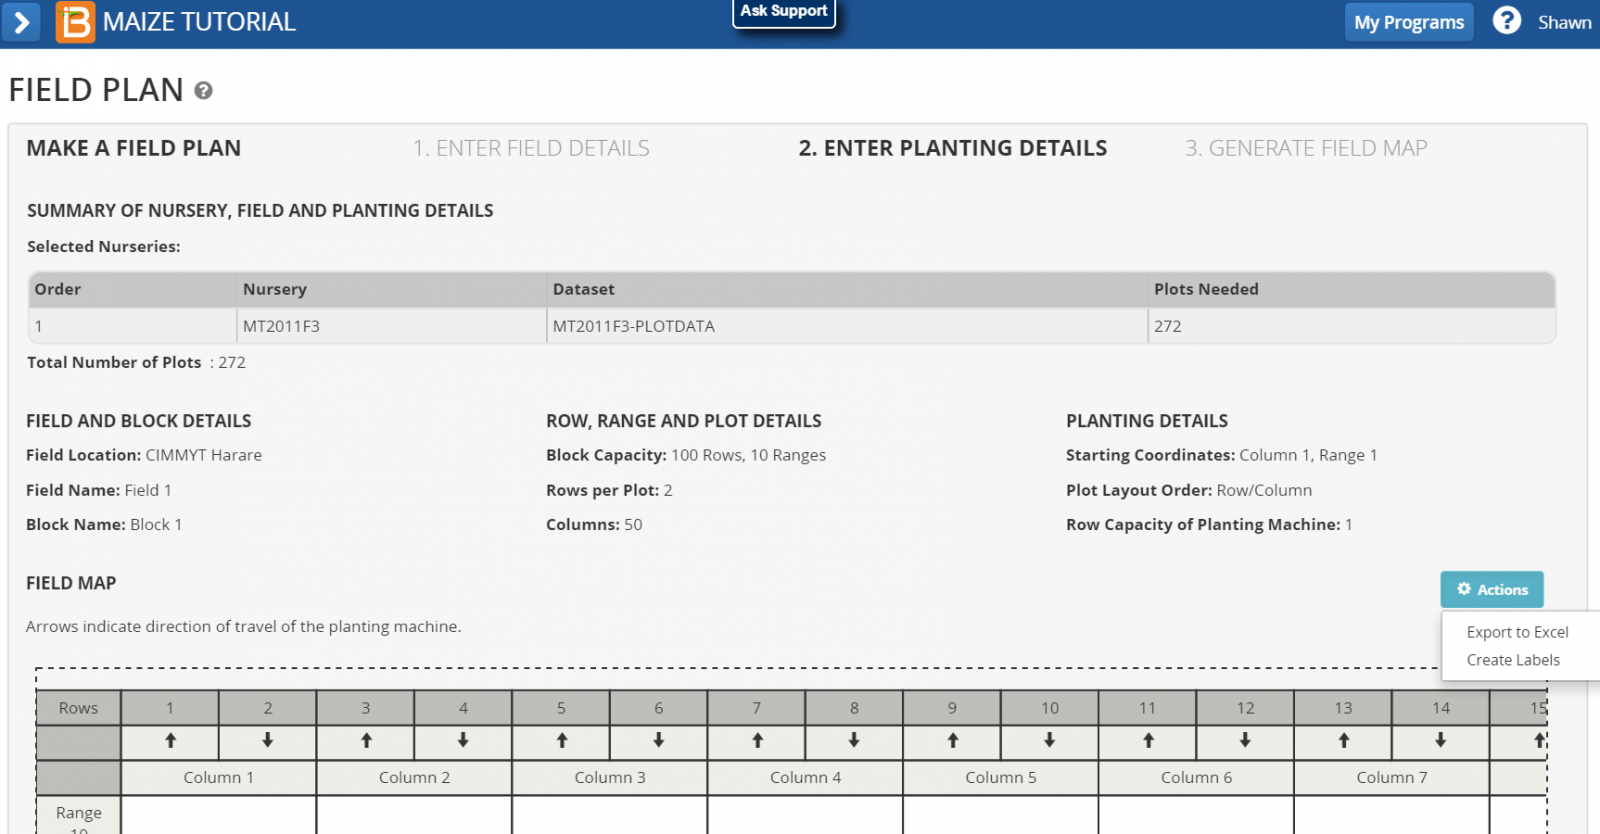
Planting labels with map details
- To include map details, create labels after field plan design.
Label Format
- Choose the appropriate output file format for your label printer.
- Drag and drop desired trial and list details to appear as text with right and left fields. You can choose to have barcodes. We recommend that you use the automatically generated barcode, which is based on the unique plot ID. Give the label settings a preset name to facilitate reuse. Export Label.
- Review the labels. The barcode is translated into fine print below the code.

